


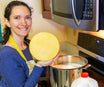

Robiolini Cheese Making Recipe
Robiolini combines the best of these two cheeses into a fantastic new cheese using Flora Danica to provide a soft texture in the cheese, even when young and unripened.
About half the size of a Camembert, Robiolini has a more even ripening of the paste and has a silky surface that's reminiscent of St Marcellin.
-

Yield
4 Pounds
-

Aging Time
~1 Month
-

Skill Level
Intermediate
-

Author
Jim Wallace


Ingredients
Total price for selected items: Total price:

Instructions
-

Heat & Acidify Milk
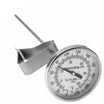
Begin by heating the milk to 76F. If you do this in a pot on the stove heat the milk slowly and stir well as it heats.
Once the milk is at 76F, add Flora Danica and Geo13. To prevent the powder from caking and sinking in clumps sprinkle the powder over the surface of the milk and then allow about 2 minutes for the powder to re-hydrate before stirring it in.
Allow the milk to ripen with no stirring for 20 minutes at 76F. This will focus on the flavor and texture producing combo of bacteria.
Then raise the milk to 86F over 5 minutes and continue ripening without stirring at this higher temperature for an additional 35 minutes.
Note: The total combined time of ripening after adding cultures will have been 60 minutes.
-

Coagulate with Rennet
Once the milk has ripened for 60 minutes add Single Strength Liquid Rennet, diluted in 1/4 cup non-chlorinated water. Let the milk sit quiet for 90 minutes while the rennet coagulates the curd.
The thermal mass of the milk should keep it warm during this period. It is ok if the temperature drops a few degrees during this time, you can heat it back to temp in the next step after cutting.
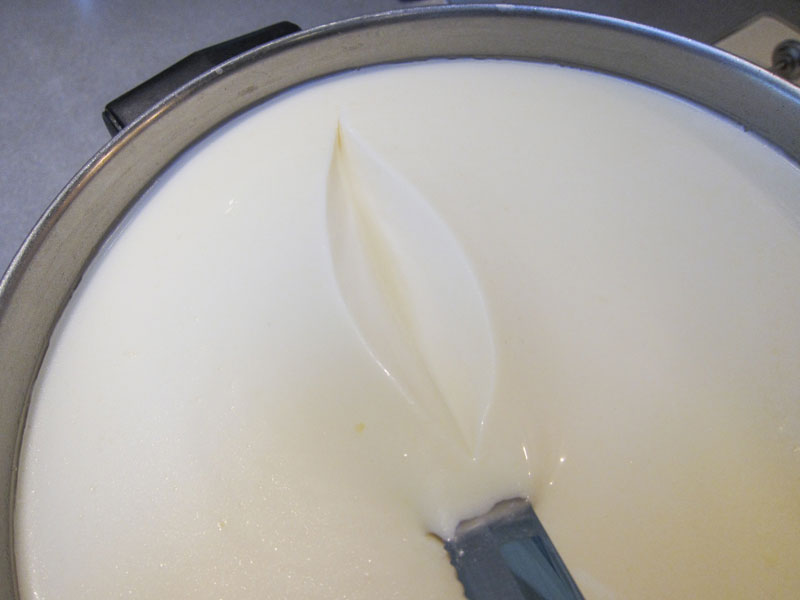
The milk will begin to thicken at about 18 minutes but allow it to coagulate to firmness at about 90 minutes.
This may seem a long time for coagulation but it will prove to be an important phase in developing the proper texture for this cheese. The extended period helps to loosely bind more moisture in the final curd.
Note: It is always best to check for a firm coagulation and if needed, let the milk sit longer. You can let it sit as much as 30% longer. The next time you make the cheese you can add more rennet for a quicker set, if needed.
-
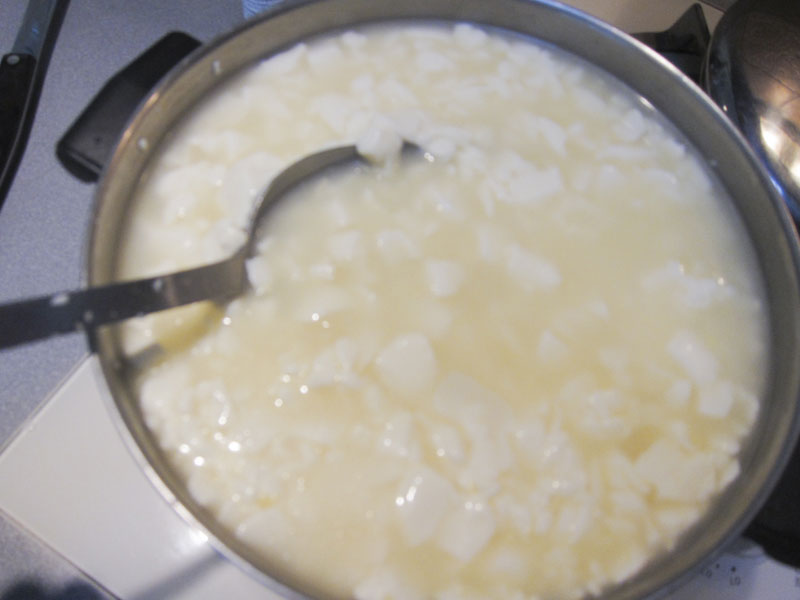

Cut & Stir Curd
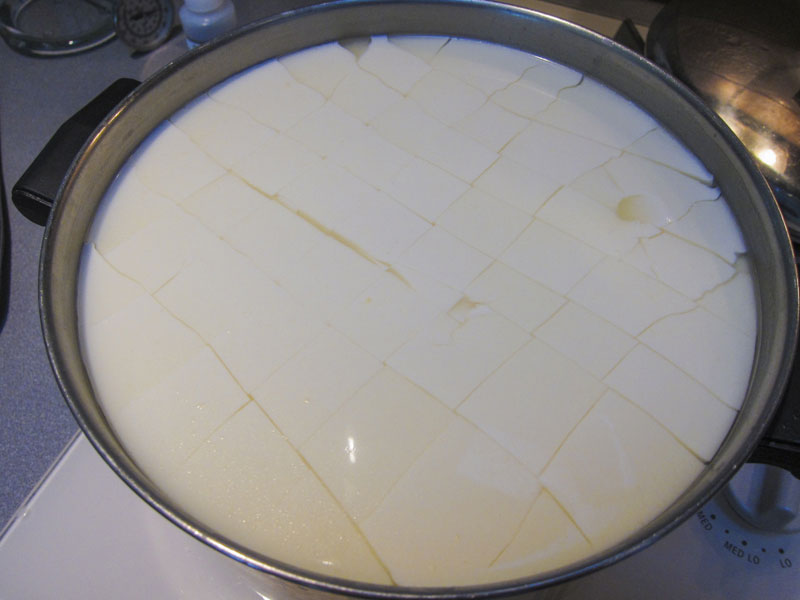
Once the milk is well set the curd can be cut, this is the first step in reducing curd moisture.
Cut the curd mass as evenly as possible to about 3/4-1” pieces, then allow the cut curd to rest for 5 minutes, so the cut curd surfaces can heal.
After the short rest, stir the curds slowly for 10 minutes. This allows the curd to release whey and the surfaces to firm up more. While stirring return the curds to 86F if the temperature has dropped.
After stirring, allow the curds to settle to the bottom and remove the whey down to the curd level.
Note: The curds should be slightly drier than curds for Camembert.
-
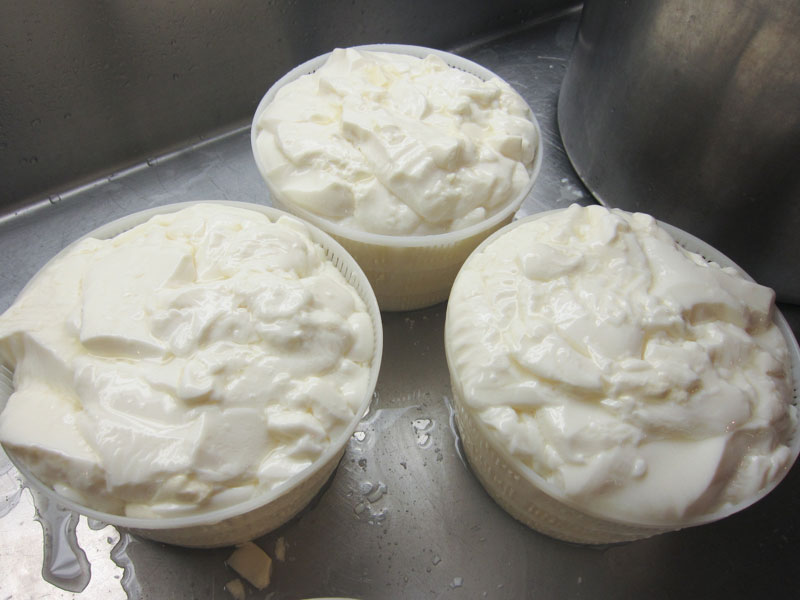
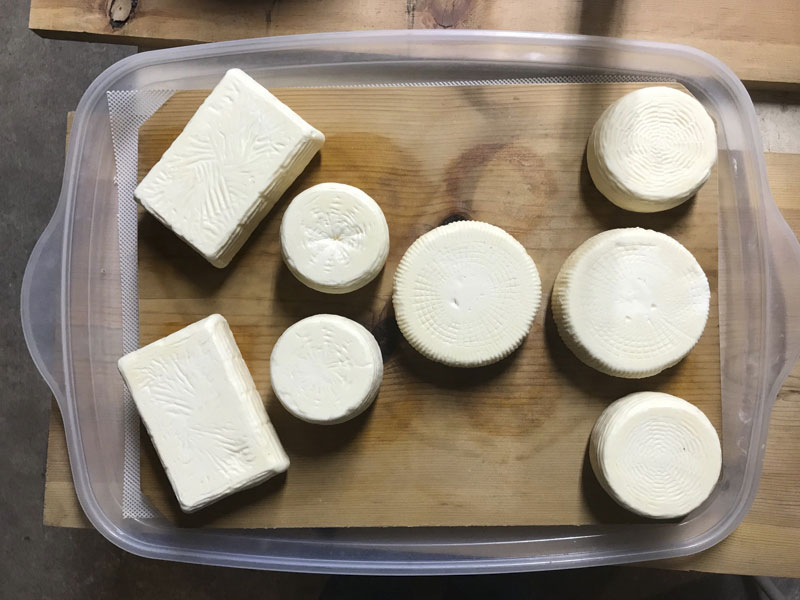
Transfer Curd into Molds
Place the cheese molds in an area that can accommodate whey being released, so the draining curds are not sitting in whey.
The curd can now be carefully transferred into the prepared cheese molds. Do this with all molds laid out near each other, and fill each of them one ladleful at a time in consecutive order to give them time to drain and be filled evenly. Fill each cheese mold to the top.
Note: Be sure your cheese molds have been sanitized. Larger patterned rectangular molds and smaller patterned molds will both work nicely for this cheese.
Any combination of the following molds can be used:
-
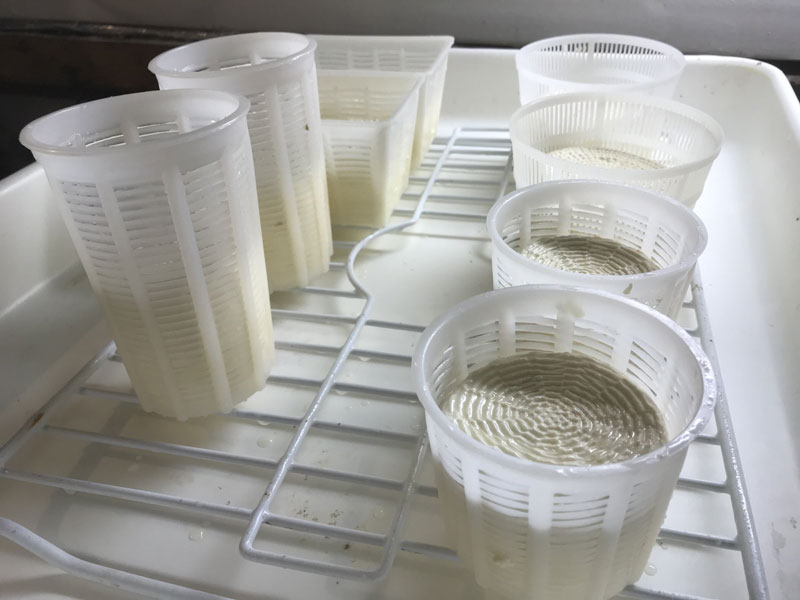
Draining
While draining, keep the curds warm at 75-80F so the bacteria can continue working. If the forms become too cool, the culture activity will slow and problems may occur while ripening the cheese due to excess moisture.
Let the filled molds drain quietly until they have consolidated to about 2/3 of the mold height. At this point the cheese will still be quite fragile but can be carefully turned in the mold.
At the end of the day, the cheese should be moved to a cooler 60-65F space to continue draining, this will slow the bacteria.
-

Salting
Once the draining whey has diminished the cheese can be dry salted with a medium grain salt.
Add about 1/4 tsp of salt to the top surface of the cheese. Spread it evenly over the top surface and then pat the salt to all sides, but not the bottom.
After salting, place the cheese back into the mold. This allows the salt to become a brine by mixing with the cheese moisture. Let the cheese sit until there is no more free liquid standing.
Then repeat the salting step the other surface of the cheese and sides again and place it back into the cheese mold once more.
-
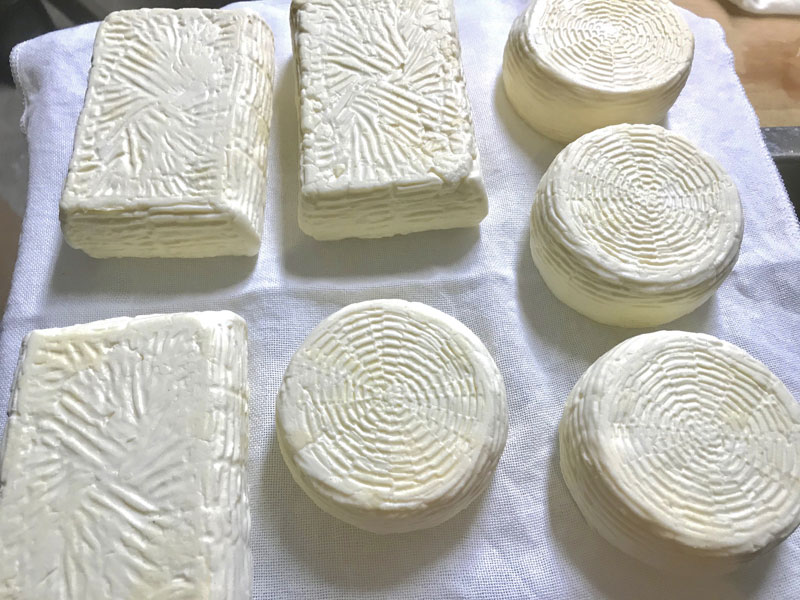
Drying
The surface moisture needs to be dried off without allowing the cheese surface to darken from excess moisture loss.
After salting, place the cheese onto an absorbent cloth on a board to wick away remaining moisture. The temperature should be 60-68F and there can be a bit of air movement if needed to help dry the surface.
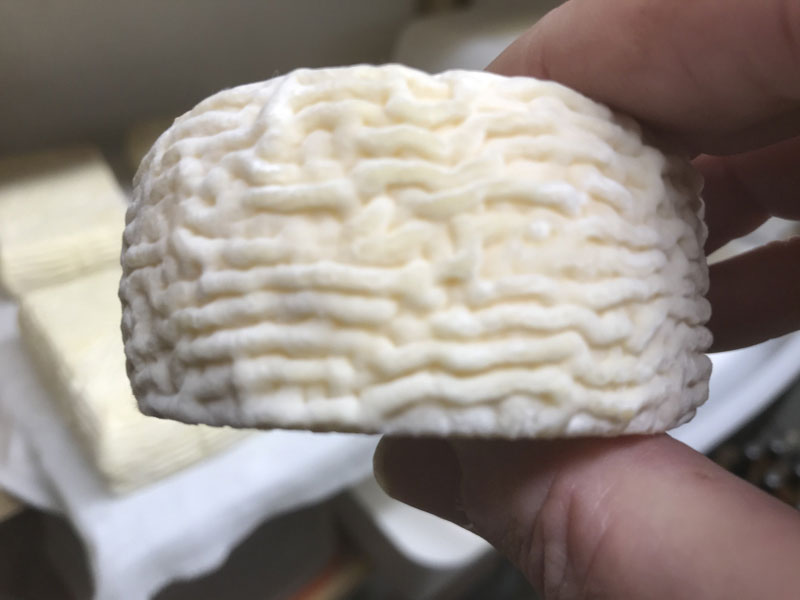
During this time ambient yeast will begin to populate the surface and will help to provide a better condition for Geo13 to develop.
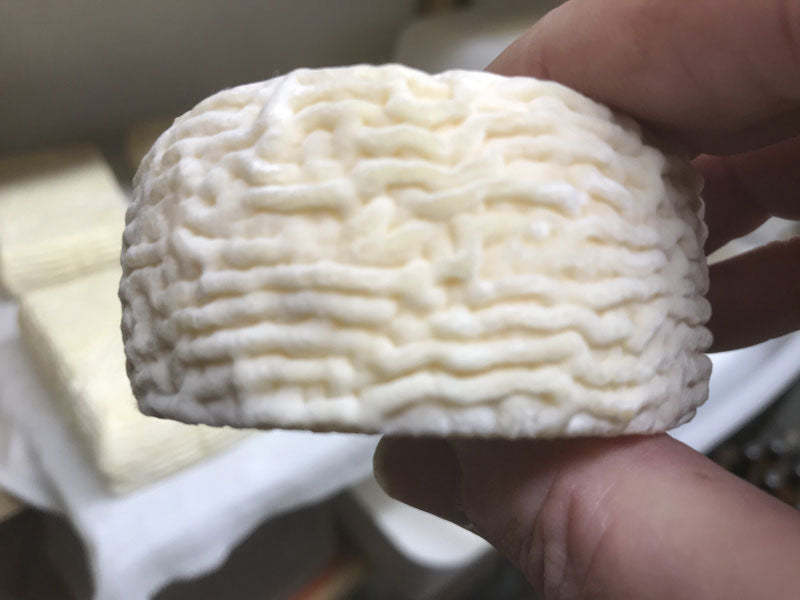
At about 3-4 days from the start of making this cheese the surface should develop a slight hazy appearance as the Geo13 begins to grow. This will develop into a thin silky surface and be the competitive factor that blocks unwanted molds, including blues and mucor from developing.
-
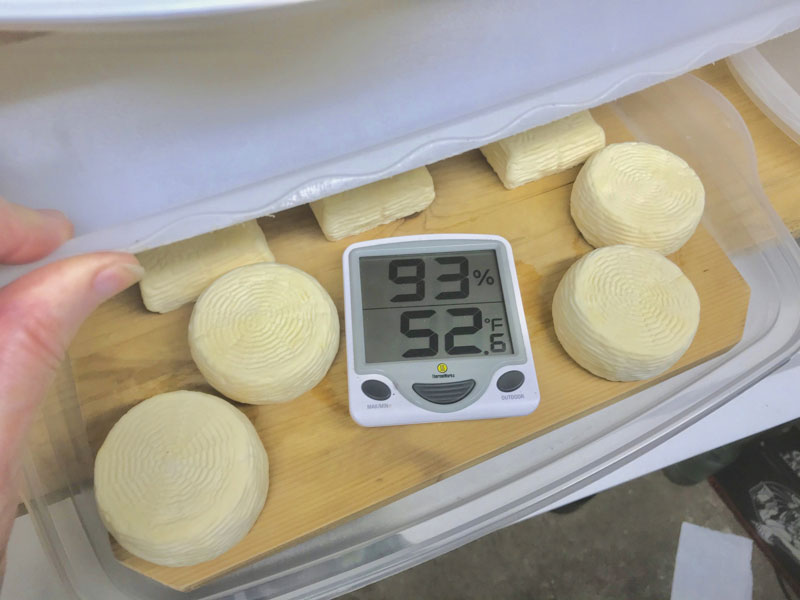
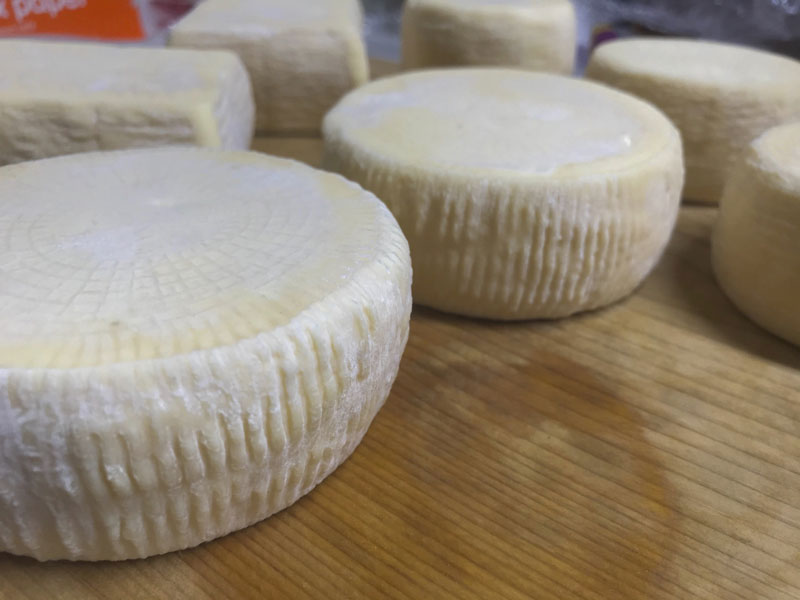
Aging
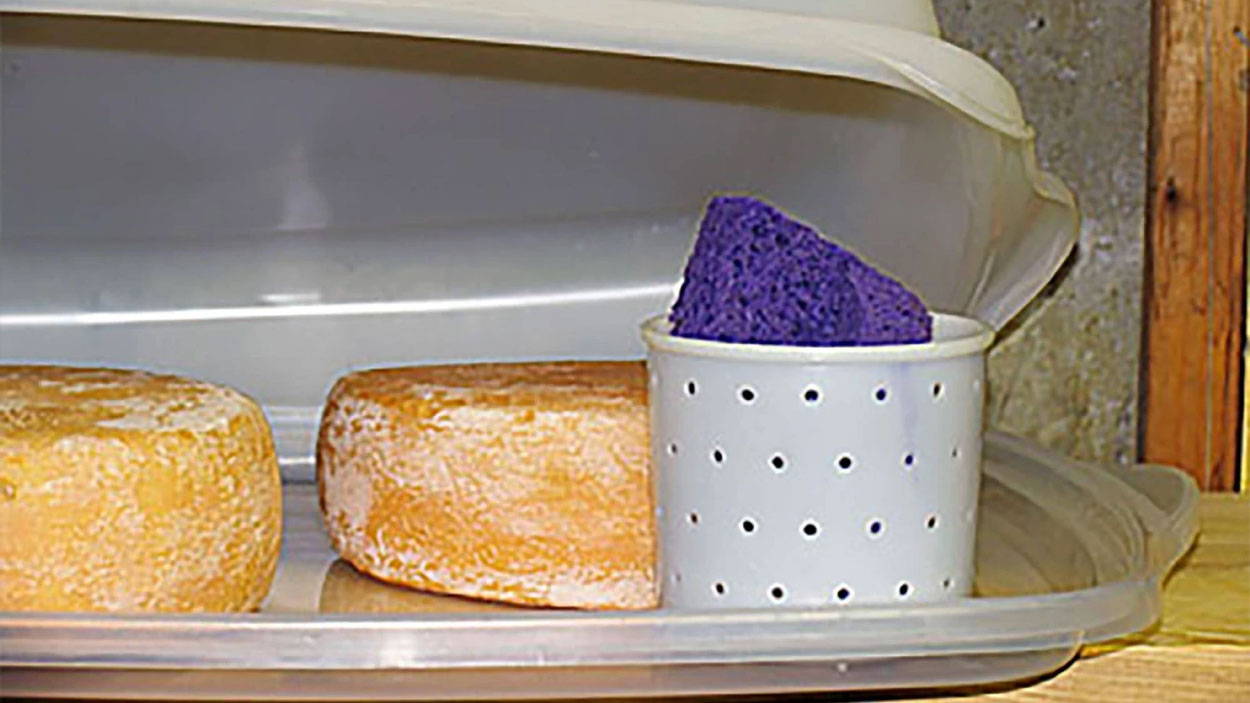
Now the cheese is ready to be moved to the cave at 52F temperature with 90-95% moisture. To create the higher 90-95% moisture for this cheese you can use a plastic tray with a cover and a board on the bottom, to buffer the moisture. This container will naturally create a high humidity environment with the moisture released from the cheese.
After about 10-15 days the Geo13 surface will have grown in completely and have begun to form a reticulated surface as shown above.
Because this cheese has not developed higher acidity like Camembert or Robiola, it is wonderful as a fresh cheese once the surface flora has grown in. It can be on your table after just 10-15 days of aging.
Alternatively, you can wait for a bit of surface ripening at a month of aging. Or even do serious ripening where the transformation of the proteins is closer to completion after several months.
When selecting the aging time, it’s really a matter of personal preference so be sure to have fun and enjoy this lovely cheese.
Cheese Making Supplies
Popular Products
Cheese Making Recipes
Recommended Recipes
Learn how to make a cheese cave right at home. If you want your cheese to ripen properly you have to make them a good home and take care of them like little bambinos.