Camembert Recipe
Ingredients
- 2 Gallons of Milk (Not UltraPasteurized)
- 1 Packet C21 Buttermilk Culture or 1/4 tsp C11 Flora Danica (use 20-40% less for raw milk)
- 1/8 tsp Penicillium Candidum
- 1/32 tsp Geotrichum Candidum
- 1/4 tsp Single Strength Liquid Rennet
- 4 tsp Cheese Salt
- 1/4 tsp Calcium Chloride (for pasteurized milk)
Equipment
- Good Thermometer
- Spoon or ladle to Stir Curds
- 4 Camembert Cheese Molds
- 5 Draining Mats
- 5 pieces of 5-6" Square Wood or Rigid Plastic (this makes it easier to turn the cheese)
- Instructions
- Camembert Info
- Reviews
- Q & A
A Recipe for Making Camembert
This recipe will make 4 Camembert cheeses from 2 gallons of milk but everything can be cut in half to make 2 cheeses or expanded proportionately for a larger volume of milk.
-
Acidify & Heat Milk
Calcium chloride, if being used, can be added to the milk prior to heating.
Begin by heating the milk to 90°F (32°C). Do this by placing the milk in a pot or sink of very warm water. If heating directly on the stove make, do so slowly and stir while heating.
Once the milk is at 90°F the culture amount indicated above can be added along with the ripening cultures. To prevent the powder from caking and sinking in clumps, sprinkle the powder over the surface of the milk and then allow about 2 minutes for the powder to re-hydrate before stirring it in. The milk should ripen for about 30 minutes before adding the rennet.
-
Coagulate with Rennet
A small amount of rennet is then added to begin the initial coagulation in a short period of time (15-20 min) but allow the final firming of the curd to continue for a much longer period of time (90 minutes or more from rennet addition).
This will result in a curd that tends to hold the moisture and fat better due to the stronger protein matrix.
Add about 1/4 tsp (1.25ml) of single strength liquid rennet.
The milk now needs to sit quiet for 90 minutes while the culture works and the rennet coagulates the curd. You will notice the milk beginning to thicken slightly in about 18 minutes, but continue to allow to sit quietly. The thermal mass of this milk should keep it warm during this period. It is OK if the temp drops a few degrees during this time. The long coagulation time here is to loosely hold more of the water in the curd and to allow a moister curd to be transferred to the molds.
-
Form the Curds
The forms, draining mats, and boards need to be sanitized and prepared for the curd transfer. I do this here by submerging in 145°F water for several minutes. They need to be layed down as shown in the first photo above.
This curd then needs to be handled very carefully with little to no cutting and no cooking and minimal stirring of the final curd before ladling into forms. The transfer was traditionally done without cutting and by ladling curd directly to the molds with a special ladle (La Louche) designed to fit the molds perfectly.
Today, however, many cut the curds mass slightly and stir just enough to release a bit of free whey to make the draining a bit faster.
You can choose your own method but may have to wait awhile for some drainage to fill the final molds if not doing the pre-cut and stir. I really do not see much difference in the results.
-
Draining
The next stage is to allow the whey to drain off as the acid production continues. During this, the forms need to be turned on a regular basis. The way to do this is to place another draining mat and board on top of the form then CAREFULLY and quickly flipping it over. This is best done before the curd settles too far into the mold. The curd mass should drop evenly to the new draining surface with no breakage. This initial turn will set a nice smooth surface for the final cheese.
The turning of the cheese needs to be done several times during the draining process to assure the even drainage of the curd.
By the next morning the cheese should have drained to about 1/3 of its original height and the final acid level should be correct. I do try to keep the curds warm during this period to assure the proper whey drainage. I use an insulated sink here with an insulated pad and board to keep the temperatures good for acid development and drainage (70-75°F). A pan or bottles of warm water would also be good for keeping the temperatures during cooler weather. A simple insulated cooler would also work for this.
-
Salting
At this point, I remove the form and then add the first dose of salt to the surface of each cheese. 1/2 tsp of a medium crystal cheese salt is added and then evenly spread over the surface. This can then be lightly spread to the outside edge as well. There will be less salt on the edge but the next application will also be applied to the edge and even out the distribution. When finished, place back in forms with salt side up and leave until the salt dissolves in the cheese moisture and eventually into the cheese.
In about 4-6 hours flip the cheese and repeat on the other side.
The next morning (day 3) the mold can be removed and the cheese placed on a dry surface to begin the drying phase. This should continue until all surface mositure is done. In humid areas a small fan may be needed. This is best done in a room of 58-65°F and 60-75% moisture. Turning several times during the drying will also help.
NOTE: If the cheese is moved to the aging area before the proper draining/drying phase is complete, excessive moisture will cause defects such as mucor or blue mold and increased protein breakdown at the surface resulting in runny cheese during aging.
-
Ripening & Surface Mold
Once the cheese surface is dried, it is time to move to the aging area. This should be maintained at 92-95% humidity and 52-56°F. The cheese should be turned once or twice daily at this phase. Failure to do this may result in excess mold growth growing into the mats and tearing the surface on removal.
Initially, the cheese surface may become somewhat slippery/greasy with a smell of ripe fruit. This will be the yeast growth stage.
Within a few days of this you may notice a light surface of white mold and this should dry the surface even further. This will be the secondary growth of Geotrichum.
Finally, about day 9-14 you should note a growth of a white felt-like surface of mold (P.candidum), which will begin to fill in over the next few days and eventually cover the surface with a full coat of fuzz. This can be gently patted down when you turn the cheese.
It is these molds that will produce the enzymes responsible for changing the protein structure of the Camembert.
-
Final Ripening
At this point it is best to slow the final ripening down a bit by moving the cheese to a cooler space at 42-45°F and allowing it to ripen to the desired level for the next several weeks.
It's a Favorite
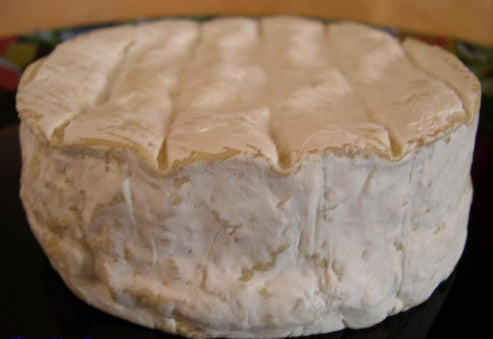
When we mention Cheese and Normandy together it is hard to think of anything but Camembert. (Rememberthe 't' is silent)
This cheese with the beautiful white coat and ripe texture has been pleasing cheese lovers for centuries and with this recipe we'll show you here how to make it in your own kitchen or farm.
A Bit of History
This story involves the French Revolution, a priest on the run, and a lady farmer (sounds pretty cheesey so far Eh!).
During the French Revolution (1789), many priests took refuge in the countryside. One such priest sought refuge with the family of Marie Harel in Normandy near the village of Camembert. Marie was born and grew up in Camembert and had been making a regional cheese. The priest came from the Brie region near Paris. In return for the refuge he gave to Marie the “secrets” of making Brie-style cheese. In fact, Marie and her family had been making a well recognized cheese in Normandy for many years before this but with the contribution from the priest, Marie Harel was able to adapt the cheese well enough that others in the region began to adapt these changes as well and the new cheese, Camembert was born.
Initially, this was a very regional cheese that did not travel well due to its soft ripe condition and primitive transport. However, with the invention of the mass produced round wooden boxes to protect the cheese and quick transport of the railroads, the cheese could be safely and quickly moved to major markets such as Paris.
The fame of the cheese spread and for many years it was a hand produced artisan made product. Then along came industry with its changes and the cheese has changed.
The majority of the Camembert made in France today is produced and ripened very differently and most is from pasteurized milk. All that arrives in the US today from France is of this style.
Fortunately, a few artisan cheese makers in the U.S. have modified the recipe to work quite well with the pasteurized milk requirements handed down by the all knowing "food protectors".
In the following page, I will focus on making this cheese at home where you can decide for yourself if you would like to make the cheese from a pasteurized milk or a high quality raw milk that you are 110% sure is safe.
As a raw milk cheese, this will not be aged for the required 60 days and hence cannot be sold legally in the USA.
The Concepts of Making Camembert
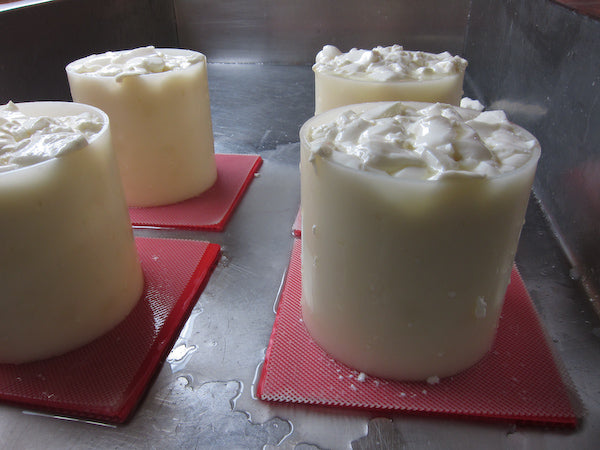
Creating the fresh cheese:
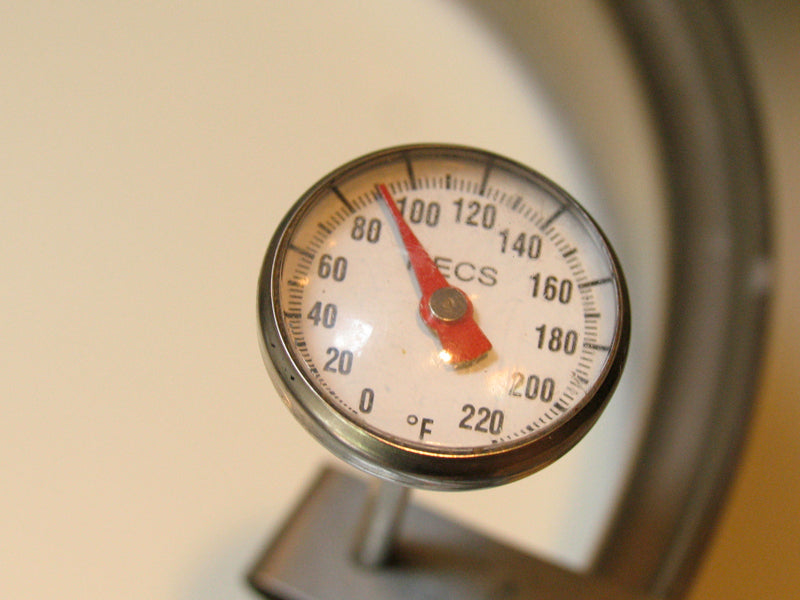
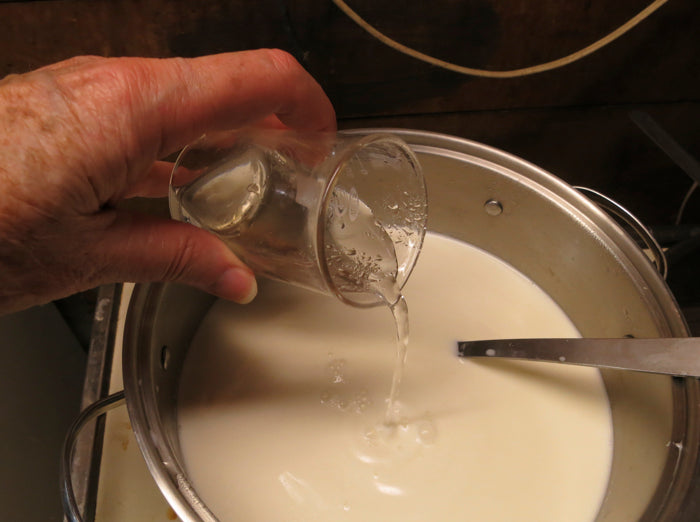
The primary consideration in making a Camembert is to create the young cheese that retains as much of the milk fat and moisture as possible while the final acid develops.
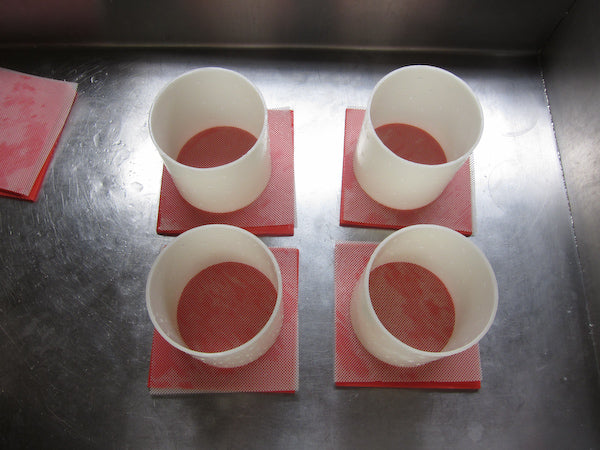
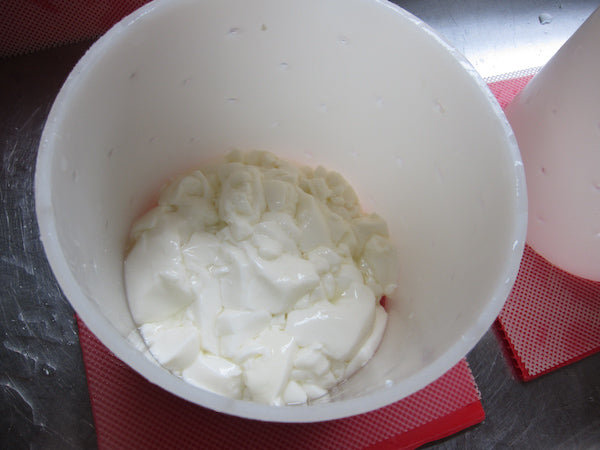
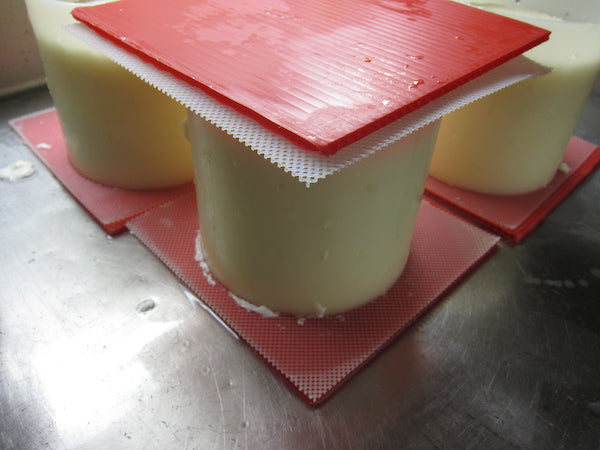
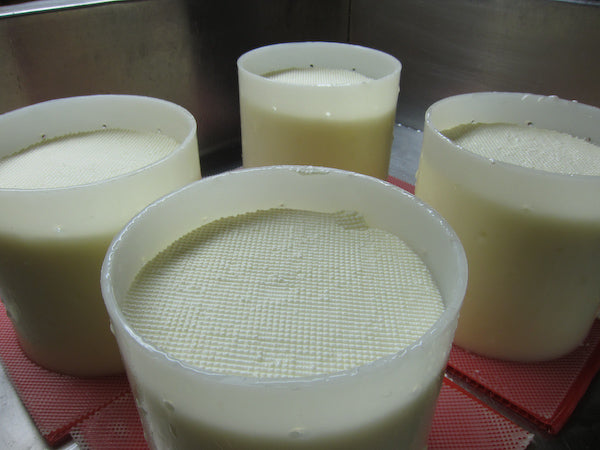
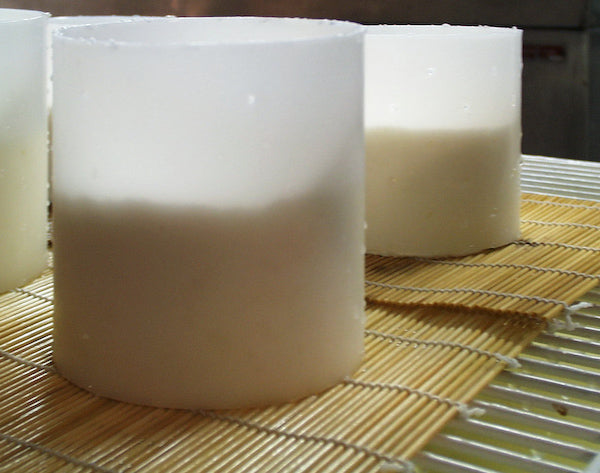
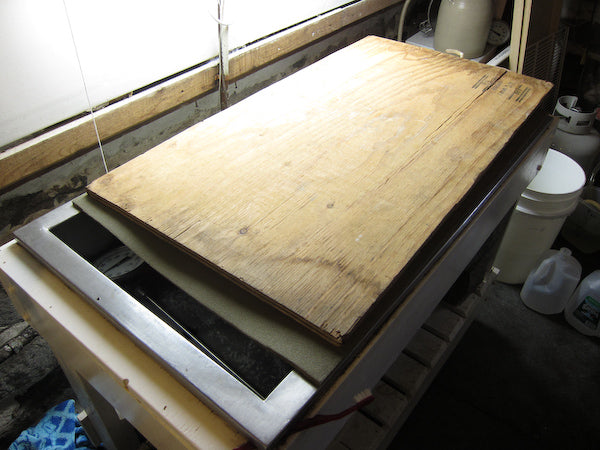
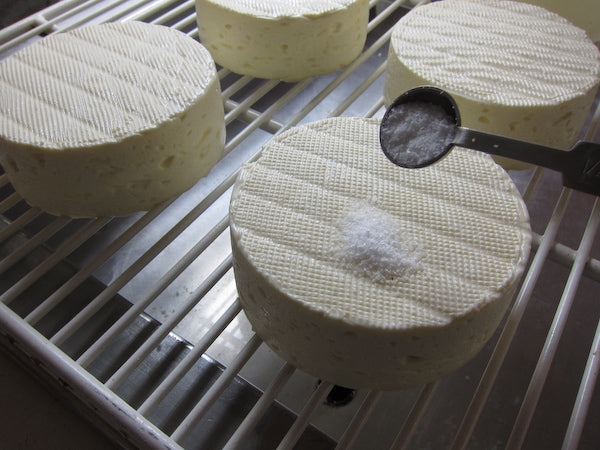
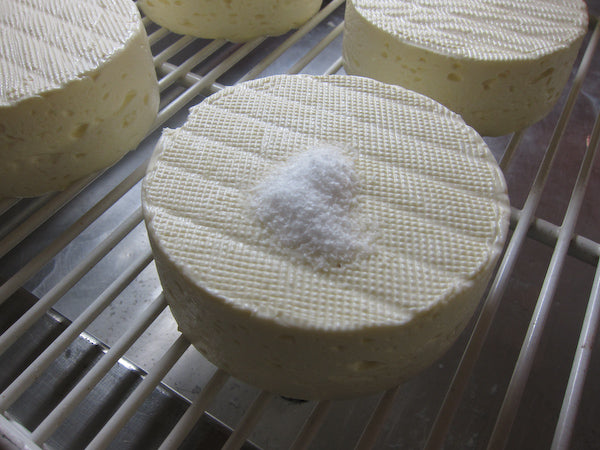
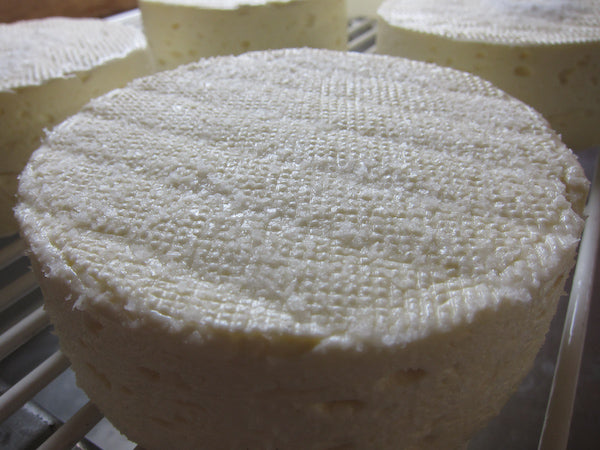
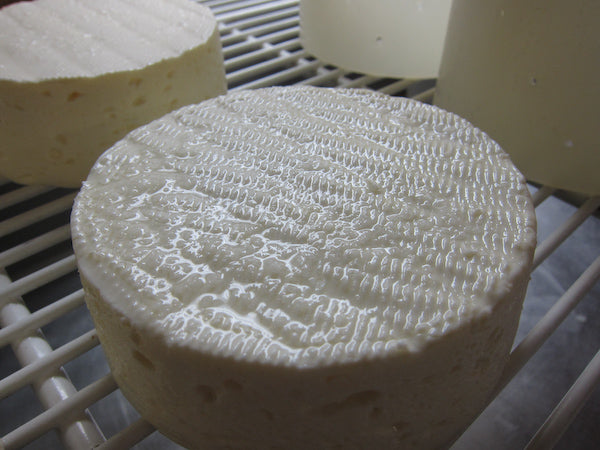
The very moist curd is then transferred very carefully to molds set on a draining mat to release the whey over the next 12-24 hours. The forms are carefully inverted several times during this period to encourage moderate whey drainage. At the end of this period the cheese is salted on first one side and then the other to slow the bacterial action. The next step is to place the fresh cheese in a cool room with good air flow to further dry the surface in preparation for aging.
Preparing the surface:
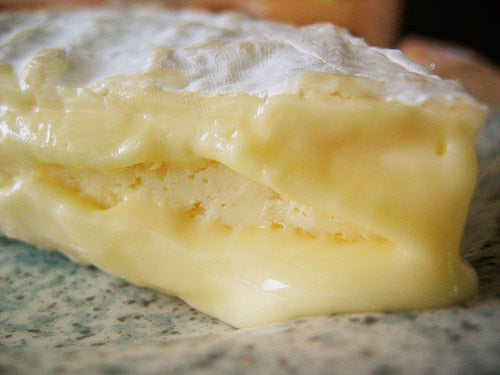
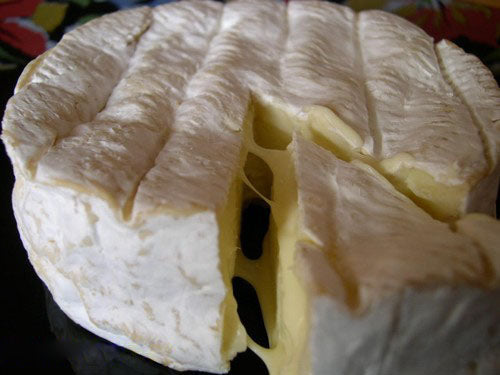
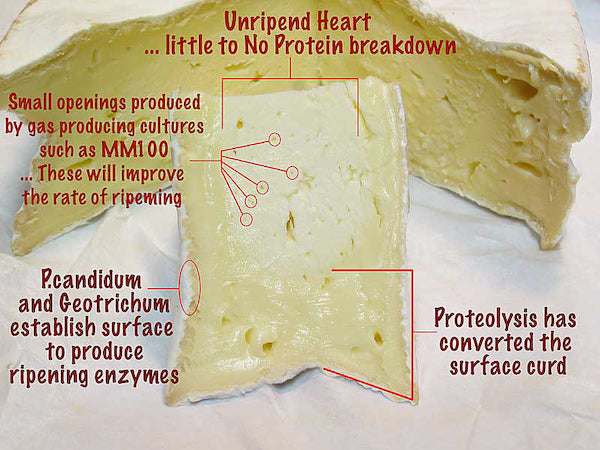
Once the cheese has been drained and dried it can be moved to a space for aging. At this point the surface flora develops and is responsible for the final ripening and changing of the curd texture from the initial raw white curd to the very different soft Camembert that becomes very creamy and almost flowing in texture if allowed to warm up a bit.
This is a three stage affair:
- Natural yeast from the environment will populate the surface during draining and drying. These can survive in the more acid conditions of the young cheese. These will produce a very fruity almost pear or apple like aroma and change the cheese surface by reducing the acid level.
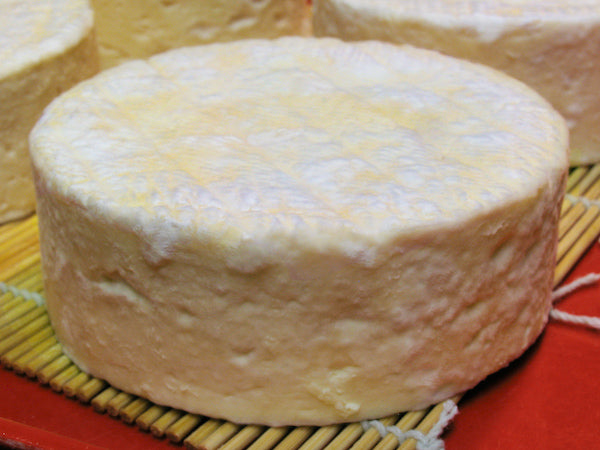
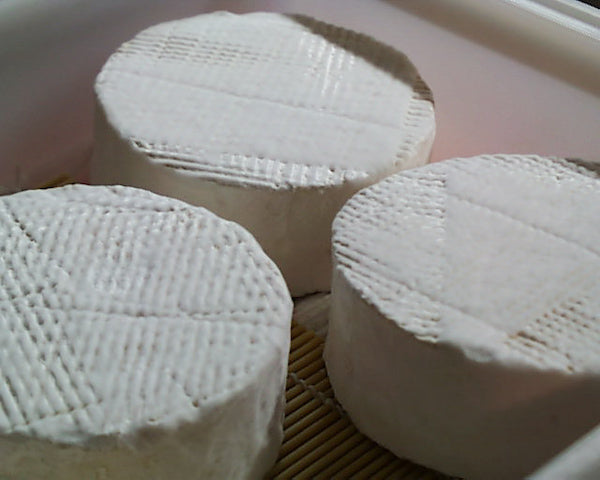
- Once the acid level begins to decrease, another natural occurring surface mold called Geotrichum (can be added to the milk) will take over, drying out the greasy surface somewhat and forming a light covering of white mold. This will then decrease the surface acid even further.
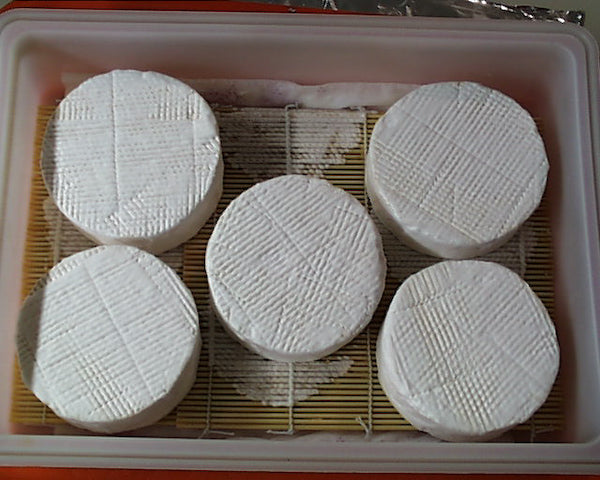
- At this point the final surface growth begins. This is the Penicillium mold (also added to the milk) and will form a full white felt-like cover over the next several days.
Aging the Cheese
This surface covering and its growth in a timely manner is essential in the development of a properly ripe Camembert cheese.
As the final growth of penicillium occurs, it produces special enzymes that travel into the cheese surface and begin to change the protein structure to the soft paste we are familiar with in a ripe Camembert. This ripening usually occurs over the next 2-3 weeks from the surface to the center (centripetal) of the cheese. As this begins to happen, the cheese is usually moved to a much cooler aging area where it is turned daily. This will slow the activity down to make this protein change take place in a slower but more complete manner. If the cheese is not cooled at this point the conversion will happen too quickly and bitter peptides (smaller proteins) may result.
As you can probably see here, the making of the initial cheese form seems quite quick and simple but the proper draining, drying, and surface development becomes a bit more challenging in creating a great ripened Camembert.
A great video on making Camembert is here
Get to Know Camembert
The picture below will help considerably in showing the ripening aspect of a Camembert cheese (click on photo to enlarge).
Questions & Answers
Q. I made your Camembert recipe last Monday and this morning I noticed that the cheese had bright blue spots all over it like someone dribbled food coloring all over it- I've included a photo. It doesn't look like mold and it smells fine but there is no sign of white mold developing. I used StarSan sanitizer on all of my equipment that came into contact with the cheese/milk. I made it with goat milk.
A. This is a color I sometimes see when salt becomes contaminated with iron. Perhaps your salt is stored in a metal container or you used a metal draining bed for your cheese.
- Reviews
- Questions
- recipe
- Camembert
- cheeses
- mold
- success
- France
- someone
- rind
- batch
- Quality

The recipe was easy to follow and my cheeses developed a nice white mold faster than the time indicated in the recipe so I didn't wrap them right away and am wondering if that might have been beneficial as I did notice the white rind to become less white in spots. This is the first wheel that I have opened with the start date of March 19. This wheel seemed softer. Not sure if the texture is quite right but it definitely is creamy and tasty!

After great success with Triple Creme I gained enough confidence to make Camembert by special request of someone who loves France and this cheese! It was so easy to make and while it was delicious a few weeks ago tonight it was perfect. When I started making cheese I said I'd never make bloomy rind cheeses. They scared me. Well, it has been just the opposite! Thank you for this easy to follow recipe.

I just started with my first batch of goat camembert. The cheeses are now 1 week old at 52deg and 92% RH. The smell is delicious, like of a well aged camembert and they are now completely covered with white mold. I cannot wait to taste them in around 5 more weeks. The recipe calls for a decrease in temperature after 9-14 days (42-45deg) but it does not mention at what relative humidity. Could you please advice. Thanks!!
I made this cheese after returning from the 201 Cheesemaking Workshop with Jim Wallace in May 2019. It's a nice cheese to make and has a short aging period so you don't have to wait too long to enjoy. You learn alot while making this cheese regarding size of the curd cut, drying temperature and whey drainage, curd moisture, the importance of drying the cheese sufficiently befor aging and watching all of that cheese mold grow. The best part was trying some, most people loved this cheese.
My experience with making camembert has been uniformly wonderful! I have a great local/trustworthy source of farm-fresh (unpasteurized) milk, and I think the quality of the milk you use with this recipe makes all the difference in the world. I first used the bamboo mats and then fine mesh mats and promptly pitched the fine mesh mats out the window. The new curds quickly imbedded into the mat and tore with any movement. The bamboo mats were initially a bit of a pain because they are not the correct size unless you fold them in half. Once I cut them in half and retied them so they would not fall apart, these have become my go-to. I also took a plastic lid that was big enough to hold 5 of the molds and cut a slot in the bottom for whey to drain out with the opening overhanging the sink. Remember that if you have 5 cheeses you need 6 followers and mats in order to do the flipping. I would also strongly recommend using the double layered cheese paper they sell in the store as I think this really helps maintain the moisture balance in the cheese. I think the CWCF-8 is specifically for camembert, although I have been using the CW1-9 with great success. That also simplified my life greatly. The recipe states it takes about 6 weeks for the cheese to be done. Keep in mind (especially if you do not have a house full of people who like to eat cheese that smells like feet, that you will probably go through about 1 a week and for me the recipe makes 5 of these, which means your 3d and 4th one may be robust and consuming your 5th one may require an act of bravery on your part. You risk being told to “go eat that **** on the back porch!” I have been starting my first one early in the 5th week and it has a good taste even then. The difficulty for this cheese is rated as “intermediate” but honestly it is the easiest cheese I have made. The instructions in the recipe are clear and well-supported by the pics. My mother is from France and so is a difficult to please cheese skeptic/snob. She has given me the ultimate compliment and says that because EU rules prohibit the use of unpasteurized milk, my camembert is better then the cheese you can buy in France today and “may be almost as good as some of the camembert she grew up with.”