


Sour Cream Recipe
Going one step further, we also tested different types of cream to find the best combination for making sour cream. Check out the recipe to see our favorite.
-

Yield
1 Pound
-

Aging Time
None
-

Skill Level
Beginner
-

Author
Jim Wallace


Sour Cream Recipe Info
A Kitchen Staple: Sour Cream
What is Sour Cream
How to Make Sour Cream
Styles and Variations of Sour Cream
Ingredients
Total price for selected items: Total price:

Instructions
-

Selecting Cream
Begin by finding the best milk/cream you can. You can use a quart of half and half, or mix your own from milk and heavy cream.
If purchasing half and half, be sure it is not ultra pasteurized.
If you would like to mix your own milk and cream, the cream can be ultra pasteurized, but make sure the milk is not ultra pasteurized.
To make your own mix an example might be: 1 pint of Non-Fat Milk (NOT UP) and 1 pint of heavy cream (~36-40%). The resulting mix would be about 18-20% butterfat. You can vary this blend up or down to suit your taste and needs. Always use heavy cream when blending.
Note: The reason that you can use the Ultra Pasteurized Cream in the blend is that the milk provides the proteins and lactose but the cream only needs to provide the fat portion. Non-UP does work best though even for the cream but sometimes its hard to find.
I ran a few trials to see how the various creams worked and especially to see what issues Ultra Pasteurized cream would bring to the final product.
- High quality heavy cream (pasteurized only) to be blended with pasteurized milk
- High quality local half n half mix (pasteurized only)
- Ultra Pasteurized heavy cream to be blended with pasteurized milk
Note: Heavy cream will make a thicker sour cream and light cream with make a thinner sour cream. So, choose the type of cream based on your desired texture.
-

Heat Cream & Add Culture
Heat the cream to (70-72F) and then add the culture. To prevent the powder from caking and sinking in clumps, sprinkle the powder over the surface of the milk and then allow about 2 minutes for the powder to re-hydrate before stirring it in.
Note: You can use the suggested sour cream culture or 1/4 tsp of MM100 Culture or Aroma B Culture.
Another option is the use cultured buttermilk, from the store. But, with this option you will be relying on that buttermilk's live culture to be active enough to complete the ferment of lactose. If it has been hanging around for some time in the cooler or your refrigerator, the viability may be less than you like. This may lead to problems in getting the final Sour Cream.
-

Let Cream Set
The cream now needs to be kept at room temperature for the 12-24 hours, while the culture is working. It will be very slow initially but will soon kick into its more rapid rate of converting lactose to lactic acid and the milk cream will thicken and begin to develop its tangy flavor.
So, 12-24 hours is a big difference in time; how do you know when its done?
Not a simple answer because it depends on the milk/cream combo you are using, and maybe even more importantly what you want for sour cream. Different people may like a thinner or thicker texture, or a more or less tangy taste. These are things you can control by watching the temperature and how long you let it go for before you stop the fermentation by chilling.
In my workshops here, I always stress the importance of using the evaluation tools you were born with. Looking, tasting, smelling, and even a bit of poking. They have been the cheese makers tools for a thousand or more years. The best ways to do this is to start the sour cream in the evening, this way you can take a look at it the next morning. Has it thickened? Does it taste tangy enough? Sour cream should have a thicker texture and anywhere from a slight tangy flavor, to almost a big yogurt like tanginess. Hopefully it hasn't gone too far yet, and if it needs more character and thickness, let it go a bit longer (but not too long) until it's what you want.
-


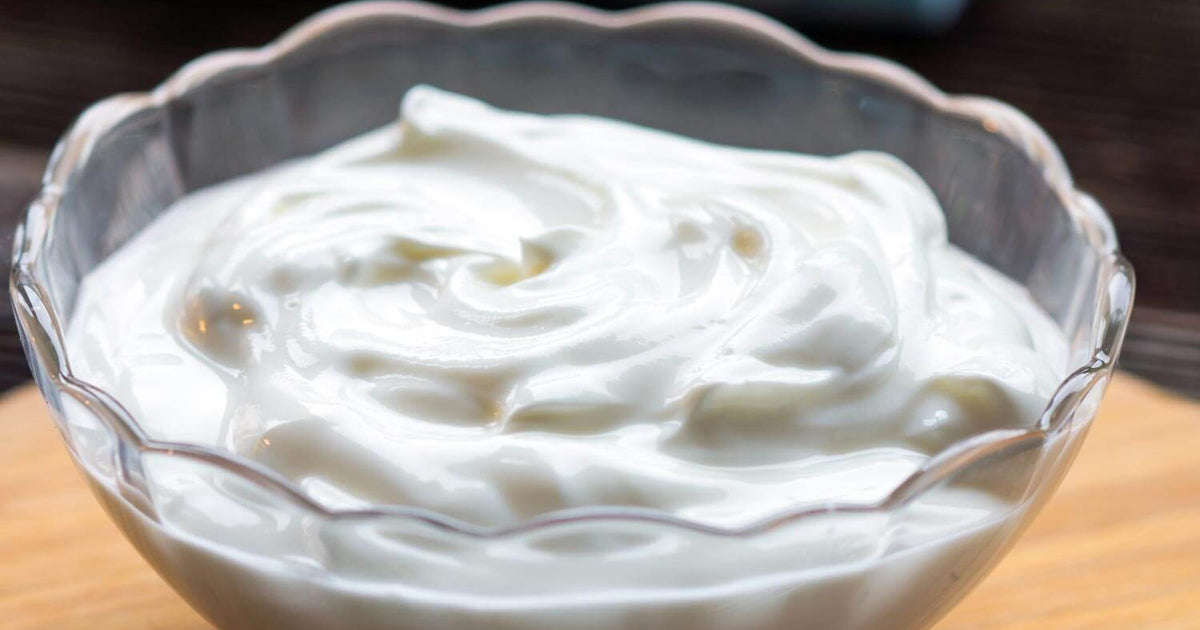
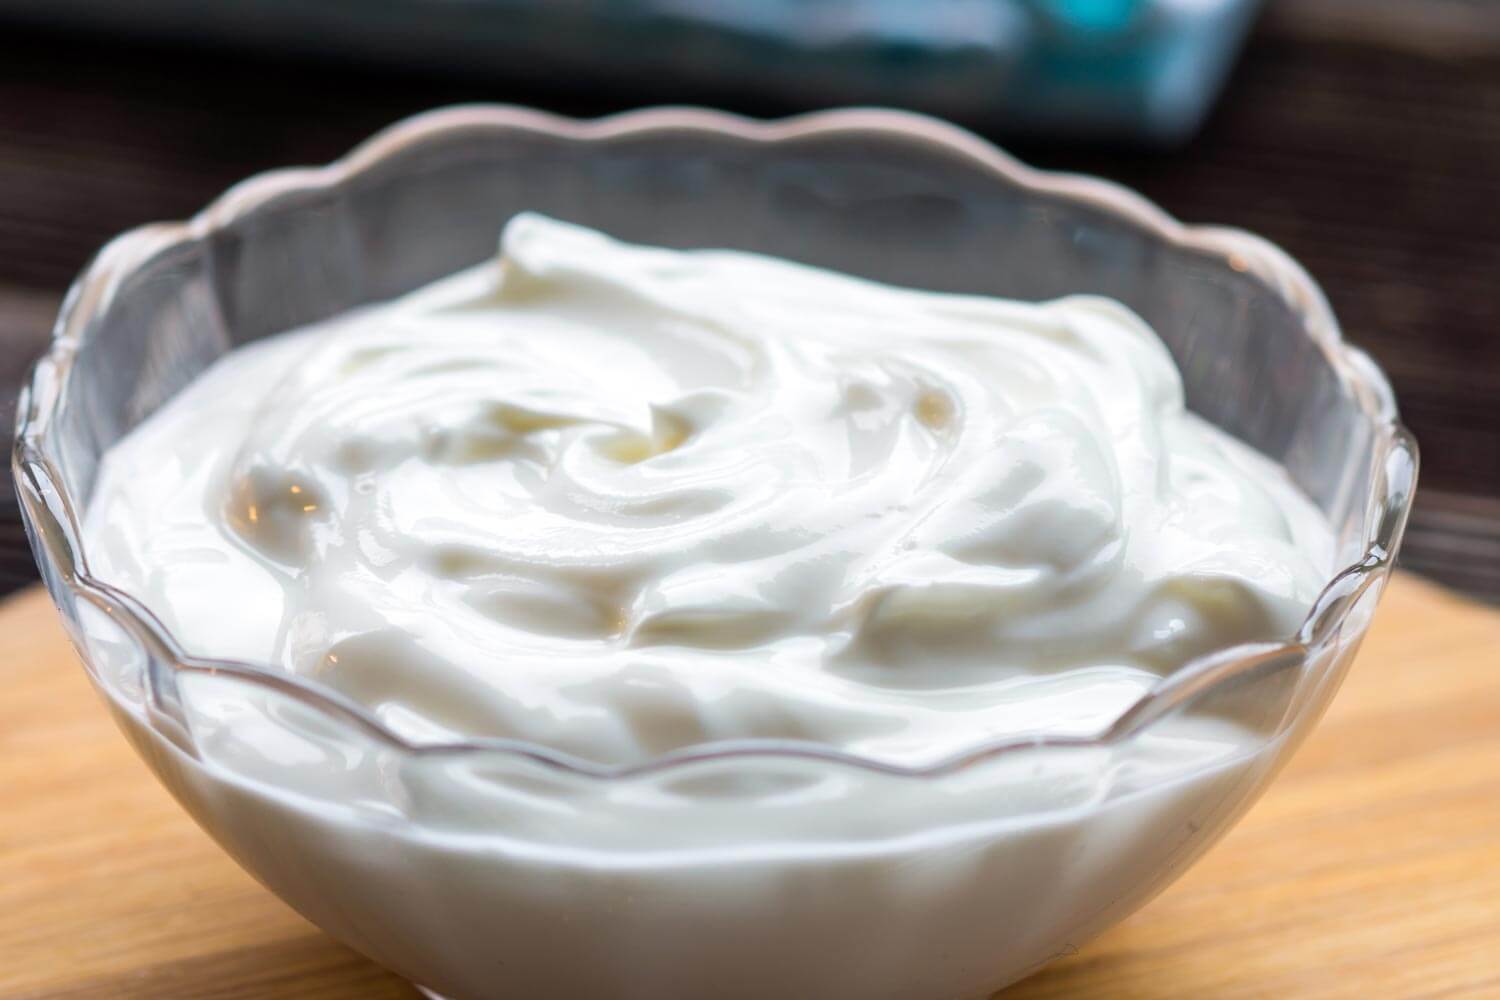
Finished Sour Cream
When done, the sour cream should have a wonderful clean flavor plus a tanginess ranging from mild to prominent. You decide on what you want. Also the texture should be thick but never pasty. If you notice a few clumps you can stir the cream gently and they should go away.
My results showed pretty much what I expected. I let them all develop about the same level of acidity
- The Ultra Pasteurized heavy cream mixed 50/50 with the Pasteurized Whole Milk did form a decent tasting sour cream, but it was not as thick and not quite as smooth as the better quality local cream.
- However it did not take as long (17 hrs) to develop the acid level desired The local Pasteurized Heavy Cream mixed with a great quality Pasteurized Whole Milk, and the Pasteurized Half n Half, produced similar results, with a richer flavor and a much thicker and smoother texture.
These both took about 24hrs to develop the tangy character
If things go as planned, we would like to see a thick, smooth, creamy product with just the right amount of tangy character and no graininess. If you opt for a less tangy sour cream, you may find that the texture is not quite as thick, but it should be smooth and no sweetness to be detected.
In the end, the flavor should go from the sweetness of milk lactose to a neutral to somewhat tangy character and should look something like the pictures below. This should be covered and moved to the fridge as soon as you think it's what you want.
It may develop just a bit more acid as it cools and then it should keep for several weeks
-


Trouble Shooting
Like many things in life, they don't always go as planned and we just don't understand what happened.
Some surprises might be:
- The sour cream has become too tangy: too much acid was produced, either from the temperature being too high, adding too much culture, or ripening too long
- The cream does not seem to be doing anything: this can be caused by using an older culture, or a buttermilk from the store that has a lower viability.
- The cream is developing an off flavor: same reason as #2, but perhaps an unwanted bacteria has take over.
- You open the jar to inspect it and the cream has risen, or worse, it's overflowing the jar as in the left and center photo below: this is a contamination has taken over and it is producing a lot of gas.
- The whey has separated in the jar, as in the photo on right: here you see pockets of liquid in the jar caused by excess acid as in #1.
- The cream is a little grainy: this sometimes appears in lower fat mixes and when using a UP cream mixed with milk.
Cheese Making Supplies
Related Products
You May Also Like


