


Blue By You Recipe Instructions
I often hear people say they ‘don’t like Blue cheese’ but I think they just haven’t tasted the right ones yet.
Blue cheese covers a wide range of styles from the mildest of the Scandinavian blues to the more aggressive blue ‘Valdeon’ of northern Spain.
In America some wonderful versions of Blue cheese including ‘Baily Hazen Blue’ from Jasper Hill in northern Vermont, and ‘Rogue River Blue’ by Rogue River Creamery which won best in world in 2019 at the wold cheese awards in Italy.
In northern Italy, the oldest and most famous Gorgonzola produced in the Valsassina at ‘Mauri” and Bruno and Alfio at ‘Quattro Portoni’ near Bergamo where they produce only buffalo milk cheese, ’Blu di Bufala’ is one of my favorites.
Other European blues cover the gamut from bloomy rinded blues to the very rare ‘Bleu Termignon’ from the mountains of Savoie, which is the only spontaneous blued cheese left.
So as you can see the world of blue cheese is a mixed bag and this months cheese is one I have created from all the different things I love about Blue. You know how I love to experiment.
In fact, all of the oldest, original or traditional blue cheeses were accidents, a Shepard forgetting his lunch in a cave, a tavern owner finding forgotten cheese in his cellar… In one way or another they were all spontaneously developed blues with wild blue mold that found a home in a forgotten cheese.
Each of these originals developed in different locales that led to cheese with different qualities.
This blue cheese, that I have been working on the past few months, is the result of ‘all things blue’ banging around in my head from lots of tasting over the years. I wanted a higher moisture cheese, more elastic curd, one that ages in 2-3 months, a bit more of an open texture and silky mouth feel, more of the aromatics and buttery flavor, and a medium plus blue intensity.
And the best part of making Blue By You is that with a bit of experience you can begin with my guideline and then make your own adjustments in search of your own unique blue cheese.
-

Heat and Acidify Milk
Add the blue mold to about 1/4 cup of clean un-chlorinated water and set aside for later use. This will begin the hydration process for the blue mold.
If using cold stored pasteurized milk add Calcium Chloride to the milk.
Heat milk to 78F, once heated, add all of the cultures listed above and stir well. Hold the milk at 78F for 30 minutes. At this temperature the mesophilic portion of the MA 4002 culture and the optional LM 57 to begin working.
After 30 minutes, increase the milks temperature to 90F, once heated add the re-hydrated blue mold powder. Hold the milk at 90F for an additional 60 minutes.
Note on the cultures: MA 4002 culture, commonly referred to as the Farmhouse culture has mesophilic culture that helps produce small gas holes for a more open cheese texture and a more buttery flavor. In addition, it also has thermophilic culture which is a slow worker that does well at higher temperatures. It also has lactic acid producers.
LM 57 can be added in addition to MA 4002 for an even more open texture, since it is primarily a gas producer.
-

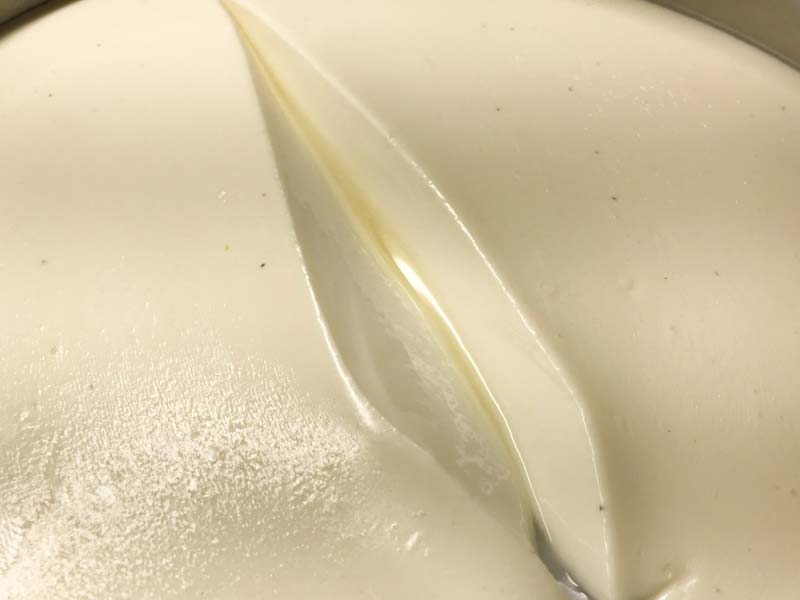
Coagulate with Rennet
Add about 2.5ml of single strength liquid rennet. Stir in slowly and thoroughly for 1-2 minutes, then allow it to rest totally still.
Let the milk sit quietly for 90 minutes, while rennet coagulates the proteins.
Although the milk will begin to thicken at about 18-20 minutes, allow it to coagulate to firmness at the full 90 minutes. This should be a very firm curd for cutting.
The thermal mass of this milk should keep it warm, it is ok if the temperature drops a few degrees during this time, you can heat it back to temperature after cutting the curd.
Note: It is always best to check for a firm coagulation, if needed allow the milk to set for as much as 20-30% longer. The next time you make the cheese, adjust the rennet amount, if needed (more rennet for a quicker set).
-
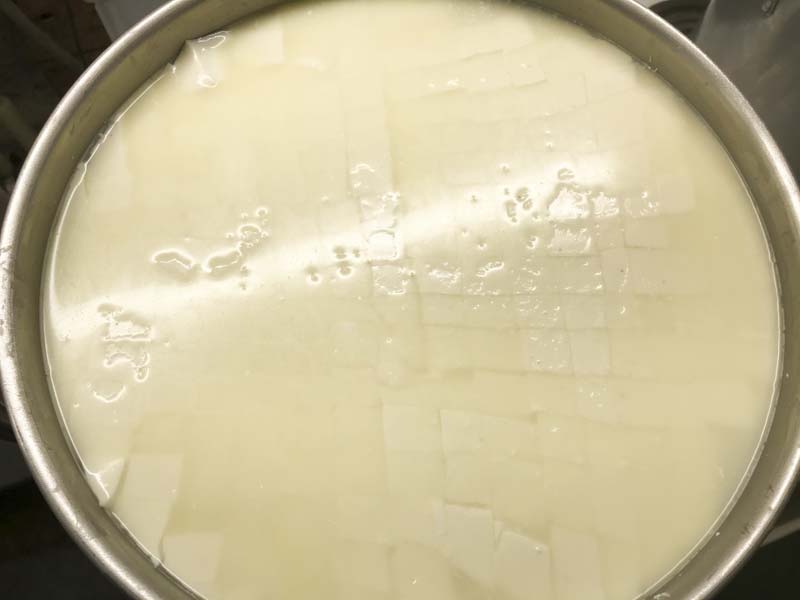
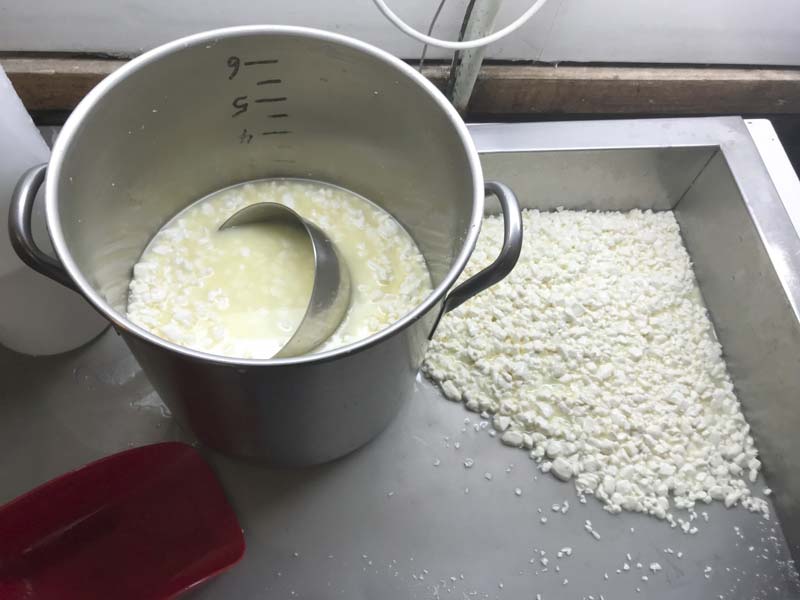
Cut Curd
Once the milk has set, it is time to cut the curd, this is the first step in reducing the curd moisture.
Cut the curd curd as evenly as possible into 1/2-5/8” pieces, then allow the cut curd to rest for 5 minutes, so the cut curd surfaces can heal.
After the 5 minute rest, slowly stir the curds for 20 minutes. This will allow the curd surfaces to firm up more. If the temperature has dropped below 90F during the rennet phase, bring it back to temperature during this stir.
-
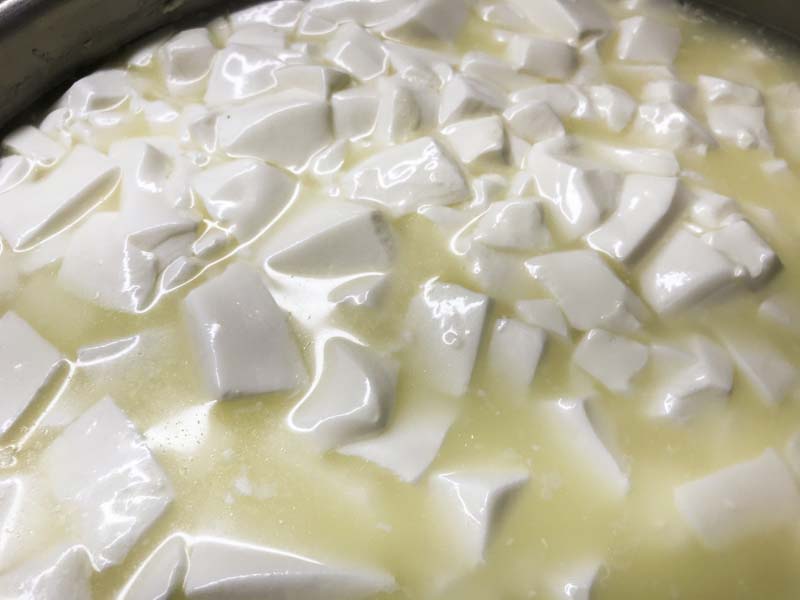
Drying The Curd
Remove 10% of the original milk volume as whey (1.6 quarts of whey).
Keep the temperature at 90F while slowly stirring in a bottom to top motion for 10-15 minutes.
Repeat the above whey removal and stirring again for 10 minutes.
Note: the character of a good blue cheese needs plenty of separation between the curds in the cheese mold for blue to grow. A moist curd tends to collapse from its own weight in the mold.
To achieve an open separation of curds, the final curd must be moist but at the same time the surface should be slightly toughened.
By reducing the whey in the vat, and bringing the curds to the surface, it will be easier to keep an open space between them in the cheese mold.
-
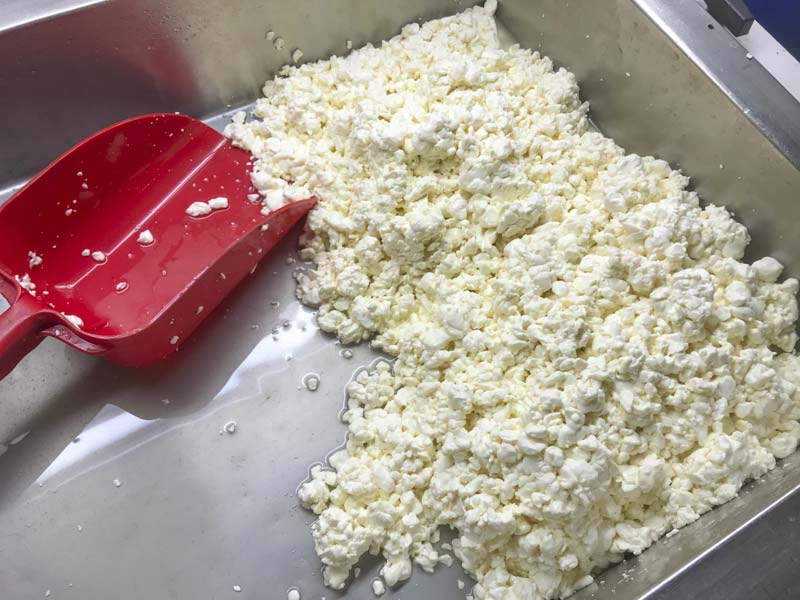
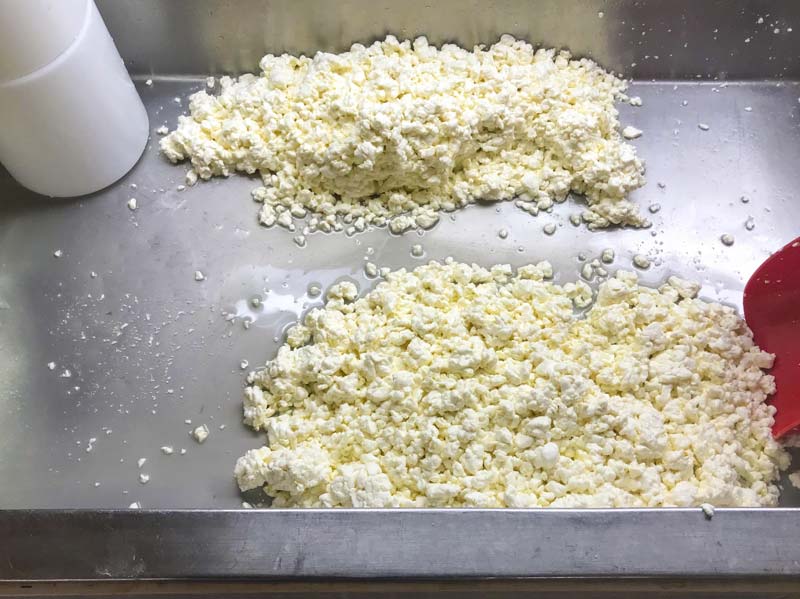
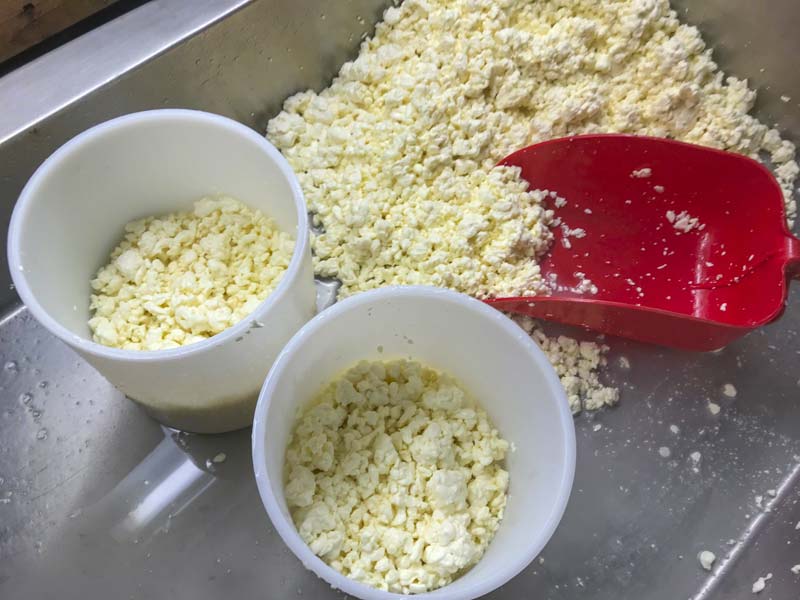
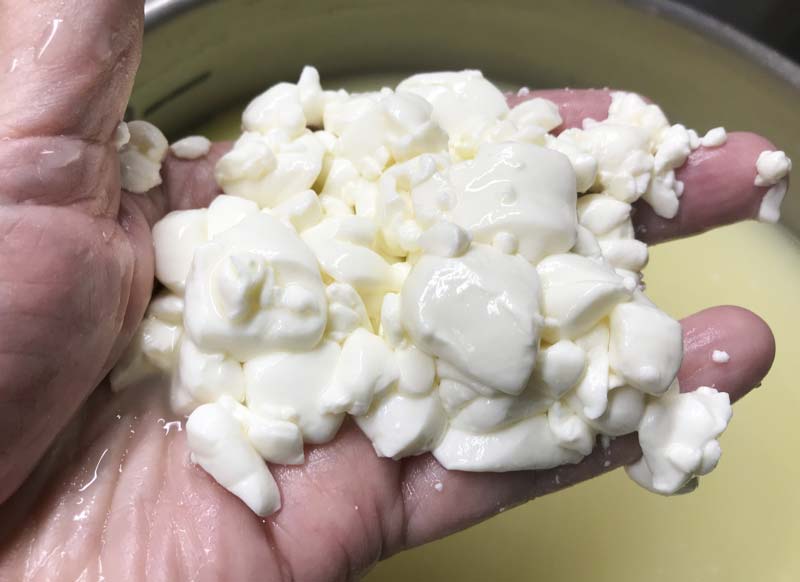
Drain and Transfer Curds to Molds
For some cheeses the curds are meant to be well packed together before placing in molds to make sure the final cheese has no holes. Blues run counter to this because they need to have plenty of holes internally between the curds for the blue to grow in, especially when they have a softer texture and more moisture.
To keep the curds from collapsing we will add a pre-draining step here. This will help dry and aerate the curds surface, leaving a structure that does not collapse in the form
In large modern dairies they use vibrating belts to keep the curds separated while they drain. Before that, and some still do, they would have huge sheets of cloth and curds layered onto them while two workers would grab the four corners and lift and toss the curds lightly (or maybe not so light).
For this process I simply dump a layer of curds onto my drain table, leaving channels for the whey to run off, then I use a flat scoop to toss and mix the curds until the whey has drained and the surface begins to dry slightly.
A large colander or draining pan with holes would work well for this.
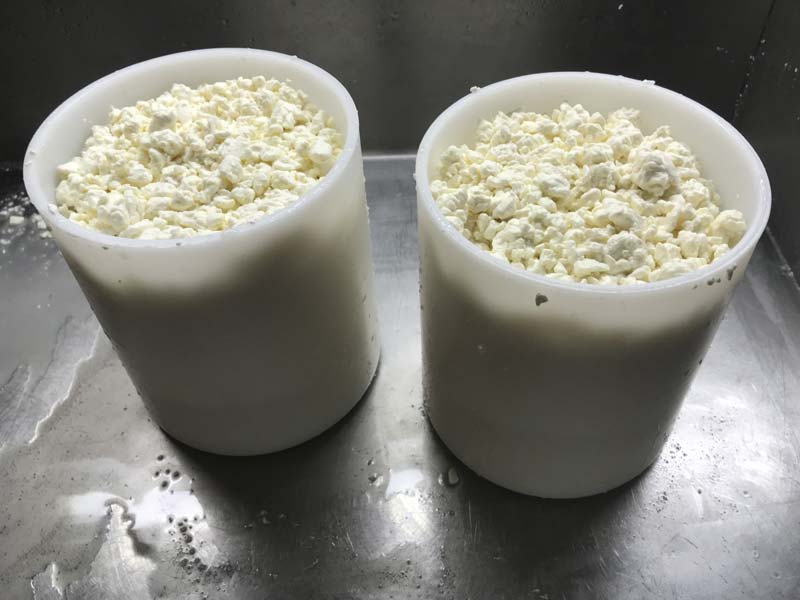
When the curds are dry enough scoop them into the cheese molds and level the surface.
-
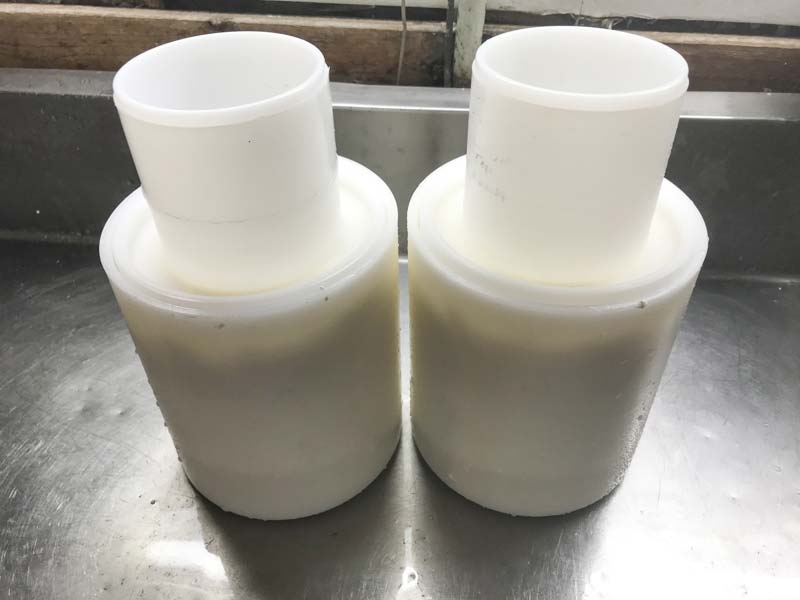
Forming Cheese
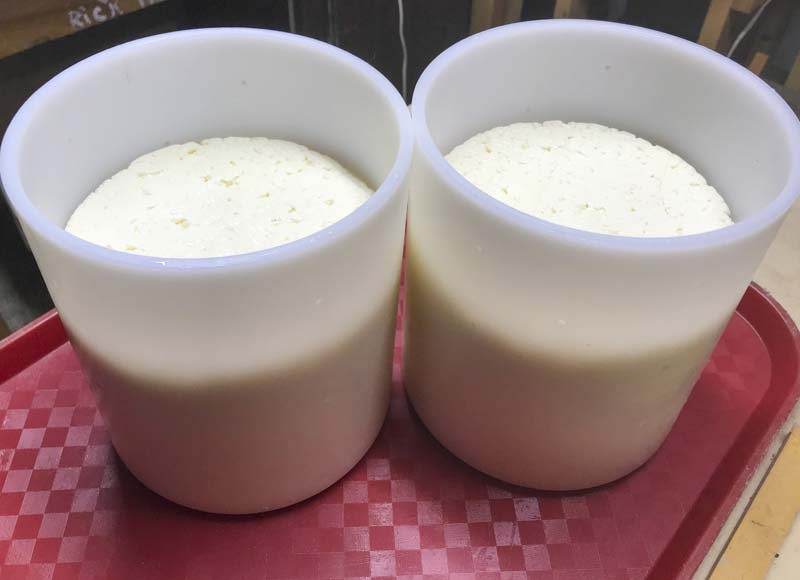
You don’t even need a press or weights for this cheese. Just make sure the the surface is level and turn the form after the first 15-30 minutes to set the surface. The weight of the cheese will do most of the work. Then, turn the cheese every hour or so, leaving it at room temperature. The cheese temperature will slowly drop from the vat temperature to the room temperature, while draining in the mold.
At each turn you will find the cheese sitting lower in the mold as it develops a bit more acid and consolidates.
When the curds were transferred into the cheese molds they were still quite sweet, because the acid production is still in its very early stage. I normally find that it takes about 8-10 hours from culture addition to complete the final lactose conversion. At this point I move the cheese to a cooler room at 62-65F for an overnight.
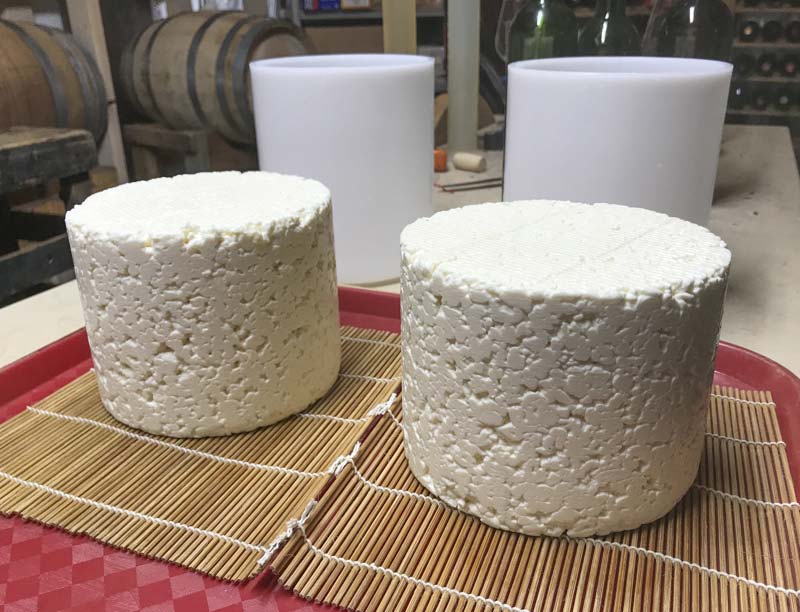
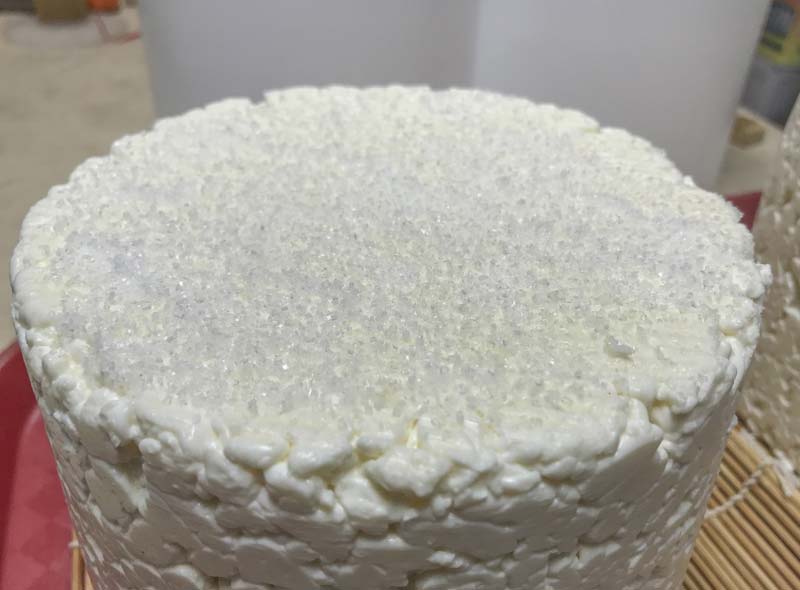
Note: The finished cheese should have a bit of a hollow sound when slapped on the surface. This is an indication that the important spaces for the blue to grow have been left open. The surface should also show many crevices as well.
-
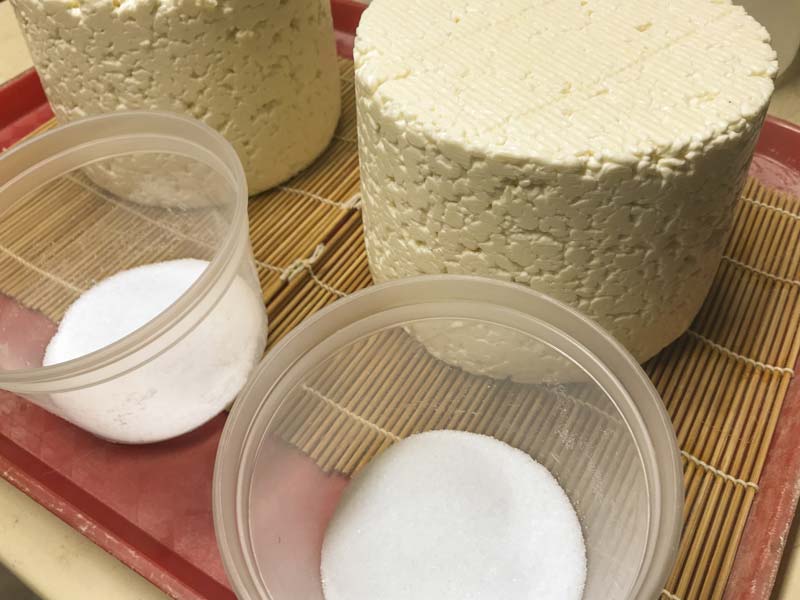
Salting
The following morning weigh out about 2.5% of cheese weight in salt. A medium size salt grain is preferred for dry salting. If the salt is too fine it will dissolve too rapidly and form a brine that runs off the cheese before it has a chance to soak in.
Begin salting with about 30% of the salt spread evenly over the top surface, then rub some of this into the sides. Leave the salt to dissolve and be absorbed by the cheese. During this process keep the cheese cool, preferably in the aging space, no warmer than 60F. A high moisture of at least 85% should also be maintained. This will draw off some whey and moisture and will run off during the salting so use a plate or tray to catch the liquid.
On the following morning repeat the salting process but flip the cheese so you are working on the bottom surface, that has not be salted yet.
The next day, when both surfaces have been salted, begin the cycle again.
When the salting has been completed move the cheese to the aging space at about 52F and 85-90% moisture to begin aging.
-
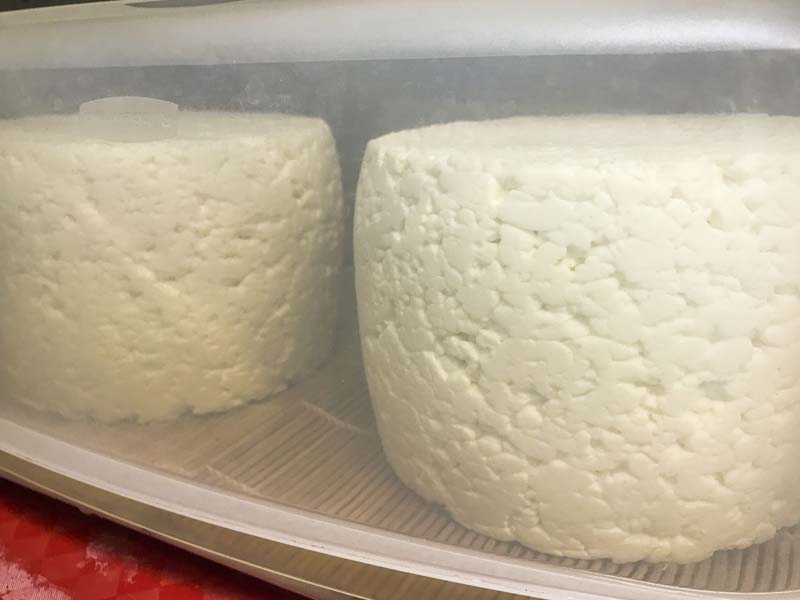
Aging
Once the cheese is in the aging space turn it daily and be sure to maintain 52F and 85-90%.
While aging, the higher surface salt will prevent unwanted molds from developing on the surface. Inspect the cheese daily for signs of blue developing.
To keep the moisture up, you can place the cheese on a bamboo mat resting on a board, then cover the cheese, mat and board with a plastic cover to maintain a higher moisture than the rest of the cave.
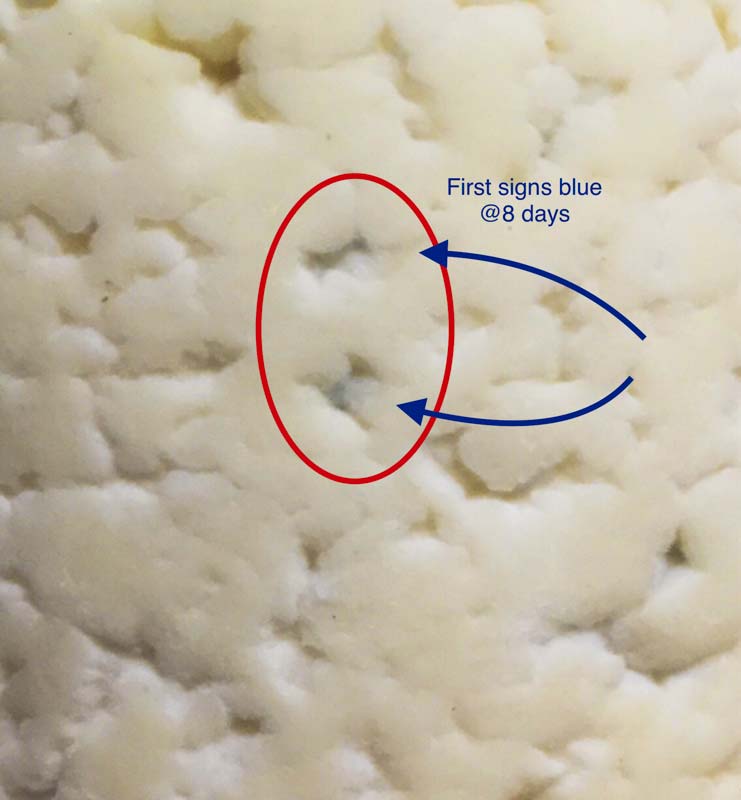
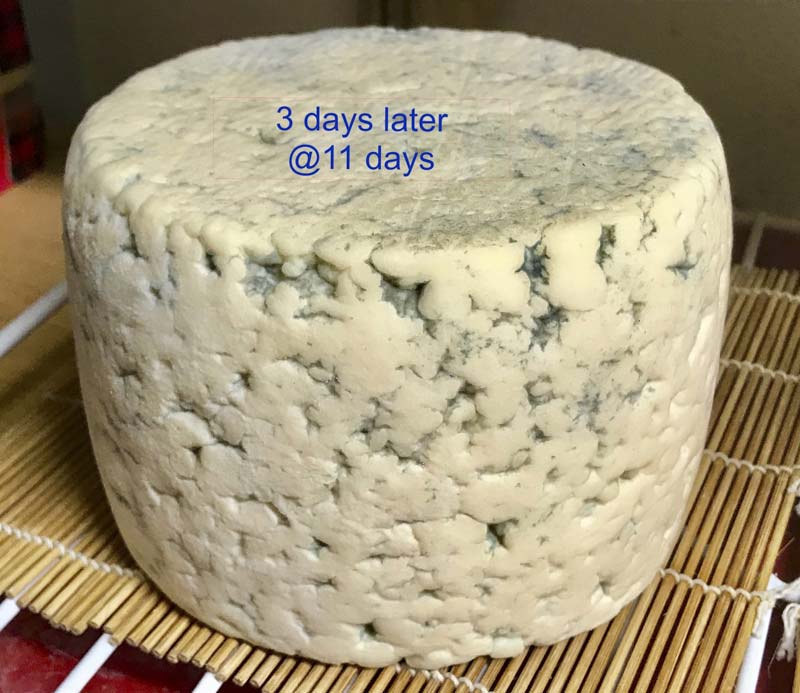
The last cheese I made showed a hint of blue developing first at about 8 days and 3 days later, at day 11, it showed a respectable amount of blue. The blue mold will only grow in the presence of air.
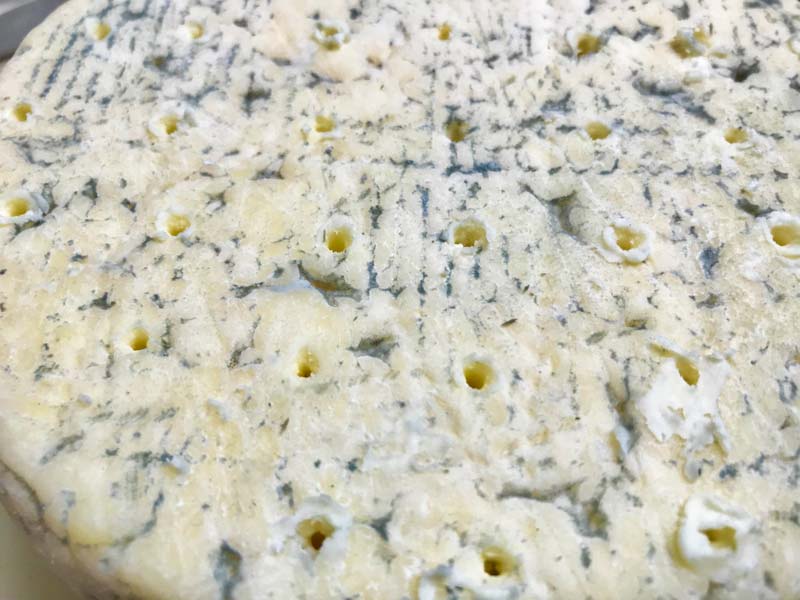
Once you see this surface blue developing, the cheese needs to be aerated. This can be done with a stainless steel skewer by poking a pattern of holes into the top surface about 3/4-1 inch spaced, about 2/3 of the way into the cheese. Then flip the cheese and repeat on the opposite side.
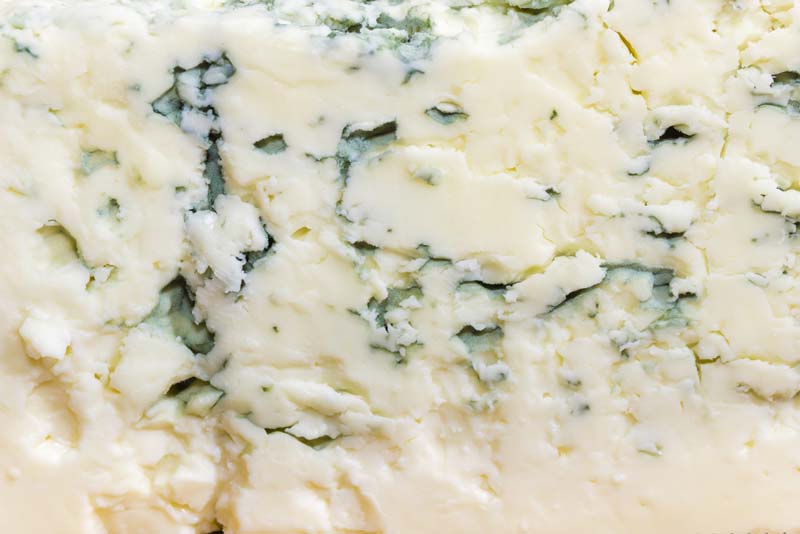
Now you simply need to turn the cheese every day or so and wait for ripeness at about 2-3 months. When ready, you should notice a distinct softening of this cheese.
When fully ripened and cut, the blue should show as a veining running through the small spaces left between the curds, not just in the holes punched in the cheese
You may also notice a distinct rosy color of the rind if the curds were a bit too moist when forming the cheese. If the surface actually becomes red/orange and slimy or develops an offensive aroma, you may need to scrape the surface, this is an indication that the curds may have been too wet or were not drained well initially.