


Edam Cheese Making Recipe Instructions
The process of making Edam is focused on a special method adapted by the Dutch, likely due to living in the pastoral lowlands of the Netherlands, The choice of vessels to make cheese was wood and not metal because iron, copper, etc were not locally convenient for cheese making.
In order to heat these large vessels, the milk was taken direct from the herd at body temperature to ripen. If they needed to heat the curd further, they could not apply direct fire to the large wooden vats so their only choice was to add hot water to the vat contents. Also, since these vats tended to be filled to the max with milk, there was a need to make room for the hot water by removing as much whey as hot water to be added. This became the traditional Dutch method that we now call the 'Washed Curd' method.
In addition to heating the curds, this process does two things to change the final cheese:
- The removal of whey takes away some of the lactose used by bacteria. This will slow down the process of acid development and potentially produce sweeter cheese.
- The added water, which is warmer than the original whey/curd, has a tendency to move into the curd, which also leads to a sweeter and milder cheese.
Edam, like Gouda, was named for its respective town in Holland. Although these two cheeses have different characteristics, including to their shape and size, the towns for which Edam and Gouda were named are only about 50 miles apart.
Edam is usually made with a lower fat, (1.6-3% butterfat) milk and Gouda is usually made from full fat, (3.75-3.9% butterfat) milk. This difference tends to make Edam a drier cheese because even though the make process is quite similar the lower fat content will hold less moisture.
-
Heat & Acidify Milk
Heat milk to 72F then add all cultures when the temperature has been reached. Let the milk sit quietly for 30 minutes.
After 30 minutes slowly heat the milk, over 10 minutes, to 86-88F (the higher temperature is for richer milk). Hold the milk at this temperature for 1 hour.
While the milk is sitting quietly, it is a good time to sanitize your cheese mold, cloth and draining area to prepare it for the finished curd mass and pressing.
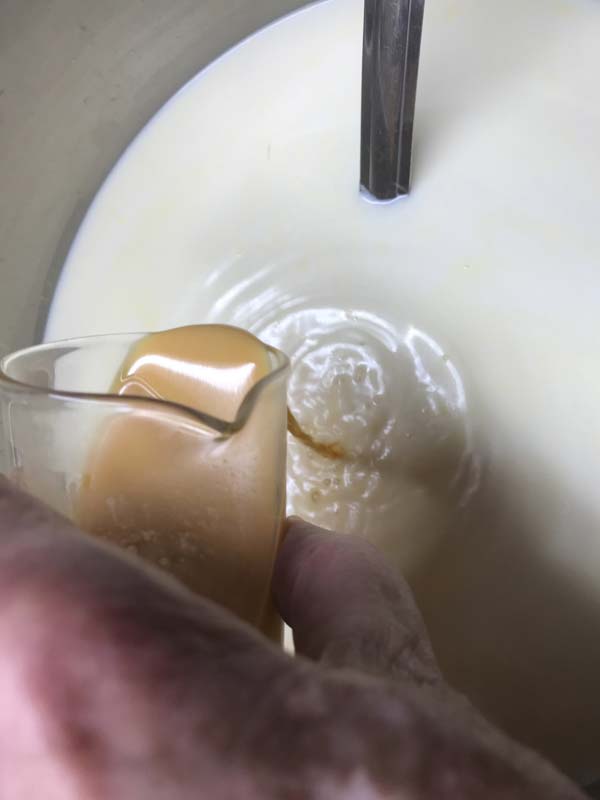
Note: For a richer color, before adding the culture you can add Annatto coloring to the milk, as you begin heating.
To add annatto first mix the desired amount in 1/4 cup of the milk then add the mixture back into your your heating milk and stir in throughly.
-
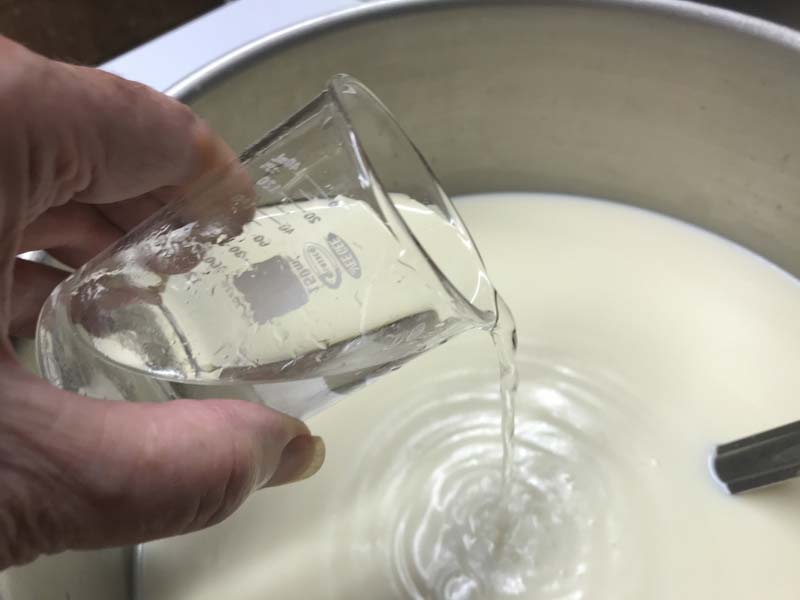
Coagulate with Rennet
Add 3/4 tsp of single strength liquid rennet, diluted in 1/4 cup cool water. Stir rennet into the milk in a slow, up and down motion for about 1-2 minutes then still the motion of milk.
The thermal mass of this milk should keep it warm during this period. It is OK if the temp drops a few degrees during this time, you can heat it back to temp after cutting.
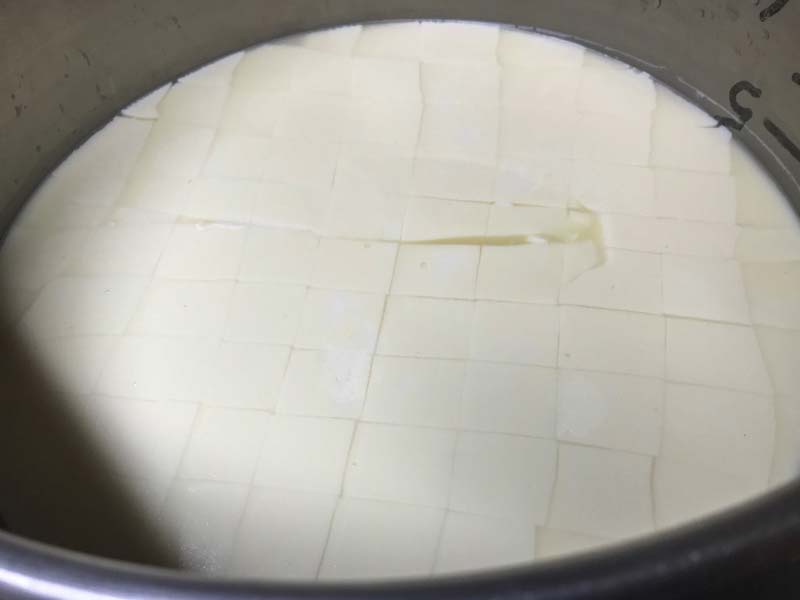
Let the milk sit quiet for 45 minutes while the culture works and the rennet coagulates the curd.
The milk will begin to thicken after 12 minutes, but allow it to coagulate to the proper firmness at about 45 minutes.
It is always best to check for a firm coagulation after 45 minutes, if it seems to need longer allow it to go as much as 50% longer. The next time you make the cheese, adjust the rennet amount if needed, more rennet for a quicker set.
Note: If using raw milk reduce amount of rennet by 25-40%. If your rennet is stronger than single strength adjust for strength.
-
Cut Curd
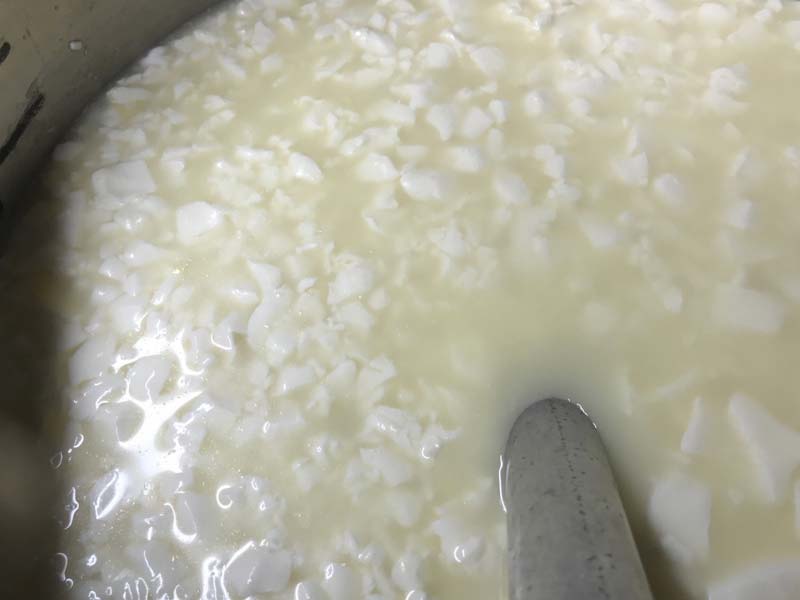
Once you have determined the milk has set well, it is time to cut the curd. This is the first step in reducing the curd moisture.
Cut the curd mass as evenly as possible into 3/8” pieces, then allow the cut curd to rest for 5 minutes so the cut surfaces can heal.
Next, slowly stir the curds for 15 minutes, this will allow the curd surface to firm up more. After 15 minutes allow the curds to settle briefly when done.
This rest and stir are important to prepare for the cooking phase that comes next. Without it, the curds would break further and loose too much moisture.
-
Remove Whey & Wash/Cook Curd
Once the curds have settled to the bottom remove 30% of the whey (4.8 quarts for 4 gallons of milk). This helps remove the bacteria's food supply, slow the culture activity and produces a sweeter, milder cheese.
Then, using clean water at 150-160F, slowly replace the whey with the warm water to the original milk volume, while staring the curds, over a period of 15 minutes. This should increase the temperature to 102F. The warm water plus the final stirring will help the curds replace the lactose rich whey with water.
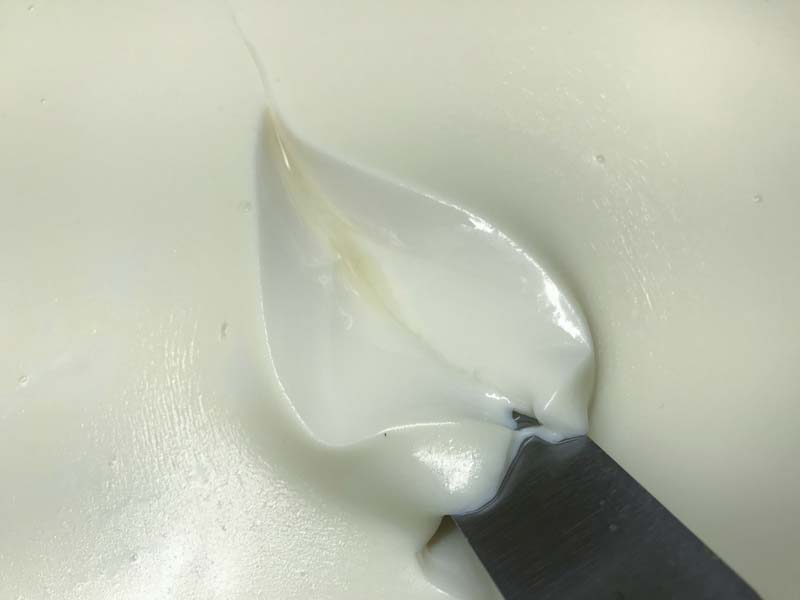
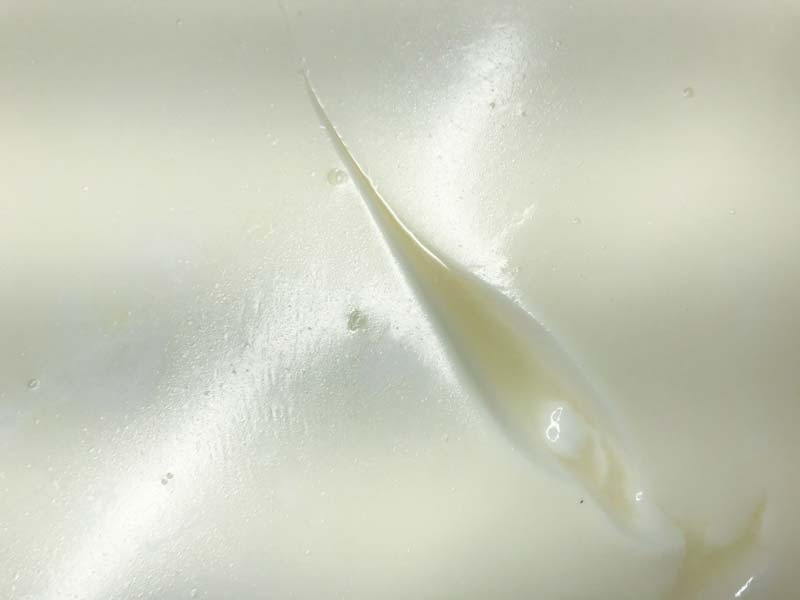
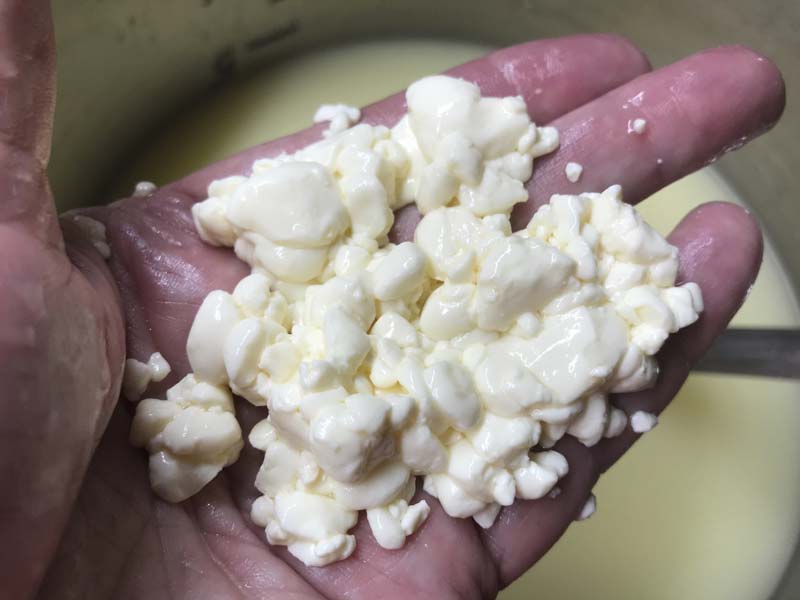
Once the temperature is at 102F, stir slowly for an additional 20-30 minutes. The final curds should be cooked well through and should be examined to make sure enough moisture has been removed. A broken curd should be firm throughout and the curds should have a moderate resistance when pressed between the fingers.
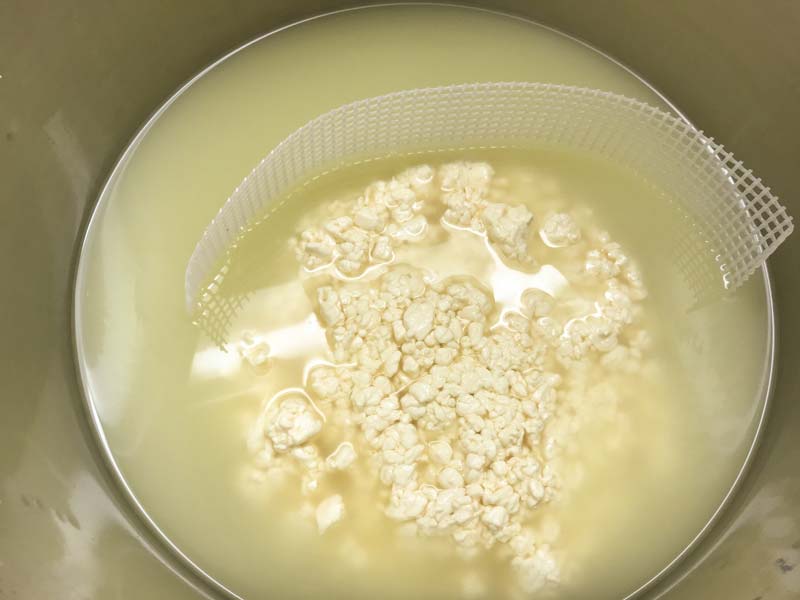
When the curds feel ready, a small handful when pressed slightly in the hand should separate easily under slight thumb pressure. Allow the curds to settle to the bottom and remove the whey down to about 2-3” above the settled curd.
After draining the whey, carefully consolidate the curds to one side of the vat. I use a long strip of medium draining mat as shown in picture here. As you consolidate the curds press firmly with your hands to consolidate it into a tight mass. Remove as much of the remaining whey as possible.
At this point the curd should taste neither sweet nor acid.
-

Transfer Curd to Mold
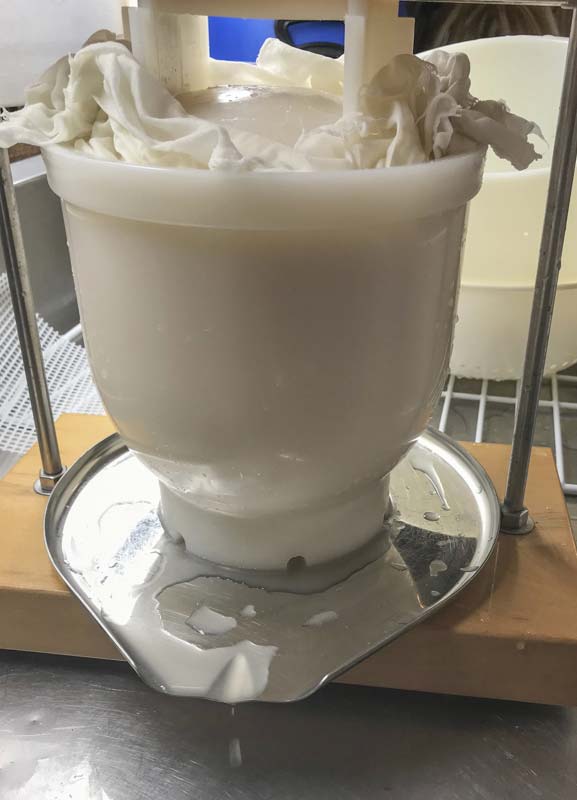
Be sure your cheese mold and cloth is sanitized and placed on a surface that can accommodate draining whey.
Begin this step by draping the draining cloth over the consolidated curd mass. Once covered, gently roll the curd mass over and grab the four corners of draining cloth. Gather the four corners of cloth (now above the curd mass) and bring them together to form a draining/pressing sack with the curd mass suspended. I sometimes press again with my hands and roll the curd mass a bit to get a good shape.
Keep the curd mass in the draining cloth and simply drop it into the cheese mold then spread the cloth and pull up the edges to reduce folds and wrinkles. A firm hand press at this point will set the curds well in the cheese mold.
Set the follower on top and you are ready for the pressing.
-
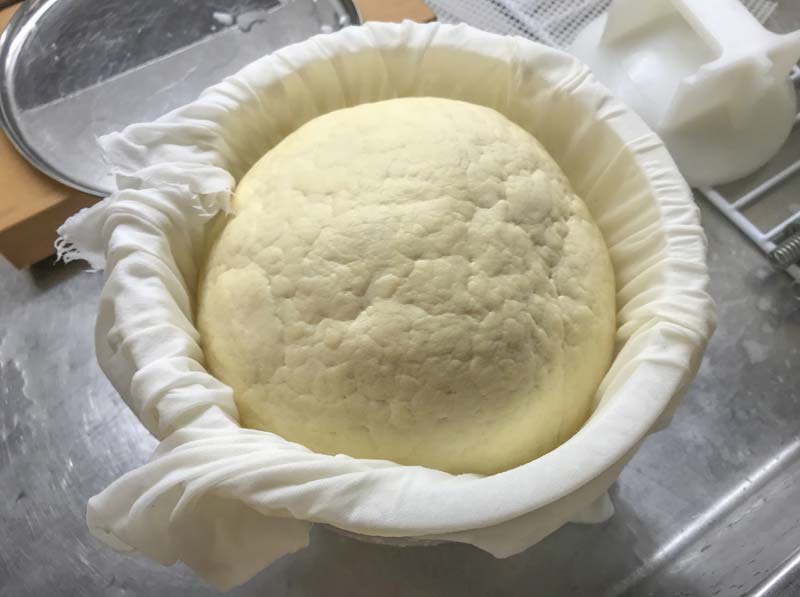
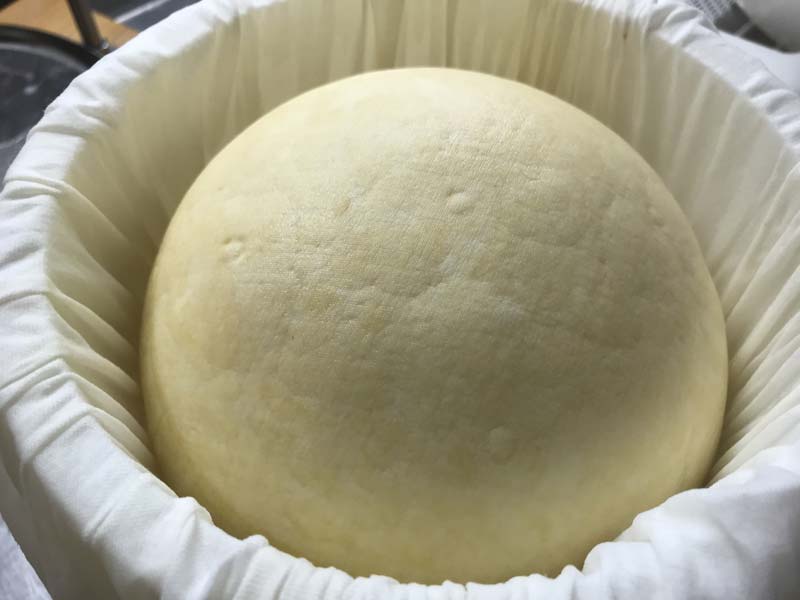
Pressing
For pressing begin very lightly and slowly then increase the weight to a moderate level:
- 30 minutes at 15 lbs
- 1 hour at 25 lbs
- 2 hours at 35 lbs
- 2 hours with enough weight to close the surface 30-40 lbs
- Overnight with no weight, in cheese mold placed in a cool space 62F
The cheese should be removed from the mold, unwrapped, turned, rewrapped, and put back into the mold at the above intervals to assure an even consolidation. At each turn you will notice the cheese has formed a smoother surface and will rest lower in the mold.
The rate of whey running off is simply a matter of drops and not a stream of whey being released. This is a good rate of whey removal during pressing and will slow even more as the residual free moisture is released. The mold should show tears of whey weeping from the holes very slowly. When this stops you can increase the weight slightly.
The final weight of the cheese should be between 4.5 - 5 lbs.
-
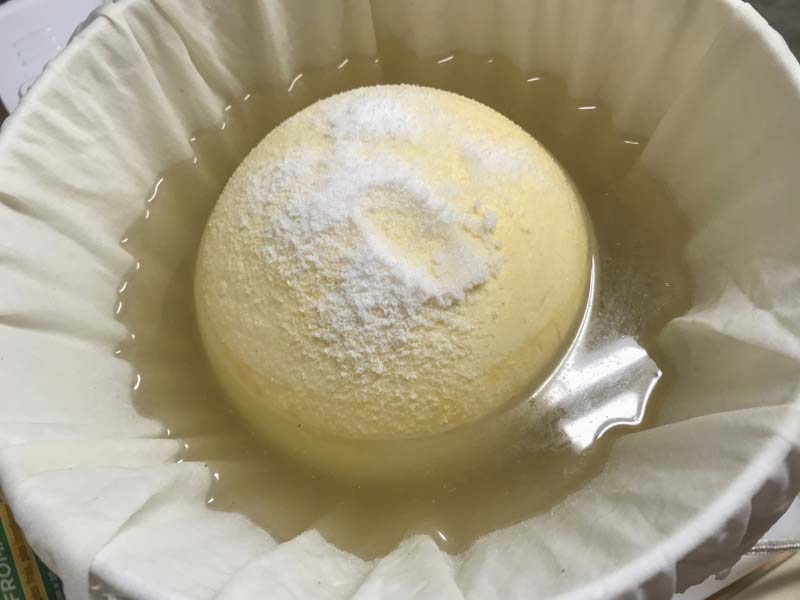
Salting
You should have a saturated brine prepared for salting this cheese. You will find all of the details you need on brining here.
A simple brine formula is: 1 Gallon of water to which is added 2.25 Lbs of Salt, 1tbs. Calcium Chloride (30% solution), and 1 tsp. white vinegar.
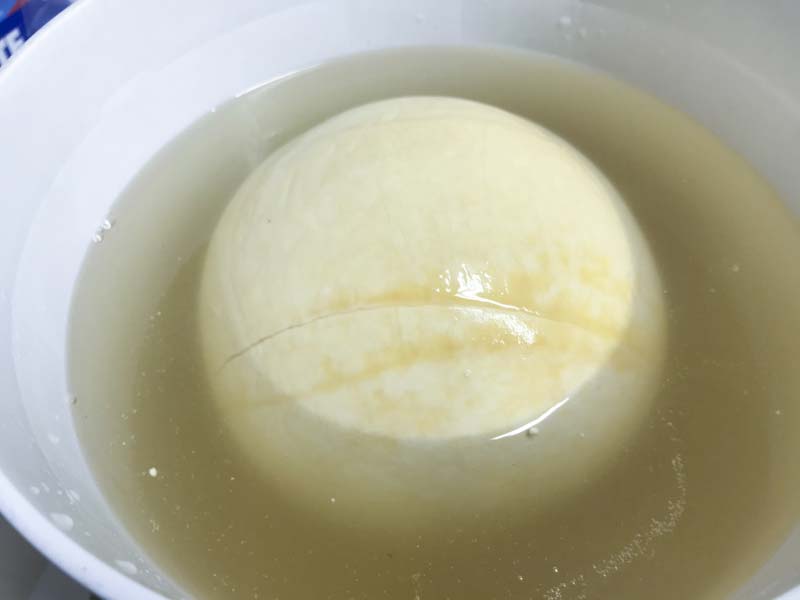
The cheese now needs to be set in the brine for about 3.5 hours per pound of cheese. The cheese will float above the brine surface so sprinkle another teaspoon or two of salt on the top surface of the cheese.
Flip the cheese and re-salt the surface about half way through the brining period.
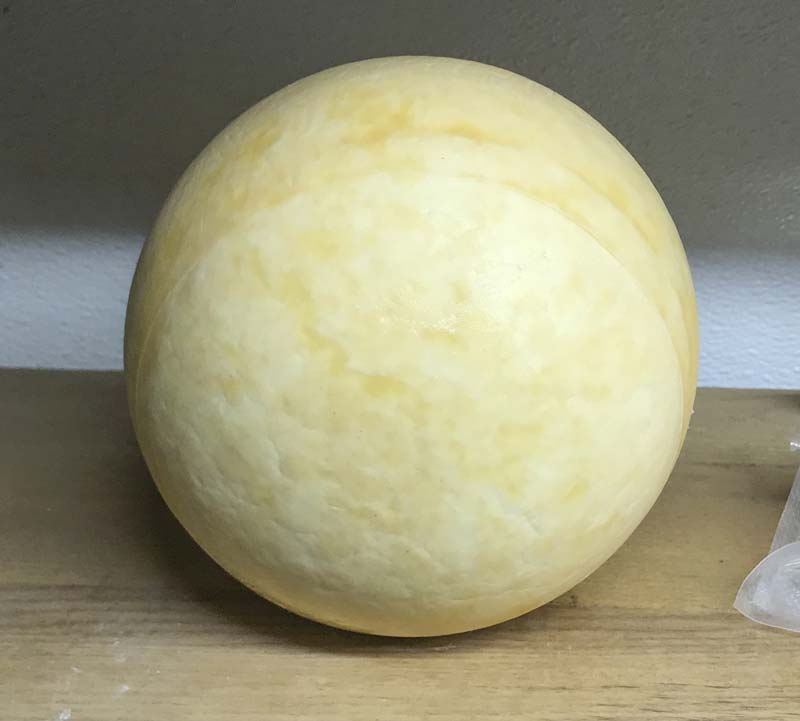
At the end of the brine bath, wipe the surface and allow the cheese to surface dry for a day or so in a cool area 65-70F with free movement of air.
Do not let the cheese darken too much or begin to crack.
Note: Because of its spherical shape like to use a small bucket to hold the brine and a coarse cloth stretched over to keep the top surface up during brining. This does not interfere with salt migration and helps to keep the cheese from rolling when I add salt to the surface of the cheese. You may or may not need to do this but it works well for me.
-
Aging
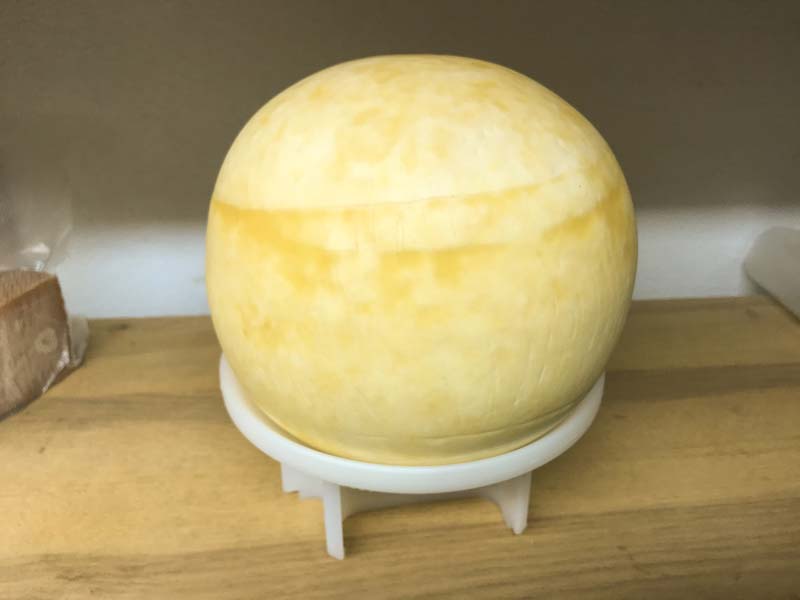
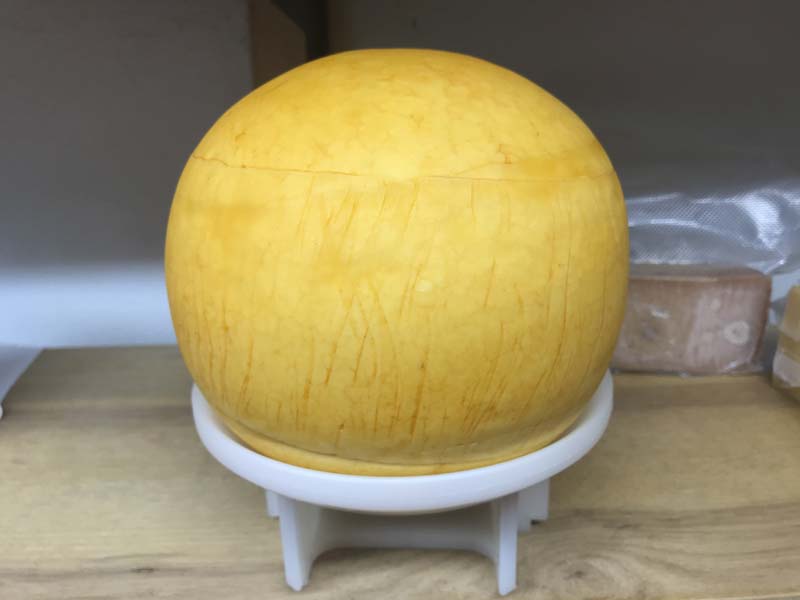
I like to apply a light surface wash with a brush and diluted Annatto for a warm orange hue of traditional Edam, as seen in the photos.
Note: I use the cupped surface of the follower here to keep the softer cheese post-brine from flattening too much on the bottom, during the early aging
You may choose to maintain a natural rind with dry brushing periodically or apply a light coat of olive oil to reduce mold growth. Another option is to wax your cheese for aging, details on waxing can be found here.
Place the cheese in your aging space at 52-56F and 80-85% moisture for 4-6 weeks of aging.
If desired, this cheese will develop more character and become drier with a longer aging period of 3-4 months. A drier curd can be aged longer, for more character.