


Alpine Washed Rind Cheese Making Recipe
-

Yield
4 Pounds
-

Aging Time
~3 Months
-

Skill Level
Advanced
-

Author
Jim Wallace


Alpine Washed Rind Cheese Making Recipe Info
Alpine Washed Rind Inspiration
Alpine Style Foundation
Flavor and Texture of Alpine Washed Rind
Aging and Serving Alpine Washed Rind
Ingredients
Total price for selected items: Total price:

Instructions
The following guideline is a hybrid I make, drawn from cheese making practices in many regions of central and northern Europe, to make one of my original hybrids (as yet, unnamed.)
As I make the cheese here and present it to my friends, I am often met with "what kind of cheese is this?". Tough question for me without the 2 hour tour and so I say, well what does it taste like?
Someday I'll actually come up with descriptive names for them all but for now I just make them and see how they fly. If they appear on these pages they've had some grand flights.
-

Heat & Acidify Milk
If using Pasteurized milk, add the Calcium Chloride
Begin by heating the milk to 90F. You do this by placing the pot of milk in another larger pot or sink of very warm water. If you do this in a pot directly on the stove make sure you heat the milk slowly and stir it well as it heats
Once the milk is at 70F, all of the cultures listed above can be added, but then continue heating to 90F. To prevent the powder from caking and sinking in clumps, sprinkle the powder over the surface of the milk and then allow about 2 minutes for the powder to re-hydrate before stirring it in.
The milk now needs to be kept at this target temperature until it is time to increase for cooking the curds. Hold the milk with culture quiet for the next 60 minutes to allow the culture to begin doing its work. It will work very slow initially but will soon kick into its more rapid rate of converting lactose to lactic acid.
-


Coagulate with Rennet
Then add single strength liquid rennet 3ml (pasteurized milk) or 2ml if raw milk.
The milk now needs to sit quiet for 45 minutes while the culture works and the rennet coagulates the curd.
The milk will begin to thicken at about 15 minutes, but allow it to coagulate to firmness at about 45 minutes.
It is always best to check for a firm coagulation and if it seems to need longer allow it to go as much as 50% longer. The next time you make the cheese, adjust the rennet amount if needed (more rennet for a quicker set).
The thermal mass of this milk should keep it warm during this period. It is OK if the temp drops a few degrees during this time, you can heat it back to temp after cutting.
-


Cut Curd
Once you have determined that the milk has set well, it is time to cut the curds smaller. This is the first step in reducing the curd moisture.
Cut the curd mass as evenly as possible to about 1/4" pieces, and then allow the cut curd to rest for 5 minutes, so that the cut curd surfaces can heal. Then stir slowly for 15 minutes, to allow the curd surfaces to firm up more. The rest and stir are important to prepare for the cook phase that comes next. Without it, the curds would break further and lose too much moisture.
-


Cook Curd
Following the brief stir above, we will heat the curds by withdrawing whey and replacing it with warm water. This is a method borrowed from the Dutch:
- First is to remove the bacteria's food supply (which is residual lactose in the whey).
- Allow the curds to settle, then remove 30% of whey (4.8 qts for 4 gallons). This will slow the culture activity for a sweeter cheese.
Then, using clean water at 130F, slowly replace the whey with the warm water to the original milk volume. This should increase the temperature to 102F over 30 minutes, while slowly stirring. The warm water plus the final stirring will help the moisture release.
Once the temperature is at 102F, stir slowly another 20-30 minutes. When the curds feel ready, transfer to a form in a pan or pot that can hold the whey and press under the whey. Press this under the whey with 1.5 times the cheese weight (~8 lbs) for 15 minutes.
The final curds should be cooked well through and should be examined to make sure that enough moisture has been removed. A broken curd should be firm throughout and the curds should have a moderate resistance when pressed between the fingers.
When this point is reached the curds can be allowed to settle under the whey in preparation for transfer to molds.
-


Transfer Curd to Molds
Even this process is a bit different from other cheeses.
- Once the curds have settled in their pot, place the LargeTomme form in another pot large enough to hold the form and its contents and drape the mold with draining cloth. Make sure you avoid a mess by placing everything in a large sink or draining space so that the overflow can be channeled to a drain or collection pail.
- Next transfer just the whey to the new form, filling it 3/4 full of whey.
- The dry curds can then be transferred to the form lined with butter muslin.
The curds will be suspended in the whey as you transfer them and this tends to force any air pockets out as you compact the curds in the mold (using moderate hand pressure). The functionality of this step is to remove as much air from the curds during the molding, which will result in a tight, compact curd mass. This will actually facilitate the small gas holes that the cultures produce during the early aging process. This part of the process will prepare the cheese body to form the small round holes caused by the CO2 gas formation, rather and the irregular holes that occur in lightly pressed cheese with trapped air.
In the picture below I have used a secondary open mold to make the transfer easier but without much trouble you should be able to get all of the curds transferred with a slight mounding over the top. This will recede as the pressing continues.
-


Pressing
Once the curds are in the molds and lightly consolidated (under the whey still), it is time to consolidate the curds.
First will be a pre-press while still under the whey. The follower should be placed on top followed by a light weight of about 8 lbs (conveniently the weight of a gallon of warm water).
Care in placing that weight will avoid a sloped pressing, or worse, a mess on the floor.
Any 8 lb. weight will do though. Let this weight sit for about 30 minutes, then remove the forms from the whey and turn the cheese in the cloth.
Note: This whey is sweet enough to make Ricotta at this point but needs to be done within an hour before it develops too much acidity.
Next will be the full weight schedule as follows:
- 25 lbs for 30 mins
- 25 lbs for 30 mins
- 40 lbs for 1 hr
- 40 lbs for 1 hr
Final Press at 8 times cheese weight
Leave in press for 3 hrs, according to the above schedule, removing and turning in the cloth every 30 min.
Post-press, leave in warm place, 80+F for 5-6 hrs (final pH 5.5.)
Immediately place cheese (with or without mold) into pan of cold 50F water to slow acid development overnight. Add about 1 tsp of vinegar and 1/2 tsp Calcium Chloride to the water to avoid calcium leaching from the cheese.
If you have a pH meter or the pH strips from our website, the final pH will be about 5.5 at this point, but will drop to 5.2 by morning in the cool water bath. This long slow acid development will play a big part in the final texture of the cheese.
Allow this to sit in a cool space overnight. The cool water will help to hydrate curds.
The final weight of the cheese should be between 4 - 4.5#
-

Salting
You should have a saturated brine prepared for salting this cheese. You will find all of the details you need on brining here. A simple brine formula is:
1 Gallon of water to which is added 2.25 Lbs of Salt, 1tbs. Calcium Chloride (30% solution), and 1 tsp. white vinegar.
The cheese now needs to be set in the brine for about 2 hours per lb. of cheese.
The cheese will float above the brine surface so sprinkle another teaspoon or two of salt on the top surface of the cheese.
Flip the cheese and re-salt the surface about half way through the brine period.
At the end of the brine bath, wipe the surface and allow the cheese to surface dry for a day in a cool area (65-70F) and with free movement of air. Do not let it darken or begin to crack.
-


Aging
Next we begin the two part aging process:
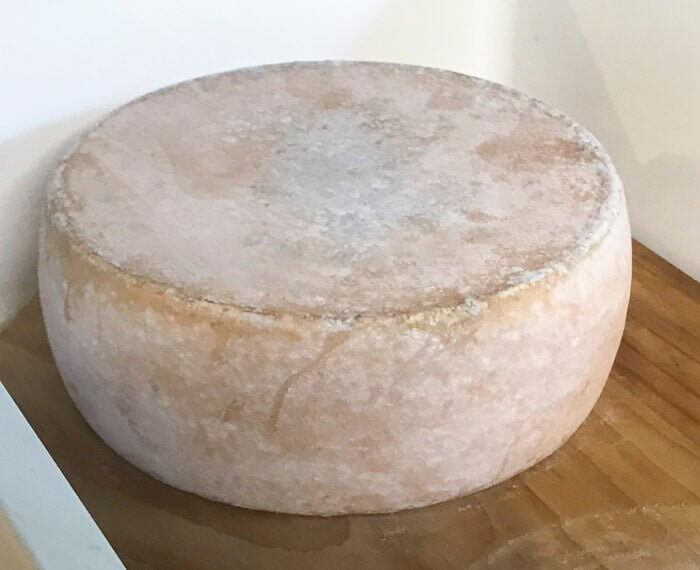
- The first part will be the warm room aging at about 62-64F and 85-90% moisture. I use a covered plastic tray, sized to the cheese for this, and the moisture in the cheese body should provide all the moisture you need. During this phase, the Propionic.shermanii you added will begin working within about 5-10 days. The gas will collect in small pockets inside the cheese body, and because we have created a rather elastic texture, the gas will be trapped and holes will begin to cause the cheese to swell slightly (note the bulging side in the pic at right.)
The longer it rests, and the warmer the temperature, the larger the holes. I prefer small holes about the size of a cherrystone for this cheese. You will notice the sides puffing out slightly as the gas forms. The cheese needs to be turned daily during this part to even out the hole development. Without the turning, the holes tend to form near one surface.
During this warm phase, the surface ill begin to feel greasy due to ambient yeast (you want this). This will be a big help in developing the washed rind later. - The second part is the cool room aging, which I hold at 52-54F and 95% moisture.
Prepare a wash for this phase, a day or so before you finish in the warm room. To make the wash: A cup of water, plus one tablespoon of non iodized salt. Stir well and add another pinch of both Geo and B.linens (just for insurance since you already added it to the milk) as noted above. Store this in a sealed jar in the fridge until use.
This cool phase begins with a cool water wipe to remove some of the greasy surface. Then move the cheese to a covered plastic box with an aging board cut to size on the bottom.
Note: Never wash your boards with detergent; just hot water scrub and dry in the sun.
They tend to harbor the complex of washed rind bios over time.
Begin using the wash on just the top surface and sides. You only need a small amount on a sanitized cloth for this. I usually pour a few tablespoons of the prepared wash on the cloth so that I do not have to mix fresh each time. Allow this surface to dry slightly and then place it washed side up in the box. Allow this to rest in the aging space for a day or so and then turn it over and do the other surface.
Repeat this every 3-5 days as you see a white film of mold developing. The surface will become damp or tacky but do not allow it to get swampy or wet. Within 10 days you should notice a slight pinkish/orange surface developing. If done properly no blue, dark, or fuzzy mold should grow. That is the beauty of the washed rinds. It took the monks to figure this out.
- The first part will be the warm room aging at about 62-64F and 85-90% moisture. I use a covered plastic tray, sized to the cheese for this, and the moisture in the cheese body should provide all the moisture you need. During this phase, the Propionic.shermanii you added will begin working within about 5-10 days. The gas will collect in small pockets inside the cheese body, and because we have created a rather elastic texture, the gas will be trapped and holes will begin to cause the cheese to swell slightly (note the bulging side in the pic at right.)
Cheese Making Supplies
Related Products
You May Also Like


