


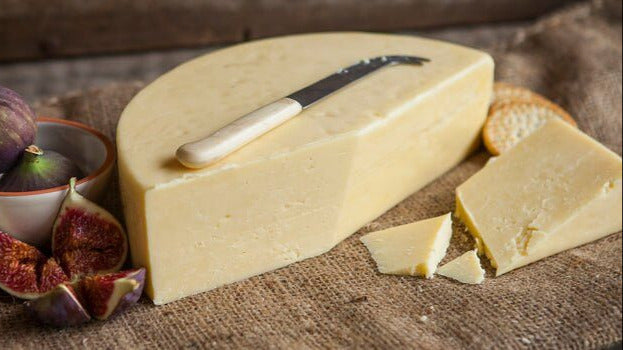
Dunlop Cheese Recipe
-

Yield
4 Pounds
-

Aging Time
~3 Months
-

Skill Level
Advanced
-

Author
Jim Wallace


Dunlop Cheese Recipe Info
Origins
The Cheese
The Story
A Taste of the Past
Ingredients
Total price for selected items: Total price:

Instructions
Dunlop, a True Scot Cheese
Traditionally the milk butterfat content ranged from 3.9% to 4.4% which passes into the high fat content of the cheese. This high fat content was enabled by the smaller fat globules of the Ayrshire cows milk, which allow an ease of incorporation of fat into the curd.
Today's dairy milk is standardized at about 3.25% butterfat. You can increase the fat level of this milk by adding 3-6oz of heavy cream to your milk.
The higher butterfat and the lower culture activity will result in a sweeter and moister cheese.
I find that this cheese works better in the larger 4 gallon size but if you would like to make a 2 gallon version simply reduce the culture and rennet by 1/2.
-

Acidify & Heat Milk
Begin by heating the milk to 86F (30C). You do this by placing the milk in a pot or sink of very warm water. If you do this in a pot on the stove make sure you heat the milk slowly and stir it well as it heats
Once the milk is at 86F the culture can be added. To prevent the powder from caking and sinking in clumps sprinkle the powder over the surface of the milk and then allow about 2 minutes for the powder to re-hydrate before stirring it in.
The milk now needs to be kept at this target temperature until it is time to increase for cooking the curds. Hold the milk with culture quiet for the next 60 minutes to allow the culture to begin doing its work. The culture activity will be very slow initially but will soon kick into its more rapid rate of converting lactose to lactic acid.
-

Coagulate with Rennet
Then add about 1/2tsp of single strength liquid rennet followed by a very even bottom to top mixing for about 1 minute.
The milk now needs to sit quiet for 45 minutes while the culture works and the rennet coagulates the curd. You should notice the milk thickening at about 15 min. but wait the full time for a good coagulation.
The thermal mass of this milk should keep it warm during this period. It is OK if the temp drops a few degrees during this time.
-


Cut Curds & Release Whey
It is important to always check the curds for a good set. If you find it too soft simply wait another 5 to 10 minutes to check it again.
The above photo on the left shows a good curd test. This is done by lifting the curd with the flat part of a knife and watching it split. You should see a clean break meaning that the split is clean along the edges and no small bits breaking off as you see in the picture below.
Once the curd has set well it is time to cut. The cut size for this cheese is larger than a cheddar curd for a moister cheese and the final cut size should be about 3/4 inch.
- First make vertical cuts at right angles to one another at about 3/4" spacing (It should look like a checkerboard as shown above).
- Then allow cut curd to firm up for 5 minutes which allows the cuts to heal slightly before you make a horizontal cut of about 3/4" spacing. The second cut can be done with a flat ladle or knife cutting at an angle. When the curds have been fully cut, give them a very gentle and brief stir to avoid breaking the cut curds . Allow these to rest for about 5 min. again to heal the second cuts.
The next step is to stir gently for about 10 min. so as to firm the curds before beginning the cooking phase. The curd will be very soft at this point (remember this will be a moist cheese) so be very gentle with a bottom to stop movement. If the temperature has dropped during this time bring it back up to 86F.
-


Cook the Curds
Next it is time to begin drying out the curds. This will be done by increasing the heat slowly to 97F (36C) within 20 minutes. The heat needs to be increased slowly at about 3-5F (1C) every 5 minutes at the beginning.
The total cooking time will be 20 minutes and may be extended another 10 min if the curds are still soft.
The final curds should be cooked well through and should be examined to make sure that enough moisture has been removed. A broken curd should be firm throughout and the curds should have a slight resistance when pressed between the fingers.
When this point is reached the curds should be allowed to settle under the whey. This is commonly referred to as pitching the curds. This phase allows the curds to become more acid while retaining a good final moisture. Give them a brief stir every 5 min. or so to keep them from consolidating. This should take another 20-30 minutes before the right acidity is reached.
-


Remove Whey
Once the curds are ready, remove the whey down to just above the level of the settled curds. They are then ready for draining and molding.
The dry curds can now be transferred to a colander or drain pan lined with butter muslin.
They should be allowed to drain for 10 minutes and a gentle stirring will make sure that the whey drains off and curds form a compact mass.
Since the traditional Dunlop was set into larger blocks with more weight, add about 1 gallon (8+ lbs.) of warm water to the top of the consolidating mass.
The curd mass now needs to be kept warm for the next 2-3 hours while the bacteria continue to convert lactose to lactic acid. More whey will be released as this happens so allow this to drain off. You should also note a change in the taste of the whey as it loses its sweet character.
The higher acid will also cause a change in the protein and calcium causing a very different texture in the cheese. Keep the curd mass warm during this period.
-


Prepare Curd for Salting
Once the curd mass is ready you will note that it has changed in character. It will have spread out as the acid production continued because some of the calcium that bonds the proteins has been released.
When the curd mass is torn in half, the regular curd structure that was normally regular and roundish when you began will be stretched out and the curd when torn will seem more like a cooked chicken in texture.At this point we are faced with a large flatish mass of curds that need to be cut or torn into smaller pieces before salting and molding.
For this style of cheese, by the time we get to this point, we need to dry salt the curds because we have finished the work of the bacteria and need to stop them by using salt.
If we were to apply this salt to the surface of the large cheese mass it would take days or weeks to reach the center and this could finish as an overly acid and dry cheese instead of the sweet moist cheese we want.
In order to achieve this we need to reduce the mass to smaller pieces so that the salt can penetrate quicker. Therefore it is essential to cut or tear the mass. For this particular one about 3/4" is the right size.
-

Salting
Once we break the curds we can add salt. The most accurate way is to determine the final curd weight and use 2% of that in salt.
For this particular cheese we weighed the curds at 4.75 lbs and 2% of that is 1.52 oz or roughly 2.5 tbs of salt if using a moderate grain cheese salt (measuring salt by weight is always better than by volume).
Add the salt in 2-3 doses allowing a few minutes for the salt to dissolve and penetrate the curds. Mix it well as you go.
-


Molding & Pressing
Once the salting is complete, the curds can be transferred to the mold lined with a draining cloth. These should already be sanitized and ready for use in a place that the cheese can drain as it is compressed under weight.
For pressing we should begin very light and slowly increase the press weight to a moderate level:
- 30 minutes at 20 lbs
- 90 minutes at 45 lbs
- 3 hours at 75 lbs
- 4-6 hours or Overnight at 75 lbs after flipping
The rate of whey running off is simply a matter of drops and not a stream of whey being released. This is a good rate of whey removal during pressing and will slow even more as the residual free moisture is released. The form should show tears of whey weeping from the form very slowly. When this stops you can increase the weight slightly. The cheese should be removed from the press, unwrapped, turned, rewrapped, and put back to the press at the above intervals. To assure an even consolidation.
At each turn you need to remove the cloth and redress the cheese.
You will notice the cheese has formed a smoother surface and rests lower in the mold with each turn. -


Aging
The cheese can now be waxed for aging. For details on waxing the details are here.
The cheese can then be placed into your aging space at 52-56F and 80-85% moisture.
Your new Dunlop cheese can now be aged for 3-9 months and it will ready for your table depending on your preference.
Even with waxing the cheese needs to be turned every 5-7 days for exposure to a new free surface
Cheese Making Supplies
Related Products
You May Also Like


