


Caciocavallo Recipe
-

Yield
2 Pounds
-

Aging Time
~2 Months
-

Skill Level
Advanced
-

Author
Jim Wallace


Caciocavallo Recipe Info
Caciocavallo Inspiration
About Caciocavallo Cheese
Caciocavallo History and Styles
Caciocavallo and the Pasta Filata Family
Ingredients
Total price for selected items: Total price:

Instructions
-

Acidify & Heat Milk
Begin by heating the milk to 92°F. You do this by placing the milk in a pot or sink of very warm water. If you do this in a pot on the stove, make sure you heat the milk slowly and stir it well as it heats.
Once the milk is at 92°F the culture can be added. To prevent the powder from caking and sinking in clumps, sprinkle the powder over the surface of the milk and then allow about 2 minutes for the powder to re-hydrate before stirring it in.
Cover the milk and allow it to ripen for 30 minutes. You should observe no changes in this time. For high fat milk you can stir the cream down every few minutes.
-


Coagulate with Rennet
Once the ripening phase is complete, add about 2.5ml -1/2 tsp of single strength liquid rennet.
The milk now needs to sit quiet for 60 minutes while the culture works and the rennet coagulates the curd . You may notice the milk thickens at about 15 min. but wait the full time. The thermal mass of this milk should keep it warm during this period. It is OK if the temp drops a few degrees during this time.
The proper curd will break clean and the whey that develops in the break will be not too cloudy (cut too early) nor it will be too clear (cut too late).
-


Cut Curds & Release Whey
The curd is now ready to cut into 1/2-5/8 inch pieces (corn to hazelnut size) to release the whey. Make vertical cuts at right angles and then use a spoon or flat ladle to cut the horizontal pieces.
You can see by the photos below though that I have found a very large whisk with thin wires that I have reshaped a bit to do this job for me, so be creative.
NOTE: For a drier cheese cut smaller and for more moisture cut larger. This is a major control point. Be very careful with the initial stir since the curds can be broken very easily.
-


Cook & Stir Curds
Now it is time to begin drying out the curds. This will be done by increasing the heat slowly to 102°F. The heat needs to be increased slowly over 20 minutes. The curds can then be cooked for another 15-30 minutes if needed to dry the curds enough.
The final curds should be cooked well through and should be examined to make sure that enough moisture has been removed. A broken curd should be firm throughout and the curds should have a moderate resistance when pressed between the fingers.
When this point is reached the curds can be allowed to settle under the whey. Allow them to settle for 5-10 minutes.
NOTE: This is another major control point because the longer the curd is stirred and the higher the temperature, the drier the final cheese.
-


Remove the Whey
Remove the whey with a ladle down to the curd level. I use the basket mold, as shown in the photo above, to keep the curds from the whey. Be sure the basket mold is sanitized in hot (145°F) water first.
NOTE: this is a very sweet whey at this point and will make a wonderful ricotta.
The curd is now ready to be consolidated by pulling all of the curds to one side of the pot. You can now remove as much whey as possible.
At this point you can now add any additions such as peppers (smoked jalapenos are my favorite) etc. Mix these in well. Now consolidate the curd mass with a light hand pressure.
You can now move the curd mass in large pieces to the draining molds and press lightly to consolidate.
-


Ripening the Curd
The curd mass now needs to be kept warm while the acid development continues. I do this by placing warm whey or water (90-100°F) into the cheese pot that I just emptied and cleaned and using a rack to keep the curd basket out of the water. I place the draining and ripening curd in this incubator to keep the bacteria happy and working.
While you are waiting, prepare a pot of hot water simmering at 175-185°F towards the end of the ripening time period.
In about 5-6 hrs I check the curd to see how the acid development is going.
"How will I know when its ripe?" you ask. Well it is really quite simple-slice a thin 1/4" strip off the curd mass and place in a bowl of the hot water (give it time to heat up). If it stretches, you are good to go. If not then allow the curd to ripen another 15 minutes and then retest.If you are lucky enough to have a pH meter for this, you are looking for a pH of 5.2-5.3.
-


The Stretch
Now for the FUN:
The ripened curd mass should be sliced into a heat safe bowl or pan in 1/4" strips. This will allow for a faster and more even heating.
A small amount of the hot water should be poured into the side of the bowl (not directly on the strips of curd). This should be just enough to cover the curds. Make sure you move the curds well enough to keep them separate to allow for even heating. With high fat raw milk you may notice some milky color from escaping fat. This is hard to avoid because the fat is now in its liquid state.
When the curd begins to visually stretch a bit, you are ready to change the water. Empty the water from the curd and add fresh hot water. The curd will now become easier to stretch and will begin to meld into one mass. Begin stretching by lifting with a wooden spoon. Do this several times, folding the curd back on itself. If the stretching becomes difficult, add more hot water and keep reheating for a good stretch.
Soon you will notice the lumps disappearing and the curd will begin to take on a smoother texture. If you are brave you can now begin stretching the curds with your hands. Good plastic gloves may help, but I find that dipping my hands in COLD water will make this much less painful (the curd should now be about 135-140°F). The stretch you do here will give the cheese the texture of the style. A few nice long stretches will suffice, just fold the curd back on itself several times at the end of each stretch.
-


Forming the Cheese
Now you are ready to shape the cheese. Remember to dip your hands in COLD WATER:
1. Begin by folding the cheese into a flat square. Then push down on all of the edges to form a bag shape.
2. Stuff these edges into the center of the cheese as you squeeze the neck of the bag closed. Keep reheating the cheese as needed.
3. Continue to push and stuff into the center opening as you narrow the neck into a nice topknot (where you will tie off to hang the finished cheese).
4. You will find that the hot curd will have a tendency to sag, so keep it moving and reshape as you go. Your initial shape should be more like a ball with a narrow topknot. If you have not been dipping your hands in cold water, you are probably in pain by now.
5. Once you have a nice smooth surface and the shape you want, it is time to cool the mass in cold water but first allow the cheese to hang briefly and gravity will change the ball shape into a beautiful pear shape. Immediately chill the cheese in COLD water, but do not allow it to rest on the bottom because it will be reshaped there. I generally just hold the warm cheese in the water until the cheese begins to cool and retains its shape. The cheese will be somewhat buoyant in the water but will still rest on the bottom otherwise.
Although I have been doing this for some time, I feel that my results are not as effortless and smooth as what I see the experienced Italians doing but I do think this comes with time and experience. Although this all sounds a bit involved, take a look at a first timer below making his first Caciocavallo.
-

Salting
You will need a saturated brine prepared for salting this cheese, find all of the details you need on brining here.
A simple brine formula is:
- 1 gallon of water
- 2.25 lbs of salt
- 1tbs. calcium chloride
- 1 tsp. white vinegar
- Bring the brine to 50-55°F before using.
Once the cheese cools enough for the surface to be cool, it can be floated (if it rests on the bottom the cheese will change shape) in a saturated brine solution for 2-3 hours brine time per lb. of cheese. For moister cheese use less time and drier cheese more time. The cheese will float in the brine due to the brine's higher density. Make sure you turn the cheese at least once in the brine during this soak.
The internal temperature of the cheese will be still warm enough to flow somewhat so the natural forces will take place and the final cheese will have some of its irregular dimples smoothed out a bit.
-


Finishing & Aging
Once the cheese leaves the brine it is ready to be "Strung Up". Simply use a piece of twine or other type of string that will not cut into the cheese surface, tie a loop around the smaller knot end of your Caciocavallo and hang it in a cool dry place to age a bit. The drier cheese need more time but at least give them 6 weeks or more.
-


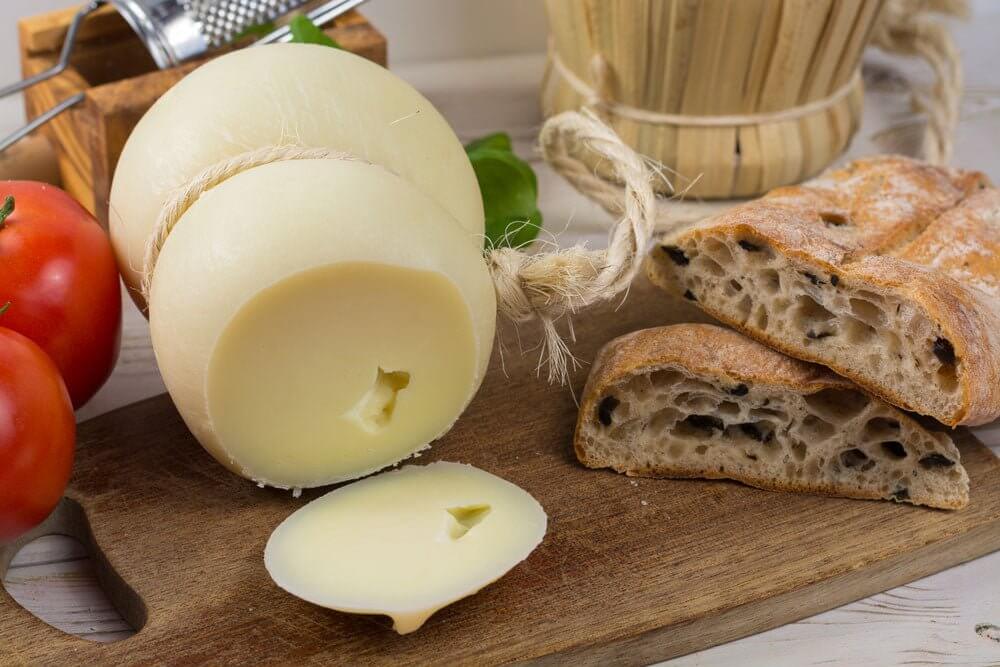
Finished Cheese
This series of photographs above was taken while traveling through Italy. It gives you an idea of what to expect in the finished cheese.
That's all for this wonderful recipe and do remember, if you try this one, have fun doing it. Maybe it wont be perfect the first time, but it's an adventure in history as well as food and it's sure to improve with time.
Cheese Making Supplies
Related Products
You May Also Like


