


Colby Recipe
Colby is considered to be one of the first truly American cheeses, since it was developed by an American in the United States, and was not an imitation of European cheese.
-

Yield
2 Pounds
-

Aging Time
~2 Months
-

Skill Level
Intermediate
-

Author
Jim Wallace


Colby Recipe Info
Colby Cheese Origins
About Colby Cheese
The Washed Curd Method
Modern Colby Cheese Making
Ingredients
Total price for selected items: Total price:

Instructions
How to Make Colby at Home
Colby has unfortunately been lost in commercial translation over the years yet it's one of the few truly "Original" American cheeses. lets take a good look at its history and try to resurrect this great American cheese that's been lost in the back corner of our Deli counters. Maybe we can even make it into a new favorite for home cheese makers. This recipe is "Ideal" for new cheese makers since it's fairly quick, easy to make and only requires 4-6 weeks of aging.
For this recipe we used homogenized milk that was pasteurized to the higher end of the usable milk spectrum. This milk was heated past the defined 161°F pasteurization temperature to 180°F. Although we normally do not use this type of milk, this recipe shows how great cheese can be made from regular milk bought from the grocery store.
We also steered away from the "modern" Colby process and focused on a more "traditional" process that should produce a cheese that can be differentiated from a young cheddar. It will be moister, more elastic, and have a fresher flavor that is less acid with focus on the good quality of the milk.
Jim's inspiration for this was an old transcript he discovered from the early 1900's documenting the details of the original Colby making process by 2 well known Colby makers of the time.
This we think will bring your Colby into its own with a unique flavor/texture in a young cheese and not just a "modified" Cheddar. Hopefully one that you will do again and again.
-

Acidify & Heat Milk
Begin by heating the milk to 86°F (30°C). You do this by placing the milk in a pot or sink of very warm water. If you do this in a pot on the stove make sure you heat the milk slowly and stir it well as it heats.
Next the Calcium Chloride and Annatto can be added before adding the culture.
Make sure you rinse the spoon well after adding the Calcium Chloride since any residuals of this will cause the Annatto to precipitate into dark spots that will show up in the finished cheese. Better yet add the Annatto first and stir it in well before adding the Calcium Chloride
The Annatto is only needed to offset the snow white color of winter or pasteurized milk. The Colby was traditionally an orange cheese but I like just a medium warm color for mine here, which the 1/4 tsp will give.
I add no Annatto to my fresh raw milk in the summer because it naturally has that nice warm glow from what the cows eat.
Only 1/2 pack of culture will be used for this cheese because we want a sweeter cheese with slow acid development and the smaller amount of culture should do this.
Do this by:
- taking a fresh piece of aluminum foil off the roll (this should already be quite sterile fresh from the roll).
- Dump the contents into a uniform pile in the middle of the foil.
- With a dry sanitized knife split the pile into 2 equal piles
- Use 1/2 for the milk
- Place the other half back in the pack, reseal tightly, and back in the freezer to use again in the next month or so.
Once the milk is at your start temperature the culture can be added. To prevent the powder from caking and sinking in clumps sprinkle the powder over the surface of the milk and then allow about 2 minutes for the powder to re-hydrate before stirring it in. Then allow the milk to rest for 1 hour while the culture wakes up and begins doing its work.
-

Coagulate with Rennet
Add 1/2 tsp (2.5ml) of single strength liquid rennet.
The milk now needs to sit quiet for 45 minutes while the culture works and the rennet coagulates the curd. The thermal mass of this milk should keep it warm during this period. It is OK if the temp drops a few degrees during this time.
At about 15 minutes you should notice the milk beginning to firm up. Allow it to remain quiet for another half hour for a curd ready to cut. This will be a total of 45 minutes from rennet addition to cut. If your curd does not seem firm enough then allow it to rest another 10 minutes before cutting.
-


Cut Curds & Release Whey
The curd is ready to cut when it shows a nice clean even break when lifting with the flat of the cutting knife and then a clean whey in the opening that is neither to milky (cut too soon) or too clear (cut too late).
The curd can be cut to 1/2" cubes by first cutting the 1/2" vertical cuts as shown below and then using the ladle or spoon to break these into 1/2" pieces as uniformly as possible.
I have found when using the higher temperature pasteurized milk like I am using here that the curds do tend to shatter into smaller pieces much more easily. The key is to go slow and gentle in the cutting and stirring at first. If using a fresher milk or one pasteurized at lower temperature, You will find it less of a problem.
-


Cook the Curds
Now it is time to begin drying out the curds. This will be done by increasing the heat slowly to 102F. The heat needs to be increased slowly. The total cooking time will be 30 minutes. The curds can then be gently stirred while holding at the final temperature for another 15-30 minutes if the curds are still soft.
The final curds should be cooked well through and should be examined to make sure that enough moisture has been removed. A broken curd should be firm throughout and the curds should have a moderate resistance when pressed between the fingers. This is a fairly subjective test (depending on how firm/soft you want the final cheese.)
When this point is reached the curds can be allowed to settle under the whey.
The time spent so far is about 2.5-3 hrs.
-


Remove Whey & Wash Curds
This is one of the key parts in making this cheese a real Colby cheese.
The curds are now resting on the bottom of the pot at 102°F with only a moderate amount of lactose converted to lactic acid. In other words a very sweet cheese curd.
If left in this condition, the lactose (milk sugar) will act as a food source for the bacteria and the result will be a higher acid curd which dries the curd out as the acid develops. The bacteria will also be very happy working at this temperature as well.
We plan to alter this situation by:- removing whey (lactose) - this will deprive the bacteria of much of its food source and slow things down
- adding cold water and cooling the curds to 70-80°F - this will place the bacteria in an environment that it is not happy with and will work much more slowly. The lower the temperature the more affect this has.
In Addition the cold water will begin to increase the moisture of the curd. If the water temperature is lower that the curd temperature the curd moisture increases. If it is higher than the curd temperature it will decrease the moisture (this is how Gouda is made).
Begin by removing the whey down to the level of the curds.
Then add water first at 75°F as the curd cools to 80-85°F with stirring. Then allow the curds to settle again and remove the whey/water down to the curd level again.
Next add very cold water (60°F or less) until the curds are at 75°F.
The curd can now be stirred in its cooler state for another 15-30 minutes as the curds begin to firm up. This will cause the curds to form a skin that will keep them from consolidating fully in the press, leaving some small openings in the final cheese.
At this point the process has taken about 3.5-4 hrs and we are ready for the final stage of molding and pressing.
-


Drain & Mold Curds
The dry curds can now be transferred to a colander lined with butter muslin. A gentle stirring will make sure that the whey drains off well. The curds are now ready to be transferred to a sanitized muslin lined mold.
The curds should be packed into the mold using a moderate hand pressure. The amount of curd formed here may likely be heaped over the top.
Finally pull the cloth up evenly all around the form to eliminate the wrinkles, fold the top cloth over and place the follower on top. You are now ready to press.
-


Pressing
The curds in the form are now still quite wet and heavy pressure early on may lock this moisture in the final cheese. Even though we have slowed down the conversion of lactose to lactic acid, we are still producing acid and will continue this during the final pressing. This means that the cheese will continue to release moisture through the pressing as a bit more acid is present.
For pressing we should begin very light and slowly increase the press weight to a moderate level:
- 15 minutes at 10 lbs.
- 30 minutes at 20 lbs
- 90 minutes at 40 lbs
- Overnight at 50 lbs.
Notice in the photo above the rate of whey running off is simply a matter of drops and not a stream of whey being released. This is a good rate of whey removal during pressing which will slow even more as the residual free moisture is released. The form should show tears of whey weeping from the form very slowly. When this stops you can increase the weight slightly. The cheese should be removed from the press, unwrapped, turned, rewrapped and put back to the press at each of the above intervals. To assure an even consolidation. At each turn you will notice the cheese has formed a smoother surface and rests lower in the mold.
The next morning the cheese can be removed from the mold and cloth.Finally the pressing is finished and you should have a nicely consolidated wheel of cheese with no surface openings. This should still feel quite springy and elastic with mild hand pressure still. The surface should not feel at all sticky at this point
-

Salting
You should have a saturated brine prepared for salting this cheese. You will find all of the details you need on brining here.
A simple brine formula is: 1 Gallon of water to which is added 2 Lbs of Salt, 1tbs. Calcium Chloride (30% solution), and 1 tsp. white vinegar.
The cheese now needs to be set in the brine for about 8 hours.
The cheese will float above the brine surface so sprinkle another teaspoon or 2 of salt on the top surface of the cheese.
Flip the cheese and re-salt the surface about half way through the brine period.
At the end of the brine bath, wipe the surface and allow the cheese to surface dry for a day or two before waxing. The surface will darken somewhat during this time.
-


Aging
The cheese can now be waxed for aging. For details on waxing the details are here.
The cheese can then be placed into your aging space at 52-56°F and 80-85% moisture.
The cheese can now be aged for 4-6 weeks and it will ready for your table.
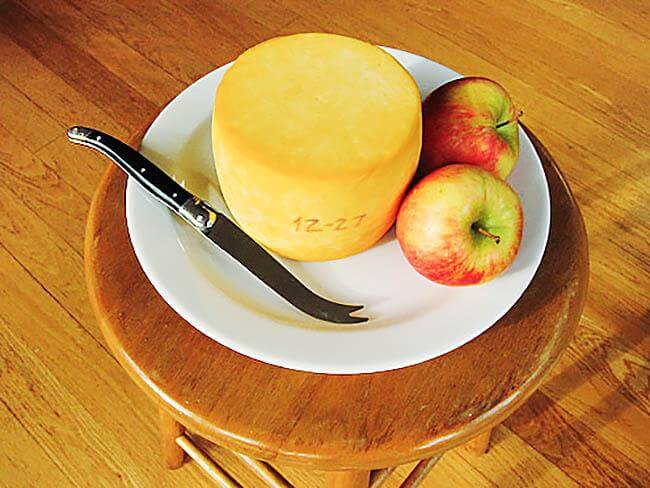
Before I was able to get this cheese waxed, my wife Robin who is a great "Still Life" photographer, insisted on capturing it on film (pixels).
Meanwhile our "Quality Control" dept (Jazz) got wind of this and had to check on the new cheese. We have found that she only likes cheese that costs more than $25 a lb and so have given her credit for her cheese tasting abilities (no financial compensation though).
Cheese Making Supplies
Related Products
You May Also Like


