Clean Cheese Surface Before Waxing
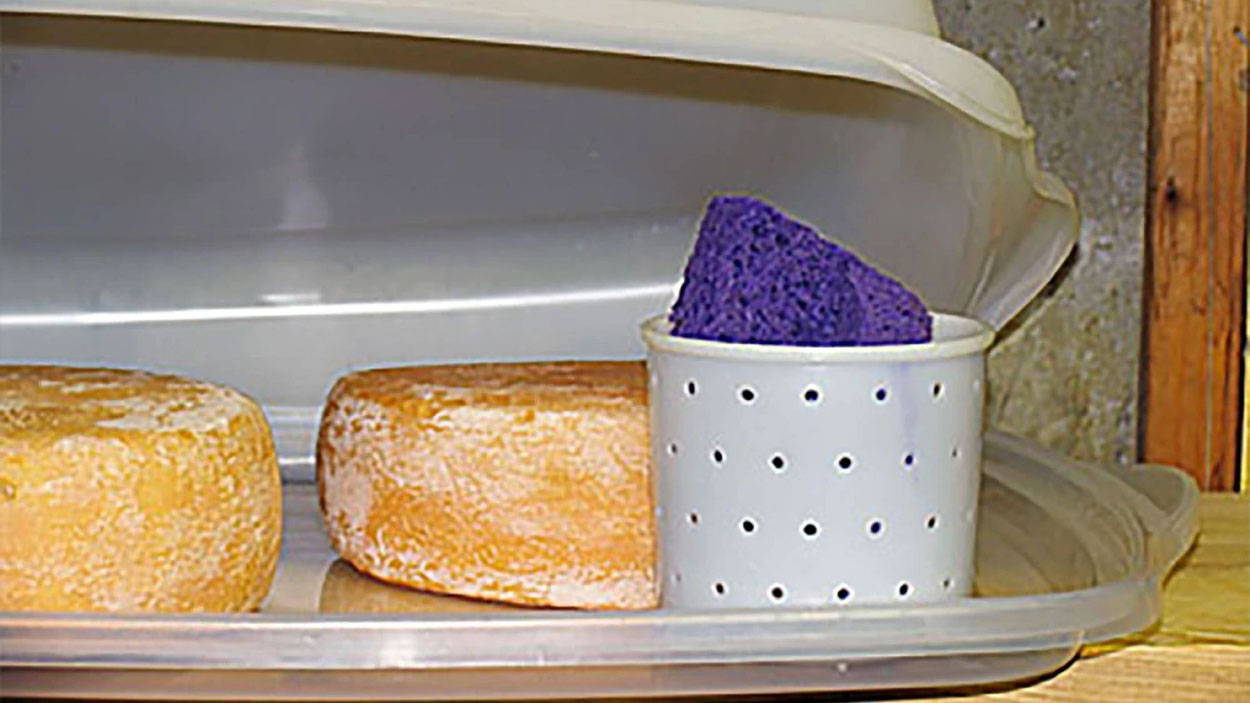
Once the cheese is formed and pressed, it will need to dry off for a few days in a cool location with good circulation. A loose pice of cheesecloth laid over the cheese should keep dust and debris off the cheese but mold may develop as seen here after a week. Before the cheese can be waxed, the mold needs to be removed. This can be done with a brine wash or vinegar wash. Both high acid and high salt will discourage mold from growing. I prefer the brine wash with ~ 1 tsp salt to a cup of cool water. As you can see in the photos, the mold wipes away easily. Photo at left shows the clean cheese ready for waxing. The cheese will dry and be ready for waxing in an hour or two.
Waxing Cheese Using Low Heat
This is the safest method for waxing cheese. When using this method you need to work quickly and have a very clean cheese surface. With this low heat method, mold spores are not killed, so mold may still develop under the wax.
- Heat cheese wax in pot or bowl, placed inside a pot filled with water, on the stove.
- Once melted, place a piece of aluminum foil down to catch any drips between the waxing pot and the cheese.
- Begin applying wax to the surface of the cheese with a natural bristled brush. Work quickly and use plenty of wax to get a good cover coat but try not to over brush.
- Wax the top surface and as much of one side as you can, then let the wax harden, before doing the remaining surface of the cheese.
- Once coated, repeat the process, so a good protective layer is created. If needed apply a thrid coat.
- When done waxing let the wax harden. Store both the wax and the brush in the same container used for melting, with a lid on top.
Pros and Cons for Low Heat Waxing
Pros: This method usually requires less wax to be heated (just enough to dip the brush and coat the cheese) and it is safer since the wax is never heated to a dangerous temperature.
Cons: The temperature is not hot enough to kill the mold spores and mold may develop under the wax. If the cheese is dried in a clean environment covered with a sanitized dry cloth this may not be a problem.
Waxing Cheese Using High Heat
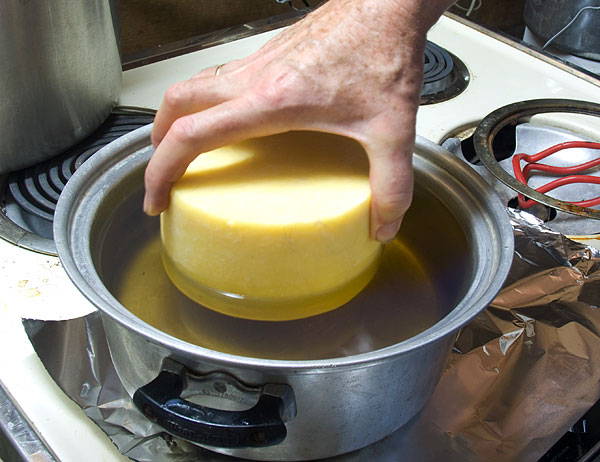
Using this method the wax temperature is extremely hot, it is much hotter than boiling water, and wax will stick and retain heat. Work cautiously and make sure you have a good grip on the cheese before dipping.
- Before starting, please read through our caution below on direct heating of wax on the stove.
- Begin heating the wax to 224-236F, once heated turn off the stove.
- Place a piece of foil on the stove or work surface to catch any drips of wax.
- Dip the top of the cheese and let it cool. Then dip the bottom of the cheese and let it cool.
- Once the top and bottom surface is cool, rotate one half of the cheese edge in the wax, and let it cool. Then rotate the other half of the cheese surface and let it cool.
- Repeat the process for a second coating. If needed apply a third coating.
- When done let the wax harden. Store it in the same container used for melting with a lid on top.
Pros and Cons for High Heat Waxing
Pros: This method will kill the mold spores on the cheese surface so that you should have little trouble with mold growing under the wax. Also, there is no messy brush to clean.
Cons: You need to use caution when heating wax directly on the burner. This also uses more wax then the first method since the entire cheese surface needs to be dipped into the wax.
A Caution on Heating Wax
Wax when heated will reach a point where vapors accumulate and may ignite with life threatening results. I am aware that Ricki says in her book to melt the wax in a double boiler, but in effect, there is a problem with that. The wax will not be hot enough to destroy the mold on the cheese surface and enough air can get through for this mold to grow under the wax. I think she is most concerned with the safety of her customers.
To be most successful at preventing mold the wax needs to reach a temp of 225-240F and the cheese dipped for at least 6 seconds.
The BIG PROBLEM here is that you really need to control the temperature because if the wax gets hotter it might reach it's flash point and catch on fire.
Our supplier gives the flash point as 400F, but I would err on the side of caution and keep it in the range described above.
A wax fire is Extremely dangerous and water WILL NOT put it out.
To limit the potential danger here, I use a heavy pot with a candy thermometer and control the wax temps carefully. Others simply get an old electric fry pan, get the wax up to this temp, and tape the temp control dial in place.
It may seem to take a long time to get the wax to go from solid to liquid, but once it has liquefied, the temperature will rise sharply. Make it a habit to constantly monitor the temperature of your wax. If that wax reaches the flash point, then the vapors produced are extremely flammable. The flash point of wax is typically above 300° F. Never let your wax exceed 250F.
Never leave the wax unattended on the stove.
General Information on Waxing Cheese
Why use wax to coat cheese
Waxing is one of the most convenient ways to protect cheese while it is aging and to keep the desired range of moisture within the cheese.
Will Waxing Cheese Save Time
Yes, if done properly, the cheese will be much easier to keep mold free and moisture loss will be greatly reduced. Very little needs to be done to a waxed cheese, other than maintaining the proper temperature/moisture levels, of the aging location, and turning the cheese every week or so.
Will Mold be an Issue
If all surface mold is removed, prior to waxing, and the waxing is done properly, mold development under the wax will not be a problem.
What is The Right Temperature for Melting Wax
As explained later in this article, the wax temperature needs to reach 224-236F (Please refer back to our caution on direct heating wax). The cheese should be held in the wax for at least 6 seconds to ‘flash’ the mold spores.
However, some cheese makers prefer to keep wax at a lower temperature, for safety reasons, and have great results.
What Wax is Used to Coat Cheese
Our cheese wax is a special microcrystalline wax that will resist cracking and hold up to the daily bumps and bruises of aging cheese. The color of the wax makes no difference, but our clear wax contains no added colorant, if colorant is a concern for you.
Paraffin is much too soft and will readily crack during aging, allowing mold to enter and grow on the cheese surface. Beeswax is nice but does not have the strength to survive aging unless handled carefully.
In the Cheese Cave
Once waxed, the cheese can be stored in your aging area, but the proper temperature and moisture levels (usually 52-56F and 85% moisture) need to be maintained. You should continue to turn the cheese weekly and check for any mold growing under the wax.
What to do if Mold Develops Under the Wax
If you find mold has started to grow on a waxed cheese, either the surface was not heated hot enough during the waxing to kill off the mold (wax too cold) or a small pinhole was left for mold to enter. If very serious, this mold should be taken care of ASAP by removing the wax, brushing or scraping the mold from the surface, and giving the cheese a good wiping/scrubbing (depending on how serious) with a cloth soaked in saturated brine. The cheese should be allowed to dry and then re-waxed.
How to Clean Up Cheese Wax
The key to waxing is to dedicate cheap utensils and pots to it so you never have to clean them. The best job of cleaning though is very hot water to melt the wax then quickly wipe with paper towels and discard. The final surface can then be cleaned with a solvent like turpentine etc.


