


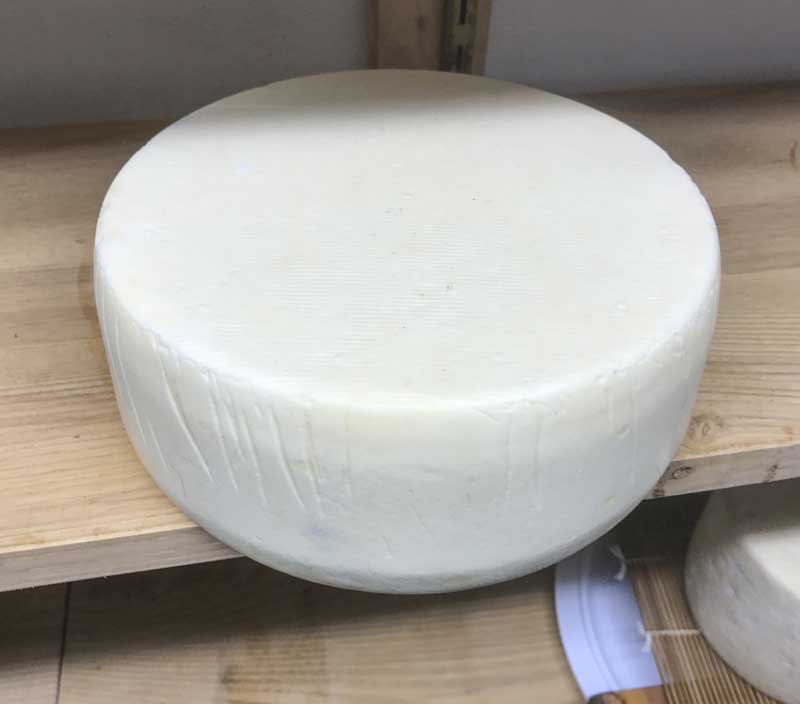
Tomme Mountain Style Recipe Instructions
A Guideline for Mountain Style Tomme
This is a fun, intermediate guideline for those who have made a few cheeses. With a steady hand for a few shifts in temperature, and a washed curd this guideline is both engaging and rewarding. After aging for 2-4 months at 50-54F with 80-85% humidity you will be able to enjoy this fabulous cheese.
Even if you’re not quite ready to make this cheese it’s still a good read and may provide inspiration for future cheese making.
-
Heat & Acidify Milk
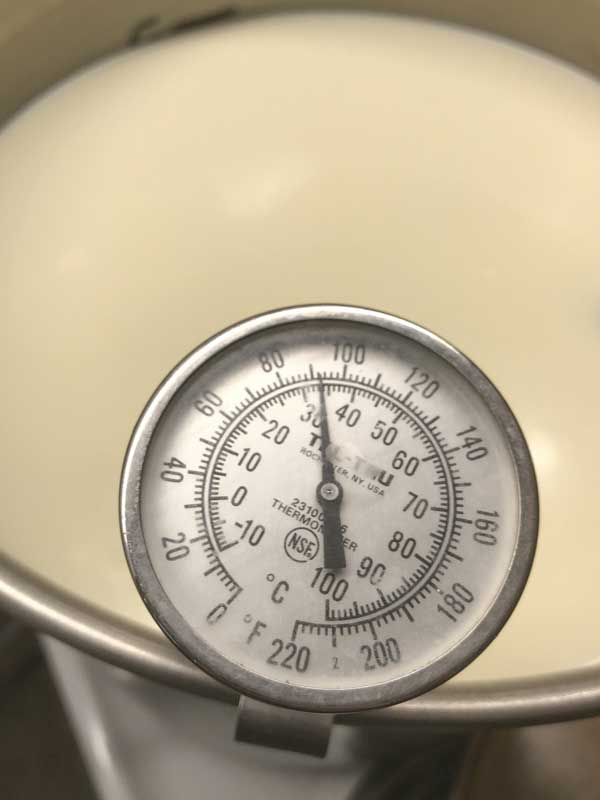
Heat the milk to 76F. Once the temperature is reached, add all culture and mold powder to milk, let re-hydrate for one minute then gently stir for two minutes.
Let the milk sit quietly for 30 minutes, then increase the heat to 96F and hold the temperature for an additional 60 minutes.
Note: The lower temperature will get the mesophilic cultures working. This will help with texture and buttery flavors.
The higher temperature will increase the mesophilic cultures acid production and will also activate the thermophilic cultures.
-

Coagulate with Rennet
Add rennet and mix in slowly but thoroughly with a bottom to top motion for one minute.
Let the milk sit quiet for 30 minutes while a curd forms.
The milk will begin to thicken after 15 minutes, but allow it to coagulate to firmness for the full 30 minutes.
Note: When done, it is always best to check for a firm coagulation, if needed let the milk set for as much as 50% longer. (In this case, an extra 15 minutes.) If extra time is needed you can adjust the amount of rennet for your next batch, more rennet for a quicker set.
Tip: The thermal mass of the milk should keep it warm during this period. It is ok if the temperature drops a few degrees. If needed you can heat it back to temperature after cutting the curds.
-
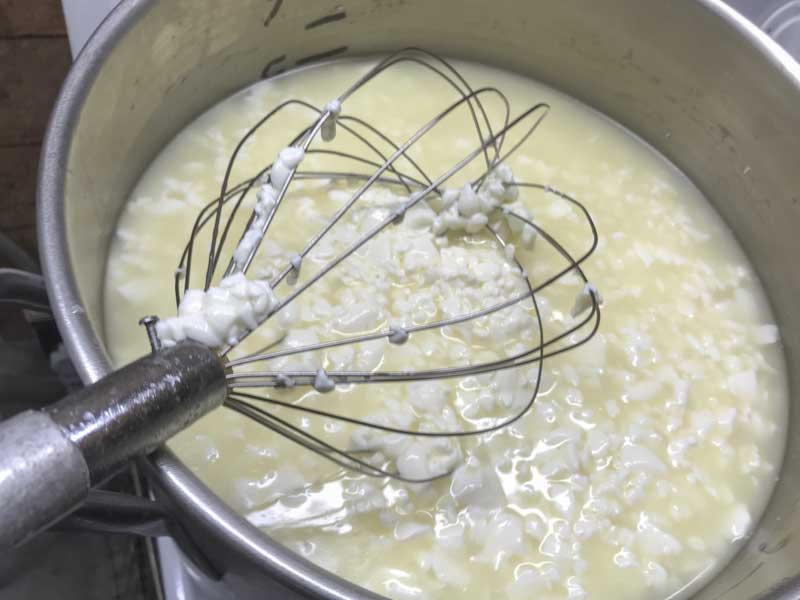
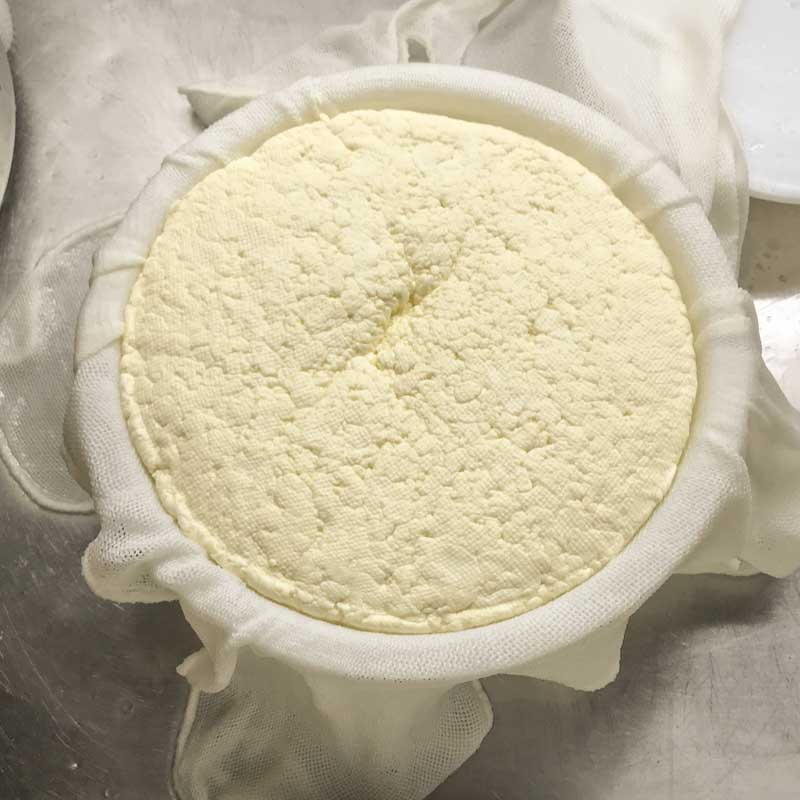
Cut Curd
Once the milk has set well, it is time to cut the curd. This is the first step in reducing the curd moisture. I like to use a large, thin wired whisk with a long handle to cut the curds. This is similar to the Spino used throughout Italy for cutting curds.
Cut the curd mass as evenly as possible to 1/4-5/16”, about the size of large peas. Allow the cut curd to rest for 5 minutes, so the cut curd surfaces can heal.
Stir slowly for 5 minutes, to allow the curd surfaces to firm up even more. Both the rest and stir are important to prepare for the next step. Without them, the curds would break further and loose too much moisture.
-
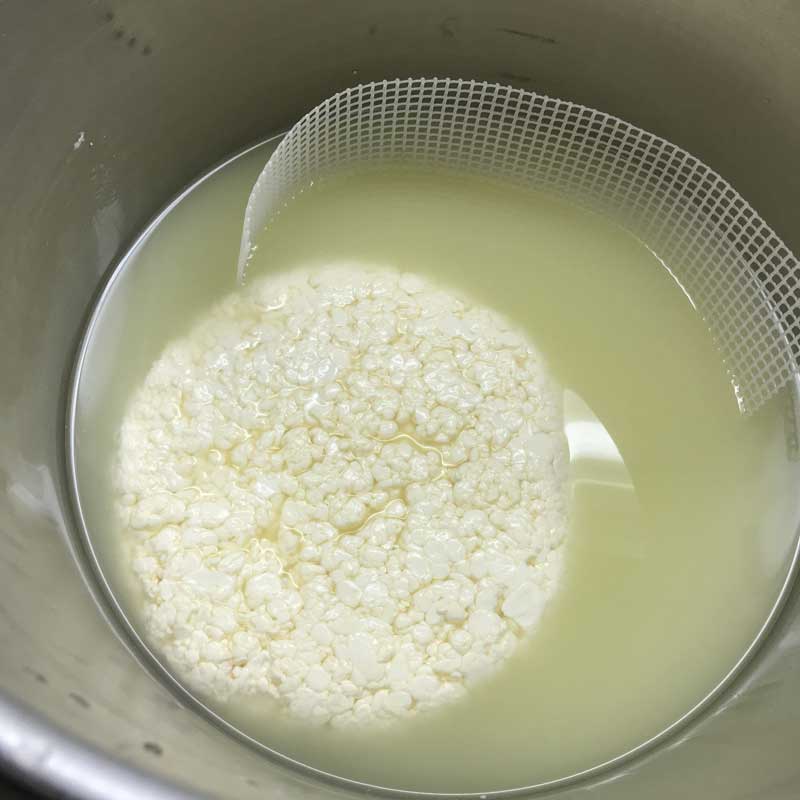
Wash & Cook Curds
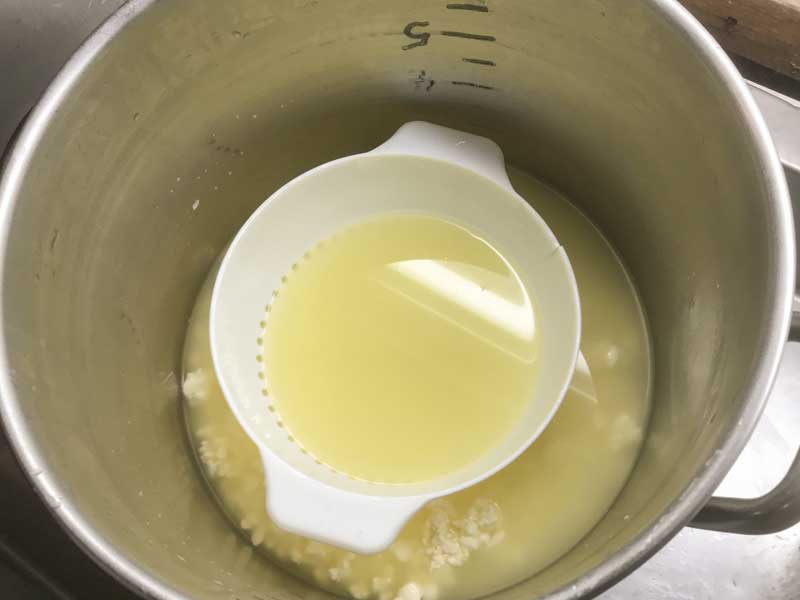
Allow the curds to settle from their brief stirring in step 3. Once settled, remove 25% of the whey (1 quart of whey per 1 gallon milk, in this case about 4 quarts).
Once the whey is removed, slowly stir the curds and add 4 quarts of hot, 130F water, over the next 30 minutes. The curd temperature should reach 106-108F.
If the curds do not reach 106-108F after adding 4 quarts of hot water, return briefly to a low heat until the proper temperature is reached.
Slowly stirring and increasing the temperature (by adding warm water) helps to release moisture trapped in the curds.
Once the curd temperature reaches 106-108F, stir slowly an additional 15-30 minutes (depending on dryness).
The final curds should be dry, and cooked well through. A broken curd should be firm throughout, and the curds should have a moderate resistance when pressed between the fingers. When this point is reached, let the curds settle under the whey.
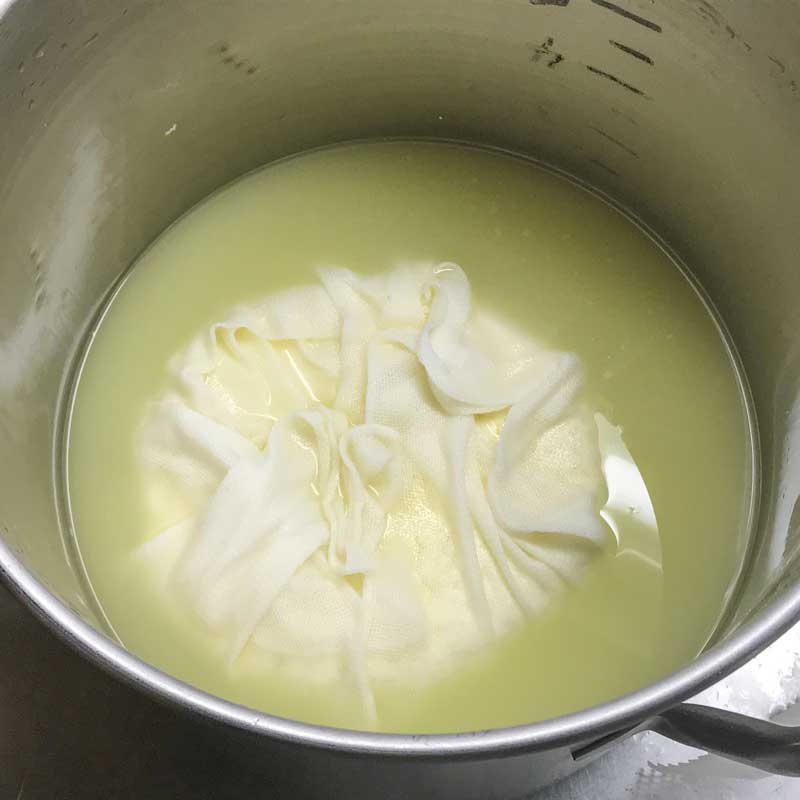
When the curds are settled, remove the whey leaving about 1” above the consolidating curds.
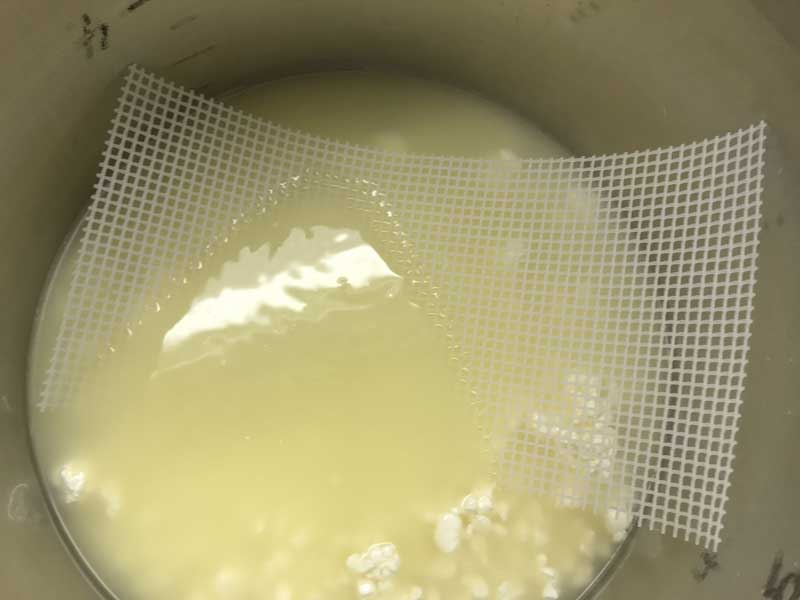
After removing the whey, gather the curd mass into a consolidated form under the remaining whey. I like to use a long piece of medium draining mat to help gather the curds.
Once consolidated, press the curds together, under the whey, with firm hand pressure. Doing this below the surface of the whey tends to reduce unwanted mechanical openings in the finished cheese.
Info: By removing whey and replacing it with warm water we are removing much of the bacteria’s food supply (residual lactose in the whey). This slows the bacteria’s activity and ability to produce acid, resulting in a sweeter cheese.
The supple and elastic texture of this cheese is due to protein bonds which have been strengthened by the presence of calcium. Early draining tends to retain more usable calcium, as we have done here; draining the curds after only a short period of stirring.
-
Transfer Curds
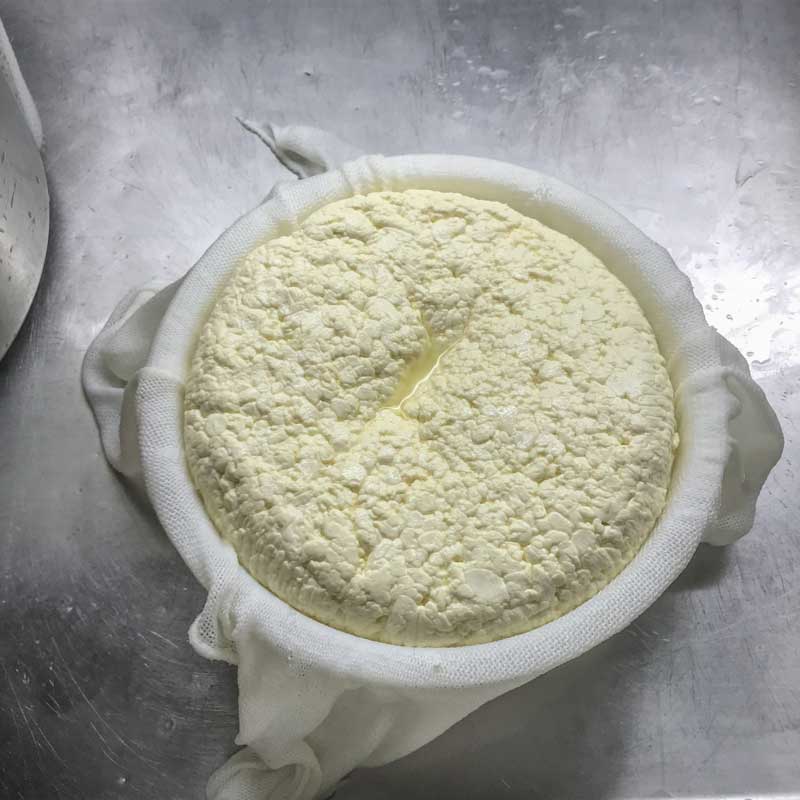
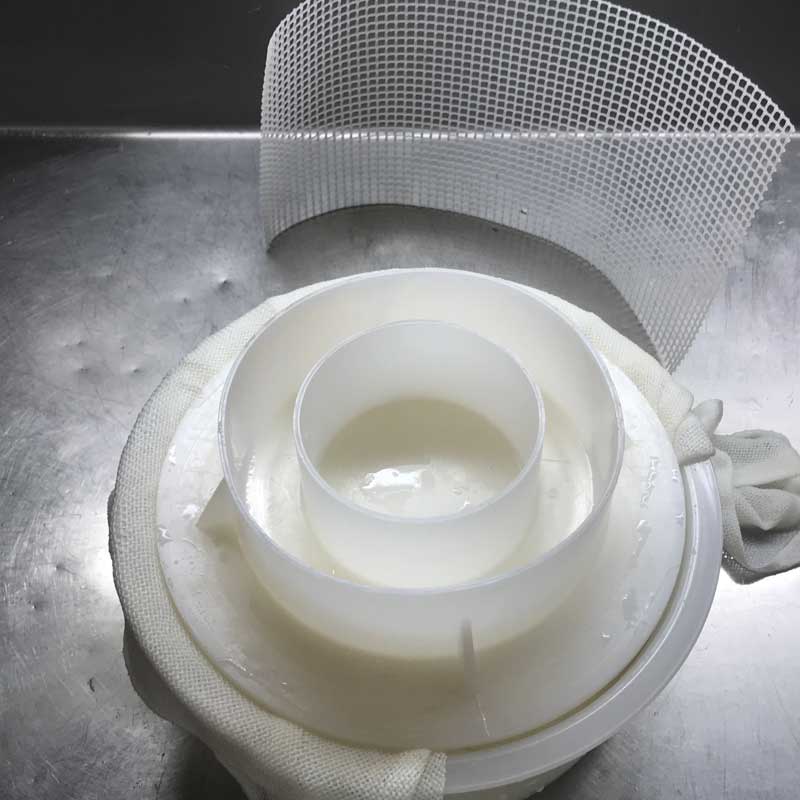
Once the curd has been consolidated under the whey, gather it in the draining cloth and transfer it to a cheese mold.
Once transferred gently pull up on the sides of the cloth to make sure all wrinkles are loosened and no cloth is bunching in the mold. Use the longest tail of the draining cloth to cover the exposed surface, and place the follower on top.
-


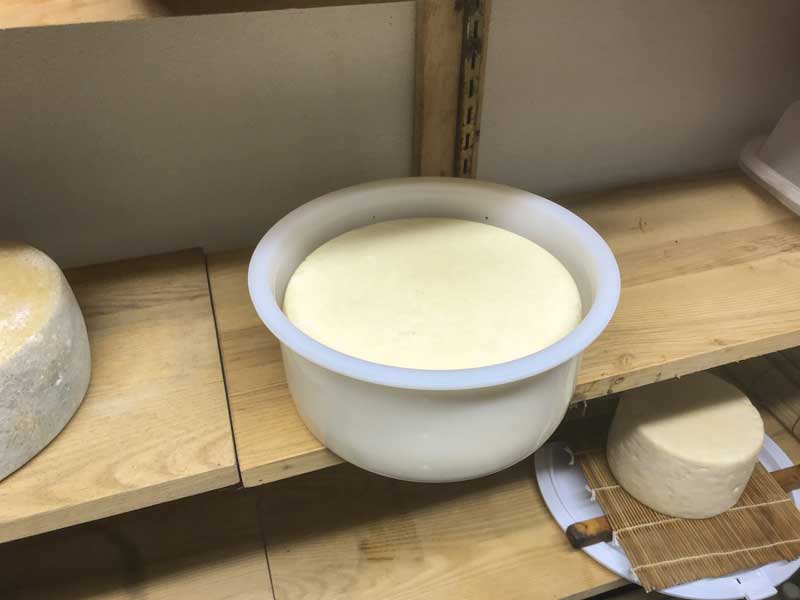
Pressing
For this cheese, the pressing is quite simple; 25 lbs of weight is all that should be needed. However, if consolidation seems slow, increased weight can be used.
Press for 30 minutes with 25 lbs of weight.
Remove cheese from mold, unwrap, turn, re-wrap, and return the mold. Press again for 30 minutes with 25 lbs of weight.
Repeat this pressing, turning and wrapping process at 1 hour intervals for an additional 3-4 hours.
Finally, remove the cloth and place the unwrapped cheese back in the mold.
Without the cloth or any weight, keep the cheese in the mold and place it in a cool area overnight, 60-65F.
The final yield should be slightly over 4 lbs.
Note: When pressing you should see tears of whey weeping very slowly from the cheese mold. As you press this cheese, there should only be drops of whey, not a steady stream. This slow rate of whey removal will slow even more as the residual free moisture is released.
-
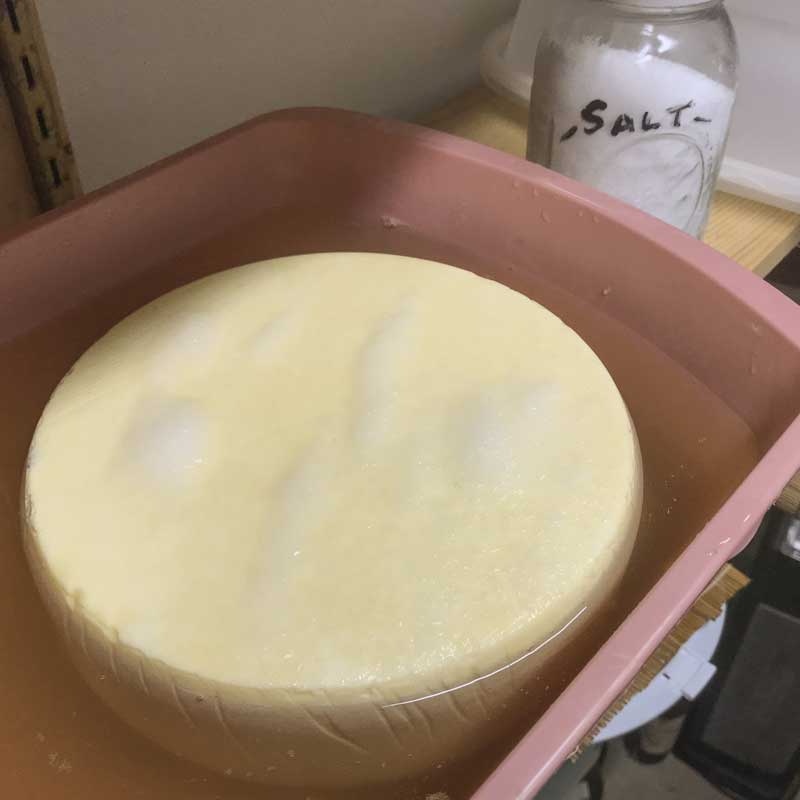
Salting
After resting in a cool space overnight, the cheese is ready to be brined. You will find all of the details you need on brining here.
To make a simple brine, mix together:
- 1 Gallon water
- 2 1/4 lbs Cheese Salt
- 1 tbs Calcium Chloride (30% solution)
- 1 tsp white vinegar
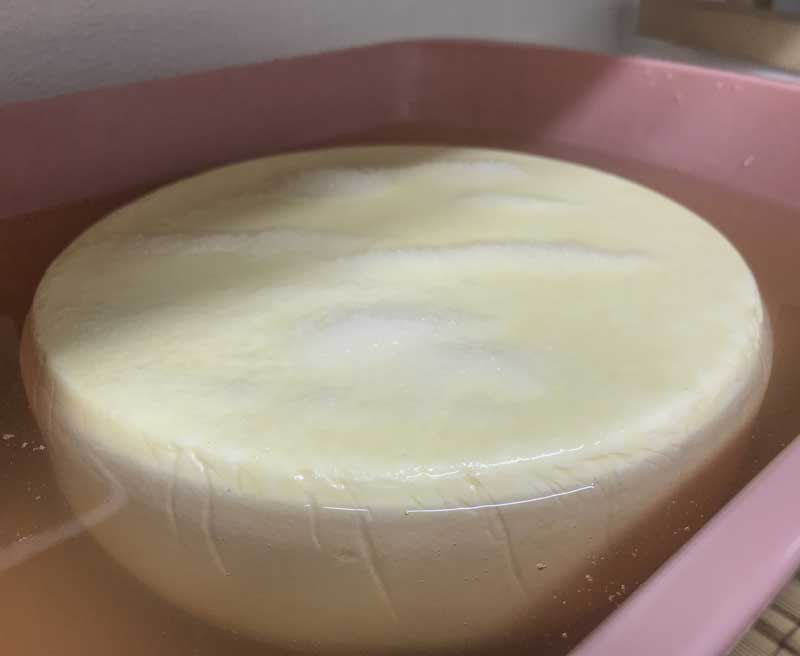
Remove cheese from mold and set it in the brine for 16 hours (about 4 hours per pound of cheese).
The cheese will float above the brine surface, so sprinkle 1-2 tsp salt on the exposed top surface. Halfway through the brining period, flip cheese and re-salt the surface.
At the end of the brine bath, gently wipe the surface and allow the cheese to surface dry in a cool space (65-70F) with free movement of air for one day.
Note: The cheese should not dry to the point of darkening or cracking.
-

Aging
After drying the surface for a day your Mountain Style Tomme will be ready for aging.
The cheese can be aged at 50-54F with 80-85% humidity for 2-4 months, or longer if desired.
Mycodore mold should be seen within 2 weeks as it grows into a thin white to grey layer with a nice aroma. As it grows it will look quite dry and powdery and should out-compete most other molds.
After 2 months the cheese will have a moist young flavor. As it moves towards 4 months it will become a bit drier and develop more character in flavor, aroma, and texture as proteins and fats are refined.
Info: Once it grows in the Mycodore, which was added at the beginning of this recipe, will provide a nice protection. While aging a light brushing is usually all that’s needed because this cheese is typically made with a natural brushed rind.
Without Mycodore the rind will be more diverse and may require additional brushing and attention.