Cheshire Cheese Recipe
Ingredients
- 4 Gallons of Milk (Not UltraPasteurized)
- 1 Packet C101 Mesophilic Culture or 3/8 tsp MA11 Culture
- 1 tsp Single Strength Liquid Rennet
- 1-2 tsp Annatto Cheese Coloring
- 1-2 oz Cheese Salt
Equipment
- Good Thermometer
- Knife to Cut Curds
- Spoon or ladle to Stir Curds
- E28 Stainless Steel Cheese Mold
- Cheese Press
- Butter Muslin
- Cheese Wax (optional)
- Instructions
- Cheshire Info
- Reviews
- Q & A
-
Acidify & Heat Milk
Begin by heating the 4 gallons of milk to 86-88°F (30-31°C). Higher temp for higher fat milk.
You can do this best by placing the pot of milk in a larger pot or sink of very warm water. If you do this in a pot on the stove, make sure you heat the milk slowly and stir it well as it heats.Once the milk is at proper temperature the culture can be added.
1 pack of C101 Mesophilic Culture or 3/8 tsp MA11 (same as Cheddar) for fresh farm milk but increase this to 1/2 tsp if using pasteurized milk from the store.
Ripen 40-60 minutes. This is ripened less than Cheddar.
To prevent the powder from caking and sinking in clumps, sprinkle the powder over the surface of the milk and then allow about 2 minutes for the powder to re-hydrate before stirring it in.
Once the culture has been mixed in well, the color can be added. This is an extract from the Annatto tree. For a full color Cheshire, about 8-12 ml of the color should be added to the milk. It is best to mix this in a small volume of milk and then add that to the full batch.
This will not appear to be very dark, but since the color is held in the curd, the color will darken through the process as whey is released and the color concentrates. This initial milk/curd will be a nice golden color. (I will be posting a more detailed page on coloring cheese in the near future).
Make sure the color is stirred in for 10-15 min before adding rennet.
-
Coagulate with Rennet
Then add about 5 ml (1 tsp) of single strength liquid rennet diluted in 1/4 cup water.
The milk now needs to sit quiet for 60 minutes while the culture works and the rennet coagulates the curd . The thermal mass of this milk should keep it warm during this period. It is OK if the temp drops a few degrees during this time.
At 20 minutes you should note a thickening of the milk, but wait a full hour before cutting.
-
Cut & Cook Curds
The curd can now be cut to 1/2-3/4 inch pieces and stirred briefly before allowing it to settle for 5 minutes.
Over the next 60 minutes stir intermittently while heating slowly over 60 minutes to 88-90°F.
Over the next 30 minutes, the curd is allowed to settle to the bottom of the vat (pitch) limiting the moisture loss while a slow acidification of the lactose takes place.
This last 90 minutes was a slow stir and settle to keep moisture loss to a minimum and thus keeping a moister curd than with the Cheddar process but it does allow the bacteria acid production to continue in the best environment.
-
Remove the Whey
Now a colander or perforated pan is lined with a draining cloth and the curds are transferred to this for the whey separation. The curd mass is wrapped in the draining cloth and weighted with 8-12 lbs to help consolidate the curds for 10-15 minutes.
Following this, it is broken into large cubes of 3-4"and turned every 10 min (5-6 times). It is kept warm while it continues to drain.
Continue with this for 2-3 hours while the acid continues to develop and the whey drains freely from the broken blocks of curd. Open the cloth and turn the curds several times to increase the whey drainage.
-
Salt & Form Curds
The curd can now be broken into 1/2-3/4 inch pieces and salted. My final curd weight was 4.25 lbs and I used about 1.75 oz of salt to slow the bacteria and flush the final whey.
Notice in the photos above how much darker the curd has become.
Once the salt is absorbed the cheese is transferred to a cloth lined mold (I am using the 6 inch stainless mold for this cheese here) BUT NO WEIGHT is added now.
This also is a major departure from the Cheddar process. The forms should be turned occasionally as they drain and are kept overnight in a warm place at a temperature between 75-80°F.
I achieve the warm phase by placing the form filled with curds back into the pot and water bath and keeping the temperature of the outer pot around 80°F.
-
Pressing
The next morning the cheese is removed from the forms, re-wrapped in cloth, and placed in a press.
It will be pressed slowly for about 2 days and turned daily while in the press. The weight begins light at about 12-20 lbs and is increased gradually until finally it reaches about 150 pounds in a 6 inch diameter form. With each change in press weight, unwrap the cheese, turn and re-wrap.
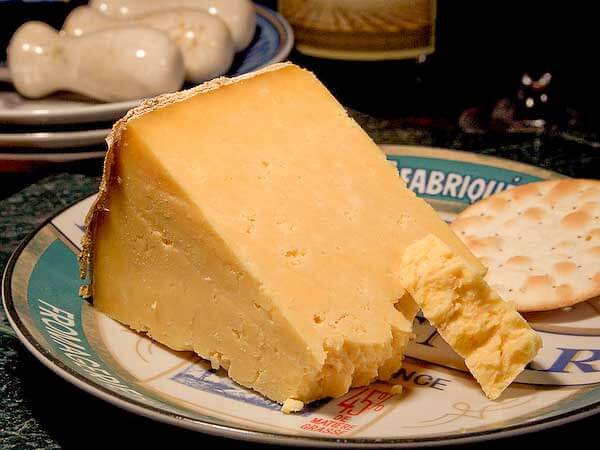
-
Finishing & Aging
The cheese is removed from the press, dried and wrapped with a bandage or waxed. It is cured on shelves in a curing room at temperature of 55-60°F. Notice in the photo here how dark the color has become compared to the earlier stages of the process.
This early-ripening cheese may be cured for as short a time as 3 weeks (I find 5-6 weeks better). The medium-ripening type is cured for about 2 months, and the late ripening type is cured for at least 10 weeks and often for 8 to 10 months. The longer curing period improves the cheese.
Once Britain's Finest Cheese
With this cheese we delve into a bit of history to find out why a cheese is orange as we explore one of the worlds great cheeses, one that has almost been lost in time.
Cheshire was at one time considered to be Britain's finest cheese.
A Bit of History
Cows milk is white and at most a slight beautiful cream color when they are on rich grasses. So why orange cheese? What does it have to do with cows and green grass?
Well it seems a very long time ago, and I do mean back in the first Millenium, there was a fabulous cheese being made in the west of Britain called Cheshire (Chester/Chestershire).
Cheshire is one of Britain's oldest known cheese, having been mentioned in the Domesday Book of 1086. Over time it became of such renown that many other regions began to copy this cheese successfully.
In the hills of North Wales, Red Cheshire, colored with annatto to a shade of deep orange, was originally developed and sold to travelers. The color was added to distinguish the fact that it was not made in the traditional Cheshire region. This trade was so successful that the travelers came to believe that all Cheshire cheese was orange, and producers in Cheshire's home county were obliged to dye their cheese in order to match the expectations of the market.
Of course, this has little to do with why Cheddar is still orange in Wisconsin and I am still searching for the answer to that question.
The traditional region for making Cheshire cheese extends into Lancashire, Staffordshire and Shropshire.
Prior to Britain's Milk Marketing Board and its homogenization of the English cheese landscape, Cheshire was considered to be one of the best cheeses produced throughout the country. However, as the emphasis became placed on Cheddar, Cheshire production, like many of Britain's farmstead cheeses, went into a decline.
Today, the direction for Cheshire has been to younger, fresher, crumbly cheese that requires shorter storage. Crumbly cheeses like Cheshire became less important as they did not lend themselves to the new pre-packing requirements of the supermarkets. Traditional crumbly cheeses simply did not pack well!
They continue to use traditional methods of manufacture - open vats and manual curd handling to produce what many regard as one of the most under-rated cheeses in Britain.
Cheshire, the Cheese
Today Cheshire comes in three varieties: red, white and blue and following the tradition that Cheshire should be red, most is lightly colored.
It is also made in 3 levels of moisture for different lengths of aging. The primary difference in these 3 is the milk quality (time of year), the final moisture in the cheese determining aging potential.
Cheshire is a cheese characterized by its moist, crumbly texture and mild, salty taste. While some consider it a form of Cheddar, it is quite different both in texture and taste. The primary difference between the Cheddar and Cheshire process comes in the late slow acid development where the Cheshire curds sit for another day at warm temperatures to drain and develop the final acid before being salted and pressed.
Making Cheshire Cheese
As I began looking into the Cheshire cheese process, I found very little in current literature on how it is made since there are only a handful of people still making this the traditional way.
My sources for this centered around "Practical Cheese Making" by Walker-Tisdale and Woodnutt 1917 and "Cheese Making Practice" by R.Scott 1998, along with several sessions in my cheese lab to develop this recipe for you wonderful cheese makers out there.
The cheese I will be making here is a full RED Cheshire from "first grass" fresh milk and will be a shorter aged cheese (great for those just starting out and not wanting to wait for their cheese to ripen).
- Reviews
- Questions

Success!
This was my first attempt at a harder cheddared cheese. Just cut into it at the 10 week mark. The picture show how quickly it was sampled! I'm getting rave reviews on this one! The flavor is fantastic, similar to a very mild Cheddar. I got good closure internally, but needed some more weight on the surface to smooth out the edges. Had to pick some wax out of the crevasses. It was a good recipe to start with for me and I've now done several using what I learned here. I'm looking forward to doing some more of the hard cheeses and honing my skills. I've got a Derby, a Parmesan and an Italian Stout aging currently. This has been a hobby that has totally captured me. And darn it, I get to try a lot of cheese! These recipes are some of the best I've found online. The attention to specifics and detail are great for someone like me who thrives on systems. Going to have to start branching out and seeing if I can come up with my own creations now.

A great cheese!
I made this cheese in July and cracked it open for a taste in February. It's spectacular. My husband says it's the best cheese I've ever made. I'm not so sure about that... but it is awfully tasty. We used bags of mortar we had in the garage to get the pressing weight up. Going to make another one tomorrow cause we're eating up the July one. Yum!
A fluid process...
I really like Cheshire cheese and decided to try this recipe. Unfortunately, I glossed over the part about it being advanced, needing 150 lbs. of pressing weight (my press only goes to 50 lbs.), and a time commitment of basically three days. I should have paid more attention and found myself having to spontaneously adapt. Luckily I’m good at this, ha ha. I consider myself to be an intermediate cheesemaker. What follows is my experience with this recipe: The instructions are clear and the pictures show what each stage should look like. What I found a little confusing is step 4, removal of the whey and I totally misinterpreted it. After the initial 15 minute 10 lbs. press, I broke the cheese into large curds, re-wrapped and re-pressed in the strainer for about 3 hours, flipping every 30 minutes. I think weight is required only during the initial15 minutes, thus the curds may have lost more moisture than necessary. Also, I lost an hour of acid development in my confusion. Live and learn. It was late and I was tired. When it came to the long slow press to150 lbs. over 48 hours, things got interesting. Since my press only goes to 50 lbs. I had to ditch it in favor of barbell weights perched precariously atop the form. I placed everything in a pan on the floor, in case it came crashing down (it did, often). It worked in a pinch but was fussy to manage. A word of advice, when you schedule your flip times remember to consider your sleep schedule. Live and learn. After 48 hours of pressing, my cheese looked more or less like Jim’s picture. It was damp on the bottom but not wet and fairly compact. I air dried it at room temperature, flipping every 30 minutes at first, then at longer intervals as it dried out overnight. I waxed it the next day and put it in my cheese fridge where it will remain for 6 weeks. I throughly enjoyed making this, despite my mistakes, misunderstandings and mishaps. I learned a lot, came away with ideas for next time, and ended up with a nice looking and smelling round of Cheshire that I can’t wait to taste.