


Munster Recipe
This is a typical washed rind cheese that uses a regular brine wash to control unwanted mold and develop a characteristic rich flavor and ripening profile The added moisture helps the development of bacteria that gives this cheese its particular taste and color
-

Yield
4 Pounds
-

Aging Time
~3 Months
-

Skill Level
Advanced
-

Author
Jim Wallace


Ingredients
Total price for selected items: Total price:

Instructions
-

Acidify & Heat Milk
Begin by heating the milk to 86-90°F. You do this by placing the milk in a pot or sink of very warm water. If you do this in a pot on the stove, make sure you heat the milk slowly and stir it well as it heats.
Once the milk is at 90°F, the Mosophilic Culture, Bacteria Linens and Geotrichum Candidum can be added. To prevent the powder from caking and sinking in clumps, sprinkle the powder over the surface of the milk and then allow about 2 minutes for the powder to re-hydrate before stirring it in.
Allow the milk to ripen for one hour while keeping warm. This will allow the bacteria to prepare for their work ahead.
-

Coagulate with Rennet
After the short an hour of hour ripening, heat the milk to 95°F and add about 3/4 tsp (4ml) of single strength liquid rennet.
The milk now needs to sit quiet for one hour. This small amount of rennet was added to begin the initial coagulation in a short period of time (15-20 min.) BUT allow the final firming of the curd to continue for the full hour.
This will result in a curd that tends to hold the moisture and fat better due to the stronger protein matrix.
The thermal mass of this milk should keep it warm during this period. It is OK if the temperature drops a few degrees during this time. The long coagulation time here is to loosely hold more of the water in the curd and to allow a moister curd to be transferred to the molds.
While waiting for the coagulation, the cheese molds and butter muslin needs to be sanitized and prepared for the curd transfer. I do this here by submerging in 145°F water for several minutes.
-


Cut Curd & Release Whey
The curds should be cut to about 1/2-3/4 inch cubes and then gently and slowly stirred. This gentle curd movement should continue at 90-95°F for about 20-30 minutes. The actual stir time will depend upon you and the milk you are using. It may take a few batches to get it right so observe what is happening and take lots of notes.
when the curd reaches a proper firmness (shown in the photo above) the whey can be removed down to the curd level.
-


Form & Press Curds
Once the curds have developed the proper character, it is time to move them to the molds for draining.
First line the cheese molds with butter muslin then pour hot water over the molds to warm them up. Next transfer the curds into the cheese molds. After transfering the curds, stack the molds ontop of eachother to help consolidate the curds.
After half an hour, unmold each cheese and flip it, then return it to the lined cheese mold. Once flipped re-stack the cheese molds, being sure the order is switched from top to bottom to allow for even consolidation fo the curds.
Press for another half hour then repeate the same process and restack the molds once more. Repeat this step once more after another two hours of pressing.
While the curds consolidate they should be kept warm with a room temp of 75-80°F, this can be achieved by placing the molds into a cooler with a jar of warm water.
Next the cheese molds should be transfered to a room temperature of 65°F for 18-24 hrs or until pH reaches 5.2-5.3.
As the cheese is repeatedly turned, a smooth surface develops. Once done, the cheese should be firm yet still soft.
-


Salting
The final cheese is now ready for dry salting. At this point, I un-mold the cheese and apply (1.75% of cheese weight) of a medium crystal cheese salt over 1-3 days. To apply the salt simple sprinkle it onto the cheese then lightly spread rub it around the entire surface.
The cheese should be placed on a draining mat at 65°F with a relitave humidity of 80% during this drying time.
-


Aging
The young cheese is now moved to the cave at 57°F with 95-98% reletave humidity. Over the next two weeks wash the cheese with a light brine three times a week. After each washing flip the cheese to allow for even air flow over the surface.
At two weeks dry, wrap, and store at 43-46°F until ripe. This will take 4-6 weeks for small ones or 2-3 months for larger ones.
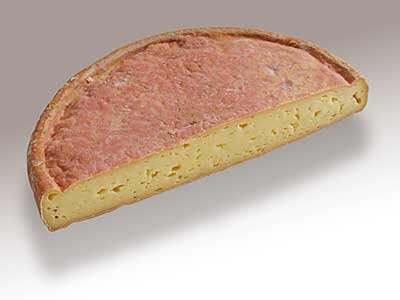
Eventually after 3-5 weeks a yellow to orange surface develops. This is the ripening culture which gives this cheese it's special aroma and flavor.
Cheese Making Supplies
Related Products
You May Also Like


