


Petit Suisse Recipe
-

Yield
2 Pounds
-

Aging Time
None
-

Skill Level
Beginner
-

Author
Jim Wallace


Petit Suisse Recipe Info
Petit Suisse Overview
Petit Suisse Flavor and Serving
Petit Suisse Milk and Cultures
Petit Suisse Make and Draining
Ingredients
Total price for selected items: Total price:

Instructions
Petit Suisse is a lactic fermented cheese with a slow coagulation that’s caused primarily from the build up of acidity. Higher acid is what promotes the linking of proteins which only slightly firm the final cheese, similar to making yogurt but at a lower temperature, and over a longer period of time.
The finished cheese is comparable to a very soft lactic goat cheese but this cheese is made with cows milk so it has a higher moisture content. Slow lactic fermentation occurs during a 12-16 hour fermentation period and continues into the following day while the curds are draining and chilling.
It’s recommended to start this cheese later in the day, about 4-6 hours before retiring, with the next day free for draining and monitoring the final result. During the final draining this cheese will be refrigerated to slow the acid development which helps to create a smooth texture without graininess.
-

Heat Milk & Cream
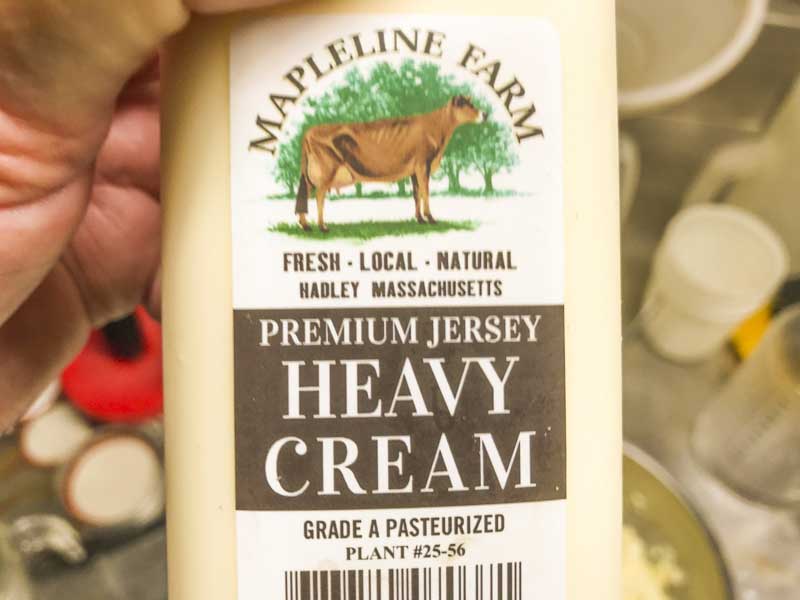
High quality ingredients are important when making this cheese so please look for the freshest milk and best heavy cream you can find. The better the ingredients the better the finished product will be. It is ok if the cream is Ultra-Pasteurized but the milk can not be.
The best time to begin making this cheese is about 4-6 hours before you retire for the night to accommodate the longer fermentation time.
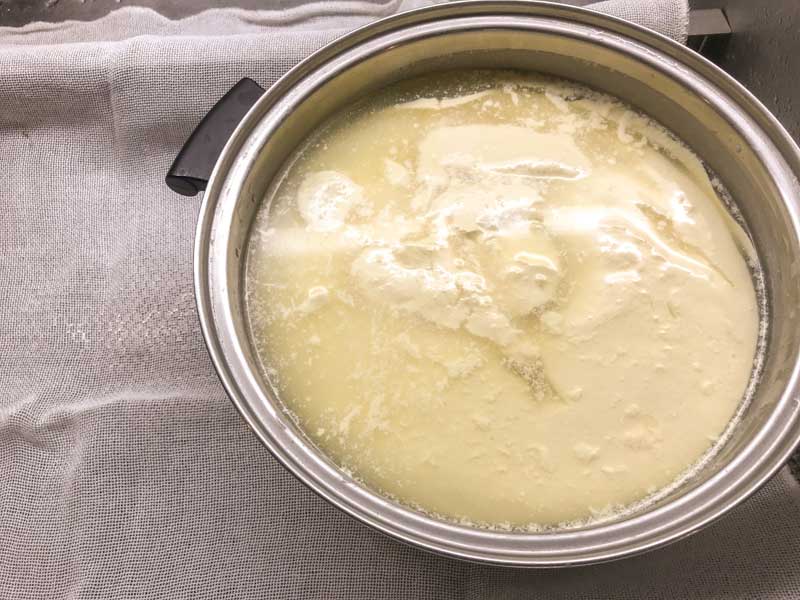
If using homogenized cream heat the milk and cream to 68-72F, if cream is not homogenized please look at the note below.
Note For Non Homogenized Cream: If the cream is not Homogenized it will rise to the top and form separate cream and milk curds. Instead of adding both milk and cream start with only the milk and add the non homogenized cream to the curd after it’s transferred into the drain cloth, after the first flush of whey has been released in step 5.
-


Add Culture & Rennet
Once heated add the culture and let it rest on the surface for a minute, to rehydrate, before mixing for 2 minutes.
Dilute 1-2 drops of rennet into 1/4 cup cool non chlorinated water. Add this mixture to the pot and gently stir for 1 minute.
Put the lid on and move pot to a quiet location around 68-72F and leave it until a curd forms, about 12-18+ hours. The variation in time can be a factor of dropping temperatures or variations in milk.
Note: Very little rennet is needed so 1-2 drops this will be enough to help the curd form.
Tip: An empty oven with a pilot light, an insulated box with a bottle of warm water, or even wrapping the pot and lid in a towel are all simple ways to help maintain a warmer temperature.
-

Observe Curd
After about 3-6 hours the milk may begin to thicken but should not be moved or disturbed until the full time has passed.
If curious, thickening can be noticed by pressing lightly on the surface with the tip of a knife. If no resistance is visible, the milk has not thickened yet and should be checked again in 30-60 minute intervals.
As the milk thickens it means that enough lactic acid has been produced to begin pulling proteins together which is the very beginning of the curd.
Still do nothing at this point except note the firming time. The curd needs to become firmer and that will take much longer, this is best done overnight.
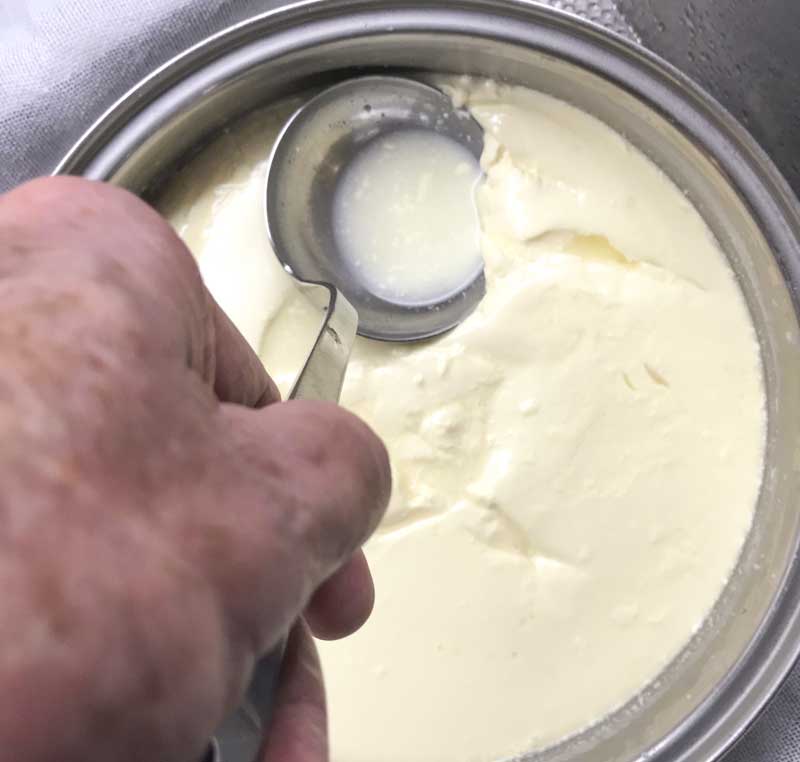
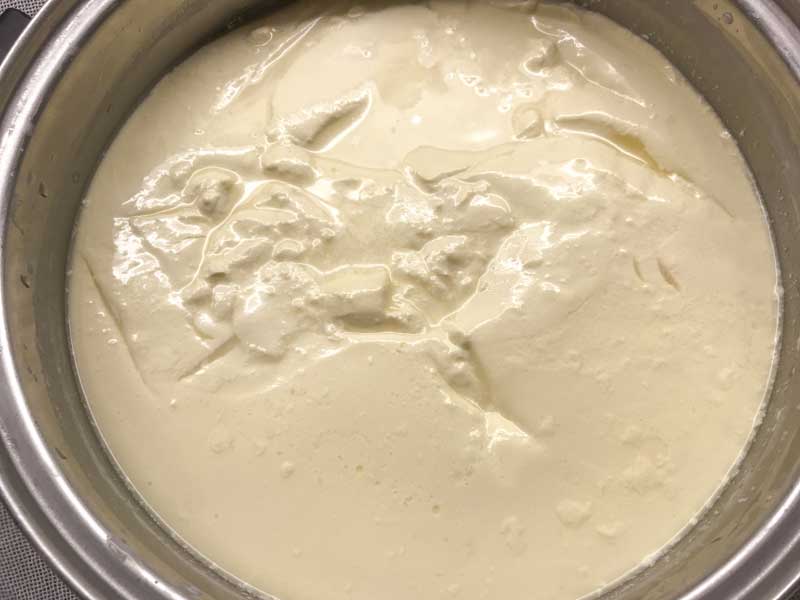
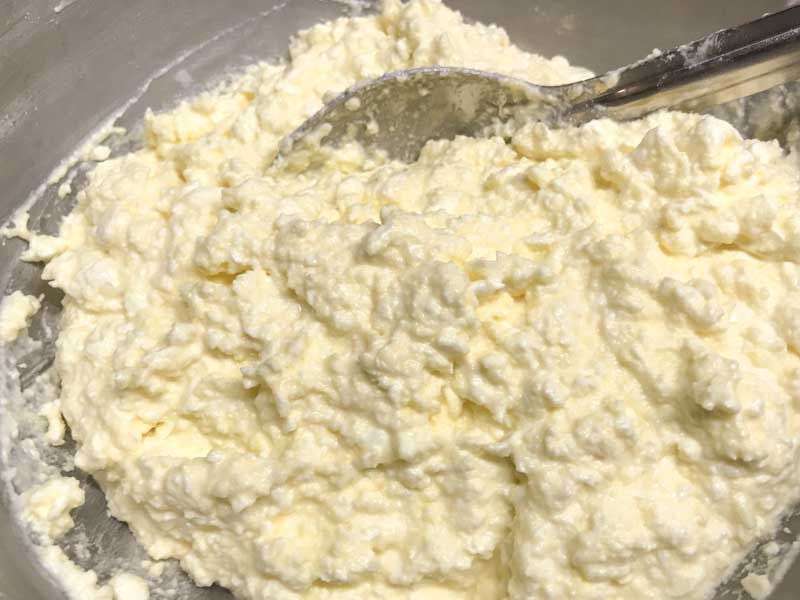
The next time to check should be sometime early the following morning. At this point a firmer curd should have formed and pulled away from the edge of the pot. There should also be a thin layer of whey on top of the curd, perhaps even some cracks in the curd mass. This will be the final curd, ready for draining.
This curd is still very soft and will easily break, so careful handling is important.
Tip: If tasted the curd should have a very soft texture much like a yogurt but be more neutral in acid. The taste should be neither sweet nor acid.
-
Remove Whey & Cut Curd
The amount of draining will be determined by observation and personal preference. In other words this step is very subjective and is partially determined by the milk being used and by what you are looking for in a finished cheese.
Draining can be done in various ways as noted below.
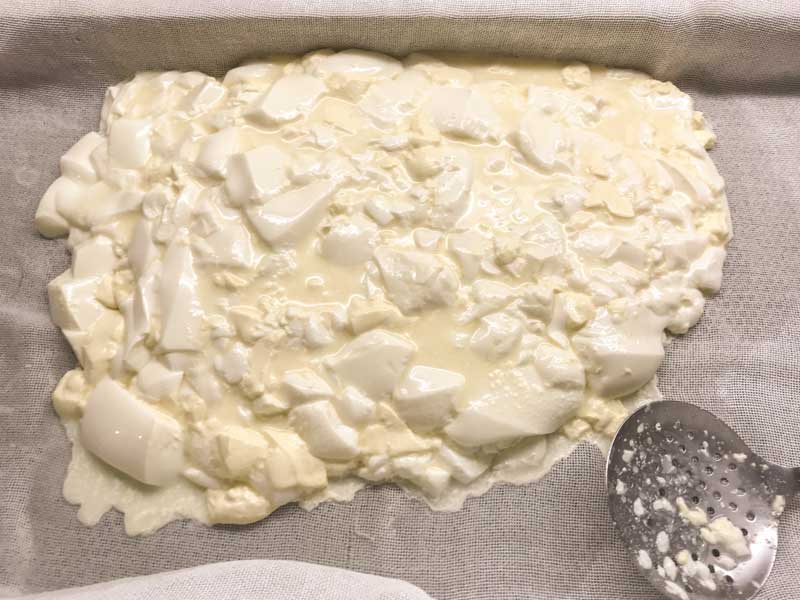
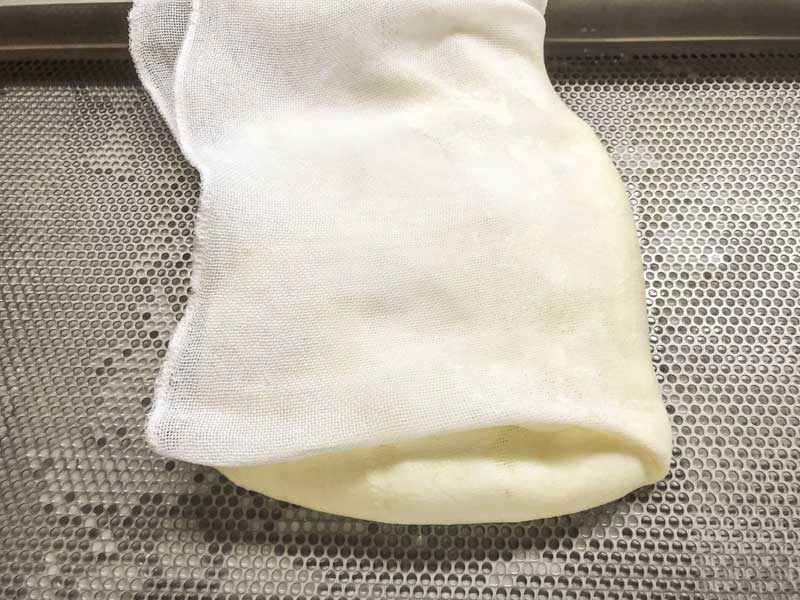
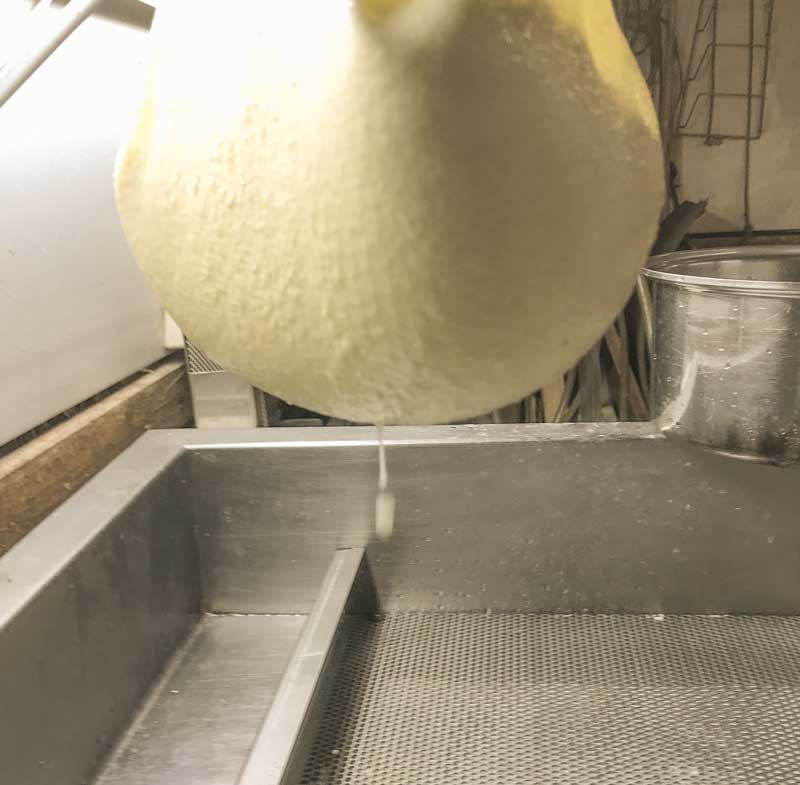
A large colander with draining cloth will work nicely for this step. But, I like to use a large perforated stainless steel panel covered with a large draining cloth as my draining surface. Whatever the draining surface, be sure the draining cloth is large enough to be gathered and tied.
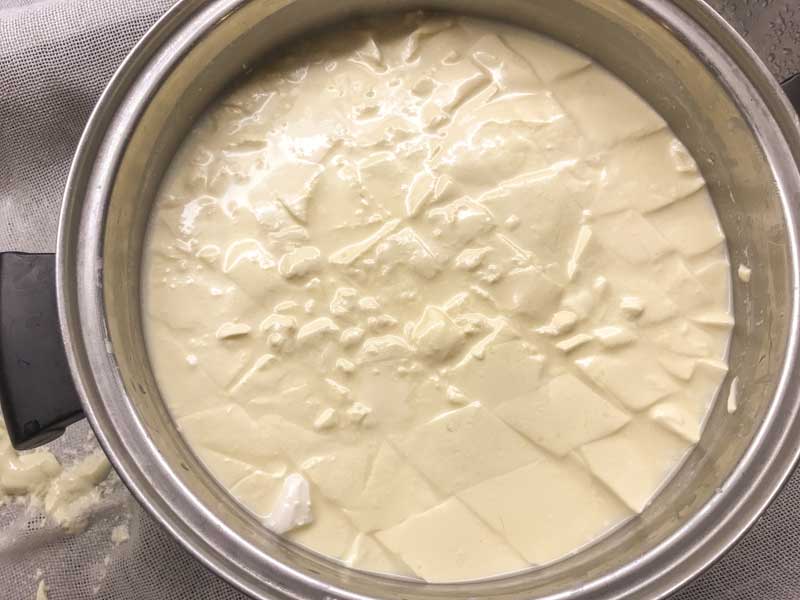
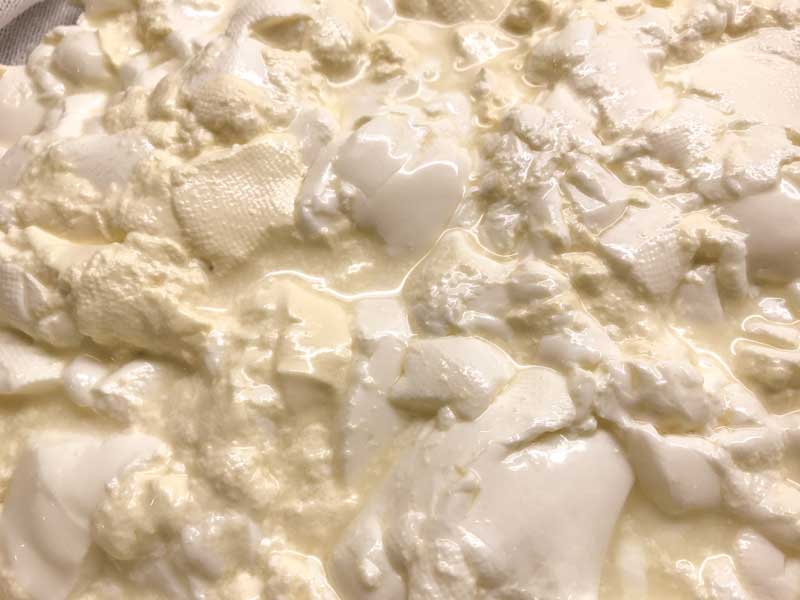
To begin draining, start by removing the free whey, from the surface of the curds, with a large ladle. Once the whey is removed cut a vertical crosshatch of about 1.5-2” squares from top to bottom of the curd mass then let the curds rest for about 5 minutes. After resting carefully begin transferring curds to the drain cloth, it will be very much like a soft yogurt at this point.
Tip: A tightly woven cloth will drain slowly and retain more solids, whereas a courtly woven cloth will drain quickly and loose more solids. Also, a warmer room temperature will cause faster draining with additional acid development.
Info: Commercially a centrifuge is used to drain but that is not commonly found in the average home setup. The overall focus is to get as large of a draining area as possible.
-

Initial Draining
Once all of the curd has been transferred allow the free whey to run off (save for garden or other use). Draining can be encouraged by lifting the cloth edges and pulling them towards the center to fold the draining curd in on itself, work in this way all around the curd mass. The cloth can then be folded over to envelop the entire cheese and be turned over to provide a new draining surface.
If needed, gently mix any cream portion that formed at the top back into the general curd to give a better blend of cream curd and milk curd.
A cooler temperature will help maintain more moisture and will prevent too much acid development or graininess in the curd.
Note For Adding Non Homogenized Cream: If using non-homogenized cream it can now be added slowly to the curd while the curds are gently being mixed to evenly distribute the protein and butterfat portions.
-
Final Draining
At this point the cheese should have a neutral or even just slightly sweet flavor unlike the tangy character of yogurt.
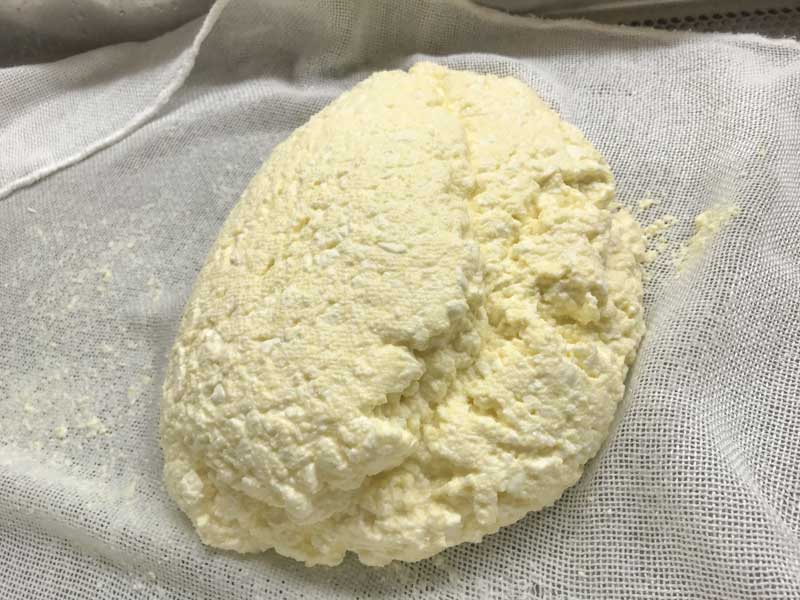
For the final draining bring the cloth together and tie the ends so the cheese can hang and dry more. This will produce a drier cheese in the end so it can be an optional step if a moister cheese is desired.
If possible, draining should be moved to a refrigerated space or a cooler room once the whey runoff slows down. It is best to limit the amount of time spent at room temperature in this step because the cheese may continue developing acid.
The final curd can be determined by a personal observation to see when the curd has drained sufficiently. If there’s too much moisture the structure may collapse but too much draining or too warm a temperature can lead to a dry, chalky and grainy texture.
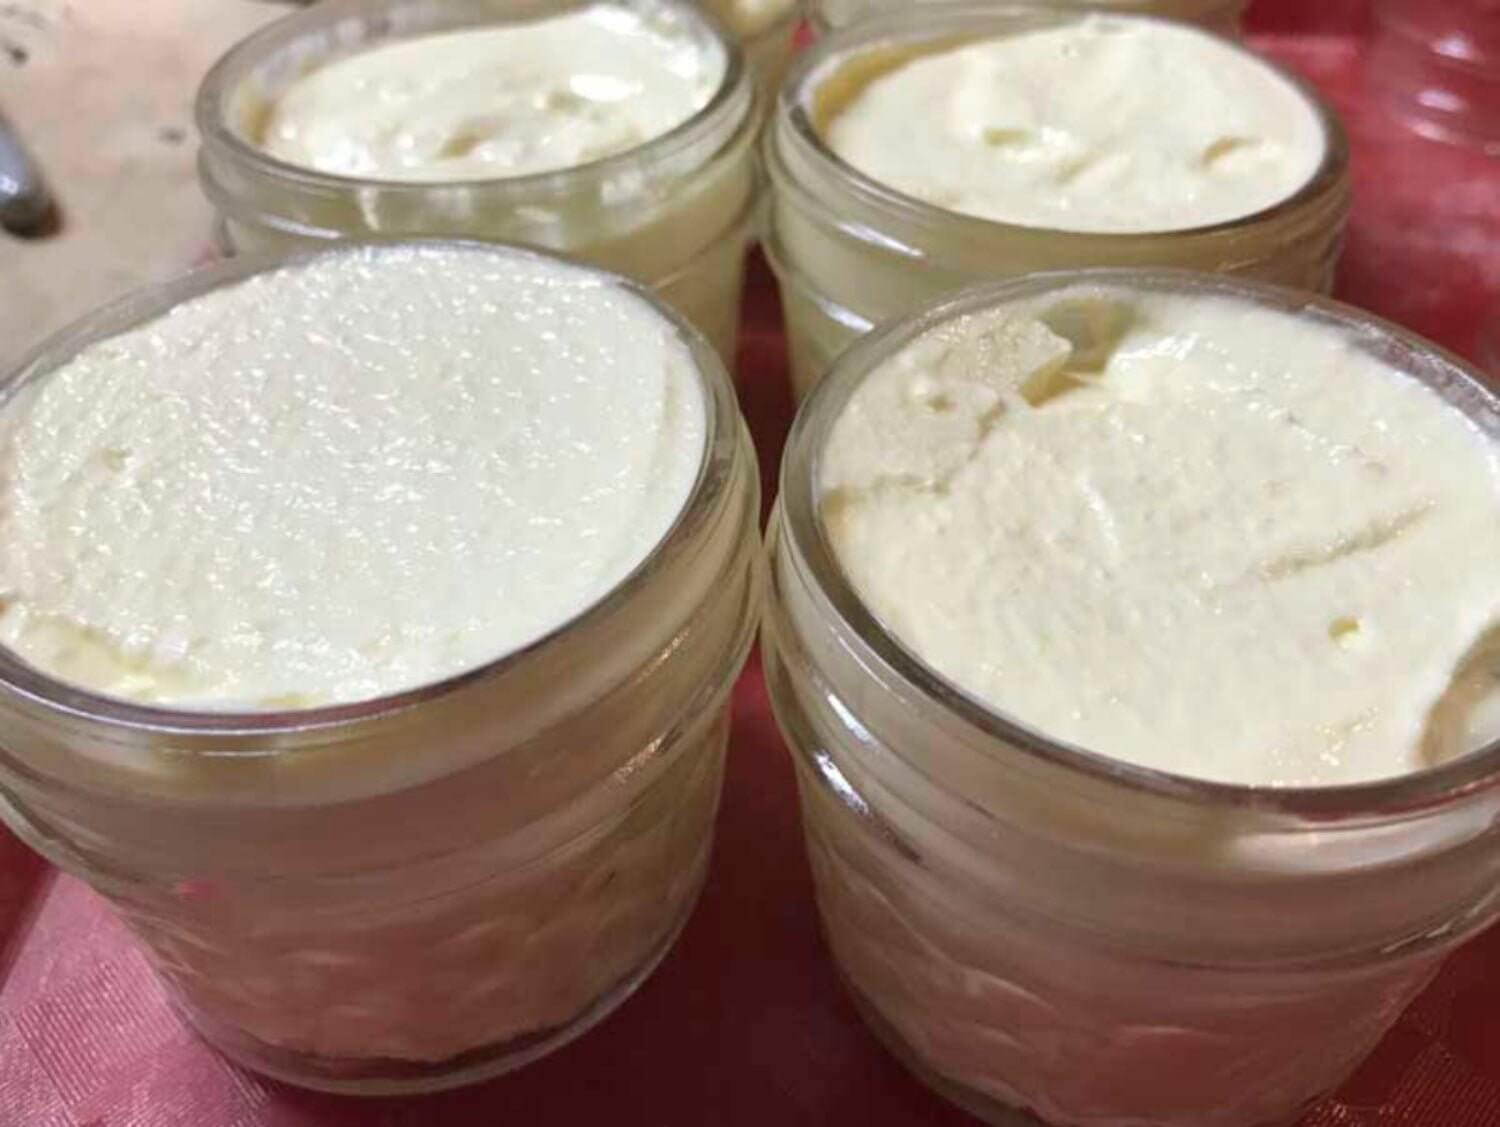
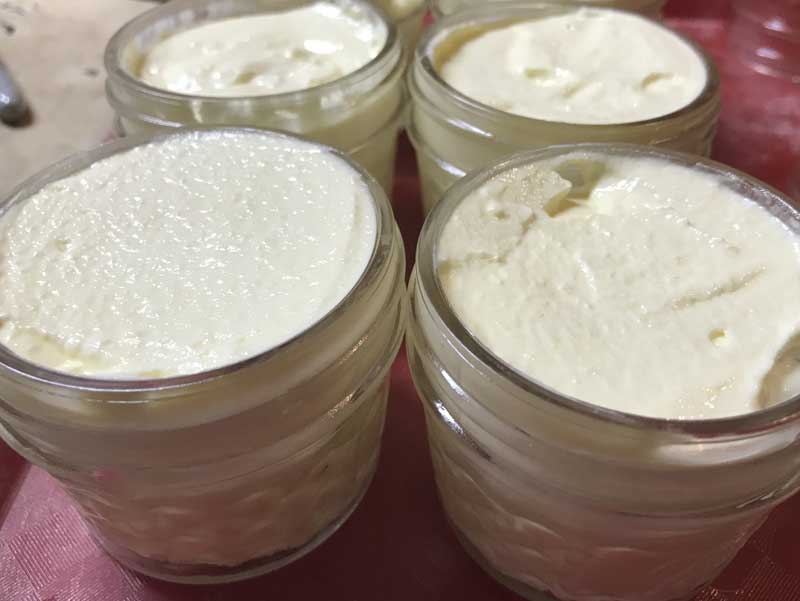
Once drained, the final curd should still be quite soft before packing but will firm up substantially after fully chilling. Once the curd has drained you can simply pack it into small 2-4 oz jars and chill in the refrigerator. The jars and lids should have been well cleaned and sanitized in hot water before filling.
-


Finished Cheese
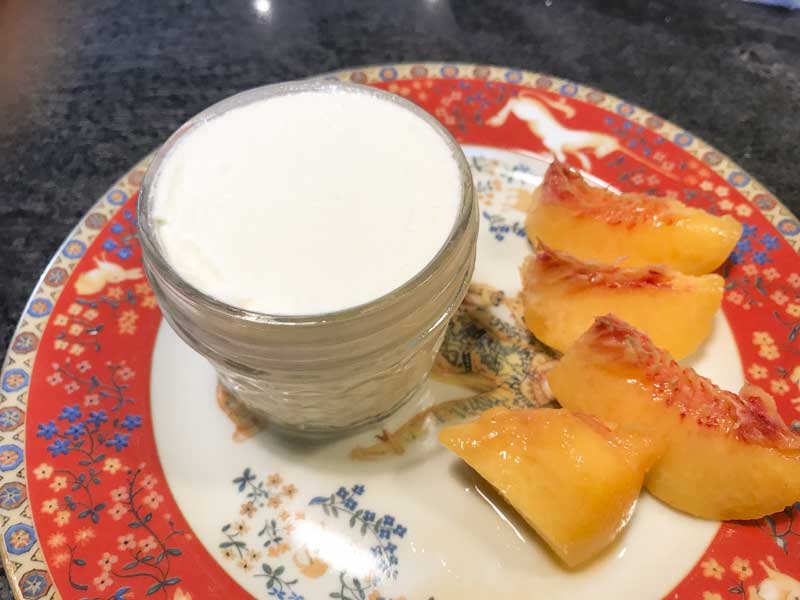
Finally it’s time to try the Petit Suisse. First remove from the fridge and allow to warm slightly. I’ve even set them in warm water for a few minutes to warm the exterior. When ready run a clean knife around the sides then turn over above a plate and with a quick rap or shake the cheese should release onto the plate. You can also enjoy it straight from the jar.
A bit of honey, light or dark sugar, or fresh fruit on top is a real treat.
If a 4 oz portion is too much for you, smaller 2 oz jars can be used for your next batch.
Originally in France the curd was formed in small molds and then removed before wrapping with paper around the circumference and packing in a box of six for sale. Today this cheese comes in small plastic cups. However we prefer to make our own in glass jars that can be re-used.
Cheese Making Supplies
Related Products
You May Also Like


