


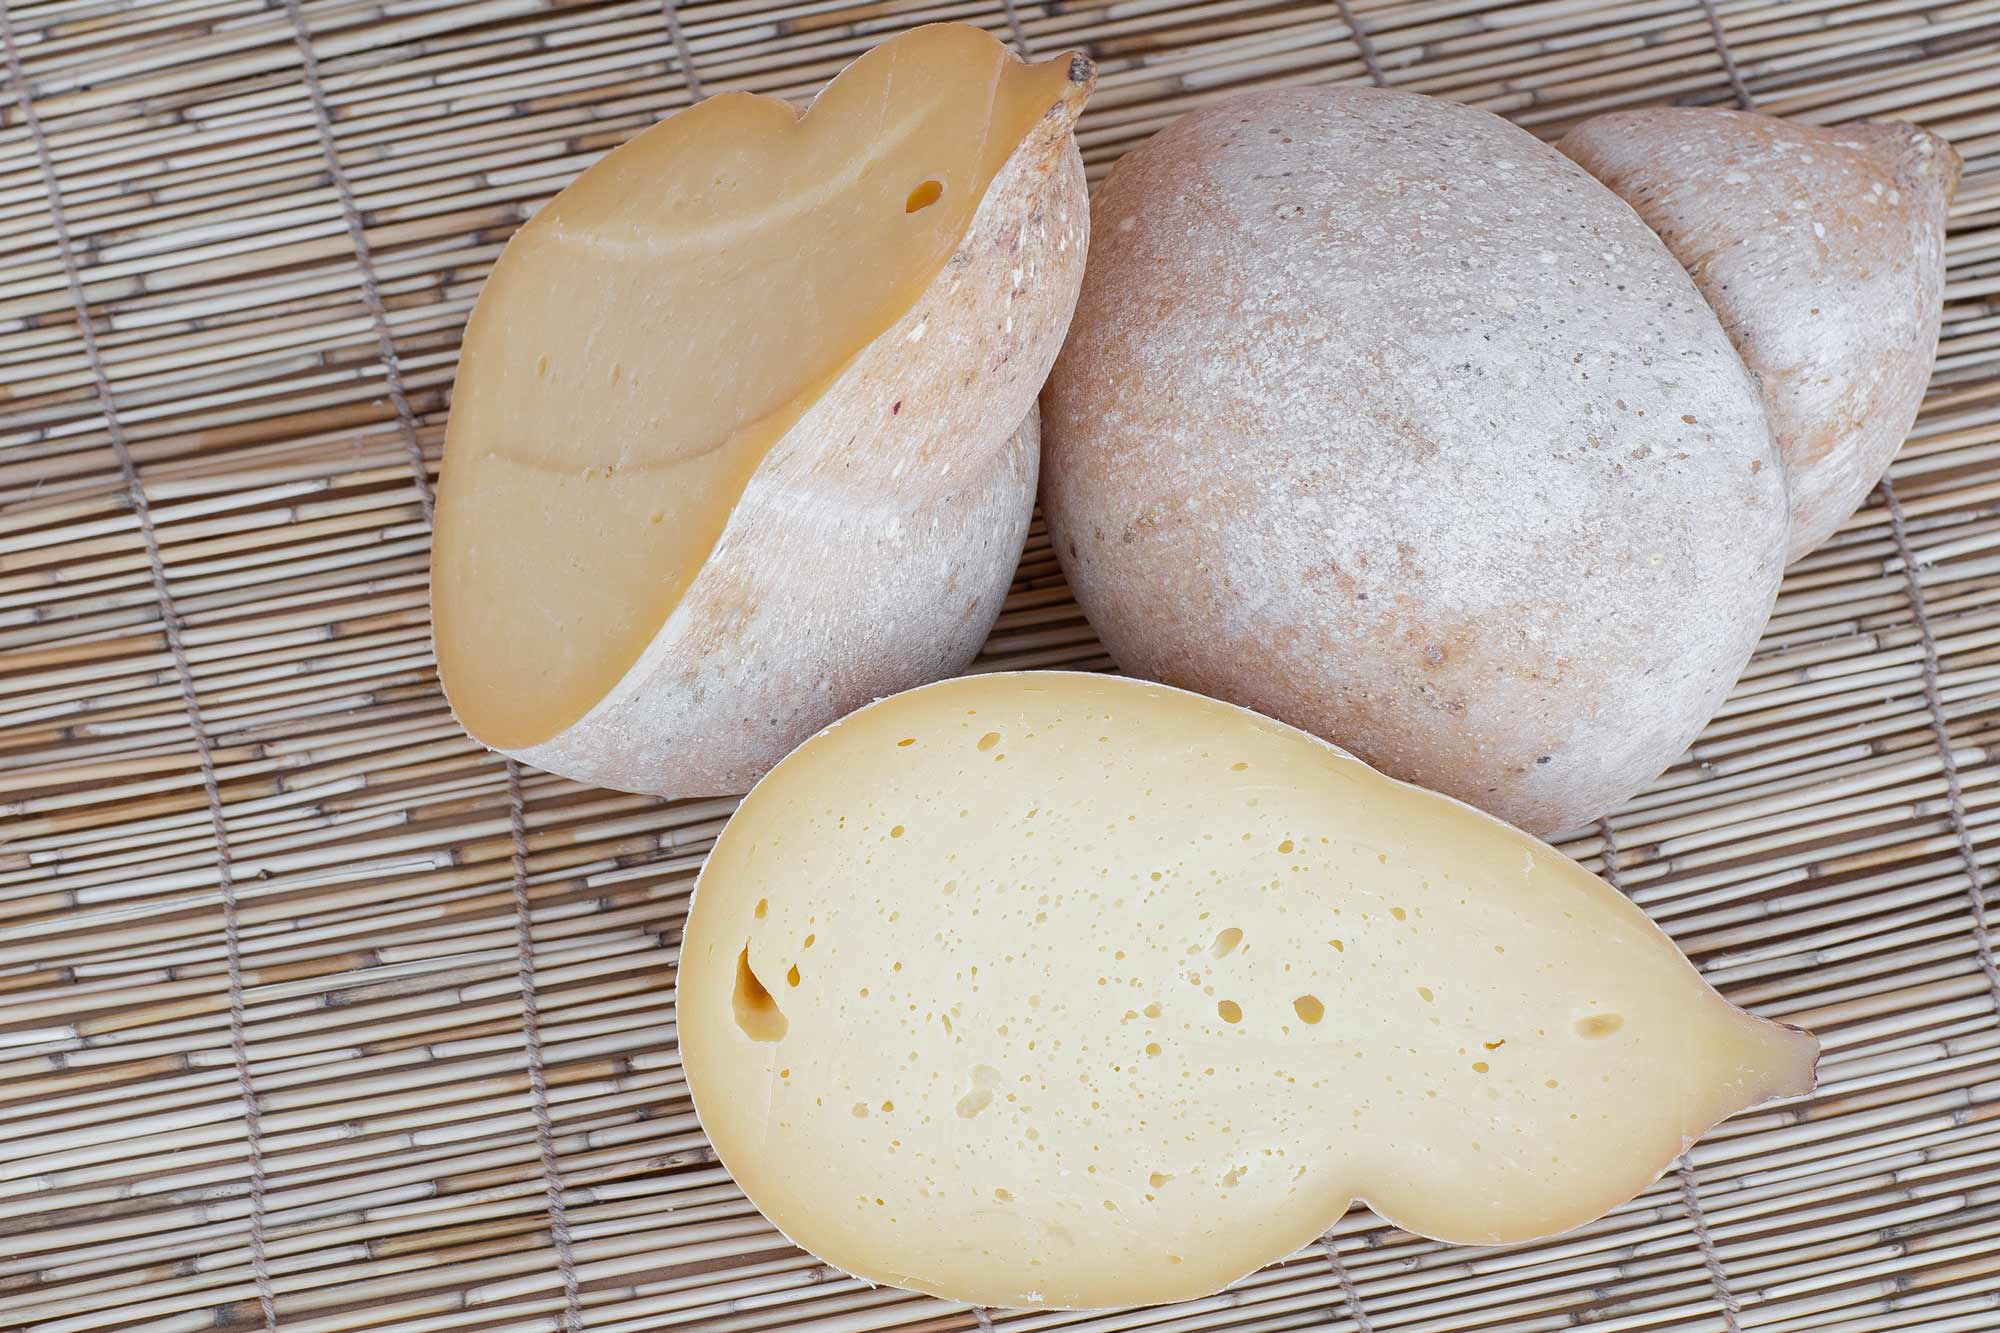
Provola Cheese Making Recipe
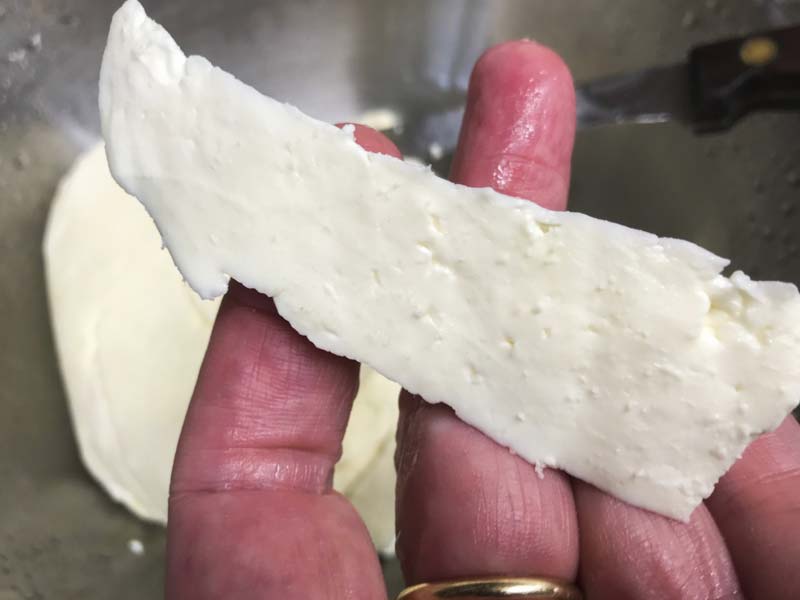
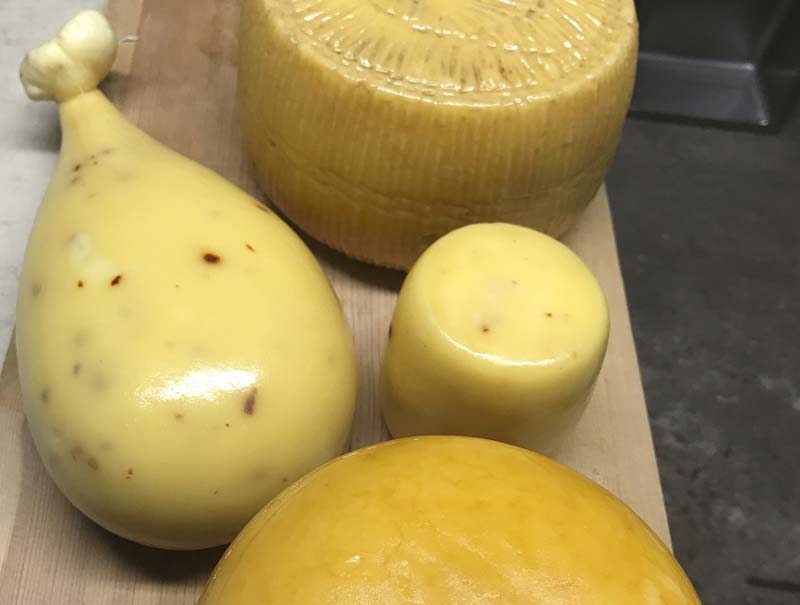
The flavor of the young cheese is quite mild and when sliced shows a very supple and elastic texture. Like Mozzarella it tends to melt nicely but flows a bit less with the heat.
Some producers will place the finished cheese into a chamber with wood smoke to emulate the traditional Provola made in small huts over an open fire.
-

Yield
4 Pounds
-

Aging Time
~2 Months
-

Skill Level
Advanced
-

Author
Jim Wallace


Ingredients
Total price for selected items: Total price:

Instructions
Much like Mozzarella, Provola relies on the initial ripening, coagulation and curd size for its moisture content. But because it's a drier cheese it can be aged for weeks or months which can give it more character than Mozzarella.
Provola is most often hand shaped but if you have yet to develop that skill you can form it by hand into a small ball and use a form to shape the cheese.
-

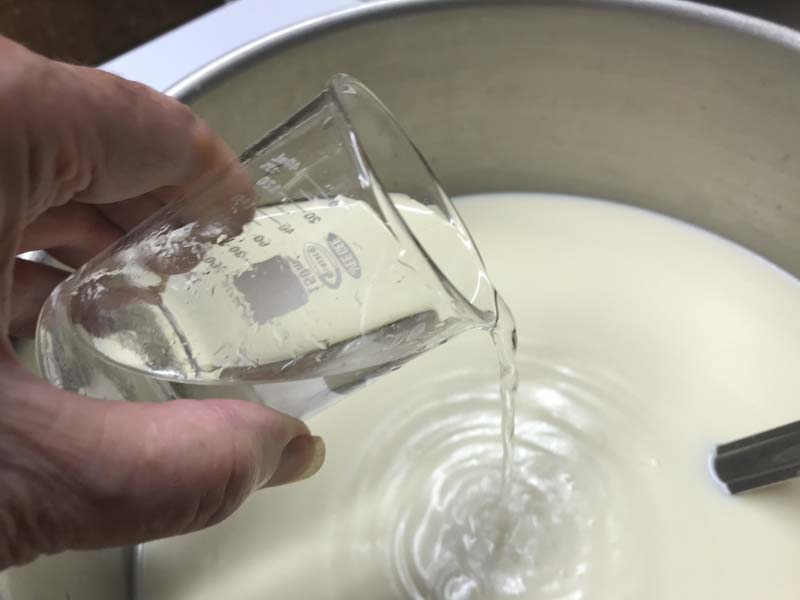
Heat & Acidify Milk
Begin by slowly heating the milk to 98F. When the milk reaches 98F add culture. To prevent the powder from caking and sinking in clumps sprinkle the powder over the surface of the milk allow about 2 minutes for the powder to re-hydrate before stirring it in.
Let the milk rest for 90 minutes to allow the culture to work.
-
Coagulate with Rennet
When the milk and culture have ripened, add single strength liquid rennet and let the milk sit quiet for 25-30 minutes.
The thermal mass of the milk should keep it warm during this period. It is ok if the temperature drops a few degrees during this time, you can heat it back to temperature after the curd is cut, in the next step.
Note: The milk will begin to thicken at about 8-10 minutes, but allow it to coagulate to firmness of 25-30 minutes. It is always best to check for a firm coagulation and if needed allow it to go as much as 50% longer. The next time you make the cheese, adjust the rennet amount if needed, more rennet for a quicker set.
-

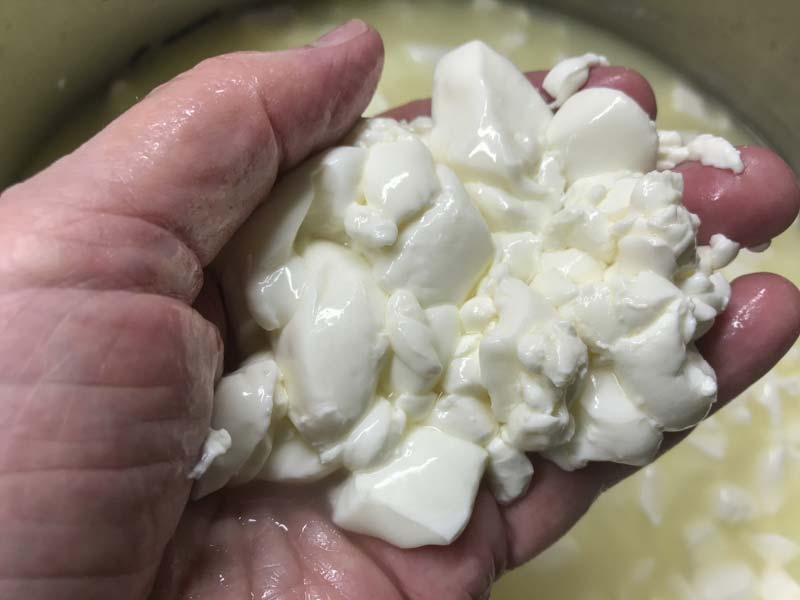
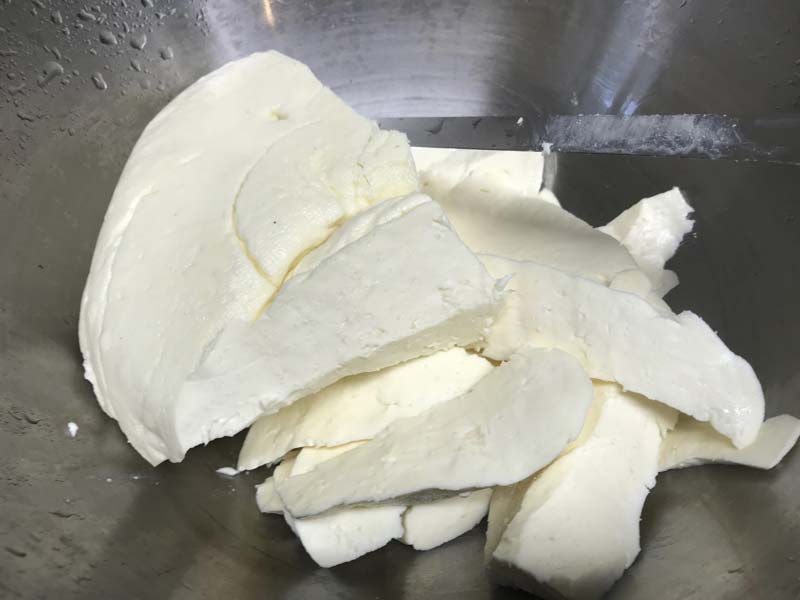
Cut Curd
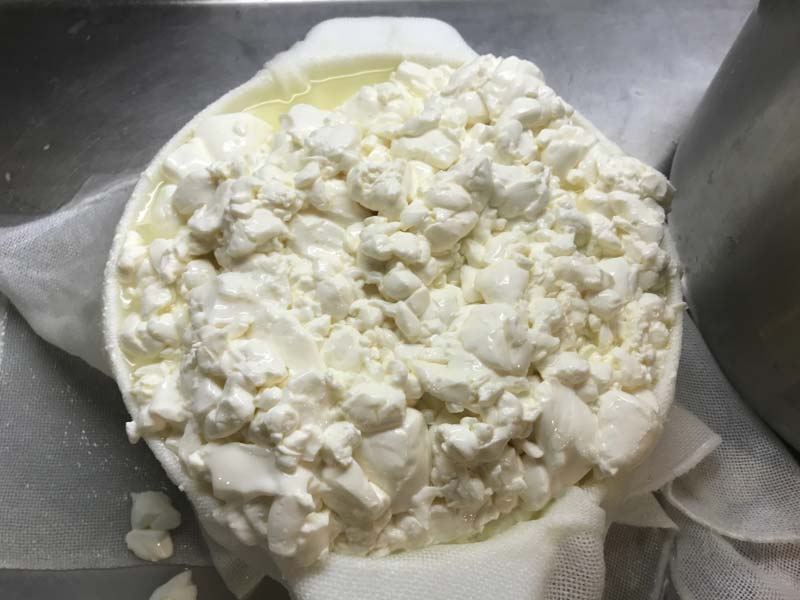
Once the milk has set well it is time to cut the curd. This is the first step in reducing the curd moisture.
Cut the curd mass as evenly as possible into 3/4-1” pieces then allow the cut curd to settle and rest for 5 minutes. This short rest gives the cut curd surfaces time to heal.
-
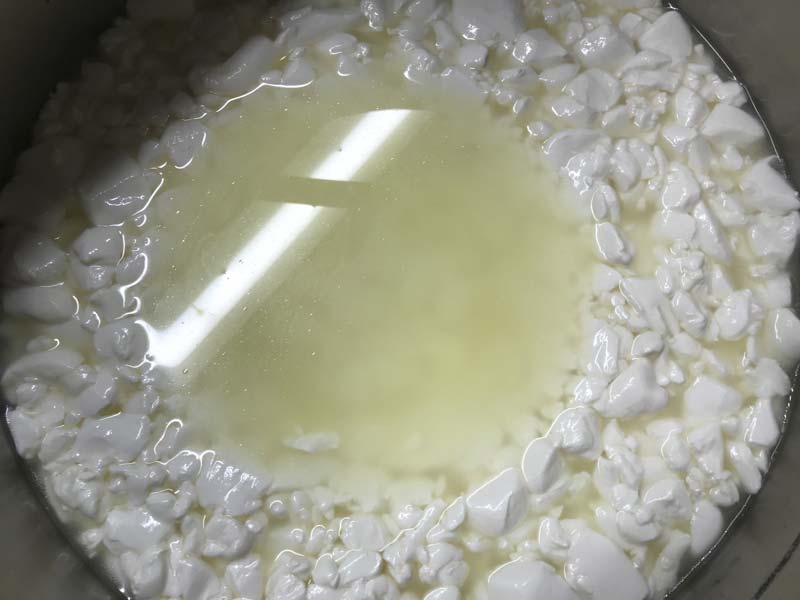
Cook Curd
Slowly stir the curds for and additional 10-20 minutes, to allow the curd surfaces to firm up more. If the temperature has dropped heat the milk back up to 98F.
The final curds should be forming a slight skin on the surface while still showing significant moisture. At this point very little acidity will have been produced.
This is a critical control point to determine the final moisture of the Provola. Recording the stir time in your notes and a description of the curds will be helpful in adjusting future batches to your liking.
The shorter stir time will maintain more moisture for a very young, milder, short aged cheese. The longer stir time will produce a drier curd and be best for a longer aged cheese.
When the desired moisture level is reached, the curds can be allowed to settle under the whey.
-
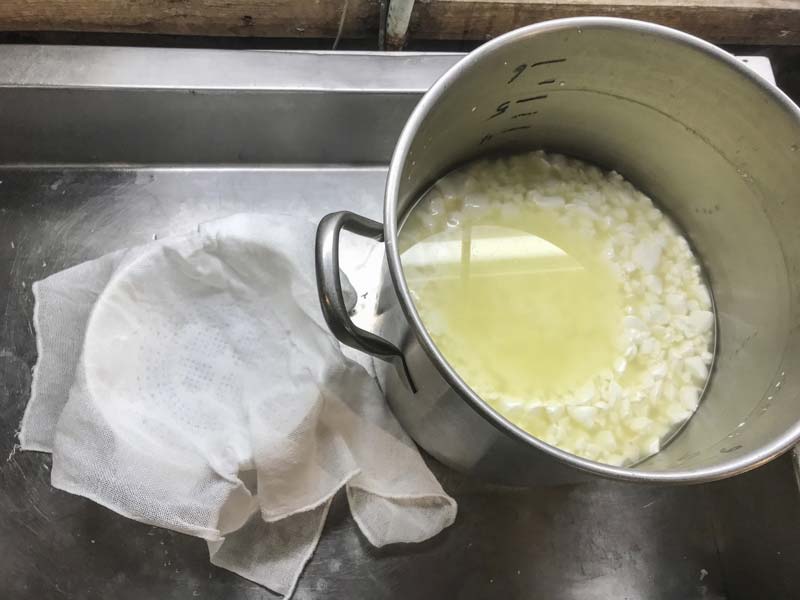
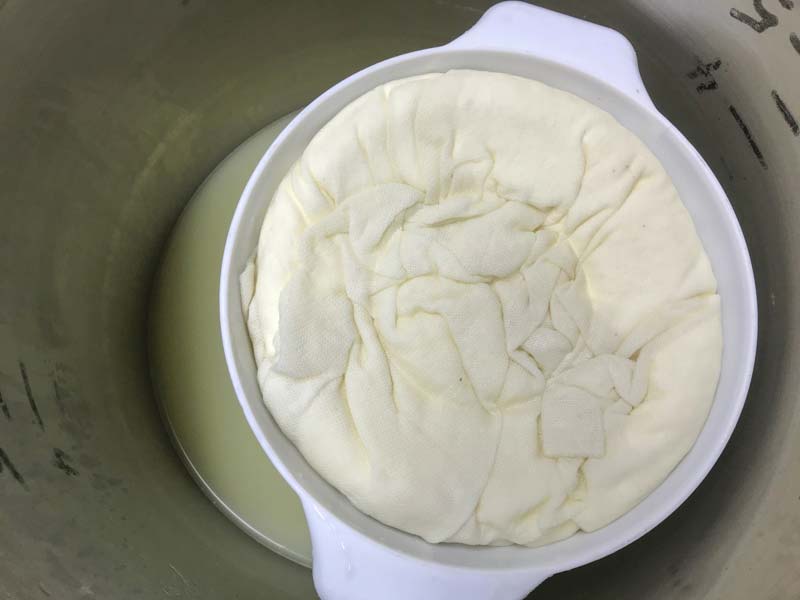
Drain Curd
At this point the curds will still be quite moist and should still taste sweet. This indicates there is still plenty of lactose that can be converted into lactic acid.
Drain the whey down to about 1” above the curds, transferring the whey to a pot. Transfer the curds to a draining mold or colander. Draining cloth may help but is not necessary unless the curds are too soft.
Support the curds above the pot of warm whey or water to keep them warm and the bacteria working for final moisture and acidity. This is where the TM81 culture is nice because it takes about 3-4 hours for the acidity to develop rather than the 6-8 hours for other cultures. These are only guidelines so beware of early or late acid development in the next phase.
Flip the curds several time while draining. Try to keep the curds warm and keep the whey level below the curd mass.
Note: While the acid is developing prepare a large pot of hot water to about 175-180F for the upcoming stretching. Also prepare a second container with cold water and ice.
-
Checking Final Acid
This is the critical point of a good stretch in order to have the perfect texture for the style cheese.
We are looking for a final curd mass and moisture that has reached a very specific level of acid. If you have pH strips then test for the final pH of 5.5-5.6. This will be a bit above the final stretch point because you don’t want to develop too much acid and shoot past 5.1-5.2.
My approved method is taste. The curds when removed from the whey will be quite sweet because of the lactose. During the final acidification the sweetness wanes as the lactic acid develops. The taste will go to neutral, so neither sweet or much of an acid taste. This should be about the 2.5 hour point.
At this point the bacteria are working at warp speed and the acid is developing fast so begin taking small strips and testing in the hot water you have prepared. Give them 2-3 minutes in the hot water and then a small stretch. They should want to stretch under their own weight.
If they stretch well, you are ready for the batch. Immediately move the curd mass to your ice water to slow the bacteria, preferably cut the mass into half or quarters to allow it to cool faster.
-

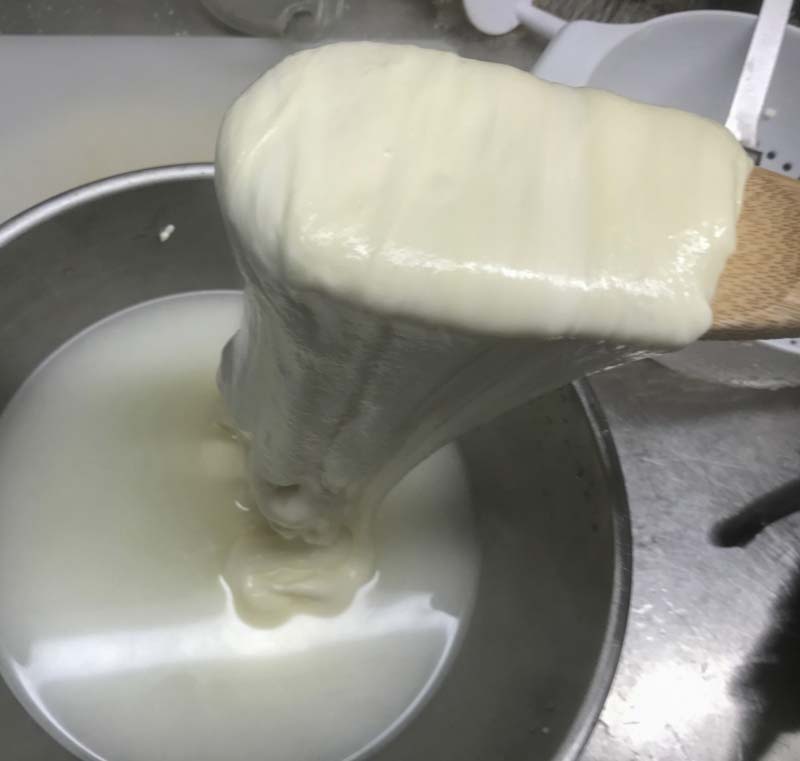

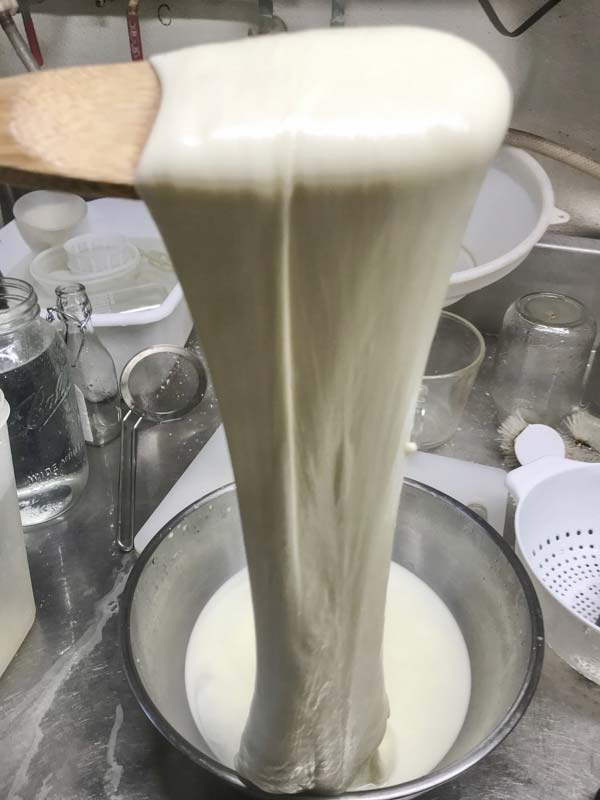
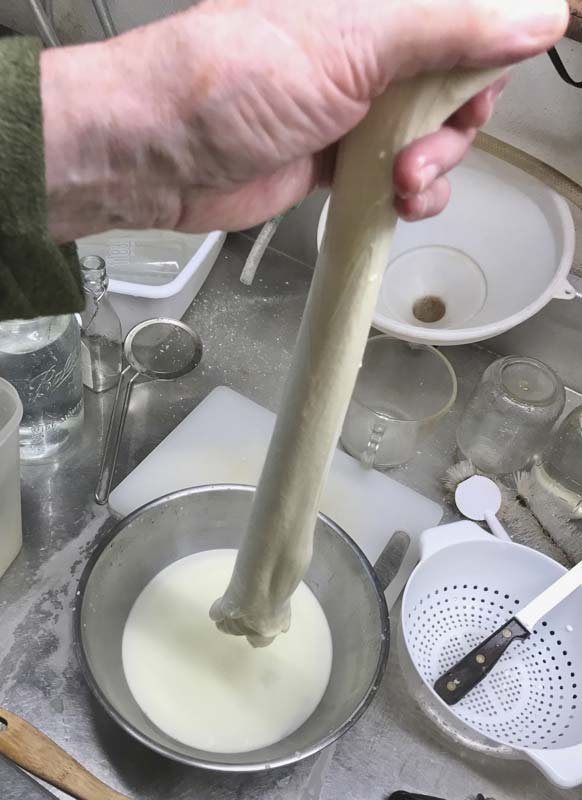
Stretching the Curd
Overview:
- Get your basin ready and check your hot water temperature.
- Remove curd from ice water and cut the large mass of curd into narrow strips of about 1/4-1/2”.
- Add several cups of hot water slowly around the edge of the curd. Allow this to warm the curds while keeping them separate for 3-5 minutes.
- Discard this water because it has cooled.
- Add another batch of hot water as before, enough so the curds are submersed.
- Using a wooden spoon or paddle, keep moving and separating the curds as they heat.
- As you see the curds beginning to stretch, lift one to see how it stretches. They should stretch under their own weight. If needed, stir longer.
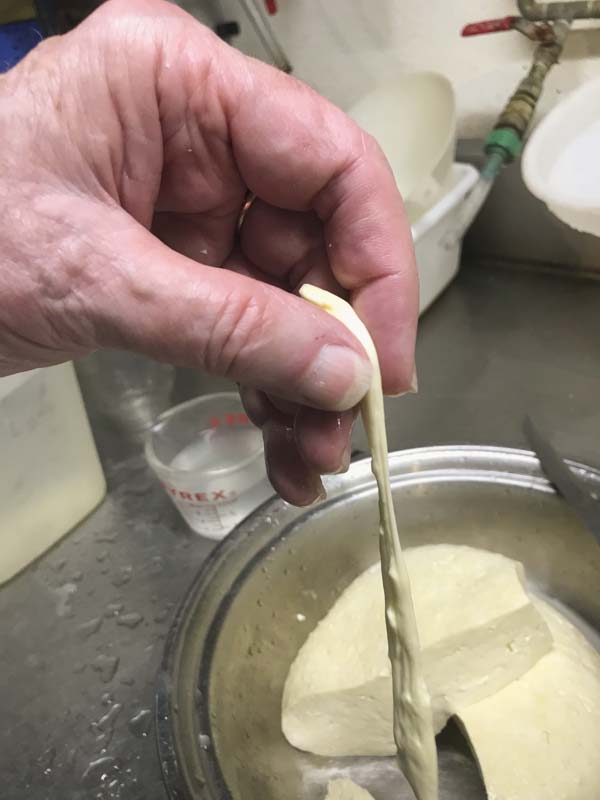
- Pull the curds together with a wooden spoon or paddle into a single mass.
- Lift the entire mass and let it stretch under its own weight, let it fold itself and lift again and repeat several times. Only allow the weight of the cheese to stretch the curd.
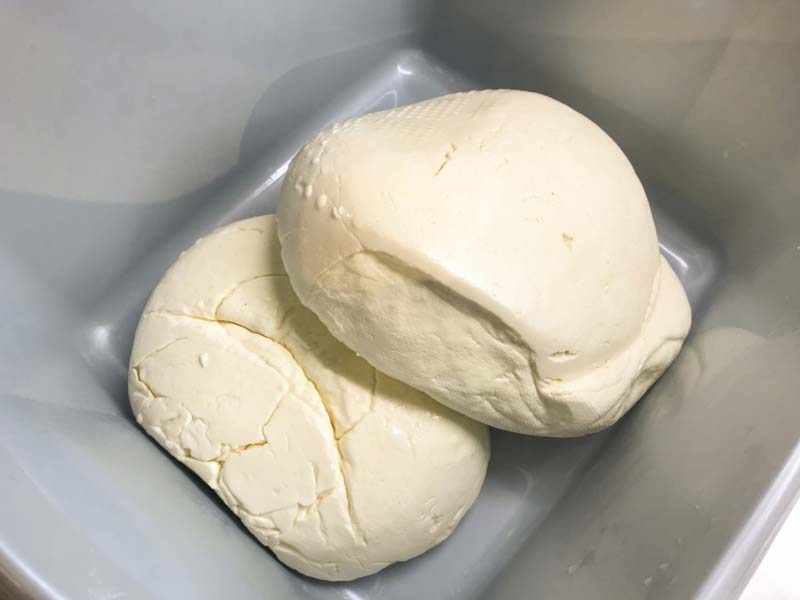
- The final curd should be silky and smooth.
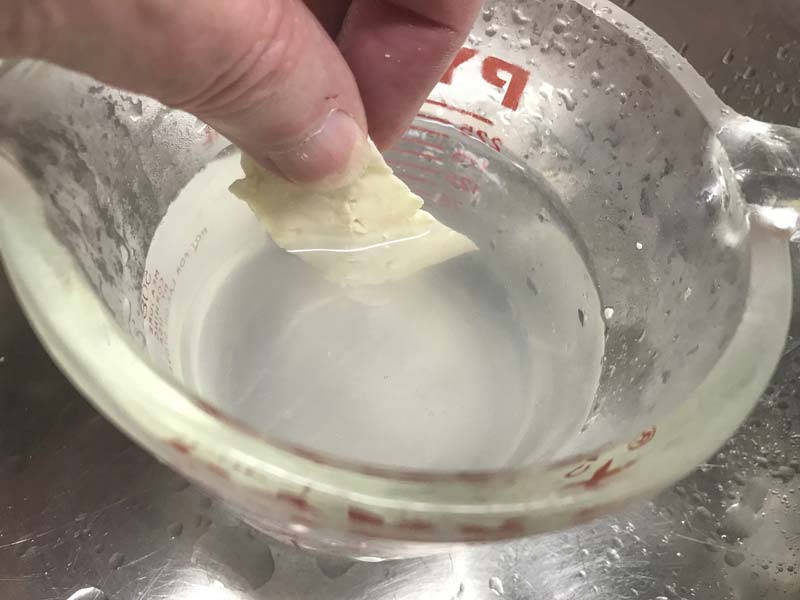
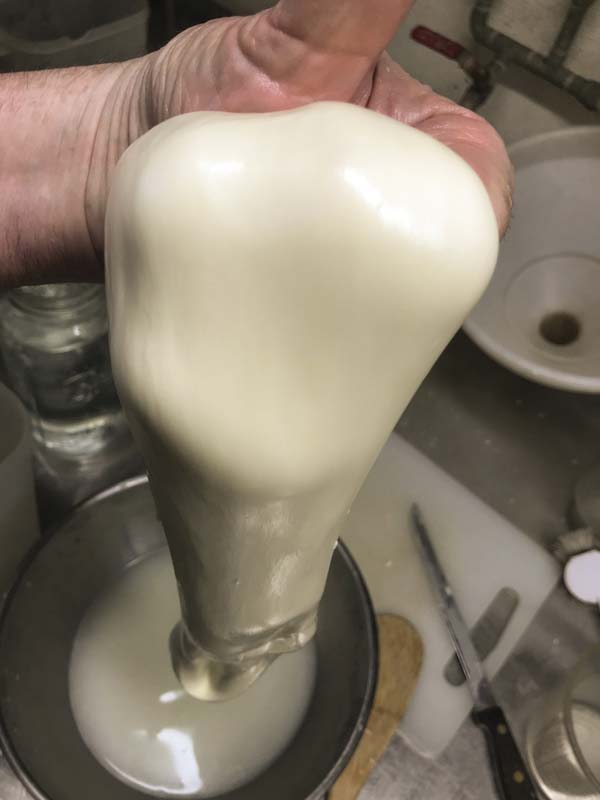
For stretching I prefer the old traditional Italian way to dip your hands in very cold water and then pull up a piece of curd when it is ready to form. Hot curd and cold hands are good for about 30 seconds. Another option is to use thick rubber gloves.
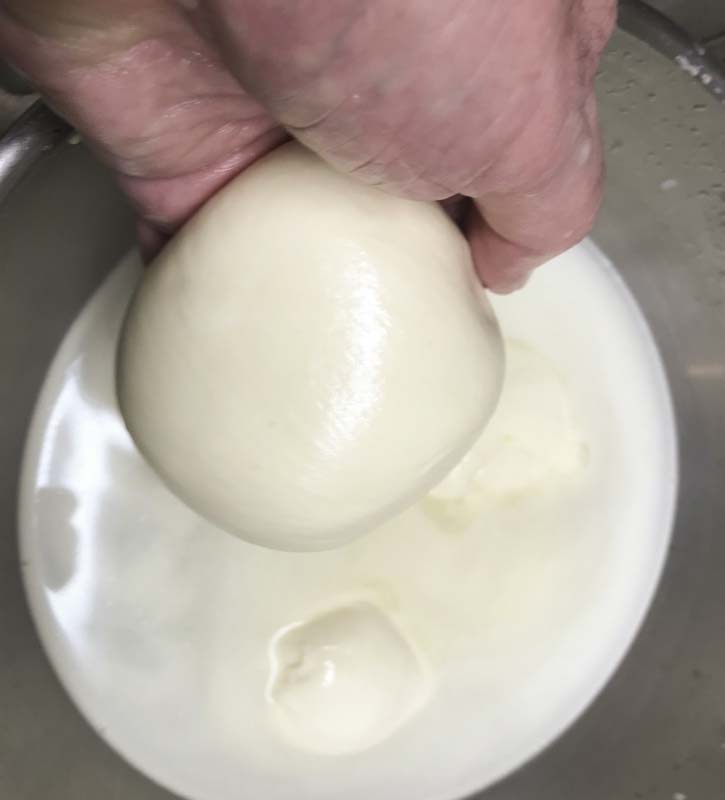
Pull the curd to a smooth rope-like strand (should also stretch under own weight). Fold it double and stretch again. Repeat a few times but don’t overwork it. Fold it back into a flat piece and begin to form a ball by tucking the corners under. Reheat the curd mass if needed in the hot water.
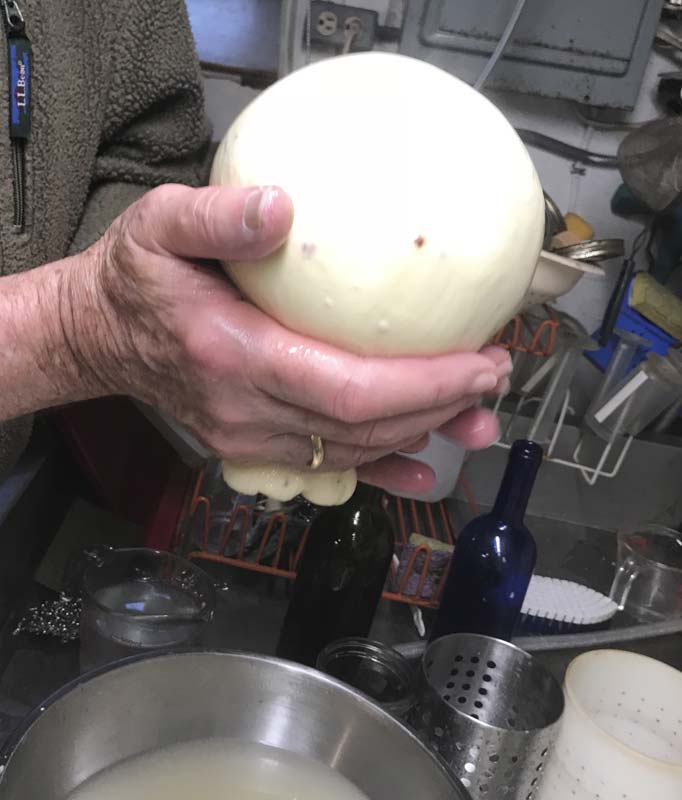
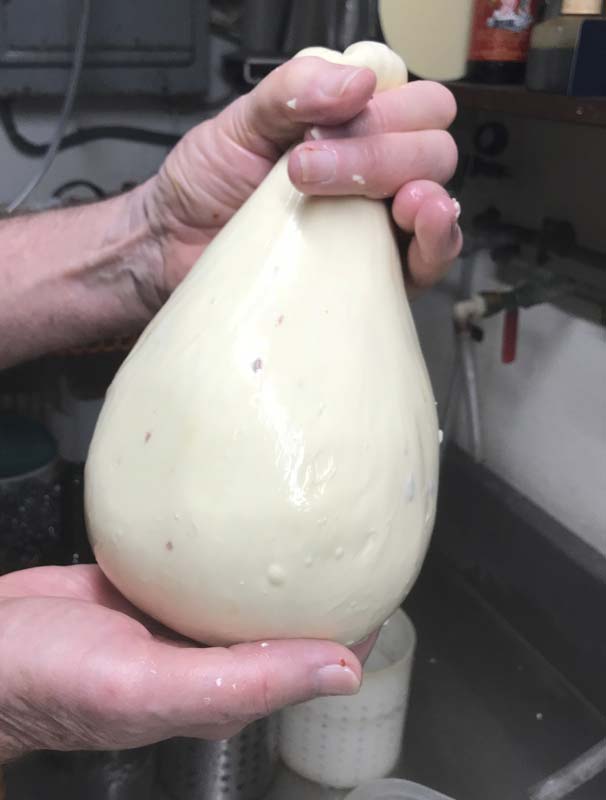
If your adventurous you can try to form the pear shape with knot on top, but if this is your first time with this I suggest to use a form and drop the hot curd mass with seam side down into the mold and spare yourself an overworked cheese. You can lose a lot of moisture working the cheese. Place the mold and cheese back into the basin with hot water to help it settle into the mold. Turn in the mold several times while still hot.
In order to form the pear shape by hand, start by flipping the seam side down after you form the ball. Working with your fingers on the bottom, press the seam into the body while stretching the base of the ball and closing up that seam opening. Then begin to form a neck by squeezing the seam end into a knot. Holding the neck, flip it over and let the bulbous end hang and stretch slightly into a pear. Sounds easy but your results will improve with practice.
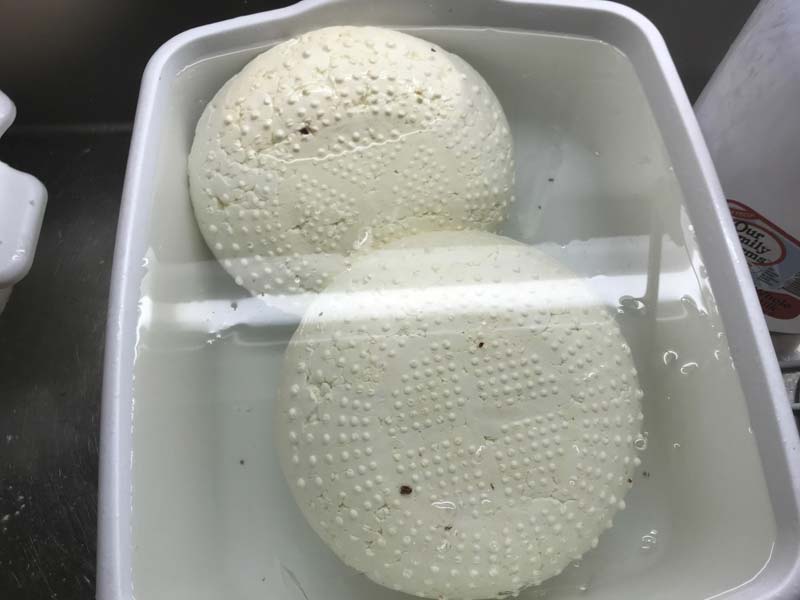
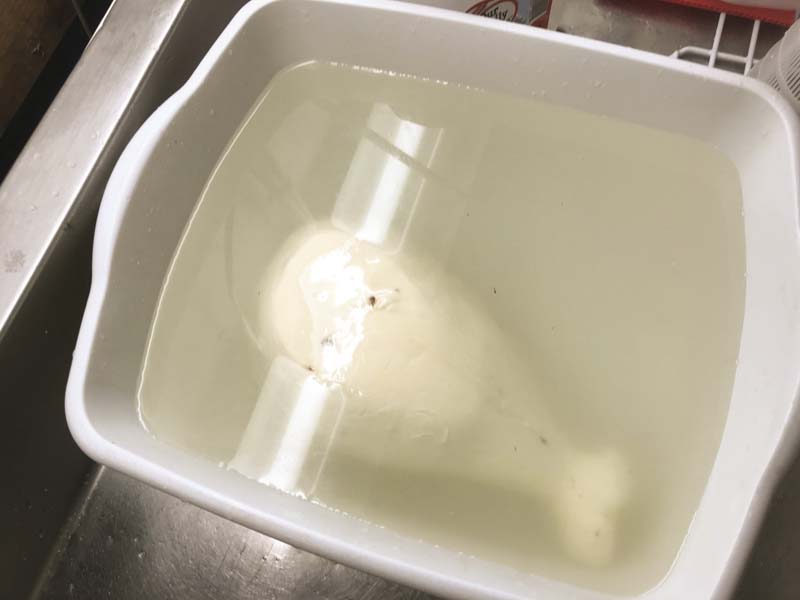
When finished with these, drop them into the ice water to firm up until they seem stable in shape. Those in forms chill in the forms. The free form cheese need to be suspended and turned for a bit in the cold water. To keep from forming flat surfaces. In larger productions they tie them in pairs and hang free under the ice water.
-
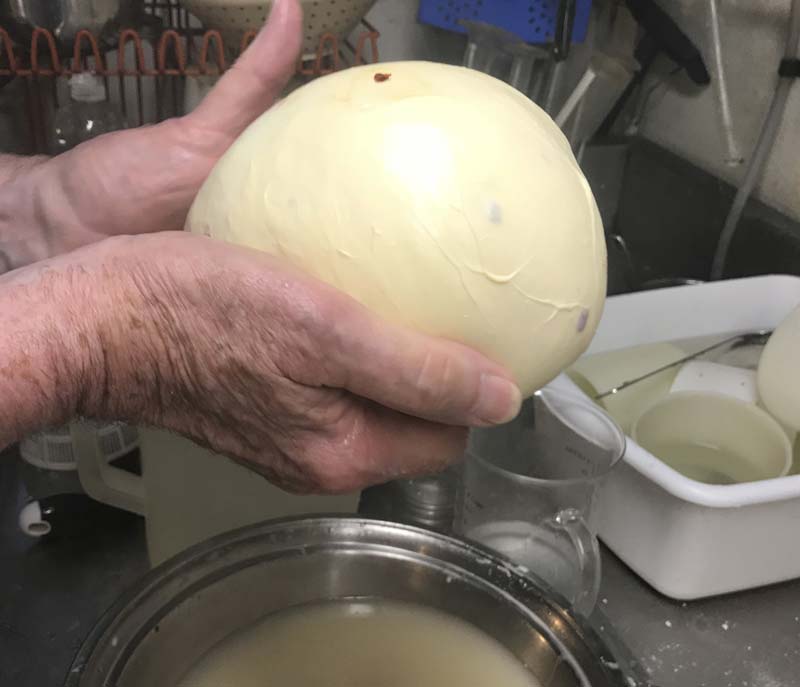
Salting
You should have a saturated brine prepared for salting this cheese. You can find all of the details you need on brining here.
A simple brine formula is: 1 gallon of water, 2.25 lbs of salt, 1tbs. calcium chloride (30% solution), and 1 tsp. white vinegar. The brine needs to be kept at 50F at all times including the brining as well as storage.
If you filter the brine after use and add enough salt to saturate again you can use it over and over.
The cheese now needs to be set in the brine for about 1 hour per pound of cheese. Remove forms before brining. The cheese will float above the brine surface so sprinkle another teaspoon or two of salt on the top surface of the cheese. Flip cheese and re-salt the surface about half way through the brine period.
At the end of the brine bath, wipe the surface and allow the cheese to surface dry for a day in a cool area (65-70F) with free movement of air. Do not let it darken or begin to crack.
-
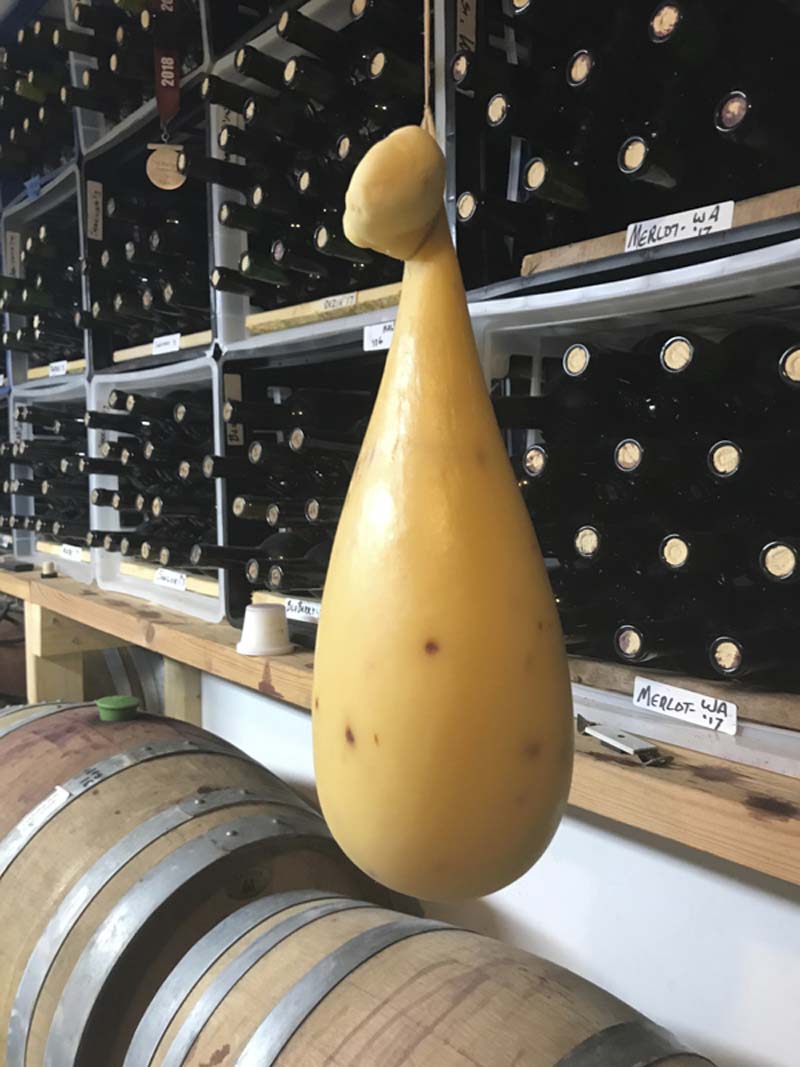
Aging
The cheese can now be moved to an aging space with a temperature of 52F degrees with 75-80% humidity.
A natural rind is typical of most of these cheeses. If aging for more than a few days, ambient natural molds will begin to develop. You can keep this down with a periodic wipe of light brine (6% - made by adding 1 part saturated brine to 2 parts water). Do this as often as needed.
Once the rind seems dry a light coat of EVOO will help keep the surface clean. However some traditional producers simply allow the mold to grow and brush the surface before sales.
For Provola the aging time can be anywhere from one week to a month or longer. It will be quite mild and soft as a young cheese and become drier and with more character as it ages.
Cheese Making Supplies
Related Products
You May Also Like


