


Canestrato Italian Basket Cheese Recipe
A thick outer rind leads to the superficial striations left from the traditional wicker basket where the curd is set. The flavor is sweet and delicate and tends toward slight tanginess when fresh, its customary form when consumed as a table cheese.
-

Yield
1 Pound
-

Aging Time
~4 Months
-

Skill Level
Intermediate
-

Author
Jim Wallace


Ingredients
Total price for selected items: Total price:

Instructions
A Recipe for Making Canestrato
I have chosen to make this cheese with cows milk since ewes milk is so hard to come by in our area but the following recipe can easily be applied to ewe or goats milk. Even a blend would be great.
If using ewes milk, you may need to decrease the culture/rennet for the higher proteins, some trials may be needed.
The recipe for this cheese will make two 1-1.5 lb cheeses and will also produce about .5 lb of the best Ricotta ever.
We do not advise less than 2 gallons of milk when makig this cheese, because aging will not be as consistant if surface to mass ratio becomes too high.
For a larger 6 gallon batch use the following amounts of culture and rennet:
- 1 Packet of C101 Mesophilic Culture or 1/4 tsp MA011 Culture
- 1/16 tsp TA61 Culture
- 7.5-8 oz prepared Y1 Bulgarian Culture
- 3 ml Single Strength Liquid Rennet
-

Acidify & Heat Milk
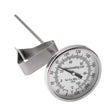
Begin by heating the milk to 90F (32-33C). You do this by placing the milk in a pot or sink of very warm water. If you do this in a pot on the stove make sure you heat the milk slowly and stir it well as it heats
Once the milk is at 90F the culture can be added. To prevent the powder from caking and sinking in clumps sprinkle the powder over the surface of the milk and then allow about 2 minutes for the powder to re-hydrate before stirring it in.
Let the milk sit quietly for 60 minutes to allow the culture to begin working.
-

Coagulate with Rennet
Now add the single strength liquid rennet.
The milk now needs to sit quiet for 35-40 minutes while the culture works and the rennet coagulates the curd. The thermal mass of this milk should keep it warm during this period.
The first signs of a coagulating gel is apparent at 15 min. but wait for the final firm curd at 35-40 min.
When the rennet has formed a good curd, you will see that by lifting the curd with the flat blade of the knife, a very smooth clean break occurs. The whey that fills this cut should neither be too clear (late on the cut) nor too milky (cut too early).
-


Cut the Curd
Here we can decide whether we want a young table cheese or a late ripening cheese with more character. Rice to wheat size grains for long aging and 3/8 inch for young cheese.
I begin breaking the curd up with a pre-cut of about 1-1.5" horizontal cuts at right angles. I then allow this to rest for 3-5 minutes, just long enough for a bit of whey to rise and the cut surfaces to heal slightly.
I then continue the cut with a large whisk, cutting slowly at first and then more quickly until the entire mass of curds is somewhere between a corn and barley size.
Once the curd has been evenly cut, rest 10 min. for whey to rise. Stir just enough to keep the curds from consolidating.
-


Cook Curd & Remove Whey
Now it is time to begin drying out the curds. This will be done by increasing the heat slowly Begin the Scald. For a young cheese 114-116F (45-47C) is good but for longer aged (drier cheese) raise the temperature to 120-122F (49-50C). This should be done slowly over 30 minutes to reach the target temperature and may be extended to 45-50 min. if the curds are still soft.
The curds will firm up from the heat and stirring over 30 minutes. Developing from what you see in the left photo to the appearance of what you see in the right photo.
The final curds should be cooked well through and should be examined to make sure that enough moisture has been removed. A broken curd should be firm throughout and the curds should have a moderate resistance when pressed between the fingers.
When this point is reached the curds can be allowed to settle under the whey.
You can now remove 1/3 of the whey and begin heating that whey to make Ricotta.Once the whey is removed, hold the final temperature and continue stirring for another 30 minutes. Then allow the curds to settle and hold the curds for another 20-30 minutes for the final acid to develop.
-


Form the Cheese
The curd is now ready to transfer to the molds which should have been sanitized and ready. I usually heat the molds with hot water or whey just before transferring curds. The forming can be don simply by transferring hand fulls of the partially drained curds into the forms.
Note that I have not used any cheesecloth in these forms because the weave is fine enough to wick the whey away (pun intended).
A firm hand pressure can be used to consolidate the curds. Once in the forms, a 3-6 lb. weight placed ontop will help consolidate the curds. The residual heat from the curd should keep the consolidating curds warm while you now focus on the ricotta production. After about 10-15 minutes the curd should be consolidated enough to flip in the forms. They should already be well on their way to forming a cheese of character.
-


Ricotta (optional)
By now your initial whey has been heating. Add the remaining whey left behind from the curd transfer to the already warm whey and quickly heat to 185 while stirring (At about 170-175 you should note tiny flecks beginning to form in the whey). Once it reaches 185, then allow the hot whey to sit for 15-20 minutes while the ricotta begins to form and float to the surface.
Note: Because of the sweet character of the whey and the amount of butterfat that goes with it , I find that this is some of the best Ricotta my friends have ever tasted and I now find that it is almost too good for traditional Ricotta recipes such as lasagna and pies. I normally serve this by itself for dessert or with honey drizzled over it and darkly toasted pine nuts on top.
-


Re-Heat Formed Cheese
One of the unique aspects of the making of this cheese is the final re-cooking while in the forms. In several visits I have seen the cheese makers place the new formed cheeses back into the vats of hot whey where the ricotta had been made. I find that this tends to heat the curds and cause the cheese to consolidate very well forming a tight paste and eliminating any small, internal mechanical openings. I find that when doing this the hot whey begins at 150-160F and then cools down over the 60-90 minute period of heating the cheeses in their forms before removing them.
If you do not make the Ricotta from this whey, you can simply use hot water at 150F to reheat the forms in their baskets.
Once the cheeses have been re-cooked, they are ready to continue their acidification process as they cool down over the next 24-48 hours. It should be noted that the Thermophilic bacteria has been working very slowly if at all while the temperatures of scalding are over 115F. As the cheese cools down slowly into the ideal temperature range for Thermophilic bacteria (98-115F) the primary acid development occurs. Keeping the cheese at a moderate to warm room temp over the next 24-48 hours will help this along. No salting wild take place during this period.
At this point you can see that the cheese has formed quite well and displays the character of these traditional basket molds.
-


Salting & Aging
You will need a saturated brine prepared for salting this cheese, find all of the details you need on brining here.
A simple brine formula is:
- 1 gallon of water
- 2.25 lbs of salt
- 1 Tbs calcium chloride
- 1 tsp white vinegar
- Bring the brine and cheese to 50-55¡F before using
The final cheese is ready to be brined and aged. 2 nice wheels of Canestrato and a fine batch of ricotta to show for the days work.
At the end of the resting phase the cheese is ready for a 24 hour brine bath. If making one large cheese this can be extended to 48 hours.
This cheese is quite dense and needs the extended time to acquire its final salt level.
Once the cheese has been salted it can then be moved to the aging space. Holding the temperature at 54-58F and moisture at 80% will produce the final cheese in 4-12 months depending on final moisture and the complexity of flavor desired.
Cheese Making Supplies
Related Products
You May Also Like


