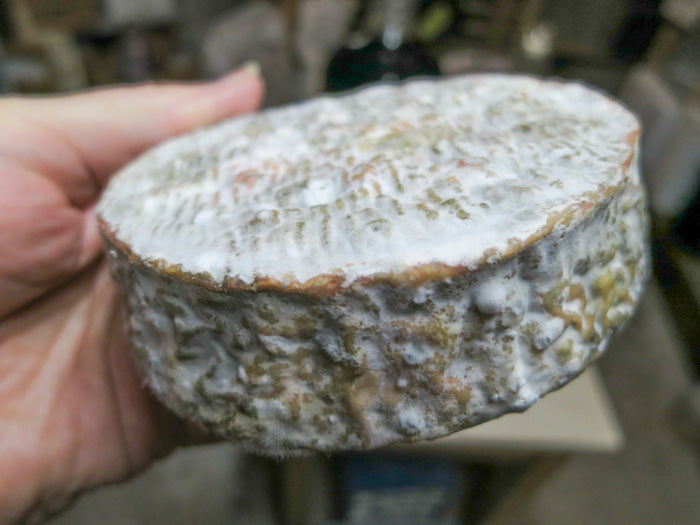
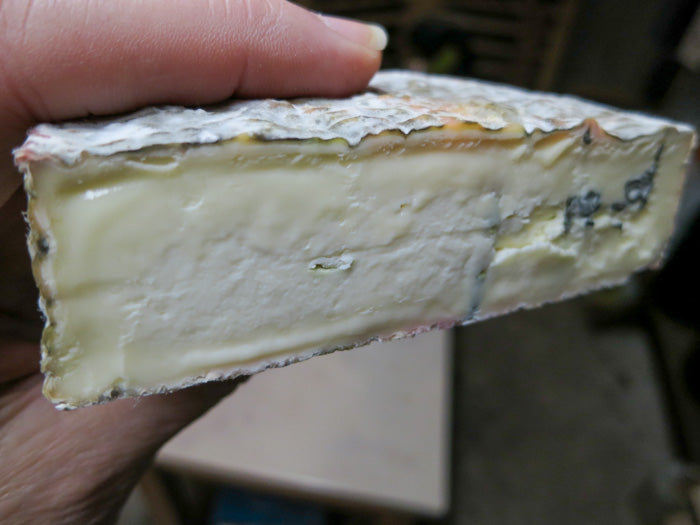
CamBlu Recipe

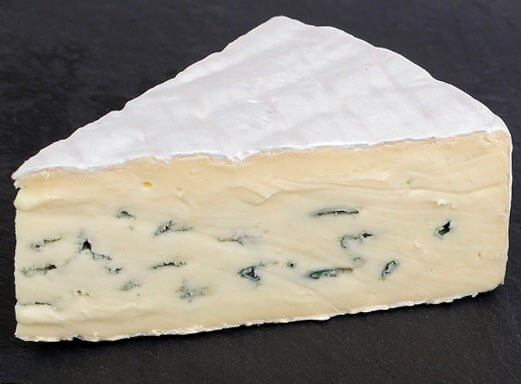
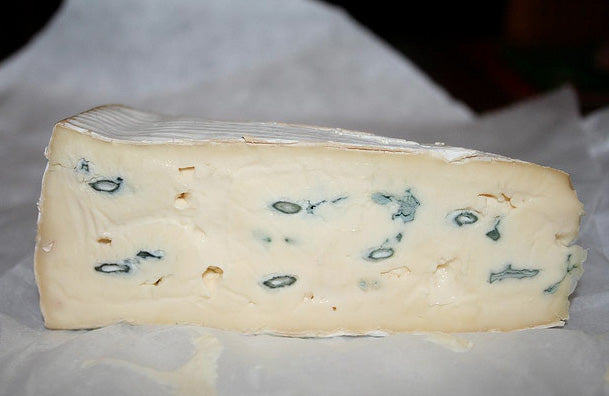
CamBlu is a rather modern style of cheese. This recipe is a great opportunity to experience making a hybrid cheese by combining two separate styes, Camembert with a mushroomy rind and soft paste with the added flavor from a mild Blue Cheese inside. The Blue simply melts into the creamy Camembert when this cheese is ripe.
  • Yield

    3 Pounds

  • Aging Time

    ~2 Months

  • Skill Level

    Intermediate

  • Author

    Jim Wallace

Ingredients

Ingredients

2 Gallons of Milk (not ultra-pasteurized)

8-12 oz Heavy Cream

Equipment

Total price:

Instructions

Step 1 Acidify & Heat Milk

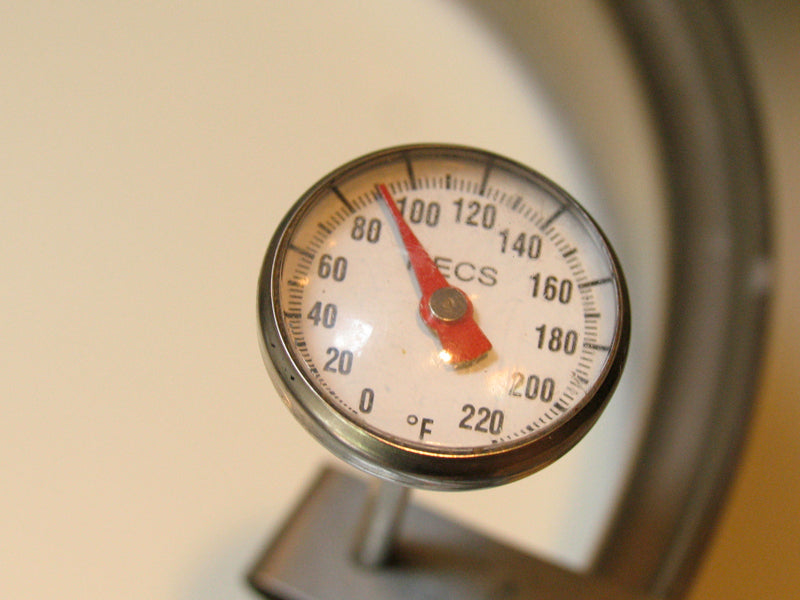
Begin by heating the milk to 90°F (32°C). You do this by placing the milk in a pot or sink of very warm water. If you do this in a pot on the stove, make sure you heat the milk slowly and stir it well as it heats.

Once the milk is at 90°F, the acidifying culture only should be added. To prevent the powder from caking and sinking in clumps, sprinkle the powder over the surface of the milk and then allow about 2 minutes for the powder to re-hydrate before stirring it in. Do not add any of the Blue or White ripening molds at this time.

Allow the culture added milk to ripen for 30 minutes while keeping warm. This is a shorter than normal ripening time because there will be a very long coagulation time for the bacteria to do it's work converting lactose to lactic acid. This will allow the bacteria to prepare for their work ahead.

Note: If preferred, either 1/4 tsp MM 100 or 1/4 tsp C11 Flora Danica can be used in place of the Buttermilk culture.

Step 2 Coagulate with Rennet

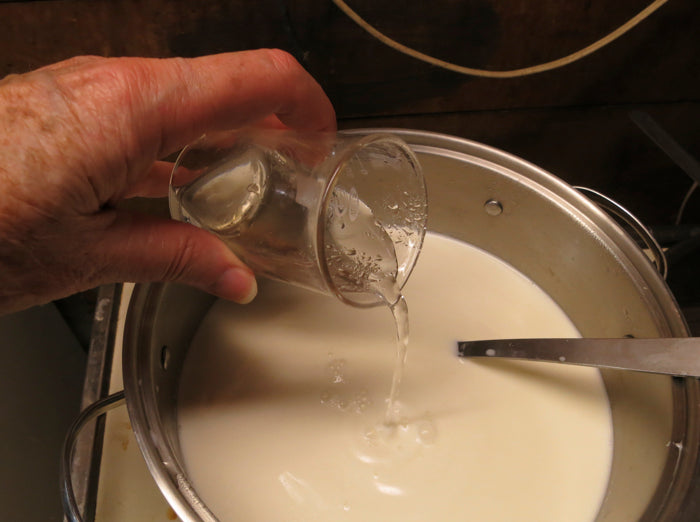
After the short 30 minute ripening, add about 1/4 tsp (1.25ml) of single strength liquid rennet.

The milk now needs to sit quiet for 90 minutes. This small amount of rennet was added to begin the initial coagulation in a short period of time (15-20 min.) BUT allow the final firming of the curd to continue for a much longer period of time (90 minutes or more from rennet addition).

This will result in a curd that tends to hold the moisture and fat better due to the stronger protein matrix.

You will notice the milk beginning to thicken slightly in about 18 minutes, but continue to allow to set for the full time. The thermal mass of this milk should keep it warm during this period. It is OK if the temperature drops a few degrees during this time. The long coagulation time here is to loosely hold more of the water in the curd and to allow a moister curd to be transferred to the molds.

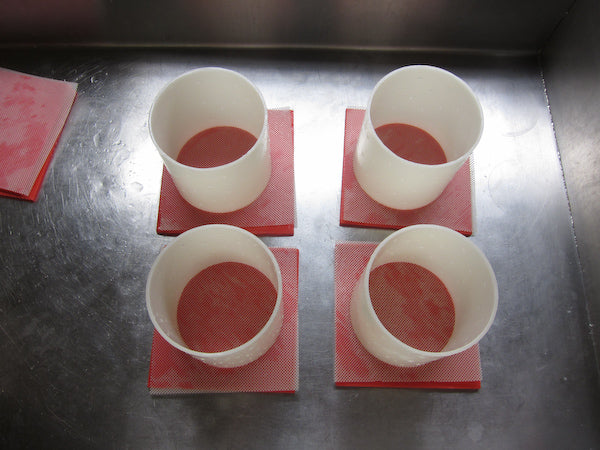
While waiting for the coagulation, the forms, draining mats, and boards need to be sanitized and prepared for the curd transfer. I do this here by submerging in 145°F water for several minutes.

Step 3 Cut Curd & Release Whey

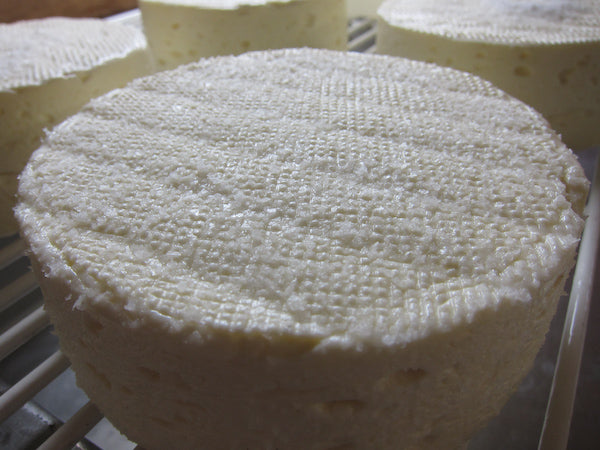
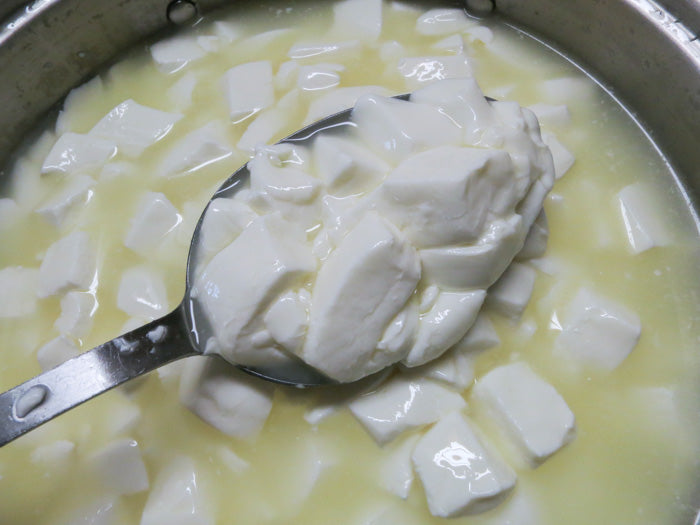
A departure from traditional Camembert or Brie will be noted once the curd has formed. In the traditional cheese, little to no cutting was needed, but to preserve some air space in the interior, a typical blue production step is needed here.

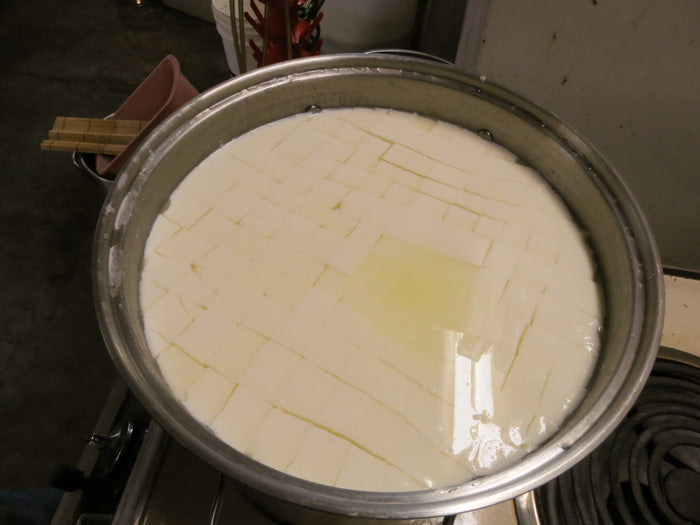
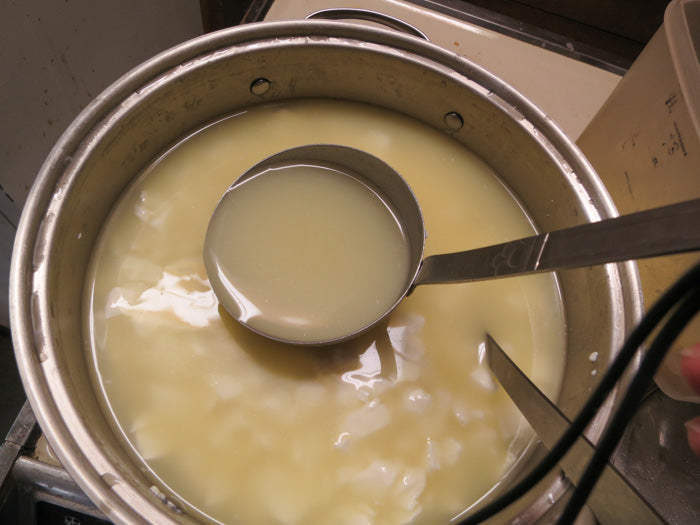
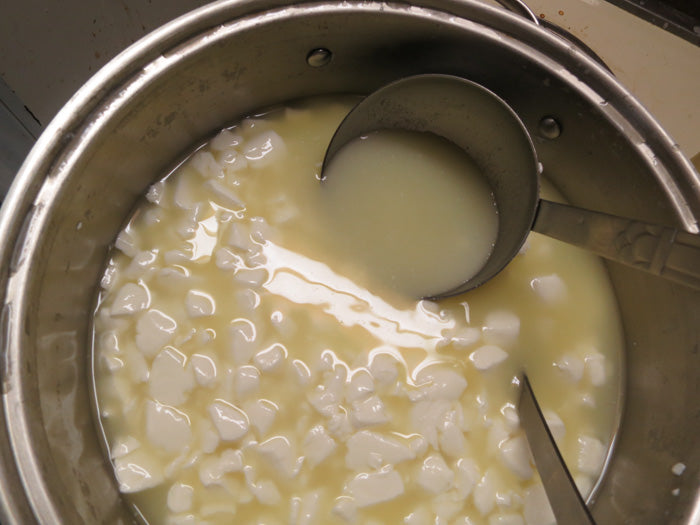
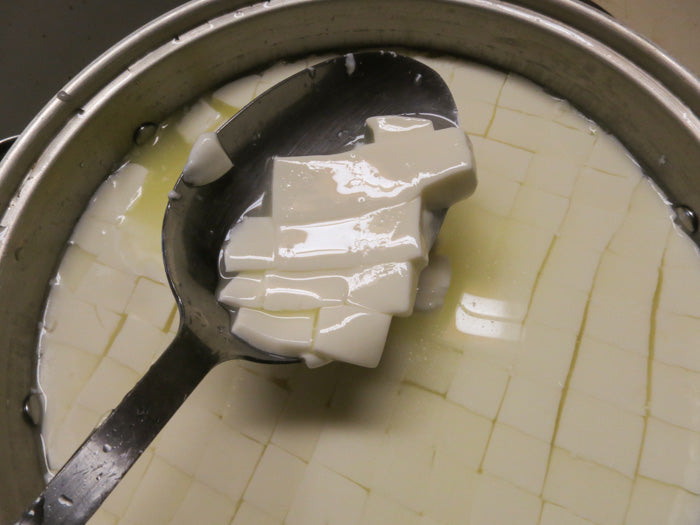
The curds should be cut to about 3/4 inch cubes and then very gently and slowly stirred. This will be focused on drying the exterior of the curd while still preserving the high moisture internally. This gentle curd movement should continue at 90F for about 20-30 minutes and I emphasize the slow and gentle. The actual stir time will depend upon you and the milk you are using. It may take a few batches to get it right so observe what is happening and take lots of notes.

Essentially, you are looking to preserve as much moisture inside the curds for the final cheese and at the same time hardening the curd exterior enough so that they leave a bit of air space (nooks and crannies so to speak) when molded. The blue needs air to do it's magic.

Step 4 Begin Forming Cheese

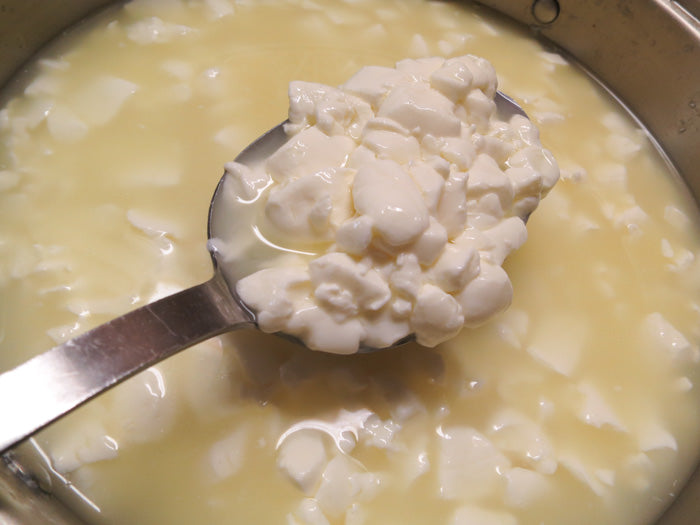
Once the curds have developed the proper character, it is time to move them to the molds for draining and further acid development. The curds should now have a drier exterior with a slight skin formed while still retaining lots of moisture inside. When placed in the molds, they should not be expected to consolidate as well as the traditional Camembert or Brie.

Normally, I would use 4 of the Camembert molds for this cheese but since we have left more whey behind during the stirring and hardening, I find that 3 molds will work best here. Actually I find it provides a taller cheese which I like better for this style.

The forms should have been sanitized and ready on the draining table at this point.

Begin by settling the curds and removing about 20% of the whey before taking the first of the curds to the molds. It is best to use a slotted spoon or ladle for the transfer because excess whey will carry off the blue mold you will be adding.

Transfer about 1/2-3/4 inches of curd to each form making sure the base is covered.

Step 5 Add Blue Mold, Finish Forming

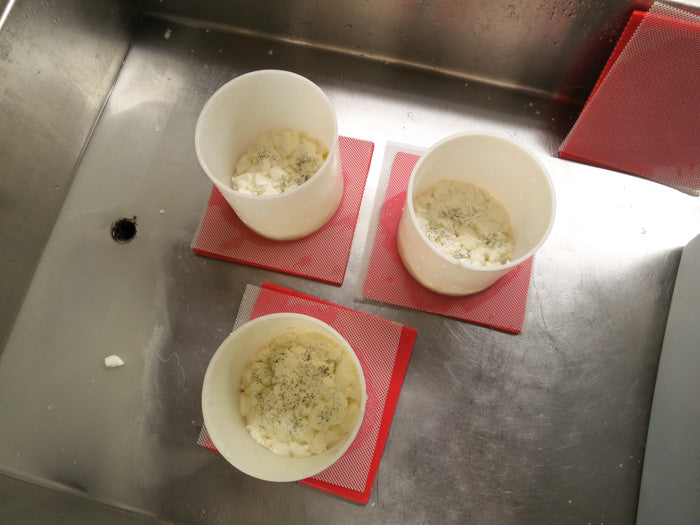
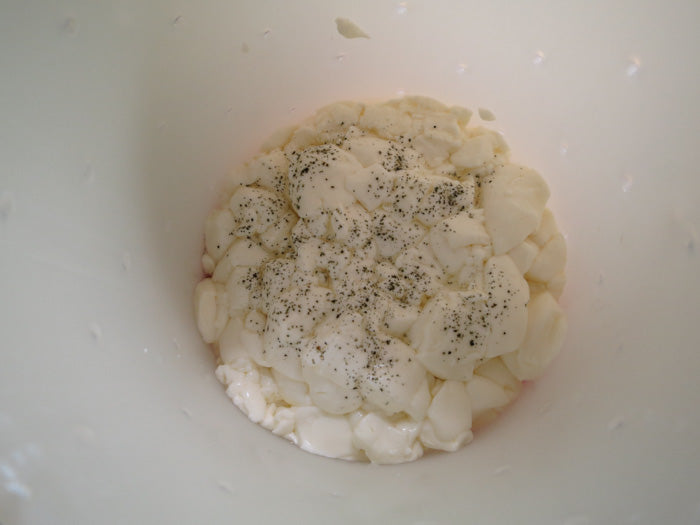
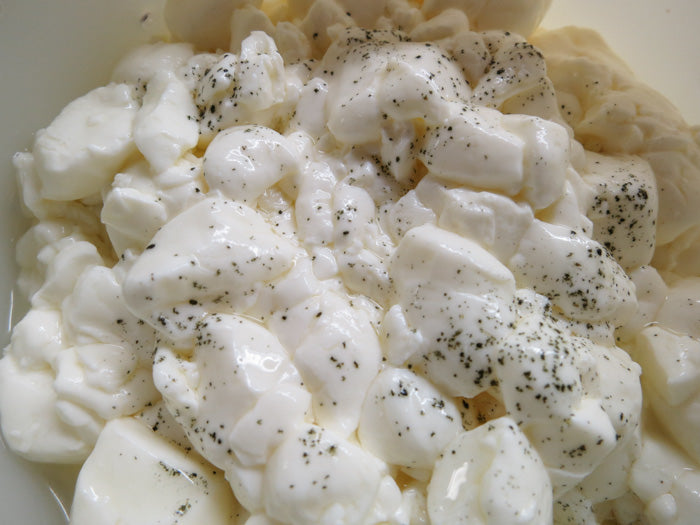
  • Taking just a pinch (~1/64 tsp) of the Penicillium Roqueforti, carefully sprinkle as evenly as possible across the surface, trying to keep in from the edges (avoids blue on the exterior of the cheese).
  • Transfer another 1/2-3/4 inches of curd to the mold.
  • Follow this with the same blue addition as in step 2.
  • Continue these layers until you have just enough curd for a final top layer of curd.
  • Add the final 1/2-3/4 inch layer of curd to encapsulate the blue inside the cheese.

Note: I have found the easiest way to distribute the blue is to use a small amount on the tip of my 1/8 tsp measure and to lightly tap the edge to get a little pepper shaker look to the surface as I fill the mold in layers. A little blue will go a long way.

If the curd will not all fit, wait until enough whey has drained and add the remaining curd - but I usually do not have a problem with this.

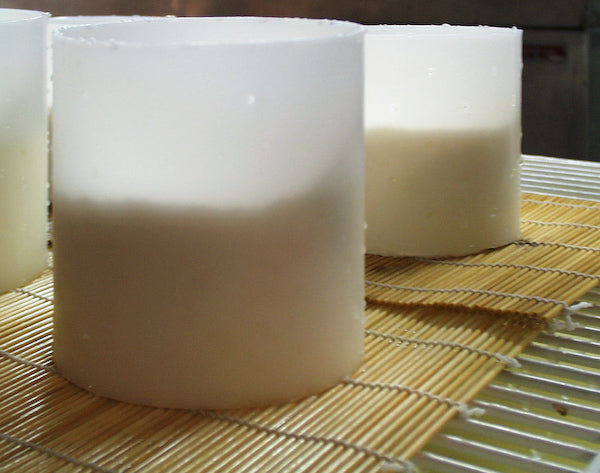
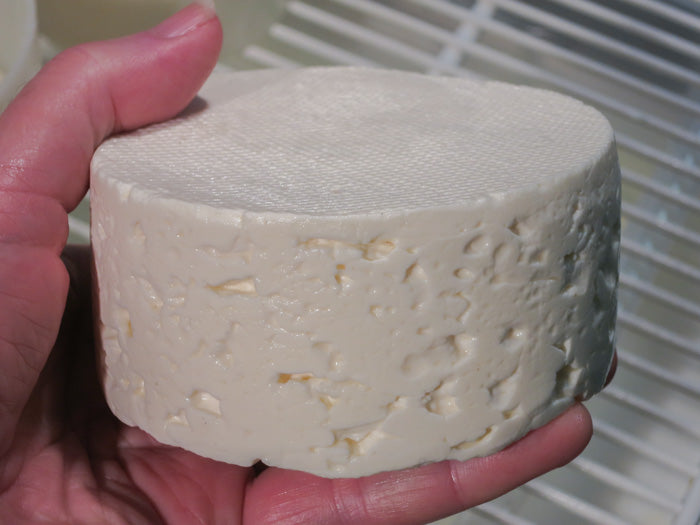
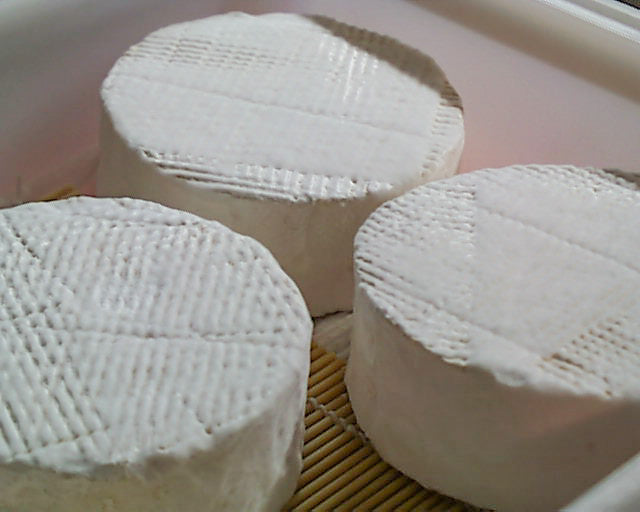
The blue distribution should be light and not extend to the edges as shown above.

Step 6 Draining the Whey

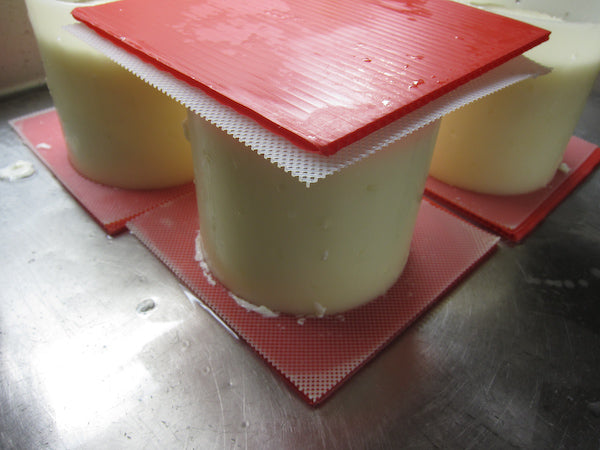
The next stage is to allow the whey to drain off as the acid production continues. During this, the forms need to be turned on a regular basis. The way to do this is to place another draining mat and board on top of the form then carefully and quickly flip it over. This is best done before the curd settles too far into the mold. The curd mass should drop evenly to the new draining surface with no breakage. This initial turn will set a nice smooth surface for the final cheese.

The turning of the cheese needs to be done several times during the draining process to assure an even drainage of the curd.

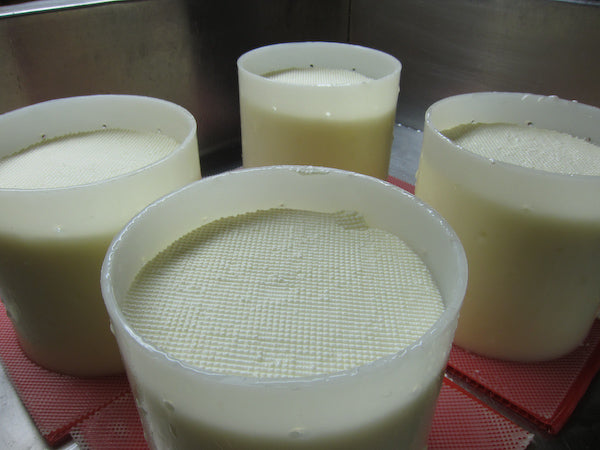
By the next morning, the cheese should have drained to about 1/2-1/3 of its original height and the final acid level should be correct. I do try to keep the curds warm (68-72°F) during this period to assure the proper whey drainage. I use an insulated sink here with an insulated pad and board to keep the temperatures good for acid development and drainage (70-75°F). A pan or bottles of warm water would also be good for keeping the temperatures during cooler weather. A simple insulated cooler would also work for this.

Note the open surface in the photos above. This will run through the cheese body and provide plenty of air space for the blue to grow.

Step 7 Salting

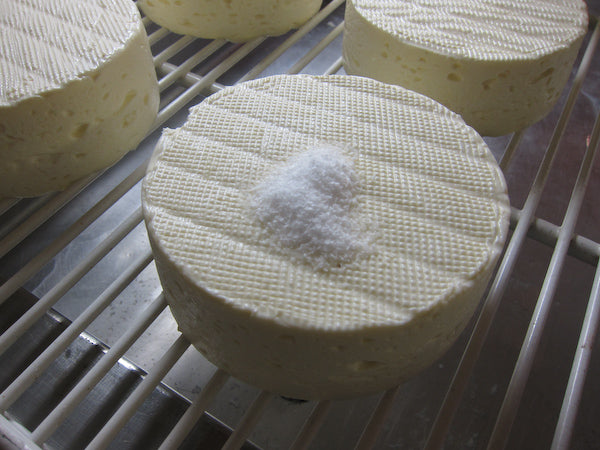
At this point, I remove the form and then add the first dose of salt to the surface of each cheese. 1/2 tsp of a medium crystal cheese salt is added and then evenly spread over the surface. This can then be lightly spread to the outside edge as well. There will be less salt on the edge but the next application will also be applied to the edge and that will even out the distribution. When finished, place back in forms with salt side up and leave until the salt dissolves in the cheese moisture and eventually into the cheese.

In about 4-6 hours, flip the cheese and repeat on the other side.

Step 8 Drying & Aging

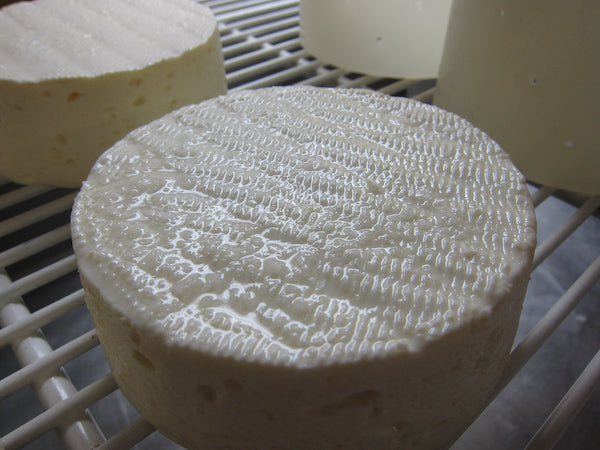
Drying the cheese: The next morning (day 3) the mold can be removed and the cheese placed on a dry surface to begin the drying phase. This should continue until all surface moisture is done. In humid areas a small fan may be needed. This is best done in a room of 58-65°F and 60-75% moisture. Turning several times during the drying will also help.

Note: If the cheese is moved to the aging area before the proper draining/drying phase is complete, excessive moisture will cause defects such as mucor or blue mold and increased protein breakdown at the surface resulting in runny cheese during aging.

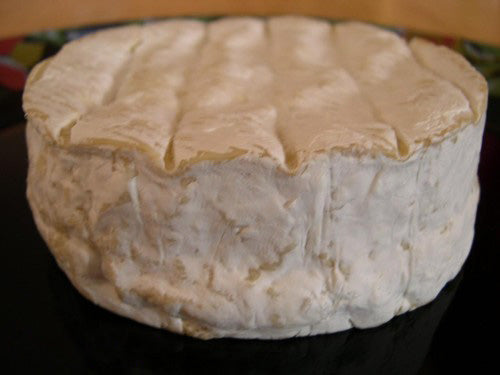
The aging space: Once the cheese surface is dried (about 1-2 days after draining has completed), it is time to move to the aging area. This should be maintained at 92-95% humidity and 52-56°F. The cheese should be turned once or twice daily at this phase. Failure to do this may result in excess mold growth growing into the mats and tearing the surface on removal.

To maintain this high level of humidity, I use plastic trays with covers and bamboo draining mats to provide air circulation under the cheese.

Step 9 Aeration for Blue Mold

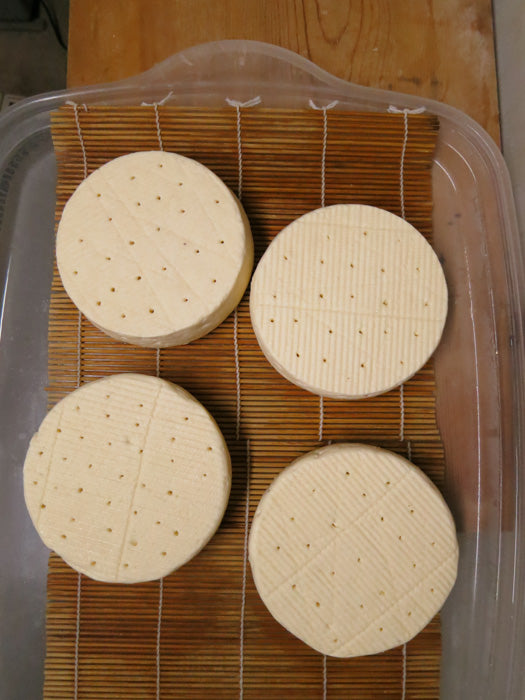
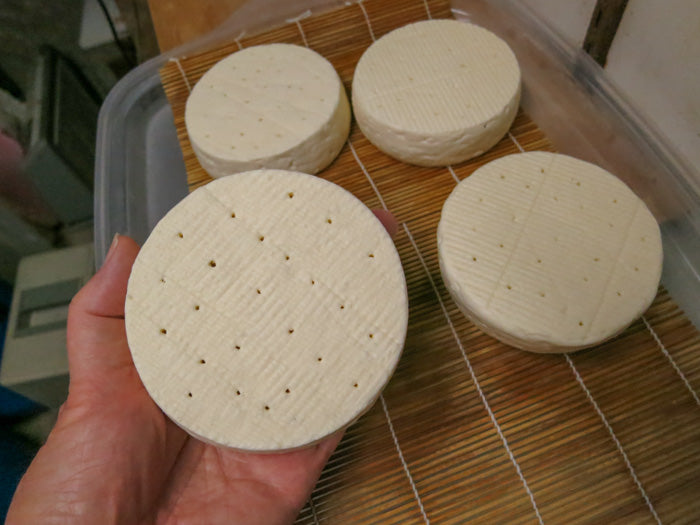
About 1-2 days after moving cheese to the aging area is the the time to pay attention to the ripening molds. The first thing we will do is make about 20-25 holes in the surface of the cheese, going in at least mid way or further. I use a 1/8 inch stainless steel probe that has been flamed and cooled to eliminate any free bacteria riders. The blue is already in the cheese body and just needs air to do its work now. Make sure you do both sides.

Step 10 Inoculation of While Mold

As mentioned previously, if these molds had been added to the milk or sprayed on earlier in the process, their growth would soon spread to the holes and grow over these to block the air needed by the blue.

About 1-2 days after the cheese has been aerated, it is time to spray the white molds onto the surface. A very fine aerosol spray bottle is needed for this. Mix about 1/4 tsp salt into 4 oz. of water and add 1/8 tsp of Penicillium Candidum and 1/32 tsp of Geotrichum into this and allow it to re-hydrate overnight.

The next morning you can spray lightly onto the surface of the cheese, taking care not to get the surface too wet. Allow the surface to dry slightly then return to the aging space

Step 11 Ripening

The cheese is now ready to ripen. Return the cheese to its ripening area and turn it at least once a day. I have seen the candidum grow aggressively enough that I needed to turn twice daily. In about 7-10 more days, the white surface should have developed to a full cover. At this point, it should be placed in an area of 42-46°F but higher humidity. This will slow the ripening and allow the enzymes being produced by the molds to do their work.

If you find that the geotrichum/candidum is growing over the aeration holes for the blue, you may find that you need to punch the surface again to aid the blue growth.

The blue mold will be ripening from the center out, whereas the white molds will be working from the outer surface in.

You should be able to determine the ripening progress by feeling the developing softness of the cheese. This final ripening should be in 30-45 days but it is best to monitor your cheese as it progresses.
Step 12 More Rustic Variation

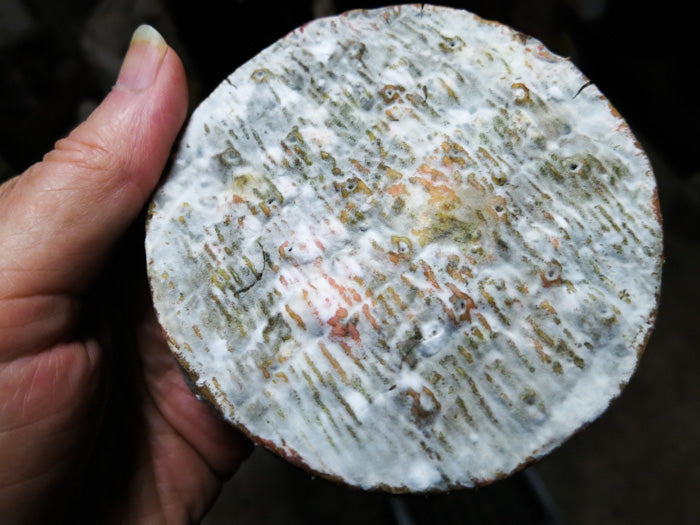
My initial goal was to produce one of these beautiful snow white surfaced cheeses like as we have seen in commercial productions. But, there is always room for experimentation. So, I just had to produce something a bit more rustic to see what would evolve.
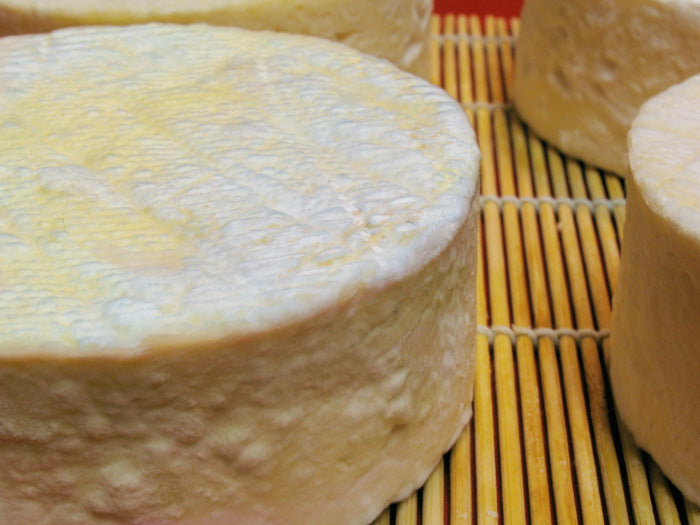
In the photos above I tried a cheese in which I added the entire cocktail of bacteria and molds directly into the milk to see how they would compete and I came up with this gem.
Initially it was dominated by blue but as ripening progressed I saw the geo and candidum begin to overgrow it. Towards the end of ripening some b.linens actually showed.

It was definitely rustic looking but the flavor texture and aromatics was even more complex than the cheese I had initially focused on.

I love to challenge my friends with cheeses like this and am always surprised at how willing they are to take it up. These were really 2 very different cheeses and I will make them both ways again.

CamBlu Recipe Info

This is a rather modern style of cheese and is a great opportunity for us to experience making a hybrid cheese by combining two separate styes.

  • A Camembert with its mushroomy rind and soft paste
  • Plus a bit of mild Blue Cheese inside.
  • The Blue will just melt into that creamy Camembert when it is ripe.

What inspired this recipe?

  • I have been fascinated by it and wanted to make it since I tried my first Bresse Blue in France.
  • I took a workshop with Roland Perin from Poligney, France (INRA). He is a true master of cheese making and one of the most sought after technicians in the world of cheese today. The workshop focused on blues and we brought up the challenges of this cheese, which he addressed.
  • I have had many folks ask about making it, so it has been on my list for awhile.
  • January is a long cold month up here in the Northeast and so, plenty of time in the cheese lab.

I thought it high time to put some of my research and experience on a page to share with you. but before I go on, I have to lay down the warning that this should be a cheese for the adventurous and somewhat experienced cheese makers. So, if you have made a few successful surface ripened cheeses such as Camembert, you should be ready for it. Don't you just love a challenge!

Cheese Making Supplies

Popular Products

Cheese Making Recipes

Recommended Recipes

How to Make a Cheese Cave
Aging

How to Make a Cheese Cave

Learn how to make a cheese cave right at home. If you want your cheese to ripen properly you have to make them a good home and take care of them like little bambinos.