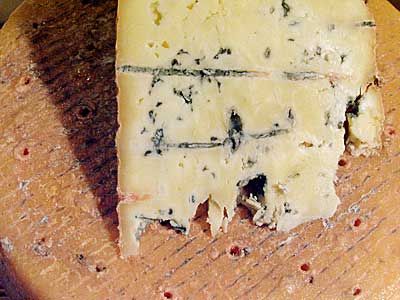
Gorgonzola Picante Cheese Making Recipe
-
Yield
7 Pounds
-
Aging Time
~6 Months
-
Skill Level
Advanced
-
Author
Jim Wallace

Ingredients
Total price for selected items: Total price:
Instructions
Traditional Gorgonzola
In this recipe we will make a cheese based on the very old, traditional Gorgonzola. The milk is set in the evening of the 1st day and ripened over night to produce a very acidic firm curd. This curd will make up the interior of the cheese and provide an open texture for blue to grow in.
On the morning of the 2nd day another curd is made, this time with less acid and a better ability to knit into a closed texture. On the afternoon of day 2 the curds are combined in a cheese mold, placing the fresh curd on the bottom, sides and top, and the firmer curds in the center.
-

Acidify & Heat Milk
Before you Begin, add 1/16-1/8 tsp blue mold powder to 1/2 cup of milk and allow to rehydrate, for several hours, before starting.
Begin with 5 gallons of whole milk and heat to 87F.
Add 3.2 oz prepared bulgarian yogurt, as starter. Add milk with re-hydrated blue mold. Let ripen for 30 minutes.
Note: The prepared yogurt should be made from our bulgarian yogurt culture. It is added as a percentage of the milk volume, .5% of 5 gallons is 3.2 oz.
-

Coagulate with Rennet
Add 3.5 ml rennet and let set 60-90 minutes, for a firm set.
-


Cut & Stir Curds
Cut curd into 1/2-3/4" cubes, let rest for 5 minutes, then stir for 1 hour.
-

Drain Overnight
Remove whey to the curd level, then transfer curds into a cloth bag or cheesecloth and drain overnight. Let acid develop at 68F for a final pH of 4.6-4.8.
-

Prepare Second Batch
The following morning, heat another 5 gallons of whole milk to 87F. Add .5-1% prepared bulgarian yogurt, let ripen for 30 minutes.
Add 3.5 ml liquid rennet, let set for 60-90 minutes.
Cut curd into 1/2-3/4" cubes, let rest for 5 minutes, then stir for 1-2 hours.
Remove whey to curd level, pH should be 5.9.
-


Mold Curds
Break up the drained curds, from the first day, into walnut sized chunks.
Fill cheese mold with the resh, second batch of curds, on bottom top & outside and the 1 day old curd in the center. Press the fresh curds down around the edges.
Flip the curds every 30 minutes to set the surfaces, keep flipping periodically until the following day.
-


Salting
This cheese gets a heavy dose of salt over the next five days, with a days rest in between each application. Alternate sides are salted AM and PM. The salting doses are distributed at 50%-30%-20%.
Begin Salting, total salt used is 4% of the cheese weight.
Distribute salt as follows:
- Late on Day3=50%
- Day5=30%
- Day7=20%
- Next day the outside curd pH= 5.4-5.2
Note how the salt melts into the cheese and forms it's own brine. It is important to use a coarse salt to control the rate of salt absorption.
Following the dry salting, the cheese will have a very rough hard surface feel and is ready for a long ripening in the cave. In about 3-8 days the dry surface texture will become somewhat moist and sticky as the salt moves to the interior. The temp should be about 52-56F and the Relative Humidity 92-97%.
-


Pierce The Cheese
At about day 10-18 the texture of the cheese will change becoming softer and the blue will begin to appear on the surface. It is now time to punch holes in the cheese surface to allow air to reach the blue inside.
With a sterile, #2 knitting needle, punch top side of the cheese on day 15 and the bottom side on day 20.
Note the development of a red rind forming. This is due to high moisture and a change in surface pH. This should be wiped down and RH should be controlled to prevent too sticky of a rind.
-


Aging
Ripen the cheese at 52-56F and 92-97% RH. Do not allow the rind to become too sticky, reduce RH% if neeeded.
After a nice slow aging in the cave for about 3-6 months the cheese will be ready to enjoy.
Cheese Making Supplies
Related Products
You May Also Like


