Yorkshire Cheese Making Recipe
Ingredients
- 2 Gallons of Milk (Not UltraPasturized)
- 1/2 Packet C101 Mesophilic Culture
- 1/4tsp Single Strength Liquid Rennet
- 1/2 oz Salt
- Calcium Chloride (for pasteurized milk)
Equipment
- Good Thermometer
- Knife to Cut Curds
- Spoon or ladle to Stir Curds
- Large Colander
- Butter Muslin
- M3 Small Cheese Mold
- Cheese Press
- Cheese Mat
- Instructions
- Yorkshire Info
- Reviews
- Q & A
A Recipe for making a cheese in the style of the Yorkshire Dales
This cheese has been on my radar here for some time now and in the end I have managed to make my own version of a cheese that to me seems to fit the profile. The research has come from no less than seven different recipes gleaned from different sources ranging from the 1700's to modern times. What I can conclude from all of this is that what we are making here is our own version of a truly regional cheese that has come through history a bit scarred but none the less very alive.
As I have done in the past, I have photographed a larger make but will give a recipe for a smaller home scale cheese using 2 gallons of milk.
Make sure to start this cheese early in the day since it will take about 6.5-7 hours from culture addition to final salting
-
Acidify & Heat Milk
Begin by heating the milk to 86°F (30°C). You do this by placing the milk in a pot or sink of very warm water. If you do this in a pot on the stove make sure you heat the milk slowly and stir it well as it heats
Once the milk is at 86F the culture can be added. This cheese needs a long slow acid development and therefore less culture than usual. Use 1/2 pack of the C101 culture for this. It's easy to split using a clean piece of foil and a sanitized dry knife: dump the culture into a neat pile in the center of the foil and split it evenly in two. Use 1/2 for the Wensleydale and the other half goes back in the pack (roll it tight seal with an elastic band or tape and into another sealable plastic bag then into the freezer, use within 6 weeks).
To prevent the powder from caking and sinking in clumps sprinkle the powder over the surface of the milk and then allow about 2 minutes for the powder to re-hydrate before stirring it in.
The curd should be kept quiet to ripen for about 60 minutes.
-
Coagulate with Rennet
Next add about 1.25ml (1/4tsp) of single strength liquid rennet.
The milk now needs to sit quiet for 45 minutes while the culture works and the rennet coagulates the curd. The thermal mass of this milk should keep it warm during this period. It is OK if the temp drops a few degrees during this time.
You should notice the milk beginning to thicken at about 15 minutes but make sure to let it sit quiet for the full time until a firm curd develops.
While you are waiting for the set, this is a good time to sanitize your draining colander/pan and cloth as well as the forms.
-
Cut Curd & Release Whey
Once a firm curd is established, cut the curds to 1/2" pieces, then allow to rest about 5 minutes before slowly stirring to keep the curd mass from consolidating.
Then stir gently every 3-5 minutes. This should be gentle movement of the curds from the bottom of the pot upwards, just enough to keep from matting.
-
Drying the Curds
If the temperature has dropped by the end of the previous 30 minute stir, then heat slowly back to 86°F.
These curds will NOT be cooked like a cheddar cheese but instead will undergo a 90 minute slow stir to keep them moving slowly in a bottom to top direction throughout the pot. Essentially the warmth and slow movement will cause the whey to be released. This will dry the curds before draining the whey.
The final curds should be cooked well through and should be examined to make sure that enough moisture has been removed. A broken curd should be firm throughout and the curds should have a moderate resistance when pressed between the fingers.
When this point is reached the curds can be allowed to settle under the whey
-
Remove the Whey
The dry curds can now be transferred to a colander lined with butter muslin. Pull the cloth together and tie in a tight knot. Turn the bundle over onto this knot and keep warm for about 30 minutes. During this time the curd will be consolidating into a firm block. Due to the smaller size of this curd mass, I augment the weight with a board and about 1/2 gallon of warm water to help the curds come together.
As shown above, I use a plastic tub that I have punched for drainage using a hot nail.
-
Cut Curd Mass
The consolidated curd should now be cut into 2 inch blocks. Once cut, gather the blocks of curd in the cloth and tie in a bundle as before. Continue to keep them warm.
Over the next two hours open the bundle every 30 minutes and break each piece of curd in two and retie as before. This will be a total of 4 breakings and with the curds being broken should end with about 1/2 inch pieces for salting.
When the final bundle is open, the curds should be all well separated. If they have matted somewhat make sure that all curds are broken to about 1/2 inch and are easily separated. This step will prepare a dry curd with little moisture and ready for salting.
-
Salting
The final curd should now weigh about 2-2.25 lbs. Measure out the salt at about 1.5% of this weight (about 1/2 oz.). Sprinkle about half of this on the curds and mix it well into the curds until it is absorbed by the curds. Then add the other half of the salt. Mix in well again
-
Molding
The curds can now be packed into the form lined with cheesecloth using a firm hand pressure.
Once this is done, pull the cloth evenly out all the way around the mold to avoid wrinkles and creases. Then fold the cloth over the top of the mold as even as possible.
Set the follower on top of this and place the mold into a cheese press. You are ready for pressing the curds.
-
Pressing
For pressing we should begin with a small amount of weight overnight and then increase the next morning
- 12 hours at 5lbs (overnight)
- 5 hours at 20lbs (begin next AM)
- 12 hours at 40-50lbs
The cheese should be removed from the press, unwrapped, turned, re-wrapped, and put back to the press at the above intervals to assure an even consolidation. At each turn you will notice the cheese has formed a smoother surface and rests lower in the mold.
The rate of whey running off should be very slow. The form should show tears of whey weeping from the form very slowly. When this stops you can increase the weight slightly.
The final cheese should be well consolidated at the end of this. If the curds still have openings or cracks appearing in the surface, then press longer and perhaps with more weight.
Note the various stages of curd consolidation as the cheese undergoes the pressing
-
Finishing & Aging
The cheese can now be waxed for aging. For details on waxing, please click here
The cheese can then be placed into your aging space at 54-58°F and 80-85% moisture.
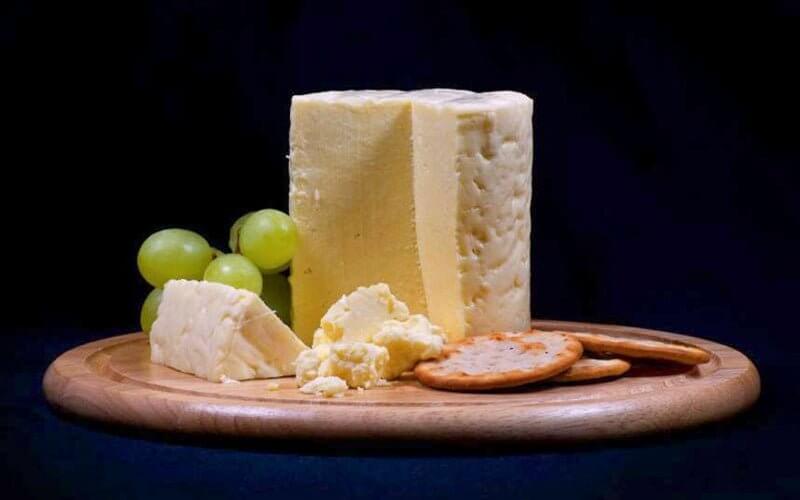
The cheese can now be aged for 2-4 months and it will ready for your table.
For a more authentic finish to the cheese, you can opt to try applying a cloth bandage to the surface as show in the photo here. The details for this can be found on our cheddar page.
The Yorkshire Dales
Through the centuries there have been many names ascribed to this cheese, but the one that has lasted is Wensleydale® . Just the name will bring a smile to many faces. Folks will perhaps remember this as being the favorite cheese of Wallace and Grommit, or Mr. Wensleydale from the famous Monty Python skit, "The Cheese Shop".
What most people might not know, however, is that this is one of the most respected cheeses in the British Isles. It's roots go back many centuries to the early monastic colonization of England's North country.
Wensleydale® has always held a very important place in the history of cheese in England, even though production slid to low levels following the 2nd World War.
The Yorkshire Dales comprise a majestic area of northern England, tucked up against the border of Scotland and just to the east of the famous Lakes District. The area is known for its open expanses and fields, separated with ancient rock walls. It is perfect country for walking in, so many people are drawn to the region on weekends and holidays. This is also an area that I have spent much time photographing over the years.
At the end of a damp day, a warm pub, a pint of beer, and a bit of local cheese spells perfection!
What is Wensleydale® Style Cheese
The cheese is typically a creamy but crumbly cheese with a slightly acid taste. The unique flavor is said to be the result of the rocky limestone, producing qualities that no other region can seem to match. These soils give the cheese a gentle flavor, beautifully balanced by an underlying and slightly tart freshness.
The forms will vary considerably from tall forms to low flats, and vary in weight from 10-12 lbs down to smaller cheeses weighing only a pound or so. Today, some are sold in plastic wrap and others are still done in the traditional cloth bandage.
A Bit of History
This style of cheese was first made by French monks from the Roquefort region, who had settled in the Yorkshire Dales during the 12th century. They built a monastery and brought with them a recipe for making cheese from sheep's milk. Having come from the Roquefort area, it would be a reasonable expectation that this cheese might have been very similar to the base cheese for their Roquefort cheese, but there seems to be no record of this.
As the land was cleared into broad valley pastures into the 14th century, cows' milk began to be used instead, and the character of the cheese began to change. A little ewes' milk was still mixed in, since it gave a more open texture, and allowed the development of the blue mold. At that time, Wensleydale was almost always blue, while the white variety was almost unknown.
Wensleydale® was originally a seasonal cheese, made in farmhouses throughout the dales of North Yorkshire. In the early 1900s, there were hundreds of farms in these valleys. An interesting note is that the rennet used was made locally from the vells of the cows, and still referred to as prezzur, directly taken from the French présure used by the Monks that made the cheese originally.
As production increased over the years, the blue Wensleydale® was rarely seen. The monastery was dissolved in 1540 but the local farmers continued making the cheese right up until the Second World War.
Towards the end of the 1800s, a merchant named Edward Chapman, who had been buying cheese of varying quality, decided to take control by buying the milk from the cheese making farmers and making the cheese himself. Farmers found it easier to sell liquid milk than make it into cheese and some might argue that the advent of this large creamery reduced the number of cheese makers in the region. This large dairy in the small village of Hawes became known as the Hawes Creamery and was the primary producer of Wensleydale® cheese..
Beginning as early as 1933, prior to World War II, the government controls of cheese making demanded that most milk in the country was directed to the making of "Government Cheddar."
The Wensleydale® Creamery
Hawes Creamery carried on producing cheese through the two World Wars, providing stability for the farmers as a regular milk customer. However, Hawes was taken over by a larger dairy and, in 1992, they decided to close the creamery and move Wensleydale production to Lancashire. As much as this hurt the Yorkshire folks, it became an even more serious threat to the local dairy farmers. The creamery managers, workers and local people got together and arranged to take over Hawes Creamery. The independent Hawes Creamery was set up in 1993 and has prospered ever since. The larger dairy that closed them down shut their doors in 1994.
Today The Hawes creamery is known as "The Wensleydale® Creamery" and promotes themselves as "the only maker of Real Yorkshire Wensleydale® cheese". The only other producer of this style of cheese I could find was the Ribblesdale Cheese Co. which is a small scale family operation in the nearby Yorkshire Dales.
According to Randolph Hodgson of Neils Yard Dairy: "The Wensleydale® Creamery is a larger producer than we are used to working with, but despite their size, they still make their own starters and buy from local Dales farmers. In addition, the recipe they make for us (cloth-bound, traditional rennet, less starter and matured warmer) is a terrific tasting cheese."
Variations in Style
Traditionally, this cheese was made from ewes milk and most commonly as a blue cheese in a taller format. In its time the blue was said to have an even better quality reputation than the Stilton cheeses and was much in demand throughout England. However, the blues today are very hard to come by.
As the cheese was eventually converted to a cows milk cheese, the focus tended more towards the non-blue cheese and eventually evolved to a smaller flat format with diameter much greater than the height. Apparently it was due to larger scale operations and streamlining of the process but it became harder and harder to get the cheeses to go blue.
When the blue cheese was dominant, the difference in production was always for a more moist curd with less acid going into the final forms and the cheese was usually a tall form with natural Cloth Bandage.
- Reviews
- Questions
- cheese
- history
- many
- advice
- number
- directions
- much
- addition
- effort
- confidence

We just tasted my first try at this cheese, and it was a huge success! My husband said, "You've found your cheese!" The directions were clear and helpful, and the photos are great. It's given me the confidence to venture on in the world of cheese. Thanks so much for all of the great recipes and advice. You're indispensable to this fairly new cheesemaker!
Re-posted from 2018: I have made many, many of the cheesemaking.com recipes, but the Yorkshire-style is my most beloved (and the one I go back to time and again). I know why it is also favored by Wallace and Gromit! This tangy, creamy, and crumbly treat is quite versatile. It is a welcome addition to any cheeseboard--simple to elegant--and can easily transform/accompany a number of dishes. I find a tall, narrow mold makes a beautiful display piece. As I cannot presently venture out to the true Yorkshire Dales, I feel a homemade version is worth the effort. It may not be a cheese for beginners to start with, but everyone can certainly enjoy its rich and famous history. Make sure to click on the 'Info' tab for a most fascinating story. --Cheesereserves: Kathy Love, Tucson, AZ
I am a huge fan of all of Jim Wallace's recipes. I have made lots and lots of them and I'm always trying new ones. This "Yorkshire Cheese" recipe is really challenging BUT,,, OH SO WONDERFUL!!!!!!! It is one that simply MUST be attempted more than once since any cheese made from a recipe this tough will only improve once a more thorough understanding is reached. I have a cow and make cheeses that I sell at a Farmers' Market weekly. This cheese is so delicious and popular it has found a place in my "regulars". People ask for it, I enjoy eating it, and although it is exhausting by the time I am done making it, I look forward to making it over and over again. It is a challenge but it is worth every ounce of work involved. Just ask the folks who buy it from my table at the Keene New Hampshire Farmers' Market!!! Thanks again, Jim,,,,, I can ALWAYS count on YOU!!!!! Thanks for all your hard work , knowledge and intelligence! I'm not quite sure that you know how much you are appreciated,,,, but,, You Are. We have customers who are visiting from Europe who comment on how authentic my cheeses taste and I could have never achieved this degree of success without your recipes!!!!