


Alpine Tomme Recipe
-

Yield
2 Pounds
-

Aging Time
6+ Months
-

Skill Level
Intermediate
-

Author
Jim Wallace


Alpine Tomme Recipe Info
About Alpine Tomme
Mountain Origins of Alpine Cheese
Cheese Making Approach
Breaking Tradition
Ingredients
Total price for selected items: Total price:

Instructions
A Guideline for Making Alpine Tomme
I have made the cheese in both 2 and 4 gallon batches. The pictures below will show a 4 gallon batch (because I feel that they ripen a bit better in the larger format) but a 2 gallon batch is what I have outlined below in text. The smaller batch size may be easier for a home cheese makers kitchen.
-

Acidify & Heat Milk
Begin by heating the milk to 92°F. You do this by placing the milk in a pot or sink of very warm water. If you do this in a pot on the stove make sure you heat the milk slowly and stir it well as it heats.
The culture I have chosen here is a Thermophilic Culture (C201) made up of two types of bacteria. These have an optimum temperature of 108-112°F but we will start them working at the lower temperature end of their range. This will give them a slower start which is in line with the long acid development phase for this cheese and will be helpful in preserving the calcium in the curd resulting in a more elastic curd.
Once the milk is at 92°F the culture can be added. To prevent the powder from caking and sinking in clumps sprinkle the powder over the surface of the milk and then allow about 2 minutes for the powder to re-hydrate before stirring it in. The milk should then be allowed to rest quiet for the next 90 minutes while the culture comes to life.
-

Coagulate with Rennet
Then add about 1.75ml or ~1/4 plus 1/8tsp of single strength liquid rennet.
The milk now needs to sit quiet for 60 minutes while the culture works and the rennet coagulates the curd . The thermal mass of this milk should keep it warm during this period. It is OK if the temp drops a few degrees during this time.
The milk will begin to thicken at about 20 minutes but wait for a full 60 minutes before the curd is cut.
During this time it is a good opportunity to make sure the molds and cloth are clean and sanitized.
The Large Cheese Mold (M2) works well with this recipe.
For a 2 gallon batch, I highly recommend the Stainless Steel Cheese Mold (E28) because its wider base will finish with a profile more suited to the Alpine style cheese which is wider and shorter.
The Small Cheese Mold (M3) will also work for a 2 gallon batch except that your cheese will be taller, more like a cheddar than the traditional tomme shape.
-


Cut Curds & Release Whey
Once the curd has firmed up and is ready to cut it is always best to split the curd as shown below and examine the cut. It should have nice clean edges and the whey that rises should be neither too milky nor should it be very clear. The firmness of the curd will determine how well the curd will hold the following cut as well as how well it will do with the stirring that follows and not break up smaller (they will actually become smaller due to whey running off but you do need to keep them from breaking smaller in the process).
I begin the breaking up of the curd with two vertical cuts at right angle about 3/4-1" apart. It will look like a checkerboard. Allow the curd to rest after this cut for 3-5 minutes while the cut edges heal slightly (less fat loss in the next cut and stir). You will see some whey rising to the surface as well as in the cuts as this happens.
The next cut is perhaps the most difficult. It is to cut the columns of curd into even sized pieces.
Our final curd size will be between 1/4-3/8 in.This can be done with a flat ladle or spoon but I have found a tool that works best for the smaller curd sizes associated with Alpine style cheeses as well as Parma or any cheese require a smaller curd size.
This is basically a large whisk with thin wires and a long handle I have added to it. It is fashioned after the Spino, a tool I see used often in Italy. This is not an item we carry in the shop here though. Remember cheese making is a craft involving resourcefulness and a bit of creative thinking.
The key to using this tool is to go slow initially in breaking up the curd mass, focusing on the wires doing the cutting. As the curd is broken the cutting can become a bit faster until you achieve the desired size. Remember the curd will lose moisture during the cook/stir phase and become smaller.
-


Cook the Curds
Now it is time to begin drying out the curds. Once you have cut the curd to the desired size, begin using the spoon to slowly keep the curds moving. Initially this is a slow movement from the bottom to the top and do remember to pay attention to the bottom edges where curds can collect and consolidate. You do not want that, the concept is to keep the curds moving and free so that whey can be released. If they consolidate into large clumps, you have defeated the work put into cutting.
Begin this phase by stirring the curds slowly, about 5-10 minutes, just enough to dry the surfaces slightly and firm the curds for the cooking to follow. Reheat to 92°F if the temperature has dropped.
The heating of the curds will be done by taking a page from the Gouda process to slow the acid development. Effectively this will reduce the lactose supply and limit the food supply for the culture, thus making for a sweeter cheese:
- Allow the curds to settle to the bottom of the vat/pot
- Remove about 25% of the whey
- While stirring add back the same amount of hot water (120-130°F) slowly over about 20 minutes
- The final temperature should be about 108-110°F.
When this point is reached, the curds can be stirred for another 15-20 minutes to reach their final dryness. The test for this (often referred to as the 'grip') is to grab a small hand full of curds and apply firm pressure to consolidate the curds. Then with the thumb try to separate the curds. Final curds should show that they will resist separation just slightly (it may take a few trials to get the feel for this).
-


Gather the Curds
Once the final curd is ready, allow the curd mass to settle and remove the whey down to the level of the curd mass.
I then use a large Medium Grade Draining Mat (MATMED) cut to about half the size of my pot circumference to gather the curds into a compact mass with a little bit of hand pressure. The pictures below should make this clear. The draining cloth is then spread on the bottom and the curd mass rolled into the cloth, the corners, ready to remove the entire curd mass to the mold awaiting (remember you should have done that way back at the beginning). The concept for this consolidation in the whey is to help get a very tight curd mass so that thee will be few mechanical openings in the final cheese. It is a character of all Alpine style cheeses.
Next transfer the curds in cloth to the awaiting molds, open the cloth and press firmly into the mold, pull up on the cloth to remove wrinkles and prepare to press the cheese.
-


Mold & Press Curds
Now the cheese is ready for pressing once the follower is positioned.
Remember that this is for the 2 gallon sized batch, you can double these weights for the 4 gallon batch (same timing)
Always, for pressing we should begin very light and slowly increase the press weight to a moderate level:
- 30 minutes at 20lbs.
- 30 minutes at 40lbs
- 3 hours at 50lbs
- 3 hours with no weight but keep warm still***
***At the beginning of pressing there is very little acid produced so there is a lot of lactose left in the cheese mass. This must be fermented before the cheese is salted to avoid late fermentation problems in the aging. Therefore the temperature must be kept warm 80-85°F to allow the culture to complete its work and ferment the remaining lactose.
This is where the larger form has its advantage because the thermal mass of the larger cheese holds its original heat longer. Remember the cheese was removed from the vat/pot at 108F. I found that a couple of bottles of warm water around the press and an old towel for insulation keeps the larger size warm if the room is not too cold.
For the smaller cheese You can surround the cheese with bottles of warm water and perhaps some more insulation (one of those 'space blankets' would be a good idea) or better yet inside a large insulated cooler that will take the cheese plus press and water bottles.
-


Mold & Press Curds (cont.)
The rate of whey running off is simply a matter of drops and not a stream of whey being released. This is a good rate of whey removal during pressing and will slow even more as the residual free moisture is released. The form should show tears of whey weeping from the form very slowly. When this stops you can increase the weight. The cheese should be removed from the press, unwrapped, turned, rewrapped, and put back to the press at the above intervals. To assure an even consolidation. At each turn you will notice the cheese has formed a smoother surface and rests lower in the mold.
Initial press weight and the cheese after the first lighter pressing. There are still many open spaces in the surface
The curd is still warm and elastic and subsequent pressing will eliminate the openings. Also the culture is still active and whey is being released. All of this will make a tighter and smoother cheese surface with each turning.
As shown above the cheese surface becomes smoother and the body becomes tighter as each pressing progresses.
-

Salting
You will need a saturated brine prepared for salting this cheese, find all of the details you need on brining here.
A simple brine formula is:
- 1 gallon of water
- 2.25 lbs of salt
- 1 Tbs calcium chloride
- 1 tsp white vinegar
- Bring the brine and cheese to 50-55°F before using.
The cheese now needs to be set in the brine for about 1.5 -1.75 hours per lb.
The cheese will float above the brine surface so sprinkle another teaspoon or 2 of salt on the top surface of the cheese.
Flip the cheese and resalt the surface about half way through the brine period.
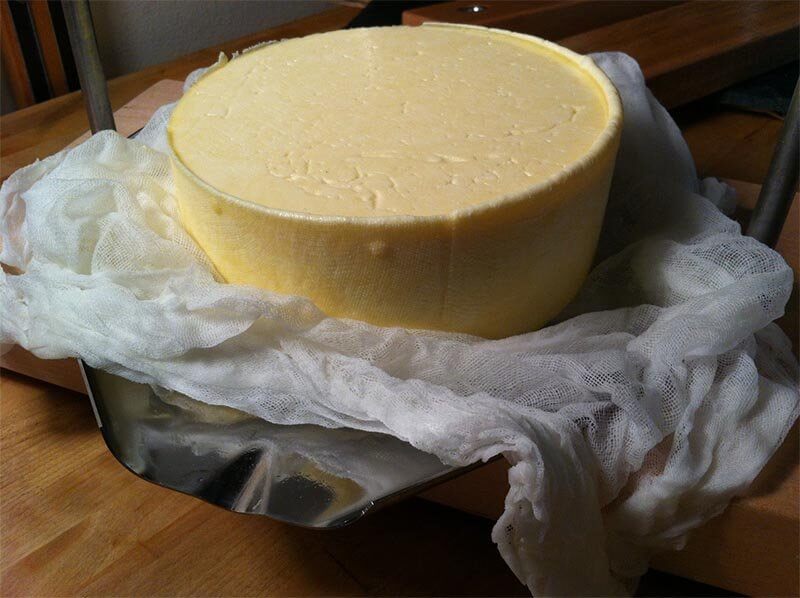
At the end of the brine bath, wipe the surface and allow the cheese to surface dry for a day or two before placing it in your aging space. The surface will darken somewhat during this time.
-

Aging
Once the cheese is dried down it can be moved to an aging space at a temperature of 52-56°F and 85-90% moisture. The moisture required is a little higher than easily maintained in a normal aging space so I use a have a series of covered boxes and trays for maintaining the higher moisture. With these the tops can be left open or closed to any degree to achieve the proper moisture.
I plan to age this with a natural clean rind. Due to the higher moisture in this cheese any existing mold will soon appear. Any mold that develops will need to be removed as soon as it appears and after a month or so the rind will be less desireable to the molds and the maintenance will decrease.
The surface maintenance can either be done with a dry cloth or brush or a cloth dampened with brine. After 2-3 weeks of rind formation a little bit of olive oil or mineral oil can be used on the surface to discourage mold as well as make it easier to remove when it does appear.
The cheese can now be aged for 3-6 months and it will ready for your table.
Optionally, the cheese could also be waxed for aging. For details on waxing click here. The final cheese may just not have the complexity of the natural rind.
Cheese Making Supplies
Related Products
You May Also Like


