


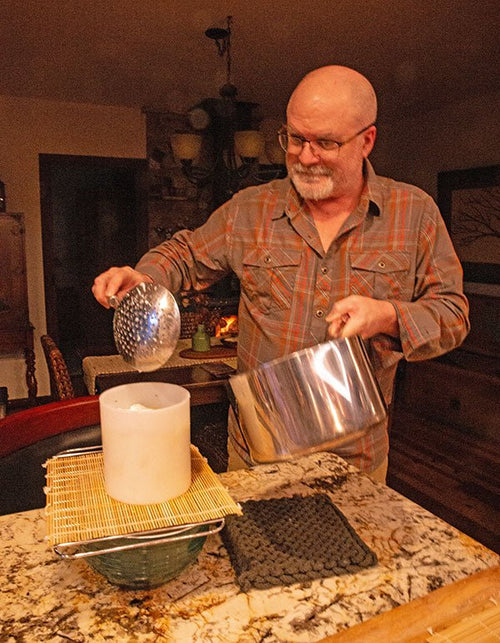
Yoel Blumberger with a 7 pound Castelmagno cheese he made and the peg mill he used when he made it.
We first met Yoel in 2019, when he sent us his directions for making a cheese drying box (Yoel’s DIY Cheese Drying Box). We interviewed him a month later (Yoel Blumberger in Tel Aviv, Israel). Then, 9 months ago, he sent us pictures and instructions for making his Humidity Control System.
Yoel is a retired systems engineer, specializing in computers. He has many hobbies besides cheese making, including surfing, skiing and traveling. In fact, he is a former national water polo player(!)
We are very grateful to him for sharing this with us. Anyone who has ever made Cheddar knows what a time-saver this peg mill will be.
Peg Mill for the Home Cheese Maker
Introduction
There are several cheeses, where in the process of making them, the curd is left to drain and dry a bit for a few hours and then they are milled. The crumbles are put into the mold and pressed. Such cheeses include: English Derby, Cheddar, Spanish Castellot and more.
Piedmont’s flagship cheese – Castelmagno (called the king of cheeses) is even more interesting because, in it’s preparation process, the curd is dried for about 10 hours and then cut into large slices, which are soaked in the whey for two days and only then are milled.
Some of the Castelmagno cheese dairies use peg mills for milling.
Some home cheese makers make it by hand, but this method results in uneven-sized crumbs and there is undesired pressure on the cheese while crumbling. Others use a knife that “injures” the crumbs, so this is not recommended at all.
The smallest peg mill in the market was too expensive (targeting professional dairies) for my small dairy, so, I built one. I am glad to share it’s construction directions with our community members – the home cheese makers.

General Description
The peg mill is a rectangular box open on top and bottom, along which passes a rotating axle. There is a row of short circular rods on each of the two long inner sidewalls and three curved rows on the axle.
When the axle rotates, the movement of the rods against each other mills the curd gently and the crumbles are gathered at the bottom on the surface where the mill is on. Since the rods have a rounded profile, they do not injure the curd.
Industrial mills are electric, of course. The one I built is manual.
The machine can be disassembled into parts so that it can be cleaned thoroughly. It will be a good idea to watch the short video of the peg mill before going on so understanding the instructions will be easier:
Materials
In general, there are two options in terms of materials. The construction directions are the same for both:
A. The expensive option. Uses high density polyethylene (otherwise known as UPE) for the construction of the box and axle (it is important to make sure it is food grade) and stainless steel for the rods. On AliExpress you can get the material for the box and axle for $100 (shipping fee must be added). The rods (cut to measure) bought locally will cost at least $80. So the estimated total is $180 not including shipping.
B. The cheaper (significantly…) option (mine). I used bamboo wood for the box (thickness (0.7″) 18mm taken from a kitchen chopping board) and rods (made from chopsticks). For the axle, I used hard wood (diameter 40mm, originally a rolling pin). The price of these together comes to about $40.
The last component needed for both options are screws (9) with flanged bolts. (See Fig 1)

Fig 1 – Screw with bolt
Cleaning. (Comparison of the two options)
The advantage of the first option (expensive) is that the peg mill can be cleaned in a dishwasher with a lot of water. The peg mill built from wood (cheap, second option) is being cleaned only with a small amount of water and a damp cloth or brush. The curd being milled is already relatively dry, so the work environment is not particularly damp, so the cleaning after milling is not a big issue.
If there is an intention to use the mill intensively, the first option may be preferable. Since I used the peg mill just twice until now, I cannot say anything about what happens over time, but I believe it will hold and stay in good condition. One can think of the cheap option as a prototype which, if works good, might be replaced by the expensive one.
Construction directions
Fig 2 shows a diagram of an upper view of the peg mill. Each box in the diagram is 1 sq cm (0.4 sq in) in reality.

Fig 2 – Top view diagram
As mentioned, the directions are the same for both options. I will describe the second option, wood-based.
1. Preparing the parts
A. Cut the four sidewalls of the box. The inner dimensions of the box are 28 x 16 cm (11 x 6.3 in)and the height is 20 cm (8 in) so needed are : 2 x 28 x 20 (0.8 x 11 x 8 in) and 2 x 19.6 x 20 (0.8 x 7.7 x 8 in) for wood with thickness of 1.8 cm (0.7 in).
B. Axle. A round roll from hard wood. Length is 28 cm (11 in) or 38 cm (15 in) depending on the connecting method seen later on. Diameter is 4 cm (1.6 in). A larger diameter is also possible, but then the width of the box must be adjusted.
C. Rods. 68 rods are needed. Length of 6.5 cm (2.5 in) and diameter of 3-4 mm (0.1-0.16 in). I used cheap chopsticks, which can be found in food shops, (they are free if you are a heavy Chinese food consumer….).
D. Screws and bolts. See Fig 1. Length of 4.5 cm (1.8 in) and diameter of 5 mm (0.2 in). Flanged bolts for easy opening and closing when taking the box apart. Eight screws are for the box and one for connecting one side of the axle.
E. Accessories. Creating the handle, according to your imagination and creativity.
2. Putting the parts together
A. Place the rods on the sidewalls. On the two long side walls (A and B in Fig 2), draw a line parallel to the long edge 9 cm (3.5 in) from the edge. Mark the position of the 13 rods on the line, starting 2 cm from the edge and with a space of 2 cm (0.8 in) between each other. (The blue rods are shown in Fig 2). See Fig 3.

Fig 3
Make a trial. Take another piece of wood, drill in it and make sure that the rod enters with pressure using a hammer. Drill a hole in each mark on the sidewall at a depth of 1 cm (0.4 in). Use a hammer for the insertion. Do not use glue.
B. Connect the axle. The axle has two ends. One connects to the box (E in Fig 2, left in Fig 4) and the other to the box and to the handle (F in Fig 2, right in Fig 4).
I engraved the axle on the handle end (reducing it’s radius) and on the other side, I used a screw to connect to the box. Those who do not have access to an engraver can use a screw on both sides. The screw on the handle side should be long enough to go through the sidewall and to connect to the handle. See both options in Fig 4.

Fig 4 – Axle options
Now, you have to screw the screw into the exact center of the side of the wooden axle (left side in Fig 4). Drill a hole in the wooden axle, in which it’s diameter is 1 mm (0.04 in) less than the screw’s diameter and screw the screw into it. If you are with the non-engraved version of the axle, repeat the same for the other side of the axle.
On the two smaller sidewalls (C and D in Fig 2), draw a line parallel to the short edge 9 cm (3.5 in) from the edge. Mark the middle of the line. Put both sidewalls together and drill a small hole through both of them. See in Fig 5 where to drill. Enlarge the holes to fit the screw.

Fig 5 – Hole in the small sidewall for the axle
C. Build the box. On each side of the two long sidewalls, two screws should be inserted, eight screws all together. Drill before screwing (to protect the wood from cracking) as explained in the axle section. See Fig 6. Drill holes in the two small sidewalls to connect to the long ones as seen in Fig 7.

Fig 6 – Long sidewall with rods and screws

Fig 7 – Short sidewalls. Holes for connecting sidewalls and axle.
D. Check. Now It’s time to assemble the box with the axle in place and check that everything is o.k. and that the axle fits into it and can turn inside.
E. Insert the rods into the axis. Disassemble to free the axle. The rods are inserted on virtual rings along the axis, each ring 2 cm (0.8 in) apart with the first being 1 cm (0.4 in) from the end. Each “ring” has 3 rods equidistant from each other. If you draw a layout on paper, it looks like in Fig 8.

Fig 8 – Template for holes in the axle
The length of the rectangle is the length of the axle. The width is the circumference of the axle. You can actually draw it, to “wrap” the axle and use a nail and a hammer to mark each point. The small holes created by the nail will mark where to drill and help to drill accurately.
If you want to check your accuracy before drilling, you can reassemble the box and check that the marks are passing between the rods of the sidewalls when the axle swivels.
Disassemble to free the axle and drill the holes. It is advisable to use clamps to hold the axle while drilling and to hold the drill vertically while drilling. Depth of the hole is 1 cm (0.4 in).
Insert a rod into each hole using a hammer. You should follow the rows (curves) from end to end, because the more rods are already inserted, the harder it is to find a way to support the axle because the rods that are already inserted are interfering. Creative, supporting ways must be found until the last rod is in place. After inserting the rods, the axle looks like in Fig 9.

Fig 9 – Axle with rods and handle
F. Make the handle. Here you can bring your own style and creativity. You can find a handle from another instrument and make an adaptation. See the handle in Fig 9, I plan to improve the handle to be more stylish (-: . If the axle is connected by a screw, you can force a bolt into a piece of wood in such a way that you can connect it to the axle and use it as a handle. The handle is taken off each time the peg mill is disassembled.
G. Final assembly. Insert the axle into one small sidewall then attach that sidewall to the two long sidewalls and then attach the second small one. The last step is connecting the handle and you are ready to mill!
3. Milling
Put the peg mill on a clean surface (stainless steel will be the best), bigger than the peg mill’s foot print because when you lift the peg mill, the crumbs that were held by the box and now set free and collapsing will stay on the surface. The bottom is the side that the rods are closer to, so when the axle turns, it continues to work on the crumbs that have already passed the rods. You have to change the turning direction every half minute. If you work on big quantities, transfer the crumbles to a bowl to free the space under the rods. If you are a strict cheese maker, you can pass the crumbs again through the machine, double milling.
4. Fixing the peg mill
To operate the peg mill, you need both hands – one for the handle, and one to hold the frame. You also need to transfer the curds from a bowl into the peg mill. Therefore, a good idea is to find a way to fix the frame to the surface on which it stands. Find a clamp from an old obsolete machine or improvise another creative solution.
Pictures:
Castelmagno cheese from 16 liters of milk (4.2 gal), before, during and after milling.
A. After drainage and drying (10 hours)

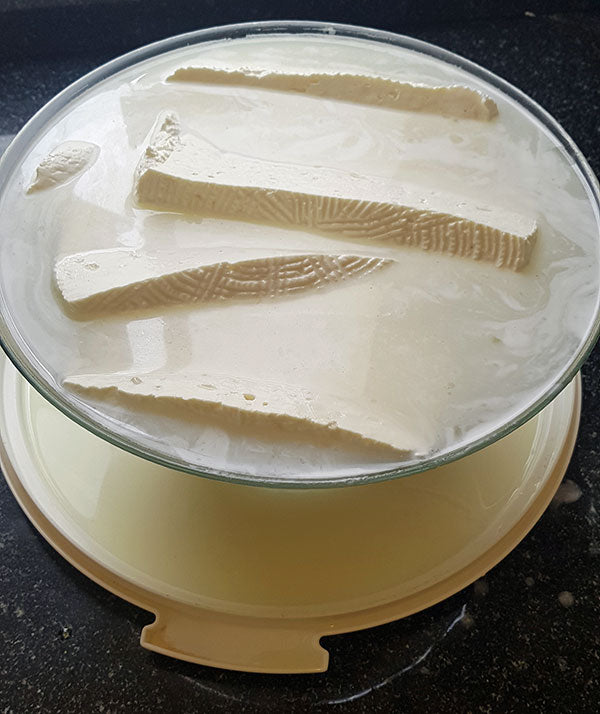
B. In the whey (2 days)
C. Milling – up on right – the ready crumbs

D. In the press

E. Cleaning


