


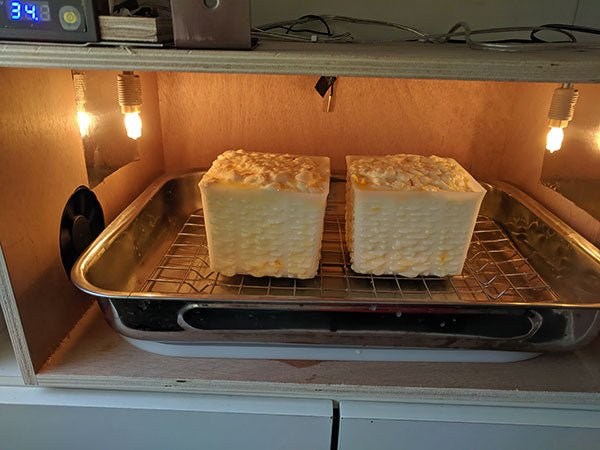

Lingotto cheese in the drying box.
Yoel Blumberger in Tel Aviv, Israel created this box for drying cheese and was kind enough to send us the directions. We will be interviewing Yoel for the June 1st Moos-Letter (Spotlight section), but we wanted to get this out to you ASAP.


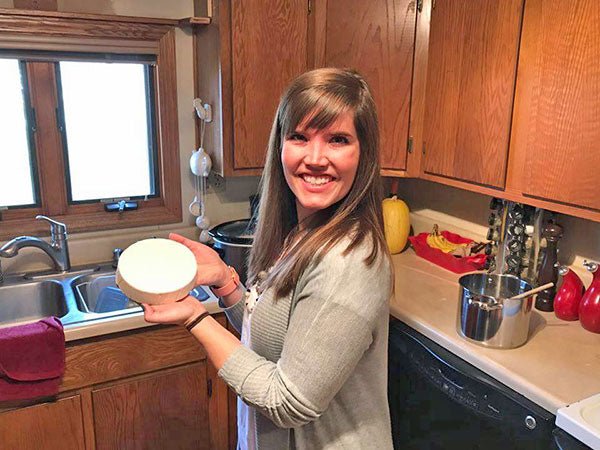
Yoel Blumberger cutting Castelmagno at a dairy in Italy.
Yoel has told us that he will be happy to answer any questions for you (or entertain any new ideas) in the comment section below.
Building a Drying Box by Yoel Blumberger
There are cheeses, which need a long time (3 days or so) of drying in temperatures of 80-82F (26-28C) and yogurt needs even a higher temperature. Some need just ventilation for drying. Lately, I made my first Georgian cheese and used my oven to provide such an environment but this was very inconvenient and inaccurate, as I had to start and stop the oven every couple of hours trying to maintain the temperature. Therefore, I decided to make my life easier and I built a very simple but convenient and accurate drying box. It relies on three main components:
A. Material – Wooden box front opening door – ordered for measure or by DIY.
B. Instrument – A small and very cheap thermostat easy to install and use. It supports two operation modes: cooling or heating, although in our implementation we need only heating mode. This means that the room temperature is less than the target.
C. Heat source – Two G9 (25W) small halogen light bulbs. If you are an electricity expert, you can use a heating coil instead.
The drying box works very simply. You put the cheese in the box over a tray (serves to hold the dripping whey and/or to contain water for raising humidity when only heating without drying is needed). Connect the thermostat to an outlet, fix the target temperature and off you go.
That Georgian cheese, for example, is being left in the box for 3 days, hassle free, maintaining constant 82°F. You have to open the box once a day just for turning the cheese (automatic cheese turning is planned for the next generation of the box (-: ). The box serves well also for cheeses that contain Propionic Shermanii to produce the holes during first maturation stage and the high temperature is crucial for their development. In this case, if humidity is also needed, putting some water into the tray will elevate the humidity.

Materials:
1. Wooden box, made for order
2. Thermostat
3. Electrical wiring – wires, plug
4. Tray and net as base for cheese mat (I used a stainless steel tray that is already in use in the dairy)
5. 2 x Light bulb G9 25W + bulb holder + connectors to the box (Any small bulb that can heat and with the same capacity (around 25W) is ok.)
6. Small computer case or power supply fan – (I cannibalized one from an old nonfunctional computer but a new one will be less than $10.)
7. Two pieces of 4″x 4″ of aluminum foil
8. Optional – Varnish (environmental friendly – water based)
Instruments for full or partial DIY:
1. Jig saw
2. Screwdriver
3. Drilling machine
Building the drying box
1. Decide on size (dimensions).
The size of the box depends mainly on the size and quantity of the cheeses you want to put into it. My box is (inner size) 17″ wide 13″ deep and 8″ high (converted from cm and rounded). It can contain 1-5 cheeses depending on their size. The given instructions are for making this box, but you can easily change them for making a bigger or smaller box. The box width should be a little bit more than the tray’s size to allow the tray’s free in-and-out movement.
2. Build the box or buy it and connect bulb holders.
The box can be made of simple wood or another finish (like Formica) as long it is safe and does not emit toxic stuff. If you want to paint the box, do it before you start working on it. Use nontoxic, water-based varnish and let it dry. You can order it complete with all openings needed, or build it by yourself or combine, for example by IKEA hacking (which means buy the basis and then do the final adaptation by yourself). The door can be one with hinges or one that can be totally disconnected from the box.
Connect the two bulb holders to the top. Start by making a hole in the middle of the left side of the top 4″ from the edge. Attach a bulb holder through the hole. Repeat for the right side of the top for the second bulb holder.


3. Install the thermostat and the bulbs.
Attention! This is the stage in which you will start to connect to the power. Be sure that you know what to do or else find someone to help you. Do not leave any connection exposed!
You may now try to operate the system before connecting it to the box. Learn how to operate the thermostat, connect the bulb holders to the thermostat, fix the bulbs and see that the thermostat turns the bulbs on and off according change in the temperature. Glue one piece of aluminum foil on the middle of the inner upper side of each sidewall near the bulb. This will serve to protect the wood from the bulb’s heat and radiate the heat into the box. After mastering the system, you are ready to connect it to the box.
A. Drill a small hole in the center of the rear edge of the top of the box. Enter the temperature probe (which is connected to the thermostat) into the box through the hole. Attach it to the inner side of the rear of the box with tape.
B. Attach the thermostat to the front part of the top.
C. Connect the thermostat to the electrical outlet and check that everything is functioning.

Bulb holders with bulbs, temperature probe, window on the right, fan on the left, protective aluminum foils. Thermostat on the top left side.
4. Make a window and install the fan.
This stage can be executed before stage 2 during the building of the box or right after purchasing it, depending on your preference.
A. Window- Make an opening 2″x 2″ in the middle of the right sidewall near the bottom. Make a cover from any material you have: wood, cardboard etc. that can close the opening. Glue a 3″x 3″ piece of netting or cheese mat on the inner side to cover the opening. The window can be open to let fresh air inside while the net prevents insects and other bad stuff from entering the box. Or, the window can be closed.

B. Fan – Make an opening for the fan on the left sidewall – my fan needed a round, 3 1/4″ (82 mm) diameter opening. Insert the fan into it. Use a small amount of glue or 4 screws (depends on the fan you have) in order to connect it well. Make a cover that will prevent the entering of air or insects when the fan is not operating. Pay attention and install the fan in the needed direction so it will draw air out from the box and not the opposite. When you are using the fan, you must open the opposite window to let new, dry, fresh air enter the box. The fan can run on a 9V battery or on AC/DC converter using the grid, which will be cheaper.

Fan and fan cover.
Your box is ready for action!


