


She never took a class, but she sure knows what she’s doing!
Lucinda contacted us originally to show us a few of her pictures and to ask a question about her Jarlsberg. We forwarded her question to Jim Wallace, our technical advisor, and then asked her about doing an interview for this article.
During the course of the interview, it became clear that Lucinda is making some fairly advanced cheeses and they look fabulous. She said she is considering selling them, but the start-up costs for that seem daunting. If anyone had advice for Lucinda regarding this, the comments at the end of the article would be a good place to share. (We did send her a copy of the Farmstead Creamery Advisor by Gianaclis Caldwell.)
What kind of cheese are you making?
I am lucky to have a wonderful friend who owns some cows, I pasteurize the milk at 145F for 30 minutes and then decrease the temperature quickly in a sink full of cold water. Once the target temperature is reached I add the culture and proceed.
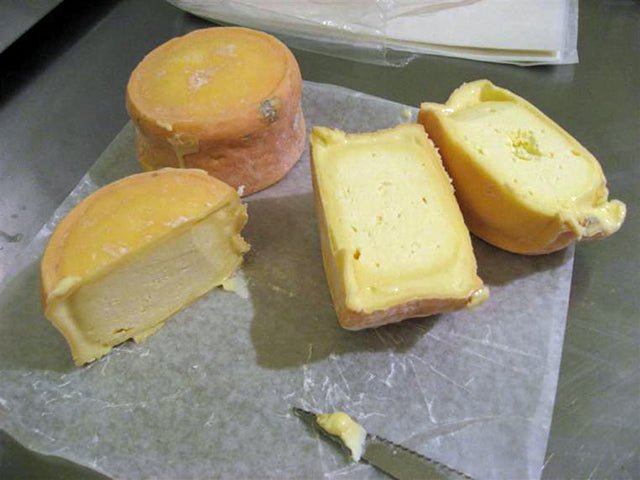
I have worked out a system to make 4 pound cheeses and am having a ball. The cheeses pictured are a Fourme d’Ambert (Blue Cheese),

a Jarlsberg,
 |
| The Jarlsberg is delicious – creamy and nutty and full of holes. |
and two photos of my Jalapeno Jack that just came out of the press a few days ago. The Jalapeno Jack is pictured before and after waxing. The wax is the yellow wax from you. I love the way the jalapenos show through the translucent wax.


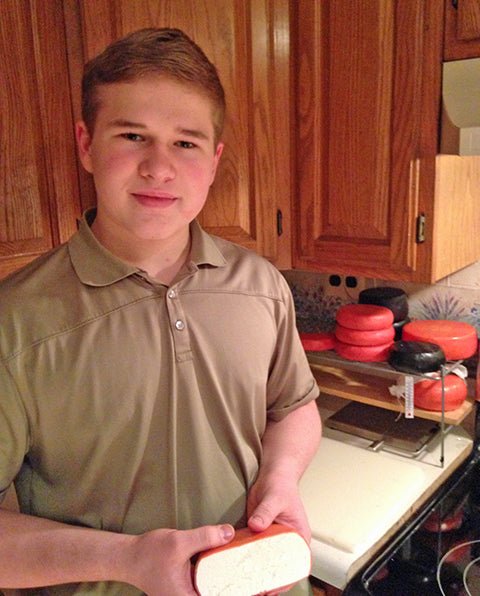
Here’s a photo of me during the summer with my canned goods and some cheeses. On the top shelf is my old cheese press. It worked well but I was always afraid of toppling cement blocks and 5 gallon jugs of water. (I didn’t like the lopsided cheeses either). My new press is so nice and so easy to use.

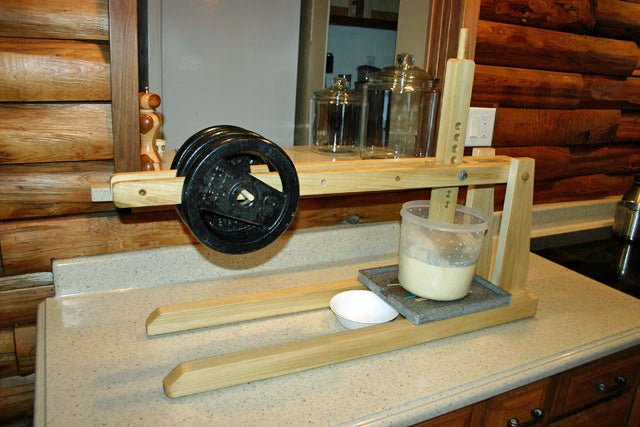
My husband just built the dutch press for me (after 2+ years of begging) and the photos below show it pressing a 4 lb Wensleydale cheese.

I have (3) 10 lb weight-lifter weights to press my cheese. There are 5 positions for pressing. The first photo shows the first position directly above the cheese and exerts 17 lbs of pressure (10 lb weight plus 7 lb of arm).
The second photo shows position 2 with a 10 lb weight (27 lbs of pressure – 20 lbs of weight and 7 lb arm),

and the third photo shows 3 weights in position 4 which exerts 127 lbs of force on my cheese. With 3 10 lb weights I can go from 7 (no additional weight) to 157 lbs (3 weights at position 5).

The last 2 photos show a close-up of my cheese in the press – the first at moderate pressure and the second at firm pressure. I plan to buy a few 2 and 5 pound weights to give me more flexibility with my press.


These next photos are of the latest Jarlsberg:

I vacuum seal my cheeses using a Foodsaver after they have finished aging to help preserve freshness. They are then stored in the refrigerator (about 45 degrees) until I am ready to use them. I used to just wrap them in parchment and then in plastic bags but the molds (especially the p. roqueforti) would always find them. So I ended up with blue contamination. With the Foodsaver I don’t have the problem with cross contamination. Also, my blue cheeses are now kept separate from all of the other cheeses in a different fridge.

 |
| A little snack with homemade onion caraway rye bread, spicy dilled green beans from last summer’s garden, and Chardonnay |
I usually coat my Jarlsberg with red wax, although in the picture above I had removed the wax for the last two weeks of aging (to mature the rind).
During the last the 4 weeks of aging, the cheese normally ripens at 62F. The container (below) has a damp paper towel to keep the moisture up in the container and you can see a piece of Parmesan rind in the container to impart flavor to the Jarlsberg rind (I hope).

The container in the background contains my saturated salt solution. After soaking my cheese I boil the salt solution, strain it and put it into a fresh container. The solution is kept at 45F until the next use.
Where do you age your cheeses?
My cheese cave is a small drink refrigerator. Unfortunately, the thermostat does not work properly and the temperature fluctuates between 40F and 60F. Very annoying. I am saving up for the refrigerator thermostat that you sell on your website to control the temp.
The area in my house where my cheese cave is remains around 62-65F all winter so cheeses that need the warmer temps, I just leave out of the cave (Jarlsberg, Leerdammer and provolone).
The cheeses on top of the cave are the ones that need to ripen at 63F (the temperature of the room). Inside my cave is a Colby, a Parmesan, an Edam, a Wensleydale, my Jalapeno Jack, a Gruyere, a bottle of Vouvray wine I use to inject into my Fourme d’Ambert Blue Cheese, and on the bottom are 2 Cheddars in black wax. I use black, red and yellow wax for fun.

How did you get started?
I have always enjoyed making healthy food from fresh ingredients and my family likes the superior taste and nutrition. So, I try to cook from basic rather than processed ingredients. Toward that end, I grow a large garden each summer and preserve the harvest for winter’s meals. We keep chickens for their eggs and I make all of our bread, mustard, mayonnaise, ketchup, pickles salad dressings, ice cream, crackers and more.
The photos attached are of my chicken coop outside and inside. This was when the coop was new. My girls (hens) are very happy in their home. The weather here in Jefferson County, New York can be unforgiving in the winter so there is a small heater on the wall and an electric water warmer on the floor to keep their water liquid.


About three years ago I began making yogurt instead of buying the
supermarket stuff and when I mentioned how easy it was to my daughter,
she replied that she’d heard that mozzarella was easy too. Well my
husband and I love to make pizzas so I had to look into making fresh
mozzarella. That’s what started me along the road of learning cheese
making. I found New England Cheesemaking on the internet and have been
having fun ever since. I love watching milk change into curds and
whey. I buy all of the supplies that I need from you.
I
have never taken any classes on cheesemaking and my first attempts were
pretty bad. The cheeses were dry, flaky, and sour. My husband urged me
to quit after about 7 cheeses but I am pretty hard headed. Anyway, I
found that chickens and dogs are not that picky about cheese and even
bad cheeses are good if you melt them.
I used Ricki’s Troubleshooting
guide in her Home Cheese Making book and wrote to Jim (Jim Wallace, our technical advisor)
about my problems. I was a little overwhelmed but I kept a lot of
notes and by changing the amount of culture, my stirring technique and
paying close attention to the curds, I finally made a delicious Edam and a
Blue Cheese. That was in March 2011. I was hooked and my husband was
happy.


