You might consider his approach unusual to say the least!
Dr. Peter Achutha is a self-employed computer engineer, rubber technologist and economist. In other words, he’s a scientist. He invented a general theorem for parallel processing called “Finite Event Analysis” and he received a doctorate for his well-known research in economics.
However, Dr. Achutha doesn’t like to use recipes, whether he’s making bread or cheese or homemade virgin coconut oil or cheesecake. He prefers to experiment and to create his own methods. Sometimes this approach leads him to some humorous results, as you will see in his experiments below.
Of course, someday his methods could lead to a culinary breakthrough, so we should probably consider this possibility and keep our chuckling to a minimum. After all, Dr. Achutha is boldly going where none of us have ventured and, most importantly, he is not afraid to fail!
He documents many of his experiments at his eclectic blog- The Bread Diaries. There, you will find articles about making bread with and without yeast, the Old Testament, Jake Goh oil paintings and descriptions of his 2 books- Perfect Love and Other Stories and Market Theories and Predicting the Stock Market by Visual Inspection.
This is the first article he has written about making cheese, and he hasn’t yet posted it on his own blog. So, you could say-this is an exclusive, written for our benefit only. After this, we’ll be looking forward to the next installment of Dr. Achutha’s cheese making adventures.
Indian Cheese – Paneer and other experiments
By Dr. Peter Achutha
This is a log of my trials and tribulations at cheese making. Looking back I really wonder what got into me to start cheese making. I guess I love the flavor of genuine cheese and considering the price of cheese in Malaysia which is about RM50 (USD$16) to RM150 (USD$48) per kg (35 oz), that is way too expensive for the average Malaysian to afford eating it every day.
Experiment #1
My first attempt, in February 2011, was to try to make the simplest of all recipes which is the Indian Paneer. The basic process was straight forward enough and consists of heating milk up to about 70C (158F) then adding some vinegar to coagulate the milk. A couple of tablespoons would do for 1 litre of milk (about 4.5 litres = 1 Imperial gallon, an Imperial gallon being slightly larger than a US gallon) – at least that is what I tried.
His reasoning about why the milk is heated:
I don’t know the reason for heating the milk but I could take a guess. Firstly, chemical reaction speeds double with every 10C rise in temperature. Assuming the room temperature is just below 30C (86F), we take some approximations to simplify calculations, and bring up the milk to 70C which would be an increase by 40C (70 – 30 = 40) which is 4x10C. This means that the rate of chemical reaction doubles, doubles, doubles and doubles ie 2x2x2x2 = 16 times faster. This means that if a reaction takes about 15 to 16 minutes at room temperature, it will take a minute at 70C. You will see this as the milk coagulates within a few seconds. The second reason would be to ‘sterilise’ the milk- ie; kill off any dangerous germs in the milk. I do not know if there is any other important reason to bring the milk temperature up.
His description of how to use your finger to guage the temperature:
To be honest, the first time I tried to make cheese I hadn’t bought a thermometer yet so I can’t tell what the temperature of the milk was … but it ‘looked’ ok. It was bubbling and too hot to touch. From my experience in the Rubber Industry, we could gauge an approximate temperature. If you can place your palm on the material being heated, it would be below 50C (122F). If you could press your finger on the material for not more than one second, the temperature would be about 60C (140F). If you could just about touch the material and had to pull your finger away immediately, the temperature would be 70C (158F) or higher. I would recommend that you don’t burn or cook your fingers using this method to gauge temperature. Furthermore, if you are used to handling hot material, your assessment would differ slightly.
His first unanticipated results:
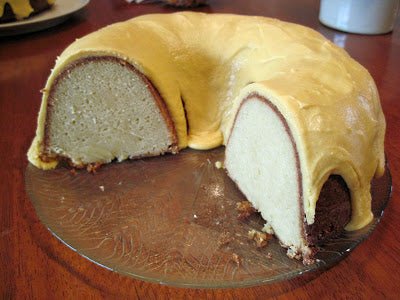
I forgot to take any photos as I was pretty excited to see the milk coagulate right in front of my eyes. I poured the coagulated milk through a handkerchief and let the solids drain slowly over night. Actually, I was not prepared and had not expected to get that far in the experiment, hence I did not have the necessary materials to drain the ‘paneer.’ I hadn’t added any salt either. After a week, a thick yellow skin formed around the ‘cheese.’ It didn’t look that appetizing and when I tasted it, it was quite bland. In some sense, the experience was a disappointment due to the meager quantity of something that looked and felt like cheese but not quite cheesey enough. I have since called this attempt the ‘banana cheese’ – yellow on the outside and white on the inside.
The actual amount of cheese (below) is smaller than what the picture shows.
Oh God, what was I to do with this miserable piece of something that was pretending to be cheese? Let’s not waste it. As it was too little a quantity to do anything, I had to make some more cheese.
Experiment #2
Once I knew that a litre of milk produces a paltry amount of cheese, I went on a milk substitute hunt, roaming the supermarket aisles hoping to find something. Milk powder was out, even though I could have made a real thick milk solution to make cheese. I settled on trying yoghurt.
Here is some of the equipment I had used for the second experiment.
Handkerchief & Strainer
Thermometer to ensure that the milk or yoghurt reaches 70C (158F) and this time around I was planning to be more scientific about it. At least, if it turns out to be a disaster, it would have been done scientifically.
The picture above shows the yoghurt coagulating while being heated.
I left the ‘new’ cheese to drain on a handkerchief which was supported by a strainer.
This appeared to be a good time to add some raw, unrefined palm sugar. I thought the cheese was dry enough to add sugar but as I scooped the cheese and mixed in the sugar, the cheese would get drier as more liquid dripped out of the cheese.
Finally, I managed to mix in all the sugar.
I blended this cheese with some olive oil and sugar and salt with the ‘banana cheese’ in a blender. If you plan to follow my example, I would suggest that you use one that could crush ice, as a smaller blender might spoil or over heat.
The blending was quite fast.
Upon adding the second batch which was the yoghurt cheese:
As you can see, the oils made it soft and everything, the yellow skin and the white center, was blended. The brown color is from the brown, unrefined palm sugar that I had used to sweeten the cheese. I was hoping that it would come out like a spread or creamy. To make it creamy I would need to add some cream, wouldn’t I? I did add a little cream.
The results do speak for themselves-see picture below:
The brown specks are from the unrefined sugar. It was somewhat edible and I managed to use it as a sort of spread of sorts with bread. Honestly, I managed to finish the stuff … what a relief.
Experiment #3
My third experiment was to make a larger batch of ‘cheese’ with yoghurt.
From the picture above its pretty obvious what were my ingredients … not true… I forgot to add the salt which may have been a good thing. The yoghurt pack is a 1.5kg (35 oz) pack. It’s amazing how much ‘cheese’ you can get out of commercial yoghurt.
If you do not want the yoghurt to burn at the bottom of the pot, I would recommend adding some water- about 10% to 20% of the weight of the yoghurt. It does not matter exactly how much you add, just pour some in and stir. The water will be drained out when the mixture is strained.
The picture (above) shows 1.5kg (35 oz) of yoghurt.
Added about two tablespoon of vinegar into the hot yoghurt.
After coagulating and straining the cheese I decided to change plans and bring about some extra flavors into my cheese. Since these are my early experiments in cheese making, or something similar, and I know how to bake breads, why not marry the two techniques? I tell you, this was not a marriage made in heaven.
In bread making, I would add sugar with the yeast to introduce extra aromatics and flavors into the dough. This would be of the order of about 10% of the weight of the flour. Hence I added 10% (as a percentage of the weight of the cheese) brown unrefined sugar to the cheese and 1% instant dry yeast and left for a few days. As the yeast ferments it releases carbon dioxide gas and aromatics and alcohol. Cover the bowl which holds this mixture and everyday lift the cover and take in the wonderful aroma.
This is what the cheese, sugar and yeast mixture looks like. It’s a bit damp as the unrefined palm sugar was made into a syrup (30% water) and mixed into the cheese.
You can see the effect of the yeast after a few hours. The air pockets are plentiful. It should have been stirred to release the alcohol into the air but I didn’t, as I wanted to see how alcoholic it could get.
A closer look at the texture.
Conclusions
I tasted the stuff after a week of fermentation and it still tasted sweet, too sweet for my taste. This means that the yeast was having difficulty surviving in the cheese mixture and did not consume all the sugar. With bread a 5% sugar mix will completely consumed within about 4 to 5 hours. A 10% sugar mix has a slight sweet flavor after about 5 hours. This indicates that the yeast has consumed most of the sugar. But in the case of the cheese a 10% mix was still sweet after a week. The next time I carry out this experiment, I should use a 5% sugar mix.
I hadn’t added the salt as excess salt will kill the yeast. Excess alcohol will kill the yeast. The next time I try this experiment I will allow the alcohol to evaporate away.
The good news is that 1.5kg (52 oz) of yoghurt yields 0.5 kg (18 oz) of cheese. That is a whole one third of the yoghurt can be converted into something that looks like cheese.
Just imagine if we could get the aromatics from yeast and the flavors from the bacteria in one cheese, that would be wonderful. There will be lots of problems as yeast is sensitive to salt, it needs sugar and I don’t know whether the acidic conditions in the yoghurt based cheese will affect the survival of the cheese bacteria.
Happy experimenting … if you are planning to follow in my footsteps. I hope you do make a splash but not all over your kitchen. If you do succeed in making this marriage work do let me know, the quarrels will be many … not between you and your spouse but between the yeast and the bacteria.


