If you’re on our mailing list at cheesemaking.com, you’re familiar with the Monday Morning Moos which links to our blog articles. Recently, Andres Schneiter noticed an article about cheese caves and “fridge conversions” and he decided to share with us some of his knowledge on the subject (see below).
Andres is a master home cheesemaker.

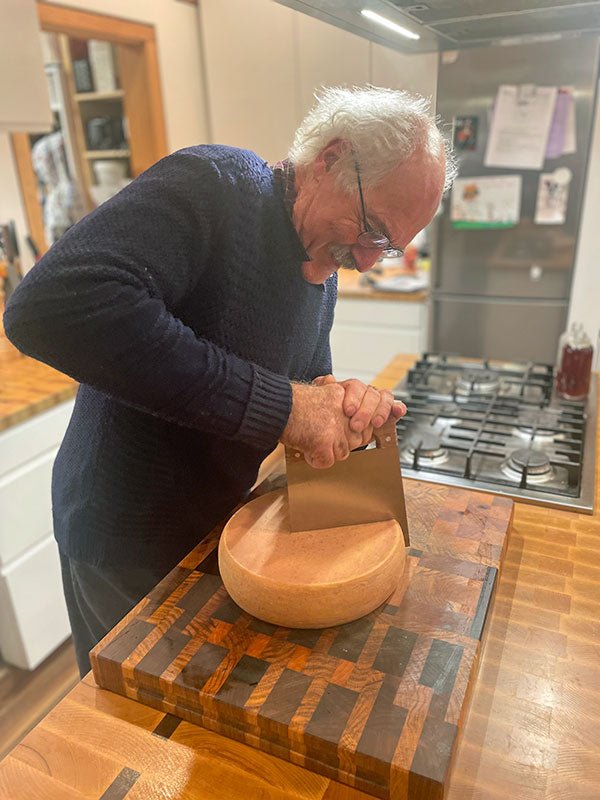
4 days of cheese making. Alpine, Gruyere, Vacherin, Mt d’Or (Swiss), Goat, Gorgonzola, more Vacherin (French)
He is also a woodworker extraordinaire. (The pictures below are from his website – MapleArt: Custom Wood Furniture, Vancouver, BCHome – MapleArt: Custom Wood Furniture, Vancouver, BC)
…and a beekeeper. (His bees have the nicest accommodations we have ever seen!)
And, he loves growing trees and rare plants such as the Chilean Bell flower (Lapageria Rosea) and Gloriosa Lily.
Andres’s Story
I was always interested in milk and cheese. Where I grew up in Chile, we had a small farm and a milking cow. With my Swiss parents, we moved to Switzerland when I was a teenager. Growing up in the sixties it was compulsory in Switzerland for every 16 year old city kid to work for 3 weeks on a farm. (This was a tradition left from WW2 but unfortunately it is no longer the case.) So, I milked cows, carried the milk on my back into the creameries in the valley and obviously enjoyed the cheeses.
I came to Canada in 1974, first to Kingston, Ontario to study for a Masters at Queen’s University. After graduation, my wife and I moved to Vancouver, BC.
In Vancouver, I once dabbled a bit into simple cheese making with my children but a growing family, a busy career in engineering and then furniture making did not leave much time to make cheese.
4 years ago my son gave me a small cheese making kit which triggered me going into cheese making big time. I took a course in a school based in Spiez, Switzerland to become an Alpine shepherd in the Bernese Alps. This was a great course. (https://www.inforama.ch/inforama/standorte/berner-oberland)
I learned all about how to look after cows and goats in the Alps and make cheese, an ancient tradition in Switzerland. The focus of the course was on making Raclette and Alpine hard cheeses.
I took the course over three months. Since it was at the onset of COVID, in the spring of 2020, it was offered over the internet (normally one has to attend in person) with lots of lectures, from milking, testing milk, cow whispering and herding cows, scientific observations and basics on milk and cheese, health and hygiene, legalities and then, obviously, the main part – making cheese and aging it in commercial set-ups and more basic and old fashioned ways in Alpine huts way up on the mountain meadows.
Later, I was able to enjoy a detailed tour of the miles-long, famous, sandstone Kaltbach caves in Switzerland where I was able to learn a bit more on aging cheese.
My hope is to one summer, perhaps, work in the Alps in the traditional way. But I fully realize that this is a tough job, perhaps meant for younger people than me. Yet imagine looking after all these animals in the fresh air and flowering meadows, enjoying the great vistas and, by the end of September, returning into the valley with cows and lots of cheese!
Being a wood worker obviously helped in building a good cheese cave and in making many necessary tools such as a press and even a special wooden “spoon” to more evenly and gently stir the curd, to allow monitoring it and to provide a platform for cutting individual larger pieces.
I also use a 12” copper plate at the bottom of my 30l (30 qt) pot. Copper is particularly important to make good Emmental and Gruyere cheeses. In Switzerland only copper vessels are used to make cheese.
Now, I process about 100l (26 gallons) of milk from a local farm every three weeks in the spring and summer months to make about 16 types of different cheeses – mostly Swiss, French and some Italian and Spanish cheeses.
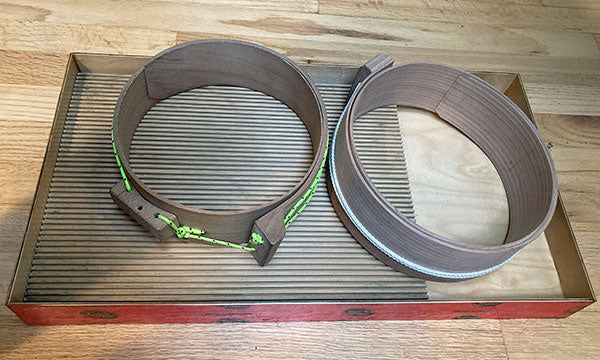
I mostly form and press my cheeses in adjustable wooden forms, called Jaerb.
My cheese press is simple and uses the principle of a lever arm. I designed it for a ratio of 10:1, meaning that for every kg (2.2 pounds) of weight at the end of the lever, I get 10kg (22 pounds) of pressure on the cheese. The holed bar in the centre allows me to adjust the pressure point for maximum efficiency depending on cheese height. The pressing weight can be adjusted from 10kg to 75kg (22 to 165 pounds).
Remember that when pressing cheese, it’s not the total weight that matters but the weight per square inch, i.e., the bigger the cheese diameter, the bigger the weight. Using a bucket with water as weight allows
for fine adjustments. When pressing in whey is required, I replace the cookie sheet with a deep pan.
How to Make a Great Cheese Cave
By Andres Schneiter
90% of the effort in making a good cheese is spent in the first few hours by resting the perfect milk, infusing it with the cultures, cutting and cooking the curd, pressing and salting. However, the last 10% of the effort (but almost 100% of the cheese’s time) is spent in the cheese cave.
A good aging environment is critical to making a good cheese with a beautiful, natural rind. Unfortunately, this is also the most difficult part for a hobby cheesemaker, yet will determine success.
There are many ideas floating around on how to build a good cheese cave. I found none of them satisfactory or within my budget. Hence, I decided to design and build my own. I must admit that I had an advantage to start with: a root cellar which is relatively cool and has higher humidity than your average basement. But the principle can work anywhere.
To age good cheese, one needs a clean room with a temperature of 10 to 15C (50 to 59F) and 85 to 95% humidity. My approach was to build a large plywood box, 4′ x 5′ x 30″ deep.
I lined it with 2” of high density styrofoam (better temperature control) and FRP panels for easy cleaning. The base is made from a large tub (4″ high) filled with plaster of Paris (see picture below) which is saturated with water (but without standing water). On walls and doors, I hang humid towels (change once a month).
The size is critical: the cave has to be as full as possible with maturing cheeses of different ages to create a good environment, so good molds can grow on rinds. A full cave will produce better cheese, so, sizing needs to correspond to the amount of cheese produced.
During 8 to 9 months of the year, the temperature of my cellar is between 10 and 14C (50 and 57F). However, lately, the summer months in the Vancouver, BC area have been very hot, dry and exceptionally long – raising the root cellar temperature to 18C (64F), too much for the cheese. To cool the cave, I drilled a 4” hole from the adjacent fridge into the cave and installed a fan. It perfectly cools the cave.
An advantage, or disadvantage, depending on your point of view, is that the humidity in the fridge slightly increases; great for veggies, other things perhaps not, especially when you get a bit of condensation. (I must admit, my wife was not so happy with what I did to her fridge, but she likes the cheese…). When not needed, the hole is plugged to keep the humidity in the cave high and constant.
Shelving is very critical. In Switzerland, cheeses are aged on wooden shelves.
I would never use plastic or steel. My experiments showed that most woods get moldy in a high humidity, acidic environment within a few days.
Sitka spruce, however, stays clean for months. I clean it with only boiling water every three months and then let it dry in full sun.
I tried oak, maple, ash, fir, regular spruce, pine and beech but nothing worked like Sitka spruce. To get better rinds and better initial drying of the young cheeses, I milled 2.5mm (1/10″) grooves, equally spaced and 2mm (.8/10″) deep in the shelves and boards. As I check and, where necessary, wash my cheeses once a day, opening and closing the doors provides enough fresh air exchange.
In my cave you can see Raclette, Gruyere, Beaufort, Bernese Alpine cheese, Appenzeller, Emmental, Goat Manchego, Oka, Belper Knolle and Limburger in various aging stages, some 24 months old. Each cheese is made from 30l (8 gallon) batches of milk, so weighs between 3 and 4kg (7 and 9 pounds) depending on the nature of the cheese.
Above my cheese cave I have a warming chamber for ripening the Emmental cheese. You can also see a Gant Chart where I record details of every cheese. My brines are now 4 years old and are getting better every year!
For me the rind is a signature of a good cheese. A perfect rind will harbour a great tasting cheese.
Now, if you are wondering what I am doing with all that cheese: I have a voracious appetite for it, a large family and many “cheesy” friends.


