


 |
| With his Cheddars – 3½ and 1 pound |
He’s the definition of a “do-it-yourselfer!”
You could say that everyone who makes cheese is a “do-it-yourselfer” and you would certainly be correct.
But, some are more “hard core” than others and they go so far as to make all their own equipment, as well as their own fabulous cheese. David Dawson falls into that second category and he’s happy to share his skills with all of us.
 |
| David lives 60 miles from Winnipeg in Manitoba, Canada |
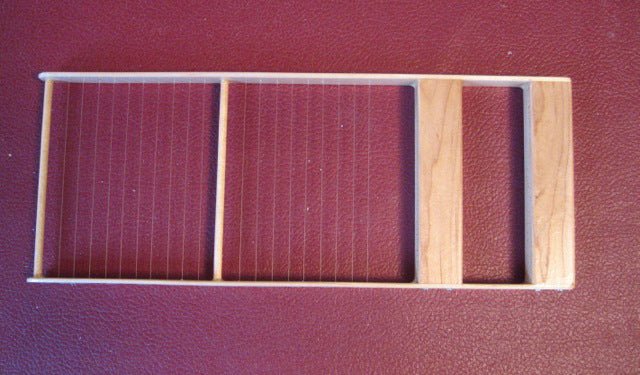
David actually made a curd cutter (harp) for Gavin Webber (Little Green Cheese) as a way of thanking him for his instructional cheese making videos on YouTube. He even gave Gavin detailed directions for making a harp, which Gavin has posted at his website (click here). It’s truly a beautiful work of art:
 |
| Curd cutter made by David for Gavin Webber |
In addition to making his own cheese, David is a photographer, a candle maker, a beekeeper, a 4-H leader and he makes and flies radio-controlled model airplanes.
 |
| This measures 6 feet across and weighs about 7 pounds |
 |
| Photo by David Dawson |
He moved from England to Manitoba, Canada in 1987, when he was 45 and he became a full time beekeeper at that time. (He had been raising bees as a hobby since he was 14.)
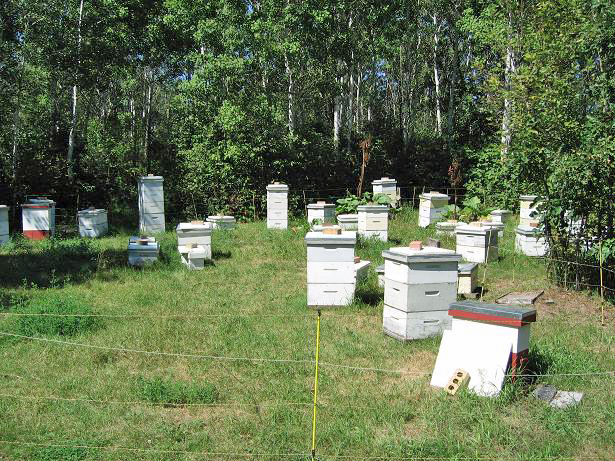 |
| Bee “houses” |
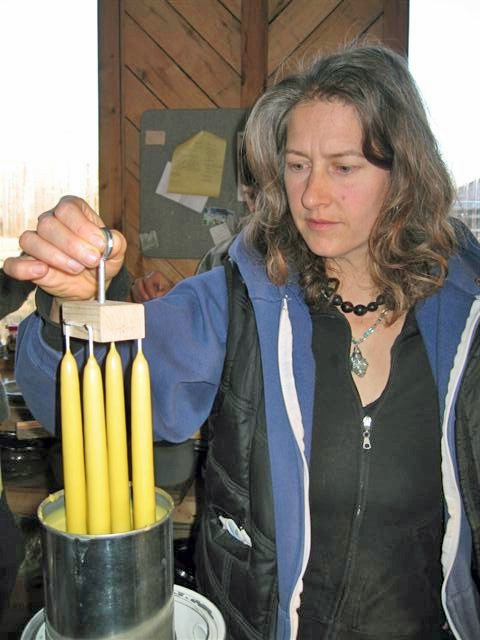 |
| Participant at one of David’s candle making workshops |
 |
| Homemade beeswax candles |
Interview with David Dawson
How did you get started making cheese?
Just to put you in the picture, I am a 70 year old widower (my wife died in 1998). I’ve made all my own bread since she died (before we shared it) and I’ve been making yogurt for years.
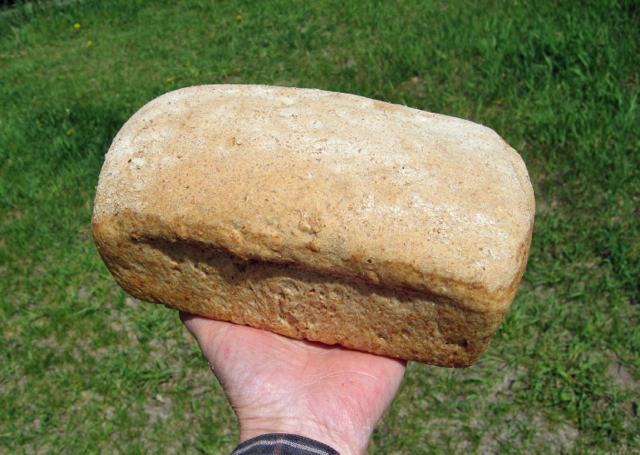 |
| Holding his bread |
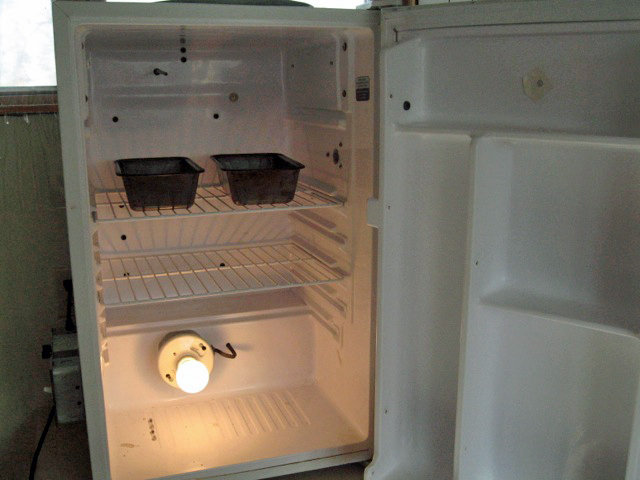
This is my bread raising cabinet – an old apartment size fridge with all the cooling mechanics removed and replaced with a light bulb inside and a thermostat that I can adjust for various temperatures. I’ve put a couple of empty bread tins inside just to give you the idea.
(Note: David has a unique way of making bread and he offered to share it with us, so you will find his method at the end of this article.)
Cheese has always fascinated me, so when a friend received a beginner’s kit & video for Christmas in 2010, I started making it. To date, I have made 26 batches, mostly Cheddar, Cheshire or Wensleydale but also a couple of blue cheeses and a couple of washed curd cheeses.
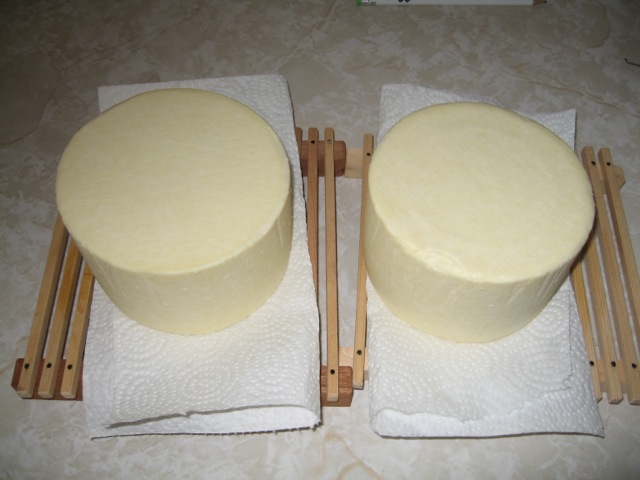 |
| Cheddars, each weighing 2¼ lbs. This photo shows the cheeses straight out of the press. |
According to my records, I made my first batch of cheese (Farmhouse Cheddar) on 25th April 2011 and my comments after aging 3 months were: “VERY good – good consistency with a flavour resembling a mix of Swiss & Dutch.”
Between watching your video at Christmas and April, I researched the subject including a private tour of the cheesemaking dept of our local university. I watched literally hundreds of Youtube videos, most of which were useless, until I came across Gavin’s series of tutorial videos, and these gave me the confidence to do it myself. I then had to get in the necessary supplies and make a press & mould.
 |
| His ‘stock’ of cheese at one point. All the cheeses are nominally 2+ lbs each being from 2+ gallons of milk. The one second from left, bottom row, is a blue cheese evidenced by the holes in the wax. |
The first book I read about making cheese was called “The Cheeses & Wines of England and France” by John Ehle that I found at a second hand book sale at my local shopping mall. It’s a very whimsical book, but being English by birth and familiar with all the English cheeses, this book really peaked my interest. (Note: We are now publishing this book.)

I suppose it was the New England Cheesemaking DVD that really convinced me to research the subject and start making cheese. I never attended any workshops or anything like that simply because there aren’t any around here.
I made my own press (actually I made four – two for me and two for friends), and I made my own moulds. For these I used a slightly tapered jug, cutting off the top and bottom, and then drilling numerous holes in it.
 |
| David’s homemade press and mould |
I looked at many presses on the web (including yours) and sort of made mine like many of them. I saw your guage and ‘holdem’s’ which would have made things easier when pressing, but mine work OK as is. Unfortunately, the threaded rods are not stainless steel. I may change them soon.
What kinds of cheeses are you making?
I have made a couple of blue cheeses using a chunk of commercial blue cheese as my inoculant, mixing it in with the curds after milling. One worked very well – the other not so well.
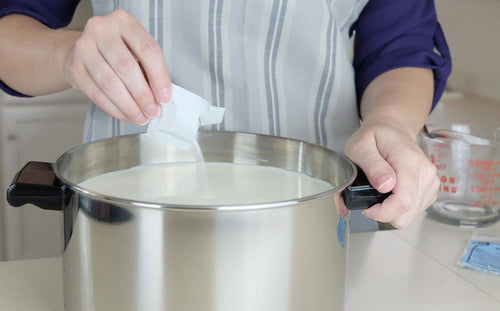
I have also made a couple of washed curd cheeses, Edam and another similar but where I added the salt to the milled curd rather than soaking in brine. The photo of the sieve in the pot with the curds is how I got the whey out without taking any curds:
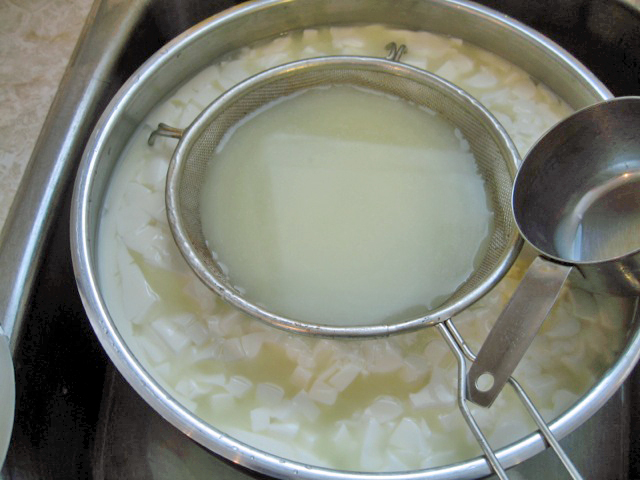 |
| A good way to separate the curds from the whey |
I have tried to make Cheddar, Cheshire and Wensleydale but most of them end up being rather crumbly and somewhat similar. Sometimes I get liquid under the wax, though not recently. I also frequently get bloating after about 2 months aging which you can see in one cheese with 2 big cracks in it.
(Note: Jim Wallace, our technical advisor, is working with David to solve these issues. He can always be reached at info@cheesemaking.com, subject-“for Jim.”)
 |
| His first washed curd cheese, basically Gavin’s Drunken Cow Cheese, but not soaked in wine. Delicious with a mild taste and a perfect texture (apart from the cracks). |
My cheesemaking adventure has been to try to perfect one type of cheese that I really like, rather than making a different cheese every time. The problem, if you can call it a problem, is that every cheese is unique and a surprise with different characteristics even though I follow the same basic recipe.
I generally make a double batch of cheese using one gallon of store-bought pasteurized milk mixed with one gallon of fresh farm milk. I have 2 pots, one in each side of my double kitchen sink with 2 gallons in each pot. To warm the milk and to ‘cook’ it, I put the plug in and fill the sink with hot water. When the milk reaches the right temp, I just pull the plug. This saves lifting the pots on and off the stove and I found that when using a double boiler on the stove, it is too easy to overshoot the desired temperature.
I generally get the farm milk from the evening milking and keep it in my cold room overnight which is what they used to do in the good old days, according to John Ehle. I like to think that the natural bacteria acidify the milk a little over night. Incidentally, I don’t pasteurize it.
 |
| Basement cold room |
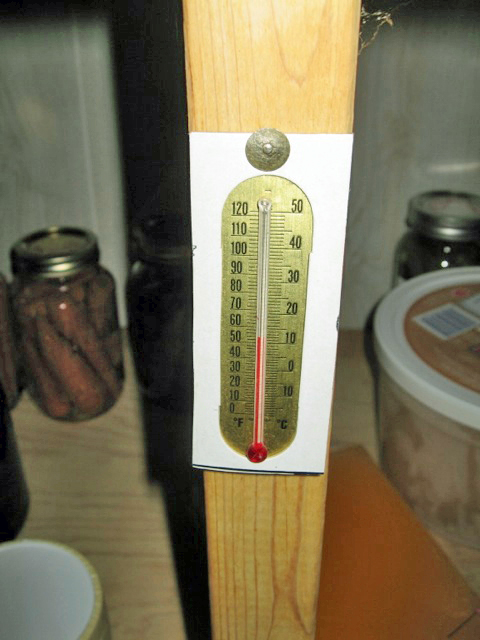 |
| Perfect temp for aging cheese |
Our winter humidity is very low here. Currently my kitchen is 40% RH (relative humidity). My hair dries in minutes and a cheese gets quite a rind after a couple of days. More than two days air drying I feel is too much as the rind gets dry and crusty. I wax my cheeses with the liquid brush-on wax and then dip them in proper cheese wax, yellow being my colour of choice.
A couple of days ago I made a gallon of yogurt and then let it drain in a cheesecloth for 24 hours. This picture is what I got. Delicious almost cream-cheese-like yog:
 |
| David’s yogurt |
What are your goals- cheese-wise?
I do not have any specific goals, such as by the end of 2013, I want to perfect making Stilton, but in general, being a scientist by training, I do want to understand more about the science behind the process. For example, I have never seen a convincing explanation as to why we add calcium chloride to homogenized milk. The amount of calcium contained in ¼ tsp (for example) is minuscule and anyway it is bound to a chlorine molecule. I think it has something to do with modifying the way the fat globules repel each other.
Other than that sort of thing, I am always keen to pass on the skills I have acquired over the years and am open to teach others cheese making either in my house on a one-to-one basis, or at communal workshops. I have been asked to do a 30 Minute Mozzarella workshop though no date has yet been arranged. I’m also arranging a workshop at our University cheese department where they have the staff, skills and all the equipment for a proper hard cheese workshop.
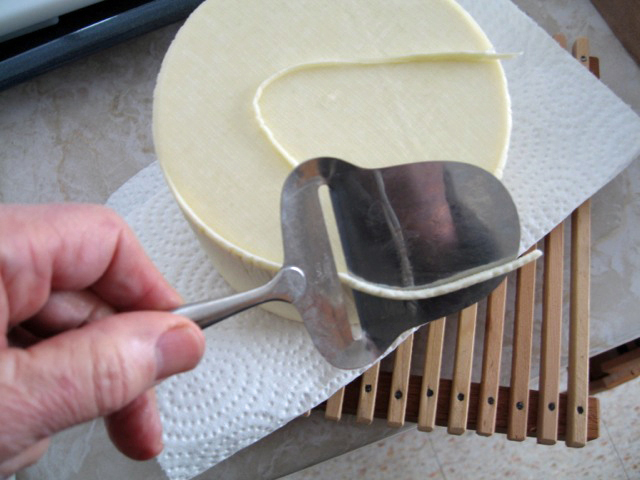 |
| Trimming off the piece of curd that squeezes past the follower |
Do you have any advice for aspiring cheese makers?
Be bold. Get started. Watch Gavin’s videos – and TriGirl123‘s. Like bread making, a mystique seems to have developed around cheese making, too, whereas in the past every farm and every farmer’s daughter made cheese. The worst thing that could happen is that you waste a gallon of milk.
David’s Bread
I was brought up in a scientific household and for many years worked in a laboratory developing new products. I would try something, analyze the results and modify accordingly, repeating this process until a satisfactory product was achieved. We all do this to a greater or lesser degree when we modify a recipe to suit our particular tastes.
Over my many years of bread-making I have developed a method which is very easy and I believe may be novel. I am not a publicist but equally I would not like to die without passing my idea on to a wider audience, so this is what I do:
Before going to bed I get out 2 bowls. In the bigger one I put 3 cups of white all-purpose flour, 2 tsp instant dried yeast and 3 cups of water. I stir this up into a batter, cover it with a lid or plastic and put it in a warm place to rise OVERNIGHT. In the 2nd bowl I put 3 cups of whole meal flour* (own ground) or store bought whole wheat flour, 1 tsp salt and any other ingredients such as ½ cup ground flax, or ½ cup sunflower seeds, or ½ cup millet etc or combinations. (note – no sugar or oil – we have too many calories in our diets already and don’t need fat IN the bread as well as butter ON it!). The cup measure is the US cup of 225 ml, though any cup would keep things in proportion.
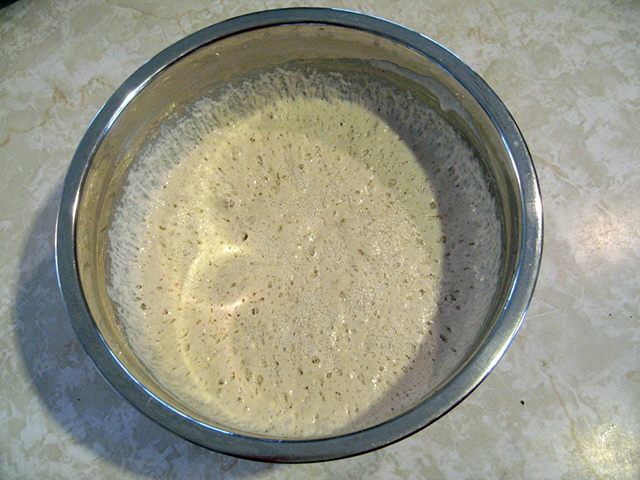 |
| Batter after overnight rising |
In the morning, the first thing to do is butter the bread tins before handling the dough.
Then, to the overnight batter I add the rest of the ingredients from the second bowl, stir until I can’t stir any more, then I get my hands in it. A little more flour is usually necessary to make a decent dough and when it is about right I tip it onto my kitchen counter and knead for a few minutes. When it feels right I cut it in two, shape it and put it in the pans to rise.
 |
| In the tins to rise |
 |
| Ready for the oven |
I bake at 415F (215C) for 15 minutes and then turn the oven down to 375F (190C) for another 30 minutes.
The beauty is that only one rising is necessary, though of course the batter rises in the overnight stage while you are in dreamland. Make sure to use a big bowl so it doesn’t over flow. In the morning, this overnight stage is like glue sitting on a puddle of water. The yeast has developed the gluten such that hardly any more kneading is necessary.
I developed this method because my son just couldn’t get the knack of kneading and he now follows the method with basically no kneading at all. He gets everything well mixed but his bread looks rather lumpy on the surface.
I rarely get up before 9am, but I can have fresh bread for lunch at 12.
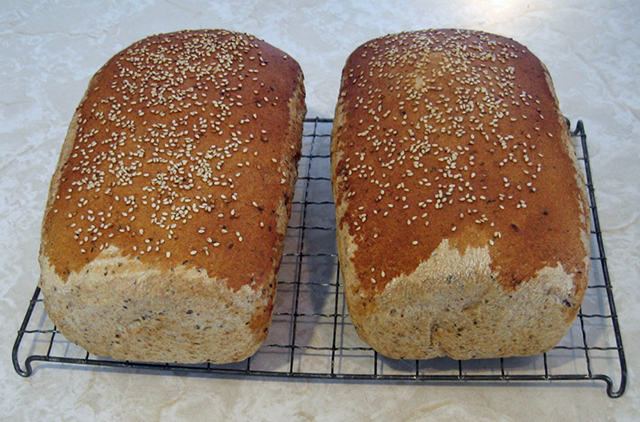 |
| The finished bread- brushed with milk and sprinkled with sesame seeds |
* About the whole grain
The actual grain of wheat is made up of three main parts – the skin on the outside, the starchy center and the germ (which would sprout if the wheat seed was put in the ground). This is much the same as an apple where there is the skin, the fruit and the seeds in the middle. In wheat, the skin on the outside when separated after grinding is known as bran. The germ, which contains some oil and tastes nutty, when separated after grinding is sold as wheat germ. The starchy center becomes the white flour.
In old windmills the whole grain was ground up, thus the resulting flour contained all three parts of the original grain. This flour is usually referred to as ‘wholemeal’ and is of course the most nutritious.
Unfortunately in Canada there seems to be no standardization of terms and the term ‘wholemeal’ is often used for marketing purposes when in fact the flour does not contain the whole grain. The best flour is that which you grind yourself at home on a kitchen counter-top mill. Allowing this flour to mature for about 10 days improves it and will increase loaf volume. Industrial flour mills often include an additive in their product designed to mimic the natural changes which occur through aging in case the flour is used before it has aged sufficiently.
As mentioned above, the wheat germ contains a small amount of oil, so true wholemeal flour must be stored in a freezer (after its 10 days of maturing) otherwise the oil will go rancid and spoil the flour. Modern flour grinding methods allow the mill to separate out the bran and wheat germ from the white flour. Then, to make ‘whole wheat’ flour they add back the bran, but not the wheat germ, thus ensuring a product with a good shelf life. So, ‘whole wheat’ flour is not actually whole wheat.
The old windmill-ground or home-ground flour is usually coarser and thus less absorbent than the modern factory produced super-fine product. Bread made from true wholemeal flour, windmill or home ground, is much more like that which we have been eating for thousands of years. It makes a heavier more tasty bread than the highly aerated modern cotton-wool product. In former times, the bread itself was frequently the main part of the meal with a little bit of cheese, a scraping of bacon fat or a meager slice of meat to help it along.


