


After Bob sent us his first post – Bob’s Homemade Horizontal Curd Cutter, he decided to make some improvements. Start with the first article and you will find that the two of them work nicely together. If you have any questions, leave a comment at the end of the article and Bob will be happy to help.
 My Second Horizontal Curd Cutter
By Bob Albers
I don’t know about you but, whenever I do something the first time, I always learn something such that, if I do it again, I will improve on it. My curd cutter is no exception.
The first thing I noted is that I failed to ease the edges of the handle as to make it more comfortable to hold.
The next thing I learned is that the width of my cutter is wrong. It should be either as wide as the full diameter of my pot or just a little bit more than ½ that size. The wider cutter would do the job with only a ½ turn whereas the smaller would require a full turn while not making a mess of the curd in the center of the pot. I must admit that I don’t know if that is important or not.
This next cutter will be smaller, or 6¼.” The height of my original cutter seems good at 12¼.” This means I will need 24½ + 6¼ + ½” for the handle entry for a total of 31¼.”
Here you see me rounding the edges of the handle material on my router table.

I am doing this before cutting it to length because the size will be too short to safely work with here. My fingers are already round enough.

After easing the edges, it is time to cut the handle to the proper length. I set the rip fence to 6″ and used it as a guide to make the cut.
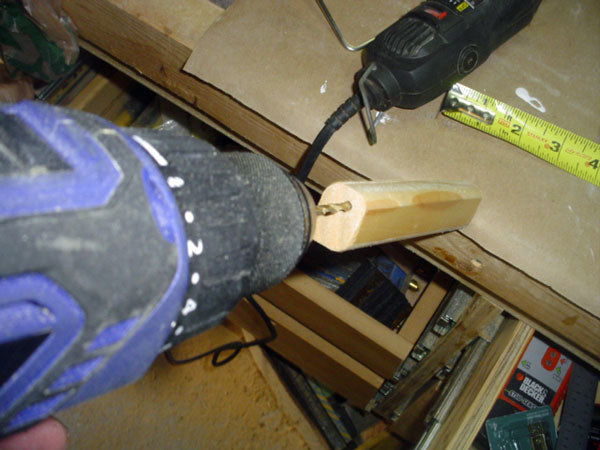
The next step is to prepare the handle to receive the wire frame. I drilled a 1/8″ hole into each end of the handle and also a 1/16 inch pilot hole for the locking screw.
With the handle prepared, the next thing to do is to bend the wire frame to shape. As this is a two handed job, I wasn’t able to photograph the 4 bends but I think you can use your imagination to envision a sharp bend ¼” from each end (to fit into the handle) and 2 bends at 12¼” from the ends.
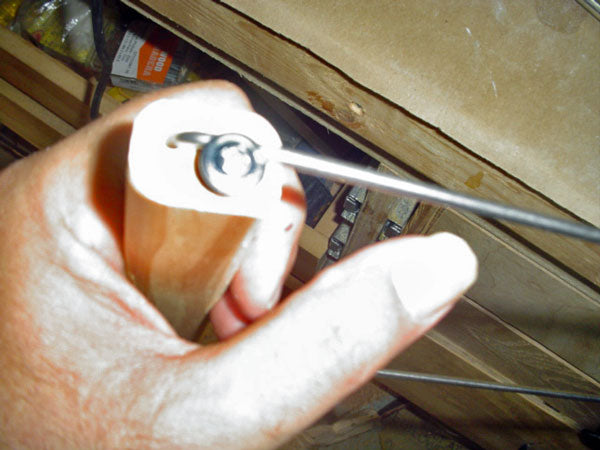
In this picture you see the wire frame attached to the handle and secured with a wire lath screw. The reason for choosing that particular screw is that it has such a wide shoulder, almost like a built in washer to secure the wire frame.

Now it’s time to measure and mark where the cutters will go. This will be marked at 3/8.”

As you can see, I have marked both sides of the frame and am ready to notch the wire at the markings. The reason for notching is to secure the cutters in their respective positions.

As you can see here, I use a “Dremel Tool” to make the small notches at each of the marks.

My shop is in the garage which is rather hot today so I brought the work into my den. Now is the rather tedious task of tying the cutters (8 lb. test fishing line). As the frame is notched at at the cutter locations, it is easy to secure each in position and be assured that it will stay put. During the tying process, I also put a drop of cyclo aniline glue (Super Glue). The glue penetrates and seals the knots so the curds and whey are excluded from the tiny cracks and crevices that the irregular surfaces of the knot provides.
My wife returned from the grocery just in time to take this picture.

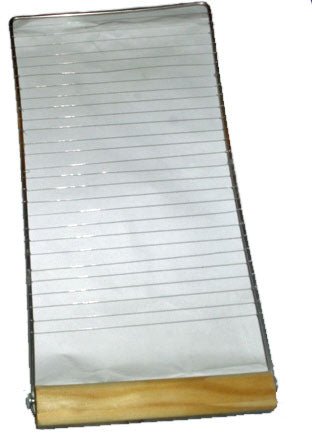
OK, here is the finished product. I hope I have given enough information for you to follow in my footsteps and make one of your own if you like the design.
Considering the tedium involved, this is absolutely a labor of love. Well, I suppose it might also be called insanity.


