


 |
| Jill Richardson |
Jill Richardson is a well-known expert on food and farming issues here in the US and all around the world.
Her website, La Vida Locavore
has book reviews, articles about food politics and even some recipes (like the one she shared with us below).
There is a fascinating account of her trip to a hog confinement in Iowa, another about how the chicken gets to your plate.
There are also extensive “diaries” of trips she has taken to Cuba, Bolivia,
Mexico and the Philippines to study food issues like land grabbing and
the impact of corn production.
She wrote a book in 2009, Recipe for America: Why Our Food System Is Broken and What We Can Do to Fix It – available on Amazon. She currently writes articles about food and farming issues for online
publications. (She wrote a series in 2010 exposing the toxic sewage
sludge in San Francisco) She serves on the policy advisory board of the
Organic Consumers Association.
(Note: All of this supports my contention that the most interesting people in the world make their own cheese!)
Homemade Cream Cheese
by: Jill Richardson at La Vida Locavore
I grew up eating bagels and cream cheese. I was very interested to find out that what we know today as “cream cheese” is a modern invention. I was already bothered by some of the ingredients in brands like Philadelphia (Milk Protein Concentrate? No thank you!). So this was the straw that broke the camel’s back:
De Voe’s Philadelphia cream cheese sounds much more interesting (and creamier) than the kind now known from Rome to Rio, which undoubtedly didn’t reach anything like its present form until the late 1920s. That was when a series of technological innovations began paving the way for cream cheese made by liquifying a hot particularly creamy curd at a temperature well above the boiling point of water, concentrating it in a mechanical separator, standardizing it to a desired fat percentage, and pumping the hot fluid mixture directly into small rectangular foil packages for retail sale. Because the heat treated cheese tends to leak water, gums such as guar and locust bean are routinely added at the standardizing stage. The end product, “hot pack cream cheese,” has a distinctly cooked flavor and gummy consistency that cannot have belonged to cream cheese before the hot-pack revolution. Today even gourmet and health-food shops and some cheese stores are unlikely to carry anything but hot-pack cream cheese, under whatever label. – Milk: The Surprising History of Milk Through the Ages by Anne Mendelson
OK, so if I don’t want to eat that, then how do I get some good cream cheese? Turns out it’s not too difficult to make it yourself!
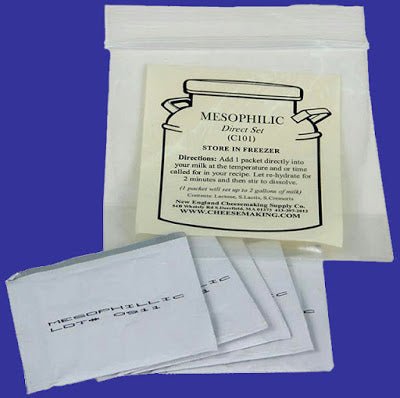
I used cultures and non-GMO vegetable rennet from the New England Cheesemaking Supply Company, so I used their recipe too. And honestly, it couldn’t be easier.
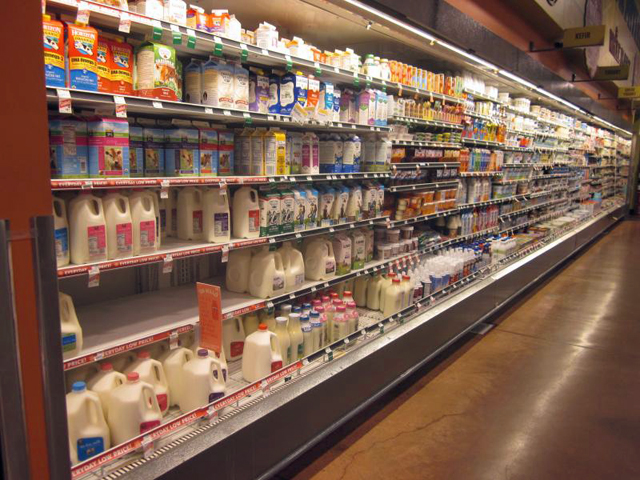
The recipe calls for 1 gallon of whole milk plus one pint of heavy cream. You can cut the recipe in half. I did about 3/4 of the full recipe. The price of getting good milk just about killed me. Here are the options:
- 1 quart raw whole Jersey milk from Claravale: $5.25 ($21/gallon)
- 1 quart whole Jersey milk, organic, not homogenized, and vat pasteurized, which is the gentlest and lowest temperature used for pasteurization: $3.99 ($15.96/gallon)
- Half gallon Strauss organic creamery milk, not homogenized, pasteurized at a higher temp (but not ultrapasteurized): $4.39 ($8.78/gallon)
And then you’re supposed to buy the cream, which probably runs you another $4 or so. If I go to the trouble of making my own cheese, I want it to be good. So I want to start with good ingredients. I ended up using 2 quarts of the vat pasteurized stuff plus 1 quart from Strauss.
Cows’ milk varies in its fat percentage, and typically dairy processors centrifuge out all of the fat and then add it back in at whatever percentage they wish. They’ve decided that “whole” milk means 3.25% fat. But Jersey milk is notoriously rich and it appeared that the stuff I got might have more than a mere 3.25% fat in it. Maybe they just bottled it as it came out of the cow (I hope). Since this was already such an expensive little adventure, I didn’t buy any cream. In retrospect, I should have.
Do you need to fork over such big bucks for milk? Absolutely not. But your cheese will probably be as good as your milk is. The recipe specifies that the milk should NOT be ultrapasteurized. I’m personally very anti-homogenization, but the recipe says homogenized milk is just fine.
To make cream cheese, you also need buttermilk cultures (or some buttermilk with live cultures in it – and I could not find any at the two stores I checked), an instant read thermometer, and rennet (animal or vegetable). The recipe also calls for some chemical stuff that I did not use (calcium chloride, I believe) if your milk is pasteurized and refrigerated.
 |
| All this variety, and no buttermilk with live cultures. Lame. |
 |
| Cultures and Rennet |
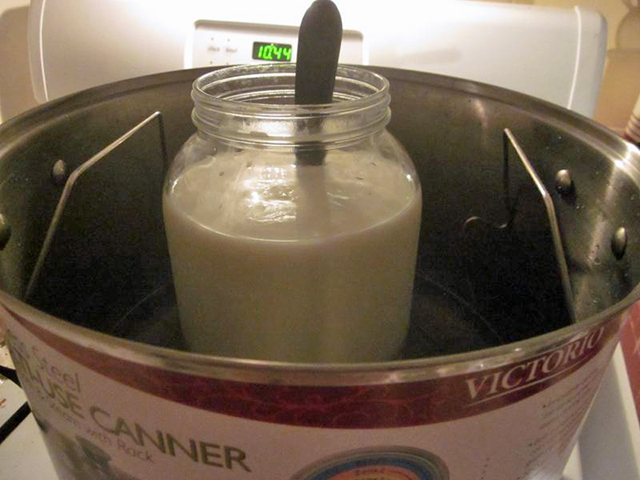
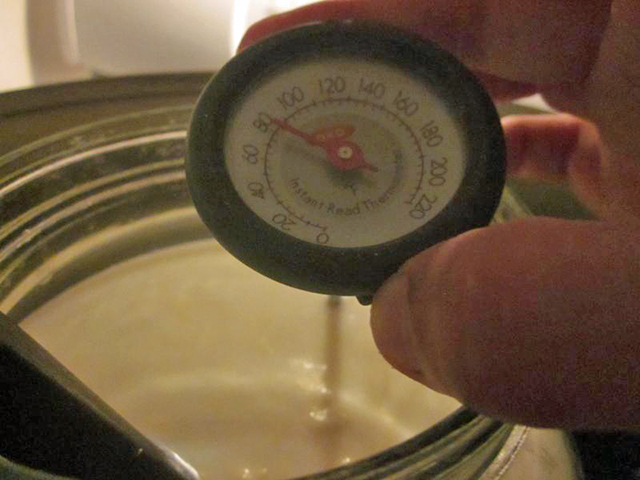
To start, SLOWLY bring the milk and cream to 86F. The recipe didn’t specify whether using a metal pot on the stove is OK or not, but it made me nervous. I’ve had disasters happen when I tried making yogurt in a metal pot because the metal was so conductive that it messed up the temperature of the milk. My guess is that a metal pot is OK to heat the milk so long as you stir continuously and then remove it from the metal once it reaches 86F.
I ended up putting my entire canner on the stove with a bit of water in the bottom. I set a 1-gallon glass jar inside the canner, and I put the milk in the glass jar. Because of the jar-holder-thingy that came with the canner, the glass was not directly on the metal, so it had a bit of water under it. Then I slowly heated the water, and that slowly heated the milk.
 |
| My setup. I’ve got a wooden spoon in the milk and I stirred almost continuously. |
The water got a lot hotter than the milk. 86F doesn’t feel very warm to the touch. The water got up past 100F and it was hot to the touch but still cool enough that I could stick my hand in it.
 |
| Almost hot enough! |
When the milk reached 86F, I turned off the flame and pulled it out of the water bath to stop it from getting any warmer. (Since the water was 100F, it would have kept heating up even with the stove turned off.) Then you add the cultures.
Using the cultures I bought, you add 1/4 tsp. of cultures (one packet) if you’re making a full recipe. I tried to use about 3/4 of a packet or so. The company sells tiny measuring spoons that measure out 1/4 tsp, 1/8 tsp, 1/16 tsp, and 1/32 tsp to use for small amounts of cultures. Not a bad idea, really…
Pour the cultures onto the milk and let them sit and rehydrate for 2 minutes. Then stir them in. Then add 4 drops of liquid single-strength rennet.
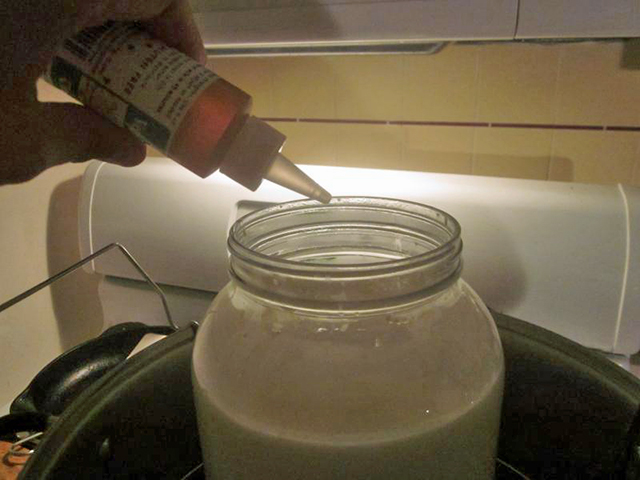 |
| Add the rennet. Sorry for the light – the lights in my kitchen require some stupid special sized lightbulb and I have been getting by with a tiny lamp instead of buying one. |
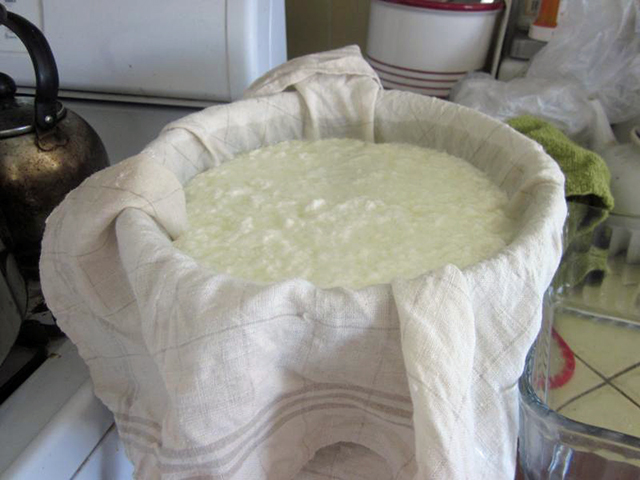
After you add the cultures and rennet, the cheese-to-be needs to sit without being moved or disturbed AT ALL for 12-24 hours. Ideally it should stay around 86F but if it gets cooler that’s OK. I raised up the canning jar rack thingy in my canner so that the milk was entirely above the warm water below it. The heat from the water rose and kept the milk at the right temp for hours. And to keep flies out, I covered it with a cloth.
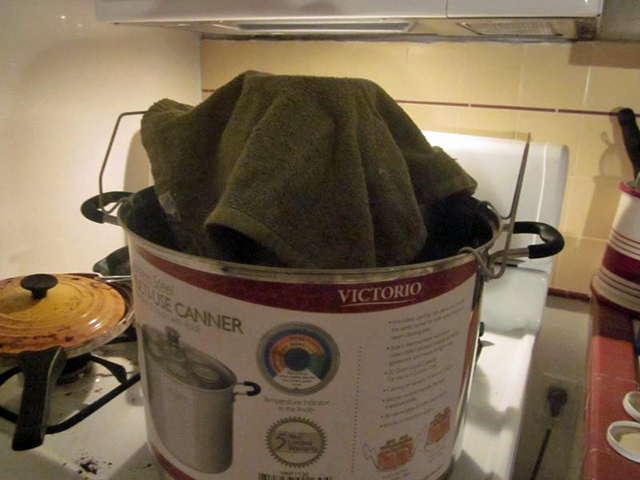 |
| Let this sit for 12-24 hours |
Now, you wait. Check in with it every so often. I put the cultures and rennet in at 11pm. I woke at up 5am all excited about my cheese and I checked on it. You’re looking for when the whey begins to separate above the curds. Whey is a clear-ish liquid with the consistency of a thin mucous. At first it will start to form tiny pools above the curds (the solidifying white parts). Then the pools get bigger and ultimately, there is a full layer of whey above the curds.
You want to wait until there are pools of whey about 2-3″ in diameter above the curds. It can get too sour if you wait beyond that. I went back to bed and got up again at noon (bad, I know, but I had a bad migraine last night). At that point, there was clearly a layer of whey above the curds. Oops.
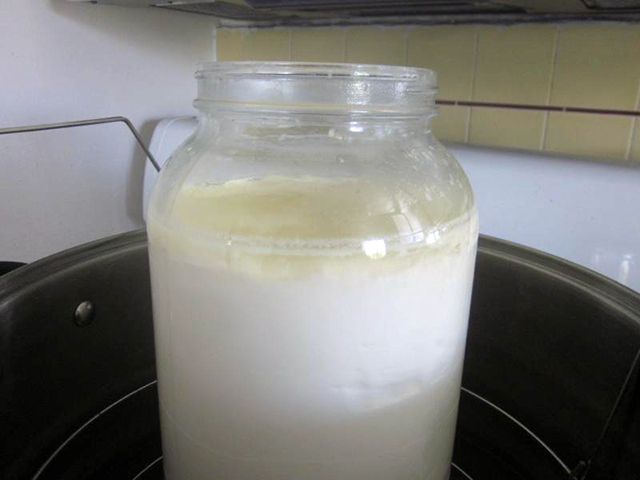 |
| Layer of whey above the curds |
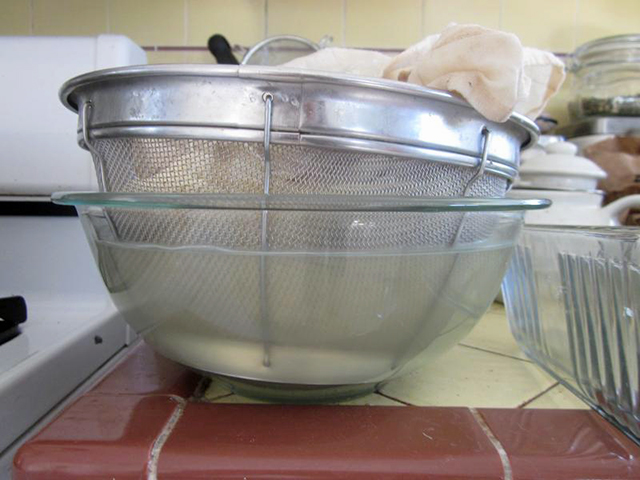
At this point, you need a bowl or pot, a colander, and several layers of cheesecloth or something with a bit finer weave than your average cheesecloth. I used an organic cotton tea towel. Place the colander in the bowl. Place the cheesecloth in the colander.
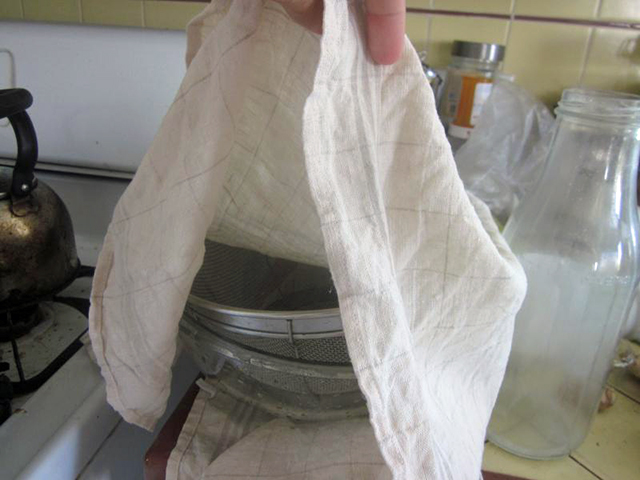 |
| My setup |
Then begin carefully scooping out the curds using a slotted spoon, placing them into the cheesecloth. The whey will drain out. You’re supposed to try to break the curds as little as possible, but I found that near impossible. There’s a handy little slotted spoon gadget the cheese website sells too, but I don’t have one. In fact, I don’t have any slotted spoons. I ended up using a quarter-cup measuring cup, and ultimately just poured the entire contents of the jar into the cheesecloth.
 |
| The curds and whey in the cloth, with the whey draining into the bowl beneath. |
Almost immediately, two full pints of whey drained out into the bowl. I transferred them into mason jars and put them in the fridge. These are full of beneficial microbes, protein, and vitamins. Whey is useful for a number of different things. I tried to see if my cats would drink it but they weren’t that into it. Ricotta is made from whey, but this whey is too acidic to use for ricotta.
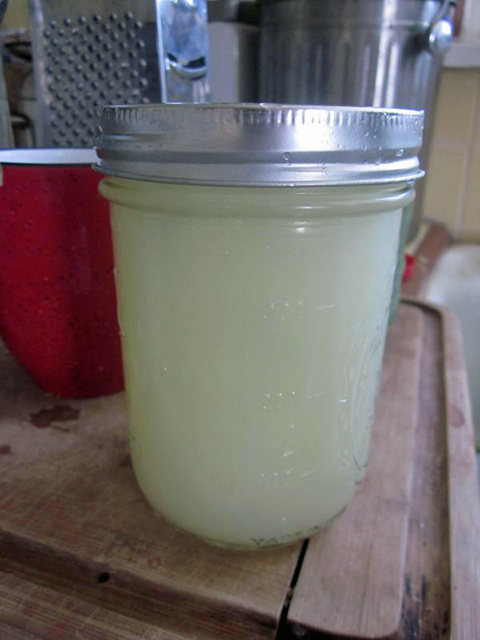 |
| Whey. There are uses for this but I need to figure them out. I’ve got 4 jars of it. |
You first just let the whey drain, then you begin occasionally stirring to speed up the draining, and last you mix in 1 tsp of salt to speed up the draining even further.
But I had to hurry to get to the farmers’ market, so before I added the salt, I left. When I came back, the bowl was full of whey.
 |
| Bowl full of whey |
I drained that and stored it in the fridge, where I now had 4 full pint jars of whey and more still to come. Then I mixed in the salt and let it sit for a bit longer.
Next step, pull up the four corners of the cloth and tie it up so that is hanging over a container or the sink. You let it continue draining for 10-20 hrs. At the end, I began trying to get my cats to drink the whey (they weren’t that interested) and just tossing it into the “greywater” bucket I keep in my kitchen. You can’t give straight whey to your plants, but you can give it to them watered down – and I will. I know I’m being a bit wasteful, but honestly, I’ve got 4 pint jars of whey already and it’ll already be a project to figure out what to do with all of that.
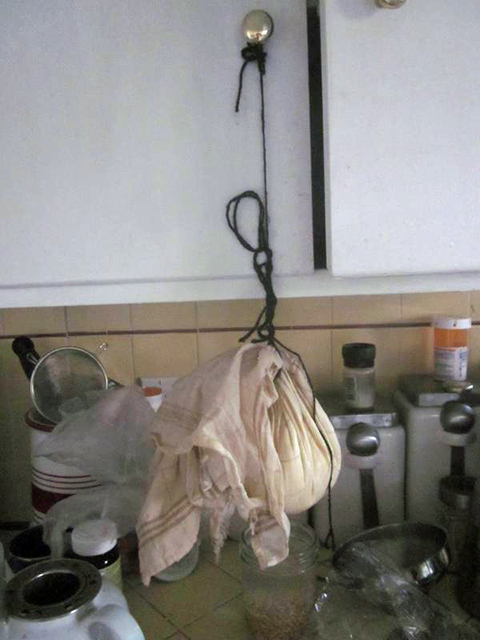 |
| Draining the whey directly into my jar of fermented oatmeal. The oatmeal only needs a few tbsp whey so I didn’t do this for long – I put a larger bowl under the whey instead. |
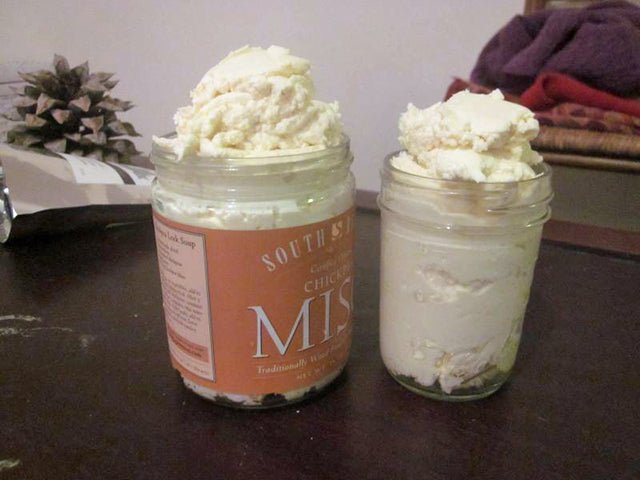
Once the whey is out, you’ve got cream cheese! If you do the full recipe, you get 1.5-2 pints of cream cheese. I would estimate I got around 1.5 pints, maybe a bit less.

And now, I can have my treat:
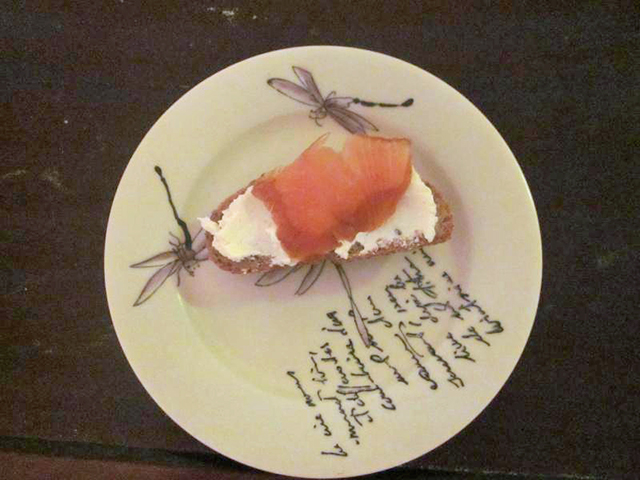 |
| Wild Alaskan Salmon lox, seedy multigrain bread (seemed healthier than a bagel and no less tasty), and my cream cheese |
The cheese could be a bit creamier, so next time I wouldn’t skip on the pint of cream no matter how nice and creamy the Jersey milk seems.
Other than the time and attention this required, it was not difficult at all if you’ve got the right ingredients and equipment. I probably won’t spring for the fancy milk next time though.


