


Jayne Maker
Warwick, Rhode Island
We first got to know Jayne in April when she was our “Interview #4 with a New Cheese Maker.” Well, she isn’t so “new” anymore. After mastering Mozzarella, Ricotta and Chevre, she went on to make Farmhouse Cheddar, Stirred Curd Cheddar and Japapeno Cheddar. She’s still waiting for the last two cheeses to age, but her Farmhouse Cheddar was a big success (according to her son, Alex.)

Jayne documents everything on her wonderful blog, Barefoot Kitchen Witch. She allowed us to condense her Farmhouse Cheddar experience which she shares in 3 separate articles;
I. MAKING
Finally, I’m making a hard cheese.
I’m making Farmhouse Cheddar, and I am both nervous and excited. I’ve started with 2 gallons of local whole milk. Pasteurized, but not ultra-pasteurized.
Right now I’m at the very beginning of the whole process – I’ve added my mesophilic starter and the milk is sitting at or close to 90F for 45 minutes.

I’m 9 minutes into that waiting period.
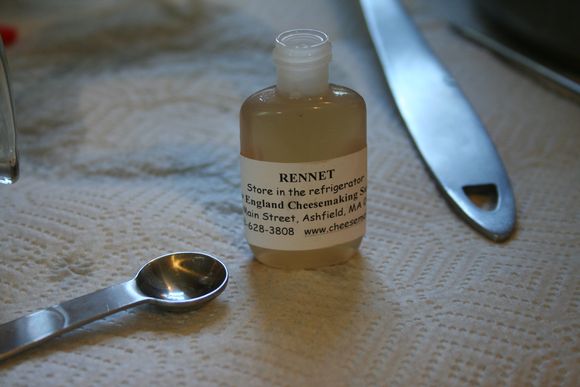
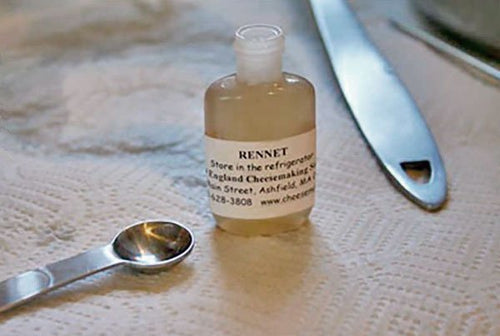
I figure I’ll update as I go along. Next up will be adding the rennet, which is diluted in cold water – 1/2 tsp rennet in 1/4 cup cold non-chlorinated water, in case you’re taking notes.
The starter phase is almost done. I just smelled the milk in the pot – it smells warm and sweet.
Okay, I added the rennet, which is done by pouring it through a slotted ladle and gently stirring so the rennet makes it all the way through the milk and to the bottom of the pot. Then you “top stir” by laying the slotted ladle kind of flat against the top of the milk and gently pressing up and down, no more than half an inch. I think this way of doing things is, in effect, rocking the rennet, like you might very gently rock a cradle – you don’t want to disturb what’s inside, but you want there to be motion. At least, that’s my take on it.
So right now, the pot of milk is sitting on my counter, covered and wrapped in a towel to maintain the temperature as much as possible.
After this step – which is, I think, the most nerve-wracking because WHAT IF IT DOESN’T COAGULATE???!!! – comes the slicing or cutting of the curds. The book calls for a curd knife, which looks exactly like one of the large metal spatulas that I use to ice cakes. So that’s what I’m using. I think I’ll be able to take pictures of that step.
LATER:
Okay. Hitting a snag. Milk with rennet sat for 45 minutes but has not achieved a “clean break” – the curd doesn’t hold together when I poke it with a finger or thermometer. I’m letting it sit another half an hour and trying to stay calm.
Okay, I’m calmer. Haven’t checked the curd again yet, but I did some reading online and it’s okay if the setting takes longer than that 45 minutes to an hour I had anticipated. So I’m still breathing.
ohpleaseohpleaseohpleaseohpleaseohpleaseohplease… five more minutes til I check again…
YAAAAAAAAAAAAAAAAAAAAAAAAAAAAYYYYYYYYYYYYYYYYYYYYYYY!!!!!!!!!!!!
Okay, here’s how it looks when you get a clean break. (Sorry – I didn’t take a picture when it wasn’t breaking cleanly for comparison – I was too panic-stricken. Hahaha. Not really. Much.)
Yes, my finger is clean. What you do is, you stick your clean finger about an inch into the curd at about a 45 degree angle…
And then you lift up with the tip of the finger, bringing it up through the curd…
And, ideally, the curd splits apart relatively neatly, like it’s doing in the picture below (hee hee hee!!!) Before this, when I’d checked it the first time, my finger came away thinly coated with creamy wet curd. Nothing clean about it. So I was VERY happy when I achieved the clean break you see below.

So what’s next?
Well, after I did my little happy dance, it was time to cut the curds.
I need practice with that. Basically, you take your curd knife and, holding it straight up and down and with the tip of the knife touching the bottom of the pot, you slice straight lines about half an inch apart, from one “end” of the pot to the other. For some ornery reason, I started in the middle.

Then, when you’re done slicing the curd in that direction, you turn the pot 90 degrees and slice half inch wide sections again, so it looks like a checkerboard.
All that is the relatively easy part.
Now at this point you’ve got half inch strips of curd – the tops are on the surface and they extend all the way to the bottom of the pot. Got that? Okay. Next, in order to make little curds, you angle your curd knife at 45 degrees or so, and slice – at an angle – through all the lines you’ve just created. So you’re re-slicing through everything, but on an angle.
I kept trying to do this but it felt like I was blindfolded the whole time, and I had no idea if I was cutting at the right angle most of the time. But I did it. I think. Pretty much.

Ideally, I shouldn’t have the smaller, thinner slivers of curd. But it was hard to see the lines some of the time. And it’s the first time I’ve ever done this. I think I’ll do better next time around.
After cutting them, you let them sit for five minutes, covered.
The reason you cut them is to create more surface area through which moisture can be released. If it’s one big curd, then the moisture (whey) is released slowly. If it’s a bunch of little curds, lots more moisture is released, and more quickly.
Now, once your curds have rested, it’s time to sloooooooooooowwwwwwwwwwwwly cook them until they reach 100 degrees F. Now, when you warmed them up and mixed in the starter and the rennet, the temp of the milk was about 90 degrees F, so getting back to 100 shouldn’t be much hassle, right?
Ha! Wrong. Remember I said sloooooooooooooowwwwwwwwwwwwly? That’s the kicker. You can’t heat your curds and whey up any faster than 2 degrees every five minutes. If you go faster, the outside of the curd dries out faster and traps moisture inside too early in the game. At this stage, you want the curds to be releasing moisture, not hanging on to it. So you can’t just set your pot on the stove and crank the flame.
To heat the pot slowly, I used the method recommended in the book (Home Cheese Making, by Ricki Carroll), which is to fill your sink with hot water and set your pot of curds in the water. I read (either in the book or online somewhere), that you want the temperature of the water to be about 10 degrees (or fewer, depending on who you read) above the temperature you’re shooting for. Or something like that. I don’t know – it was very complicated in my mind. I was worried I’d cook the cheese too fast and have to dump it all or suffer the shame of drippy cheddar or something.
But as it turned out, it really wasn’t that difficult or stressful. Just time-consuming. The pot of curds was around 87 degrees by this point. I ran water in the sink and got it to around 100 or so. Then I set the pot in the sink and held a thermometer in the curds for about 40 minutes all told. Well. Not constantly.

You’re also supposed to gently stir the curds around. This encourages them to give up whey and it also helps distribute the heat evenly throughout the pot. I used my curd knife (aka my spatula) to stir, since the spoon and the ladle I tried seemed (to me) to break curds in the process. I may have been imagining that, though.
So, anyway, my goal was two degrees every five minutes – or no faster. And, for the most part, I achieved that goal. At some point it looked like the temperature was going up too fast, so I took the pot out, set it on the counter, stirred to bring the temp down a bit, and then, when the temperature of the curds was stable, I put it back into the water and brought the curd temp up another slow couple of degrees. Sometimes I had to add more hot water to the sink.
It was a learning experience, and by the last few degrees, I felt like I knew what I was doing, which is a nice feeling to have, let me tell you.

Okay, now once you’ve reached 100, you let the curds rest again. After all, it’s hard work, shrinking and eliminating liquid like that.
While the curds took their break, I got my butter muslin (cheesecloth’s finer-woven cousin) and a colander so I could strain the curds.

I would have saved the whey, but I still have 2 quarts of goat’s milk whey in the fridge, and no extra space…so…down the drain it went. Next time, I’ll plan better.

Isn’t that cool????
They look like large cottage cheese curds. And they’re not squishy and delicate like they were when I first sliced them. Now they’re rather firm and hold their shape even when you squeeze them.
I lined the colander with the butter muslin and poured the curds and whey through. Here’s what I ended up with:
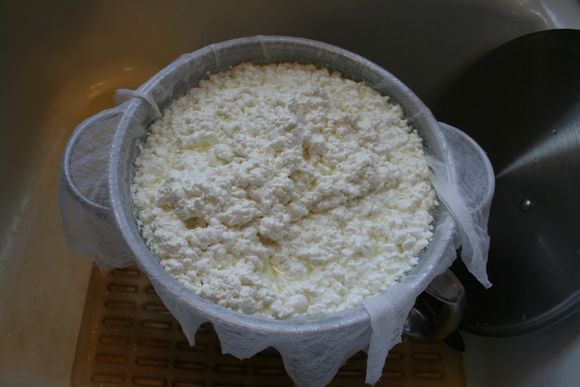
Is it silly to be this overjoyed about curds? I think not.
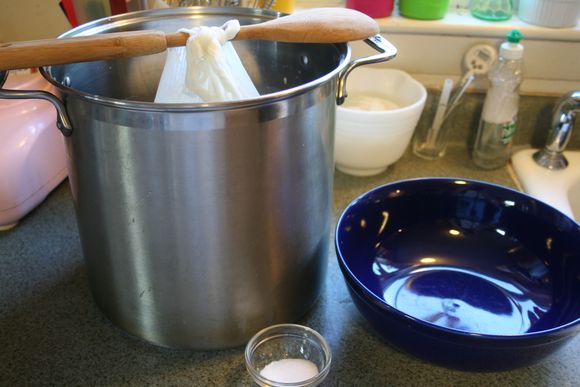
Next, I tied the corners of the muslin, ran a wooden spoon handle through the two knots, and suspended the bag of curds from the top of my cheese pot so it could drain for an hour.

An hour later, it was time to unwrap my curds!

I unwrapped it completely and set it in the bowl and just looked at it for a couple of minutes.

I really sort of wanted to leave it just like that for a while. It looked so cool.
But no, it was time for milling.
Milling is when you break up the strained curd into pieces – in this case they needed to be roughly the size of walnuts. You’re also supposed to do this pretty gently, so as not to squeeze moisture out of the curds at this point. That’s what I read, anyway. So I was careful in my milling.

Next, you directly salt the curds by sprinkling a tablespoon of salt over the curds in the bowl and gently mixing it in. I used Kosher salt, because I always have plenty of it around, but you can also buy cheese salt from cheesemaking supply companies.

I used my hands and carefully tossed the curds around a bit to distribute the salt. When I was done, I noticed a little more whey in the bottom of the bowl, which is completely normal.
Then, while I was reviewing the section on molding and pressing the cheese, I read that ideally the temperature of the curds needs to be 70 or lower, otherwise the curds will loose too much moisture when you start pressing them. So much depends on temperatures!!
Anyway, I wondered just what temperature my curds were, so I stuck a thermometer in one of my curdy walnuts, and I was mildly surprised at what I saw.
Since 82 was way too hot to start pressing, I opened the window, so the chilly after-dinner air would speed up the cooling process. Eventually I hit 70 and it was time to start molding the curds.
First, I lined my plastic cheese mold with butter muslin (didn’t have normal cheesecloth, but I believe you can use that at this point if you prefer) and set it on two sushi mats in a rimmed cookie sheet. The mats help raise the mold off the cookie sheet, so that as the cheese is pressed and the liquid seeps out, the curds are not sitting directly in the liquid. I hope that made sense – it’s getting late and I’m tired.
Next, I spooned the curds into the muslin-lined mold.

(By the way, I’m making Cheddar! Can you believe it? Me neither!)
Initially it looks like you’ve got too many curds for the size mold you’re using, but just press down on the curds with a spoon (or your very clean hands) to flatten it down to about the level of the rim of the mold.
Then you neatly fold the edges of the muslin (or cheesecloth) up over the top of the curds. You want to do this as tidily as possible so as not to form ridges in your cheese.
Next, you need to place a flat round something on top of the wrapped curds. This is called a follower (I think. I’m sleepy.) because it basically follows the curds down during the pressing. (Or at least that’s my take on things.)
You can use a small plate, or a piece of untreated wood cut to fit, or…in my case…the food grade plastic takeout lid from last night’s Wings with Sticky Sauce that we ordered from the Chinese restaurant up the street. The wings are really good, and even better, the container they were in was perfect for my cheese pressing purposes.
I cut the flat part of the lid to use as a follower (it might just be called a “follow.” I’ll check on that tomorrow and let you know if I’m wrong.) and then I used the bottom of the container to hold my weights.
(Update, Sunday morning: It’s “follower.”)

But I am jumping ahead.
To press the cheese, you start with a moderate amount of pressure – ten pounds – for a relatively short period of time – fifteen minutes. I think this is because at this stage the curds are pretty loose, and you’re just getting them mushed and squished into place and releasing the major liquid.
I don’t have a cheese press, though part of me wants to order the blueprints and make one, but we do have weights. Nice flat, round little weights that I removed from the dumbells in the basement and brought up to the kitchen. They’re the perfect size for pressing cheese.
I got four 2 1/2 lb weights to start with and carefully set them in the base of the takeout container on top of the follower on top of the wrapped curds in the mold. Like so:

Almost immediately the curds started to release more whey.
Fifteen minutes later it was time to remove the first set of weights, take the cheese out of the mold, flip it over, and increase the weight.
Here’s the cheese after I took it out of the mold. It’s still wrapped, of course.

And then, a quick flip and back into the mold it goes.

I’d also drained the whey from the cookie sheet and rinsed off the two sushi mats, by the way.
At this point, I pressed the cheese down into the mold and moved the whole thing into the pantry.
So here, for tonight, is the cheese pressing set-up:
That’s twenty pounds of weight on top. I have to leave it like this for 12 hours, then take the cheese out again, flip it over, and put the weights back on it for another 12 hours.
And there’s more to come after that, but I’ll stop now and post this, and then post short updates as the cheese moves into the drying and aging phases.
But for now – I’ve started my first batch of Cheddar. Yay!

II. WAXING AND DRYING
I had the cheese in my pantry drying on a sushi mat on top of a wooden (untreated) board for a week. The instructions I’ve read say 3-5 days depending on air temperature and humidity, but I ended up going a bit longer because I found a bit of mold on one side and after getting rid of that (by prying it off with a knife, which is really NOT the correct method, I learned afterward) I needed to give the cheese a bit longer to re-form the rind. (Correct method is to dip a clean cloth in some vinegar and gently wipe the mold away.)
So, first, after the cheese sat under the final weight for a total of 24 hours. After that point, it was time to unwrap the cheese.
So here it is, after the weight has been removed and I’ve taken the wrapped cheese out of the plastic mold:

Then I very carefully peeled away the cheesecloth.
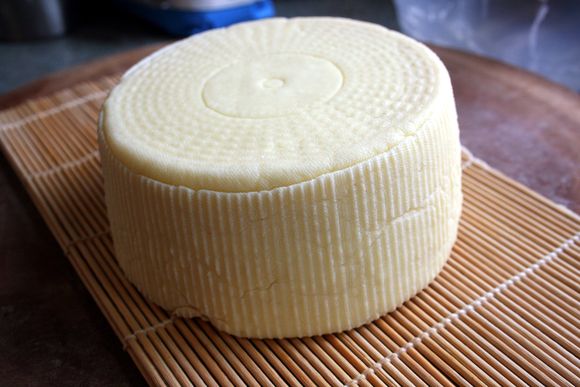
And then I set it down so I could admire my work and take pictures.
And then I critiqued it a bit…for instance, see the cracks down along the lower part in this next picture?
Not sure if that’s going to present a problem later or not. In one recipe I read, the final pressing weight was 20 lbs, but it was 50 in another version of the recipe. I went with 20 because it was, frankly, easier, but now I’m wondering if that might allow moisture to turn into mold or something during the aging phase. I guess we’ll find out around the end of June or so, won’t we?

Anyway, once the cheese was unwrapped, I just set it on a clean, dry mat on top of a piece of wood and put it all back in the pantry to dry.
And I turned it and repositioned it on the mat and the cutting board several times a day, to help the rind develop evenly and to prevent mold from forming.
As I mentioned above, despite my best intentions, a bit of mold did form, but from what I read that’s very normal and easily remedied.
So that was that – periodically turn and move the cheese until it had a nice rind. Not a hard rind – we’re not talking parmesan here. It was a darker, yellower shade than the wet cheese that came out of the cheesecloth, and it felt dry to the touch.
So, before actually waxing the cheese, it’s a good idea to put the cheese in the fridge for a few hours so it’s easier to wax.
Why would that make it easier? Well, because you’re applying heat in the form of very hot wax to this room temperature food item, and the hot wax MIGHT just make the rind soften or melt. But if the cheese is cold, it’s less likely to soften when the wax is applied. And, of course, the wax needs to be applied quickly.
So I put the cheese in the fridge for a few hours and did other stuff for a while.
And when the cheese came out, I wiped it down (as directed) with a damp cloth dipped in vinegar, to get rid of any lingering bacteria that might try to colonize under the wax. I let it sit on the counter to dry while I started melting the wax.

Here’s the cheese wax in my makeshift double boiler. Wax is flammable and cannot be left unattended while it’s melting and over heat, whether it’s an open flame or not. It’s just too potentially dangerous. It’s also recommended that when you’re melting it, you do so with the hooded vent above your stove running, to pull off the heat and vapors that might decide to go rogue and burst into flame.
Yeah, I was a bit uncomfortable about waxing. But as long as you don’t leave it alone, you should be fine.

At last, the wax begins to melt, and the block slips down and lies flat on the bottom of what will now be forever the cheese wax vessel.

Here, off to the side, is a sheet of foil, another sushi mat, and a natural bristle brush. Why? The brush was to paint the wax onto the cheese. I know, I could have dipped it, and I’d originally planned to, but then I changed my mind. The melted wax was going to be very shallow and rather than being able to dip half the cheese wheel at a time, I’d have to keep dipping and rotating the cheese wheel and I’d probably end up having to paint the center portion on each flat side anyway. So I used the brush.
The foil was so I could put the brush down without getting wax on anything else. And the mat? It served no purpose at all. I had it out because later that night I was going to be unwrapping and air drying the Stirred-curd Cheddar. But it served no purpose with the waxing. Consider it a garnish.

And here’s the cheese again, waiting patiently nearby.

I have no pictures of the actual dipping. I’m sorry. But I kind of needed two hands – one to hold the cheese and one to paint the wax on.
It took a few coats. And it was really very warm in my kitchen (80s) so I’d paint on some wax, very quickly (the wax dries fast so you have to paint fast), and then pop it in the fridge to chill down again for a couple of minutes, then back out and wax the unwaxed portion, chill again, then put on another coat in the same stop-start fashion.
And, finally, once the cheese had at least 2, but maybe it was 3 layers of wax applied and dried, I attached a little label so that eventually, when I’ve got a bunch of red wheels of cheese aging, I’ll know which is which.
It ain’t pretty, and maybe I’ll try dipping the next one, because that might look nicer…but here it is.
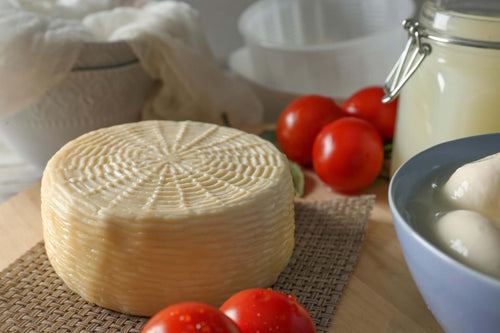
My waxed wheel of Farmhouse Cheddar. Ready to age.
Currently it’s in the basement, in the closet where we store such things as Christmas, Easter, Halloween and Thanksgiving decorations, wine, and other miscellaneous stuff. It’s nice and cool down there, but won’t be humid enough for long, so I’ll be cleaning out our chest freezer (which Bill uses to lager beer sometimes) and setting the temperature to 55 degrees F, and that will be my “cave” for the cheeses. At least until Bill decides to make another lager, which he says he has no plans to do any time soon. I’ll keep it humid during the summer with a little dish of water in the bottom of the fridge, and hopefully that will serve me and my cheeses well. One way or the other, I’ll let you know.
If It Looks Like Cheddar…
YAAAAAAAAAAAAAAYYYYY!

III. TASTING
Ahem.
So, I knew I could sample the Farmhouse Cheddar as early as a month after waxing.
Originally I was going to try to hold off for two months, but…I was just so curious. A mix of curious and worried that maybe I’d somehow messed something up and it would be spoiled.
I just had to know.
So earlier in the week I decided that we’d sample the Farmhouse on Friday.
Then I sort of forgot about it because I got 2 gallons of goat milk at the Farmers’ Market yesterday and got distracted by thoughts of Chevre. Mmmmmmmm…Chevre….
So when Bill said something like “Are you still doing the cheese tonight?” I thought he meant was I going to make the Chevre…and then I remembered.
The Cheddar!
So I got it out of my temperature-regulated chest freezer “cave” and brought it out to the deck on a plate with a knife and some crackers.
And with little fanfare (just some pictures), I picked off the label and cut the wheel in half.
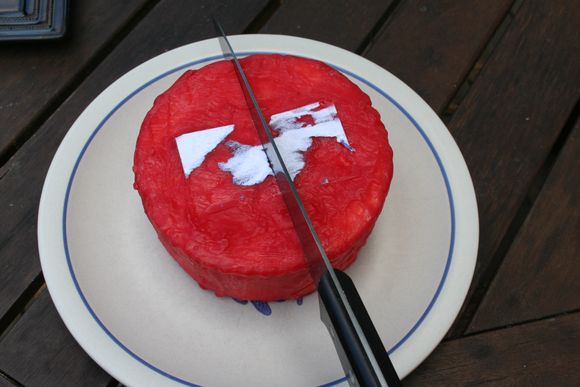
And pulled the halves apart.

AND THERE WAS NO SLIME OR MOLD OR ANYTHING BAD!
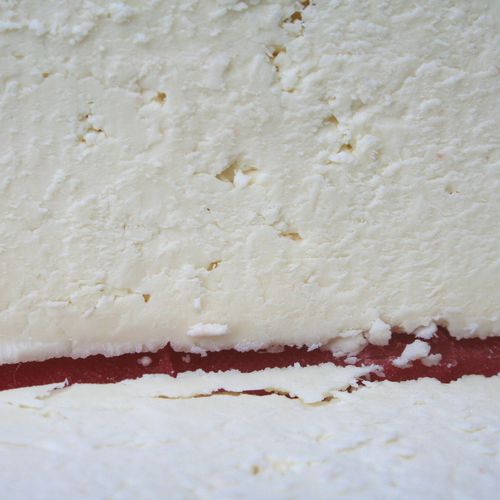
Sorry, I’m still a bit dazzled by it all.
I cut one half in two and peeled the wax off, and took pictures (while Bill fidgeted impatiently nearby) and finally, finally, we sampled a slice.
And…
…it tasted…
…like…
…mild cheddar cheese.
Holy dairy cow, Batman!
I did it!!!!!!


