


This is a challenge!
I will never complain about any aspect of making cheese again. Compared to the conditions under which people in remote areas of the world are working, I have it rediculously easy. Starter cultures, a fridge, an aging “cave,” an electric stove, etc. – these are all luxuries unavailable to cheese makers in many parts of the world.
Rachel Monger, her husband, Tim and their two children have been living in Tanzania since September, 2010. They are volunteering with Emmanuel International on a project to provide fuel-efficient stoves for schools.
I asked Rachel how she got started making cheese:
When we moved to Tanzania, by necessity we started to make things “from scratch.” Bread, cakes, whatever. Even pork! We couldn’t get good cuts of meat, so we bought piglets and later I learned to butcher (there are lots of pig stories on our blog).
We run a fuel-efficient stoves project in rural villages and as part of that do a lot of training in healthy and efficient cooking. We teach women in the village how they can make things like bread or wedding cakes to start income-generating projects. Not long ago, I was trying to think of a business niche for Lucy, a widow in town who was in need of raising extra income to support her children; at the same time our whole family was missing cheese (it is available in town but too expensive for our low budget), and that was when the idea occurred to me. Make it!
We get our milk daily from our neighbors and they could spare more therefore milk was not a problem. So with a new book and your great blog, we started with cream cheese, cottage cheese, halloumi and mozzarella and now we have tried the hard cheese. Lucy and I are learning together and I hope she will soon be making and selling her cheeses for profit! We are both enjoying the cheese-making adventure!
I thought you might be interested in reading Rachel’s blog article about making farmhouse cheddar:
Process of Cheese. Poetic or Practical?
By Rachel Monger at What’s Cooking in Tanzania?
GK Chesterton once said that “poets have been mysteriously silent on the subject of cheese.” I’m so excited about cheese at the moment, that I can’t imagine why! So come on you poets out there … can we have some cheese (as opposed to “cheesy”) poetry? Do share!
So this post is all about cheese … farmhouse cheddar cheese. But more semi-instructional or possibly emotive story-telling than poetic. After making the mother culture starter on Monday, we were ready and rearing to go on Thursday. With the cows next door freshly milked, Amisadai and Louisa went with Taifa to get 7 litres of their milk and we began our first attempt at making hard cheese at 9am.
First we gently heated the milk … actually we got a little carried away and overheated it, so then had to cool it down again. Then we added a little of our starter and left it nice and warm for an hour.
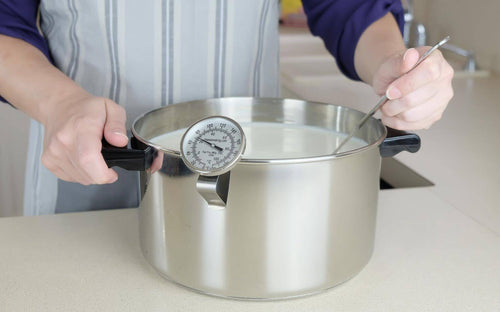
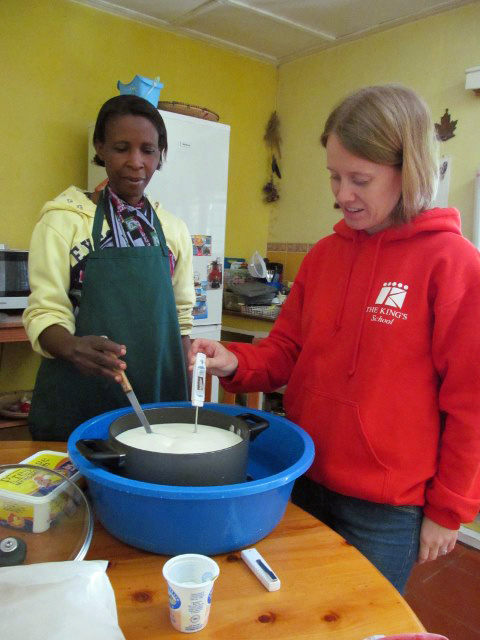 |
| Checking the temperature of the milk |
We came back and added the rennet and then left it, still nice and warm, for another hour. And another hour. And another! This was the point at which I got a little nervous, waiting for those lovely curds to appear. Waiting for the so-called “clean split” one should get in the curd with a little finger. It wasn’t happening. But what really is a “clean split” to look like? A little doubtful for just a while. But then it happened, and it was exciting! Exuberant high five with Lucy! We cut those beautiful soft white curds into little cubes. A very tactile experience! A Little Miss Muffet moment.
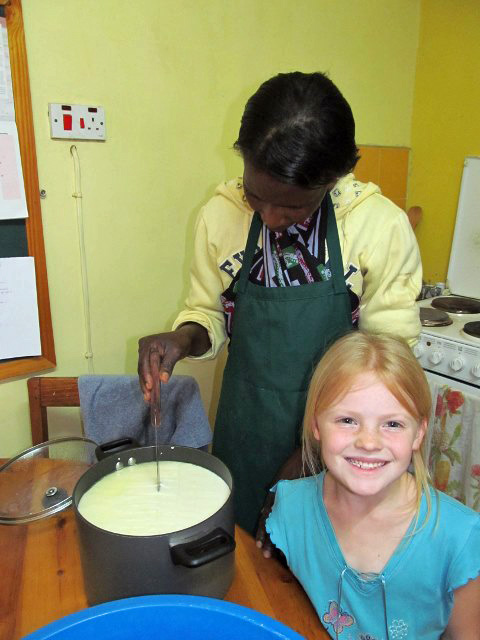 |
| Cutting the curds |

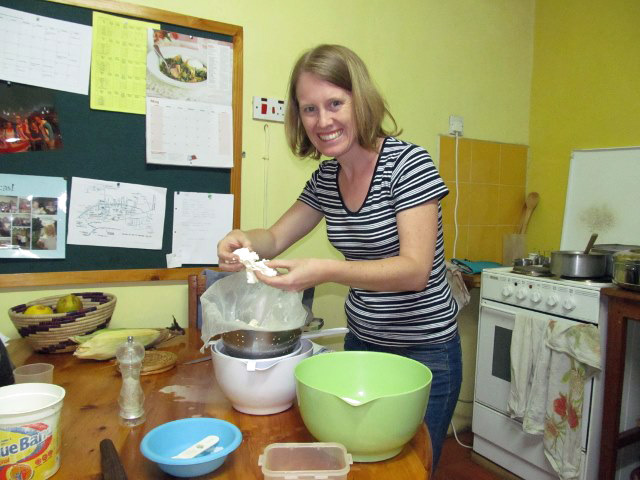
Then we heated the curds. I’m not sure how exact one has to be here, but the book says to raise the temperature of the curds one degree every five minutes. Mmm. We did our very best to follow the instructions and kept adding boiling water to the water bath that our cheese pot was in, and slowly, slowly got the curds to the required 38C. Further great excitement when we got the thermometer reading bang on! Then we strained the whey and left the curds to strain. Unfortunately it was now 4pm and time for Lucy to go home, so she missed the final steps. It was all taking far longer than anticipated! Finally the curds were ready, they could be squeezed without more than a few drops of whey dripping out, and when pulled apart they tore rather than crumbled. I gently “milled” the curd, turning it and breaking it and adding salt. Cheese euphoria!
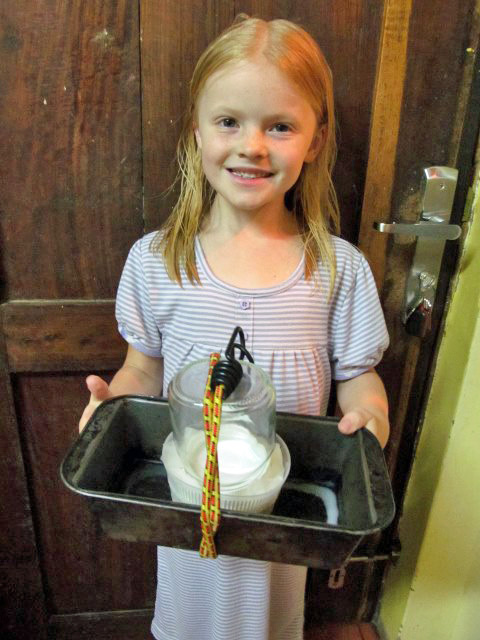
And then we were finally ready to put it into Tim’s amazing cheese press. But we realized that we had far more cheese curds than would fit in the mold. We had made a “follower” (the pressing piece of wood) to fit this particular mold, but it was clear we would need another. So we filled the first mold and put it in the press. Then we rigged up a makeshift press with another mold in a bread tin pressed with a glass jar and bungee cords from the land cruiser! As my mom said, “wasn’t it good I watched MacGyver when I was younger!”
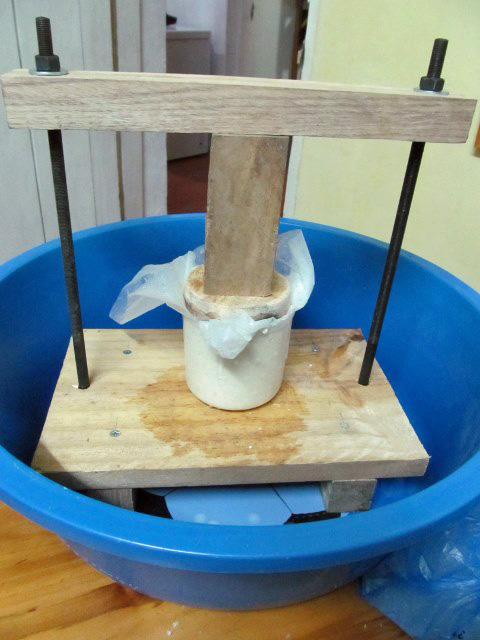 |
| Cheese in the press |
 |
| The “bungee press” |
We pressed it for almost 3 hours and then before we went to bed at 10pm, we removed it and turned upside down before pressing it harder. Every day then for 4 days, we have been removing and turning and pressing again.
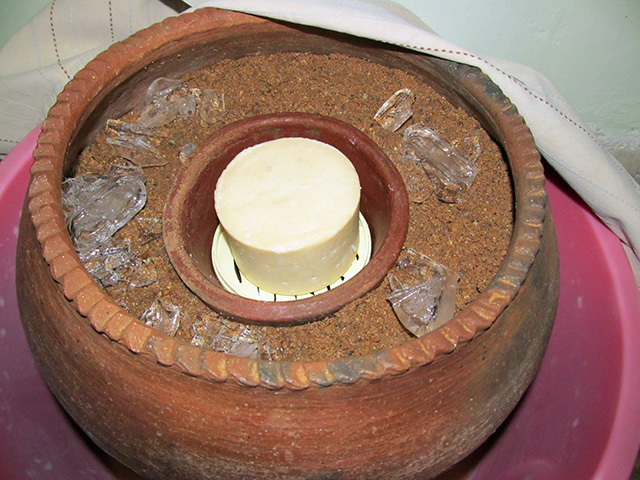
Today was the day that the cheese graduated from the press and began life as a maturing cheese. Further great excitement. But it needed somewhere cool and humid to do this. We don’t have anything remotely like a cool cellar here. So dismissing the fridge idea, today the girls and I embarked on a fridge making lesson. The girls thought about it and we looked at plans online and ended up with what we know – clay pots. One clay pot inside another. And wet sand in between. So we collected sand, scrubbed pots and put it all together and then started measuring the temperature and humidity inside. We were looking for 12C and 70% humidity. We managed to get the perfect humidity with a wet towel, but we couldn’t get the temperature low enough. We substituted a smaller pot and increased the wet sand. Still not low enough. Now with time running out and the cheese begging to be released from the press, we had to cheat. We added ice. Perfect! But the girls were not too impressed.
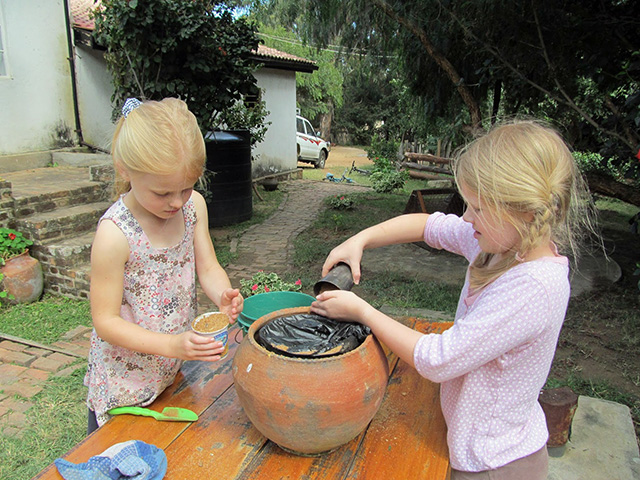 |
| Adding the sand to the clay fridge |
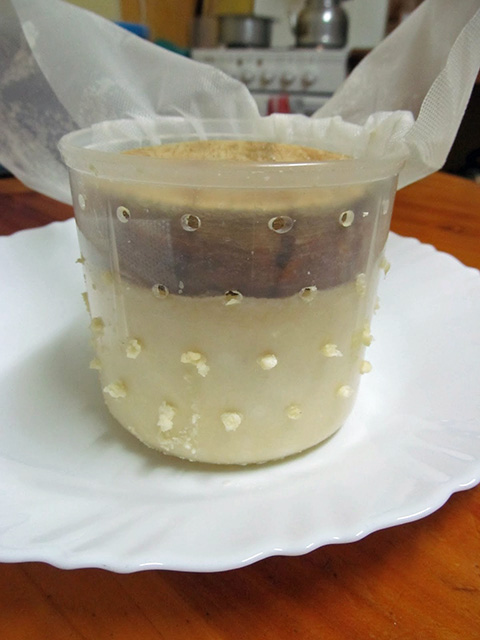 |
| The pressed cheese |
 |
| Cheese in the clay cooler |
So a great cheesy moment as we removed the cheeses from their presses. They looked good, smelled good (a bit cheesy) and felt good! We slathered both cheeses with vegetable fat and put the one cheese in the clay cooler. Unfortunately the other didn’t fit, so that has gone in the bottom of the fridge which we have turned down low and added a bowl of water for increased humidity! I have asked Tim about making a bigger-better clay cooler for us – specifically designed for the job. Maybe! And it crossed my mind that stove-makers in the village could also make clay coolers .. and there are plenty of Masai and cows out there so who knows where all this cheese-making will end!
But what a procedure! Now I know why cheese is expensive! And this is only the beginning. It still has to survive all the drying and maturing in storage for a few months. I’m already getting excited about the great cheese-tasting in a few months, hoping it will live up to (realistic) expectations!
So we need a good name for our cheese. Farmhouse Cheddar doesn’t seem so appropriate for us here. I was reading about Cornish Yarg Nettle Cheese, a medieval cheese recipe now made by and named after the Gray family. But Regnom Cheese doesn’t have the same ring to it! And Ycul really doesn’t work! Tim thought of Shamba Cheddar (“shamba” is Swahili for “farm”). Louisa’s only contribution was “Cheesy Feet” … do you have any good ideas?
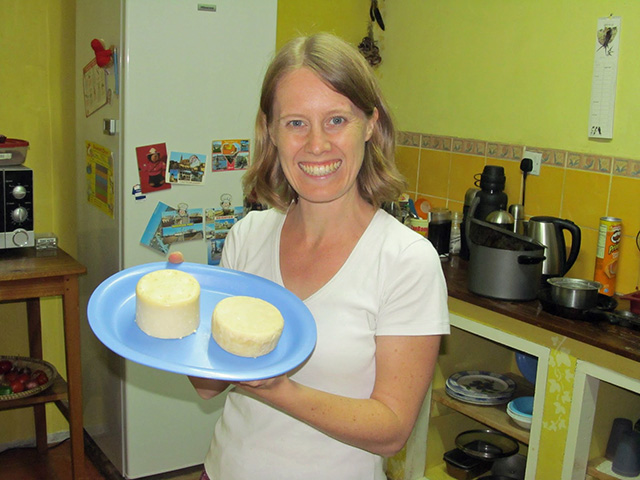 |
| Two rounds of farmhouse cheddar ready to mature |


