 |
| Louise M. Dutton |
This is the most inexpensive cheese alternative you will ever eat!
Normally we keep our focus on dairy products (because that’s our area of expertise), but we get a lot of questions about how to make “cheese” from soybeans.
Recently, Louise Dutton from Fort Lauderdale, FL wrote to us with her own recipes for making soy cottage cheese, yogurt and cream cheese. She wrote:
I’ve attached a doc file with the recipe for making soy cheese, as well as soy yogurt and milk. You can also use this “cheese” in cheesecakes. I use a bit of Mirin in my cheesecake recipe and no one can even tell it’s made from soy. (Mirin is a sweet Japanese condiment.)
Although I have never tried it, I would think that by adding nutritional yeast to the cheese it would make it taste a bit like cheddar. I used to make gallon jars of the milk and put some aside for yogurt and cheese.
I also make my own tofu from this recipe as well. After straining the milk, add nigiri or vinegar to the slurry and it acts much like cheese curds you put into molds, but it’s tofu. The tofu “whey” can be used to clean with, cook with, or feed to your plants.
I hope this was helpful. I’ve been making this for well over 20 years. The original recipe was from “The Farm Vegetarian Cooking” printed in 1975, but I’ve added what works for me.
Take one cup of dried beans, place in a bowl and cover with 4 cups boiling water.
Soak for 2-4 hours, then drain.
Place one cup of the soaked beans in a blender with 2.5 cups of hot water (be careful, start on low speed and work your way up so you don’t burn yourself).
Pour into a pot and repeat with the rest of the beans in the same way. Start boiling and skim off the foam.
Boil for 20 minutes while stirring (you don’t want it to stick to the bottom and burn or boil over). Stay on top of it and turn the heat down, maintaining a boil.
Drain through a tea towel.
Squeeze! Pour a cup or two of boiling water over Okara (soy pulp) to get out any extra “milk.”
Pour milk a into jar. Cool to 90-115F.
Briskly stir in inoculants (2 tablespoons yogurt or 1 packet of yogurt starter).
Set in a warmed oven (NOT ON!) I warm my oven to 200F before I even start and then shut it off. The pizza stone retains heat and keeps the oven warm. You don’t want the temperature over 118F or it will kill your inoculants).
Let sit overnight or until the yogurt has “set.”
Drain yogurt into another clean tea towel and hang to drain.
Once the cheese has drained (4 hours or more depending on the consistency you want) place in a bowl and mix in salt to taste and you have “cottage cheese.”
OR,
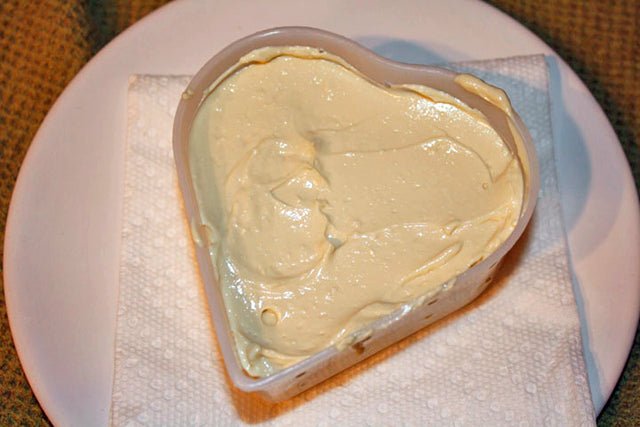
Alternatively, mix cheese, ¼ tsp salt, ½ tsp sugar and 2 tablespoons oil in a food processor and process until silky smooth. Place in a mold or container and chill for a couple of hours until it is set. Unmold and voila! You have cream cheese! Better than store bought soy cream cheese and it doesn’t contain chemicals or casein.
So what did we learn? One cup of dry soy beans (roughly 75 cents) and lots of patience, will make you one cup of cream cheese.
Personally, when I do this, I make a gallon of milk from one pound of dry beans, use half for yogurt and half of the yogurt to make the cheese. This way I only have to do it once a week.
You can use the milk as you would regular milk in any recipe. You can flavor it to your liking.
You can make ice cream, or frozen yogurt from the yogurt or even cheesecake from the cream cheese!
Making Yogurt and Soy “Cheese”
1 qt. homemade soy milk (or store bought should work too)
2 Tbls of yogurt or one packet of yogurt starter
Salt
Heat milk to boil stirring constantly.
Pour into sterile jar and cover.
Cool to 110 degrees (if you touch your wrist to the jar, it should be warm but not burn you)
Add the yogurt or starter and stir briskly until dissolved well. Cover and incubate for 2-8 hours. I put mine in a just warmed oven. The idea is to keep it as close to 110-115 degrees as possible for as long as possible in order for it to set. You’ll know it’s done if you tilt the jar and it separates cleanly from the side of the jar.
Put the yogurt you just made into a cheese bag or make a bag from cheese cloth and hang it for a few hours so the whey drains out of it.
Cottage “Cheese”
Sprinkle with salt and break up.
Cream Cheese
1 cup of the yogurt cheese
2 Tbls oil
1/8 tsp. salt
½ tsp sugar
Blend all ingredients in a blender until smooth, pour into a bowl or mold and chill for a couple of hours until it is firm.
Soymilk
1 cup of organic soybeans
Water
Optional ingredients (vanilla, almond extract, maple syrup)
Pour 4 cups of boiling water over the beans and soak for 4 hours.
After the soak, rinse them. Place 1 cup of soaked beans into a blender with 2½ cups of boiling water. Blend to a very fine slurry and pour contents into a large heavy pot that won’t burn easily. Repeat until all the beans have been processed in this way.
Cook the mixture in a heavy pot set over medium high and bring to a boil stirring frequently. Watch the pot very carefully. When it starts to boil, turn the heat down to a simmer and boil for 20 minutes. Be careful, it will boil over in a heartbeat. Strain the milk over a colander lined with cheesecloth over a 1 gallon pot or bowl or other container. Once you’ve strained it all, press the pulp and twist the bag to extract as much milk as possible from it. Be careful! It’s HOT! Reopen the bag and pour another 2 cups of boiling water over the pulp to extract any milk left and repeat pressing process. The pulp that is left over is called Okara and can be used in other recipes, like “soysage” (yum).
Pour your milk into its final container and add a few drops of vanilla extract, almond extract and maple syrup until desired flavor is achieved. Start with ½ tsp of each.
The faster you cool the milk, the longer it will keep. It should keep for 4-5 days.


