


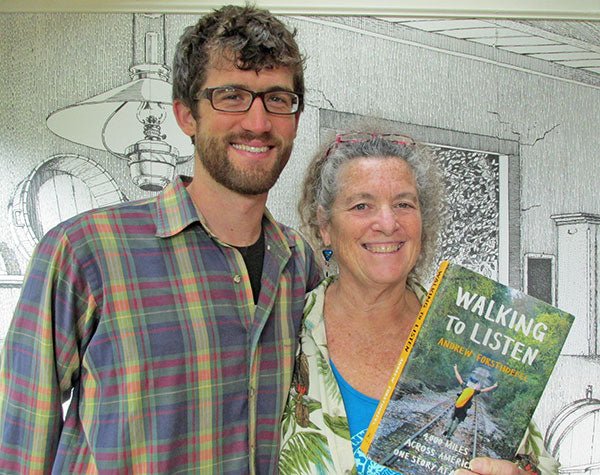
 A year ago, we posted an interview with Becca Heins when she earned her prestigious Cheese Professional Certification from the American Cheese Society (click here). She spent 6 months preparing for the exam – reading, taking online classes, visiting cheese makers and interning at local creameries.
Becca works with Kate Johnson at The Art of Cheese in Longmont, Colorado and she teaches classes in her home, as well. She makes some of the most beautiful cheeses we have ever seen. In the picture below, the purple one is a bandaged wrapped cheddar with calico over the butter muslin. She created the other ones by inserting “stencils” in the molds to imprint the shapes you see into the cheese itself. The flowers and leaves are waxed onto the surface. Spectacular!

Cheesemaking with Camel Milk
By Becca Heins, Certified Cheese Professional
I’m lucky to have had the chance to make cheese with a wide variety of milks – from off the shelf grocery store milks to farm fresh cow, goat and sheep milks. Recently I had a chance to make cheese with some new and unusual milks at a 3-day workshop at The Art of Cheese where I teach. One of our students generously brought fresh cow, water buffalo, and camel milks from Camelot Dairy, Wray Colorado. We had not had an opportunity to work with water buffalo or camel milks before. All the milks from Camelot Dairy were pasteurized and nonhomogenized. Each were rich and creamy and tasted like, well, milk! We used some of the water buffalo milk in class to make a rich and creamy mozzarella di bufala which everyone agreed was YUM! The rest of the water buffalo and cow milks were used to make various aged cheeses during the workshop, all with good results from the make.
Our first attempt in class with the camel milk was less of a success. Fortunately, there was some extra camel milk at the end of the workshop I could take home to experiment with.

The first thing I did was some online research. I read a United Nations publication on cheesemaking with camel milk, cited at the end of this article. Traditionally, camel milk is not made into cheese. It is fed to calves and drunk by humans (fresh or fermented). The content of camel milk is similar to cow milk in terms of lactose, proteins, fats, and minerals, however there are important differences. Based on my understanding of the article and my precious one gallon of camel milk, I set up two cheesemaking experiments – one for a lactic (acid) coagulated cheese and one for an enzymatic (rennet) coagulated cheese.
Lactic Coagulated Camel Milk Cheese
Based on what I read, fairly good cheesemaking results are expected from lactic (acid) coagulation-cheeses like Chèvre and Valençay that have long ripening times and use just a drop or two of rennet. So I started with my favorite lactic bloomy cheese recipe and made the following adjustments:
- Add calcium chloride at double the normal rate. When the proteins in camel milk form a curd, it binds with significantly less calcium than cow, sheep and goat milks. I theorized that adding more calcium chloride would make a firmer curd.
- Increase ripening time and temperature. Camel milk, even pasteurized, contains antimicrobials that delay acidification. I theorized that a little more heat and time than my typical recipe called for would be needed to acidify and coagulate the curd. So I increased the ripening temperature a few degrees and estimated 15 hours to coagulate instead of 12.
- Add rennet at double the normal rate (2 drops instead of 1). Many of us home cheesemakers don’t delve too deep into the differences between rennets. Rennet is a general term we use for the enzyme(s) that coagulate milk. The most frequently mentioned enzymes are chymosin and pepsin. Camel milk coagulates better with pepsin than chymosin. According to my supplier, the animal rennet I had on hand is ~90% chymosin. So even though I was making a lactic fermented cheese, I theorized that adding an extra drop of rennet would make a fractional amount more pepsin available.
- Delay addition of the white mold powder that forms the bloomy rind. In an attempt to limit the variables, I opted to apply the Penicillium candidum to the surface of the cheese after draining instead of adding it during the make.
I checked the curd after 8 hours. Temperature was steady, and the pH was dropping. Both good signs.

But I had a dilemma. Even though I had planned to leave the curd another 6-7 hours, the curd splitting and clear whey separation I could see in my pot told me the curd was ready to drain. And since it was my bedtime, I didn’t want to risk leaving it until morning and over ripening it. I decided to go ahead and fill the forms.
As expected, the curd was fragile and brittle – sort of like working with standard, off-the-shelf grocery milk if you have ever done that. I ladled it very gingerly into a muslin lined basket and left it to drain.

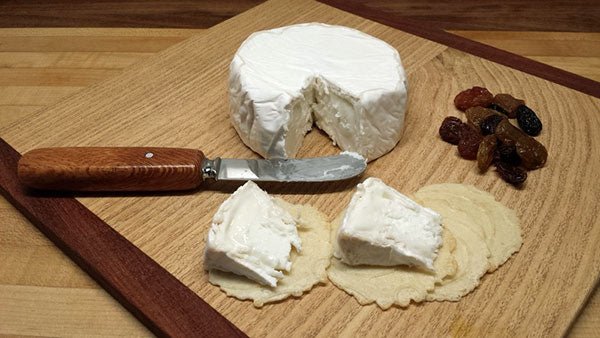
In the morning, I flipped the cheese and removed the muslin. The yield was lower than with farm fresh milk, closer to what I get from grocery milk, but I was satisfied I had gotten everything out of the milk that I could. The pH after draining was ~ 5.0, close enough to target for this experiment! I applied the salt and the P. candidum and began the usual aging steps – air dry flipping often, then move to a ripening box in my aging space.

Enzymatic (rennet) Coagulated Camel Milk Cheese
Having had good initial results from the lactic cheese make, I was ready to try a renneted one. Based on the information I read, I anticipated having to substantially increase the rennet (50 to 100%) and the coagulation time (5 or 6 times as long). But if I left the milk to coagulate 5 or 6 times longer than my recipe, I was worried the acidity would be way out of line. And I didn’t want to change too many variables in one experiment.
I have a Feta recipe that uses quite a bit of rennet (1/2 tsp. per gallon). I decided to try that recipe as written, except for the following adjustments:
- Add calcium chloride at double the normal rate under the theory that making additional calcium available would make a firmer curd.
- Add the amount of mesophilic culture called for in the recipe, but increase the ripening time 25% (to compensate for the antimicrobials in camel milk that delay acidification).
Based on good initial results with the lactic cheese and this recipe using lots of rennet, I used the amount of rennet in the recipe. After 60 minutes, the milk had thickened, but the curd was nowhere near a clean break, so I left it another 45 minutes – almost double the coagulation time.
Next I cut and stirred the curd *very*gently for the time called for in the recipe. The curd was very wet and soft compared to farm fresh goat milk. Then I ladled some curd into a muslin lined basket, wheyed off, and ladled the rest of the curd. The whey was clear but the yield was much less than usual. After draining I began the usual aging steps – salting, air dry flipping often, then move to a ripening box in my aging space.
Taste Test
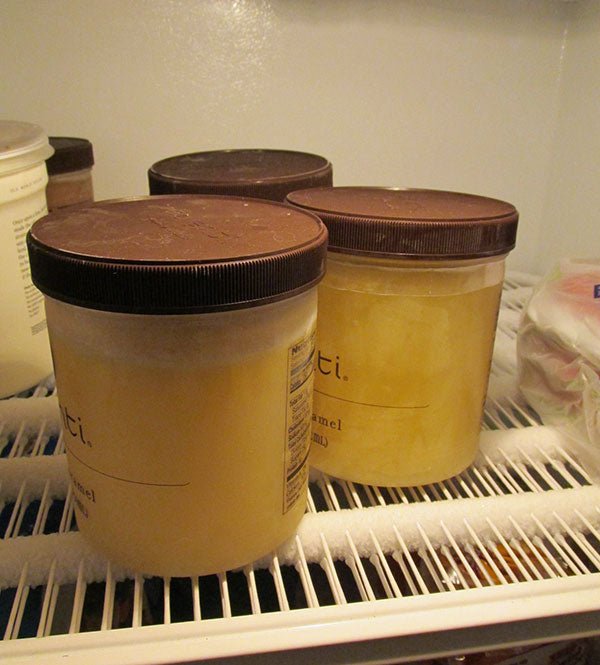
The Feta was ready to taste first. I happened to have some farm fresh goat Feta that was within a couple days of being the same age, so we were able to compare the two. The camel Feta was very similar to the goat Feta, but a little tangier, which I attribute to the longer ripening and coagulation times. And it had a certain je ne sais quoi that was no doubt the flavor of the camel milk itself. The texture was slightly chalkier and a little more brittle. Success! Perhaps the most noticeable difference was the yield, shown below. On the left is the camel Feta yield. On the right is the yield from the same amount of farm fresh goat milk.

We tasted the lactic bloomy rind cheese when it was soft to the touch. The rind and texture of the paste looked great with just the right amount of proteolysis (break down of the proteins).

The flavor was quite good with a long after taste. It was milder than a goat milk camembert I had made at about the same time. One important note: we could taste the saltiness from the extra calcium chloride I added during the make. I don’t think I would double the amount next time for this style of cheese. Interestingly, we did not detect the calcium chloride flavor in the Feta, probably because of its already high salt profile.
Conclusions
Although I only had two data points, my cheesemaking experiments pretty much confirmed what I had read about making cheese from camel milk. Yes it was “difficult” in the sense that I had to handle the curd with extreme care, and yes the yields were lower than some other milks. But it certainly can be done and with tasty results to boot!
If you are interested in cheesemaking with camel milk, there is a lot of good information in this United Nations Research Publication:
Ramet, J.P., The technology of making cheese from camel milk (Camelus dromedarius), 2001, Food and Agriculture Organization of the United Nations, http://www.fao.org/docrep/003/t0755e/t0755e00.htm


