


Your kitchen is unique, so your choice of how to sanitize your tools is your own. Some folks can get away with very little effort while others have to be very careful. It’s one of those things you determine as you gain experience. This article is meant for those of you who do not sell your cheese because there are all kinds of laws and regulations regarding procedures for commercial cheese makers.
Little known fact:
Oddly enough, it is harder for you to prepare your kitchen for cheese making than it is for commercial cheese makers to prepare their make rooms. This is especially true if you have pets (coliform) or if you bake your own bread (yeast) or if you have raw meat on the counter (salmonella). Cheese is never heated to a hot enough temperature to fight off these unwanted organisms.
Tips for preparing your kitchen include:
Do not bake bread for at least 36 hours before making cheese.
Do not have your windows open, especially on windy days (unless, of course, it’s sweltering hot).
Do not let your pets come in and out of the kitchen while you are making cheese.
Do not have any other food on the counter that day.
Do not use dish towels or sponges that day- put them away and use paper towels.
Quick review:
We’re certain you already know how to clean your equipment. (It’s easiest when you wash it in cold water first and then hot water to best remove the milk residue.) But, now you’re ready to make cheese and you know that everything has bacteria from the air and the water you rinsed it in. This is the point when you want to sanitize.
Overview:
The point of sanitizing is to kill the unwanted bacteria. A good sanitizer keeps working after it has dried on your equipment. It then becomes neutralized when it comes into contact with your milk or curds. The only way you can rinse it off effectively is with boiled water. Otherwise, the bacteria in the rinse water will negate the effect of the sanitizer.
However, even if you rinse with boiled water, your equipment still has no protection from the bacteria in the air. We know this is being picky and it may be no problem for you, but we do want to emphasize that chemical sanitizers protect from pathogens for hours (some say days) when they are not rinsed off your tools.
Reminder:
Before we begin with your many options, we want to remind you to wash your hands thoroughly, because they can be sources of all kinds of bacteria. And, needless to say, if you have a cold, please wait until it’s over so you don’t sneeeze on the cheeese!
Quick Note:
You may think that if you are using pasteurized milk, you are less likely to have a problem with bad bacteria. Actually, however, pasteurized milk is devoid of the pathogen fighting bacteria that raw milk has. So, cleanliness is even more important when you are using pasteurized milk.
Worth repeating:
Sterilizing and sanitizing are two separate procedures. Either or both may be used to prepare for cheese making. However, at the risk of saying this too many times, after sterilization there is no protection from bacteria in the air and after sanitizing (if not rinsed), there is. Sterilizing may be enough for you, but you can always follow it with a quick spray of sanitizer to be sure.
Chemicals
1. Food Grade Sanitizers
The most widely used sanitizer for cheese making (and beer making) is (Star San). It is made from food grade phosphoric acid and it is flavorless, odorless and biodegradable. The beauty of it is that if you do not rinse it off, the acid residue continues to fight off unwanted bacteria the whole time you are making your cheese (even hours later!). You can wipe it on your tools or spray it on and soak for 5 minutes, then let it air dry. When it comes in contact with your milk, it becomes inactive and tasteless.
It’s economical because you only use 2 tablespoons per 5 gallons of water. When you mix it up, if you keep it in a sealed container, it will remain effective for up to three to four weeks or as long as the pH is 3 or lower (or just keep it until it becomes cloudy). Another advantage is that it foams up which makes it easier to get into crevices when you spray it on.
In our opinion, this is the easiest and best method. If you have been making your own beer, chances are you have this product already.

2. Bleach
Household bleach is a very effective sanitizer. There is no question however, that it is bad for your lungs and bad for the environment. It was never intended to be used on skin, so please wear gloves when handling it and do not combine it with any other chemical. It should be used at 75-120F.
Many cheese makers soak their tools in a mixture of 2 tablespoons of bleach to 1 gallon of water and then rinse them off thoroughly with water. In fact, this is what we recommend in our book, Home Cheese Making.
There is an interesting option for this, which Gianaclis Caldwell points out in her book, Mastering Artisan Cheesemaking. If you use only 1/2 teaspoon of bleach per gallon of water, you do not have to rinse it off. This way, it continues to protect your tools right up until the time they come in contact with your milk. You can make sure you are maintaining the right ratio (50-100 ppm) by using chlorine test strips (available online). If you use your solution in a spray bottle, it will be effective for up to a week.
Caution: Always add your bleach (or any other acid cleaner) to your water and not the reverse. It’s much safer that way.

Available at Indigo Instruments
3. Vinegar
Believe it or not, apple cider vinegar is actually slightly more effective than white vinegar as a sanitizer. Either one (5% ascetic adid) is a very popular sanitizer, although it is not as effective as bleach. It is, however, biodegradable and every bit as inexpensive as bleach. (Do not mix vinegar and bleach!) Simply spray it (undiluted) on your tools and air dry.
You can combine vinegar in a spray bottle with 20 drops of tea tree oil to make it more effective (click here). Or, you can spray or soak your tools in undiluted vinegar, wait at least 5 minutes and then spray or soak them in hydrogen peroxide (see below). (Do not mix vinegar and hydrogen peroxide together because it makes them both less effective.

Courtesy of thriftyfun.com
4. Hydrogen Peroxide
This is another natural disinfectant which isn’t bad for the environment, but it is not the most economical option unless you have access to it as a powder for commercial use. You can usually purchase it at grocery stores or pharmacies as a 3% solution. If you use it, you will need to soak your utensils in it for at least 10 minutes. If that’s too long, you can heat it to 130F and hold it for 1 minute. Rinse and air dry. You can also wipe off your equipment and your counters with it.
Note: It is estimated to be 10 times more effective when used with vinegar (see above) than alone.

Courtesy of slideplayer.com
5. Iodine Solutions
Iodine compounds (iodophors) are possibly the most eco-friendly of the so-called eco-friendly sanitizers because iodine occurs in nature. One advantage to iodine sanitizers is that, like the acid sanitizers, they have a controlled release effect, so they continue to work long after they have been applied. They can be expensive. but if you do want to invest in a gallon bottle of it, use it at a concentration of 12.5-25 ppm and a temperature of 75-120F.
Five Star (the company that makes Star San) makes an iodine sanitizer, 10 Star Sanitizer which is used interchangeably with Star San. It was developed to compete with Idophor, another commonly used iodine sanitizer. It is less expensive than Star San.
Be aware: Many folks do not use it as a spray because it stains and because it doesn’t foam as much as Star San. It also does not last as long as Star San if kept in a sealed container.

Courtesy of leadersbeverage.com
Heat
6. Dishwasher
If you have a sanitizing cycle on your dishwasher, you can run your clean pots and utensils and mats through it (without detergent) and let them dry, then use immediately. Be advised that you may not want to put your plastic molds on the lower rack and Kodova molds are never dishwashable.
There will still be ambient bacteria in the air which will settle on everything, but unless your air is particularly contaminated, this will be enough. If you want to be very sure, follow with an acid sanitizer like one of the ones above.
7. Oven
This is easy! You can put your heatproof tools in the oven at 340F for 1 hour.
8. Hot Water
Here’s another simple method – Fill a pot (preferably your cheese making pot) with water and put all your tools and utensils in it. Heat to at least 185F for 5 minutes. This is more than sanitizing, actually – it’s sterilizing. Then, air dry everything and use for cheese making.
Note: Usually your colander is plastic, so, to clean it – After you have boiled your cheesecloth, spread it on your colander while it’s still wet, then pour the leftover boiled water through the cheesecloth and the colander, thus sterilizing the colander.
Here again, while everything is drying, it will pick up bacteria from the air. To hedge your bets, use an acid sanitizer.
Gavin Webber made a great little video about this method:
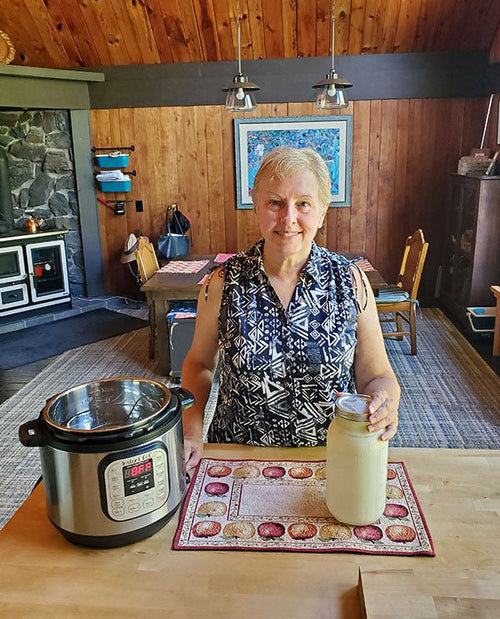
9. Steam or Pressure Cooker
You can steam your utensils in a pot with 2 inches of boiling water in the bottom for 5 minutes. Or, you can sterilize your stainless steel tools in your pressure cooker for 20 minutes at 257F (or by following the directions with your pressure cooker). You will need a wire or steel rack for this purpose (or a steamer basket).

10. Microwave
A microwave only heats liquids, so you would only use it for your wet, clean cheesecloth (or butter muslin), but it can be a quick way to sterilize your cloth at the last minute.
Cheesecloth can be used wet so don’t worry if it isn’t dry after you microwave it. In fact, whenever possible, most cheese makers dip their cheesecloth in their warm whey to help keep the curds from sticking to it.
We hope you found a method to use here. Let us know in the comments or at jeri@cheesemaking.com.
Save


