


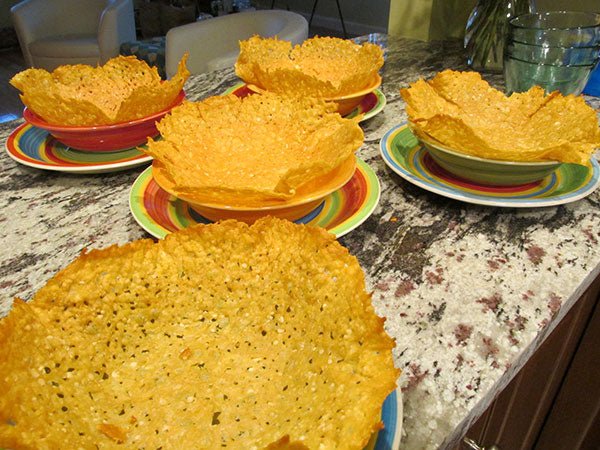

This was quite possibly the most fun I have ever had in the kitchen! I was having a little dinner party (5) and I wanted to try making cheese crisps – those little round ones you put in salads. I looked up recipes online and there were hundreds of them – probably because it’s so easy. Then I noticed a few recipes for cheese bowls and I was completely bowled over! I could imagine how impressed my guests would be, and when I finally had my party, they were!
You will need:
-parchment paper or silpat
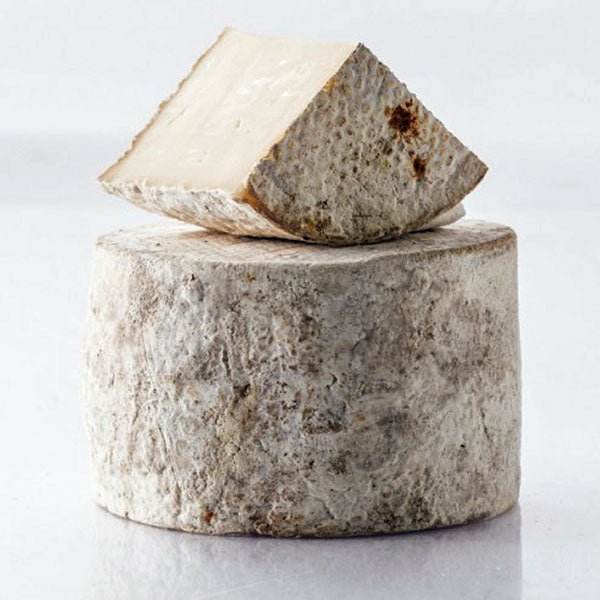
-hard cheese (Parmesan, Chedder, Manchego, Asiago, etc.) (Depending on the size of your bowl, you will need around 4-6 ounces of cheese per bowl.)
-a grater (Or, you can buy bags of shredded cheese)
-a baking sheet
-a bowl (The size will vary depending on whether you want large or small cheese bowls. You can use muffin cups if you want to.)
-paper towels
Directions:
Preheat to 400F
Pick out your bowl and put it on the counter with a few paper towels beneath it (to catch the oil that will drip down later)

I didn’t think to put paper towels beneath my bowl until I had made several bowls and I realized it was sitting in a pool of oil!
Lay a piece of parchment paper on the largest flat baking sheet you have. Grab a handful of cheese and spread it out loosely into a circle as large as you think will fit over your bowl

I might have been a little heavy-handed with the cheese. It probably could have been more loosely spread out.
 Place the baking sheet with the circle of cheese in the oven (with the rack somewhere near the middle). Set your timer for 5 minutes but check it after 4. The cheese is ready when it is bubbly and the edges have turned slightly brown. If you take it out too soon, your bowl will not be as crispy as it will be if you wait. In my oven, it took around 10 minutes before it was ready.
 Set it on your counter and as soon as you can, pick it up by the corners of the parchment up and flip it over onto the top of your bowl. Take a paper towel and put it over the parchment paper while you mold the cheese around the bowl.

 Peel off the parchment paper and let the cheese remain on the bowl while you prepare to make another cheese bowl

 You can use the same piece of parchment paper over again for the next one.
Right before you take the second one out of the oven, take the first one off the bowl and set on a rack or a paper towel. When it’s dry, it’s done.
 Just keep going with this until you have as many bowls as you want.
When they are completely dry, store them at room temperature in a plastic bag or container for up to 5 days.
 If you want, you can mix different cheeses together and you can add herbs and spices (there is already enough salt, so I wouldn’t add that).
I was originally going to fill my bowls with Caesar salad with slices of steak on top. Then, I decided that it would be more fun to break off pieces of the bowl and dip them into something soft like chili. (My bowls had too many holes to use for soup.) The question was: Will the hot chili melt the bowls?
I decided to put the cheese bowls in ceramic bowls, so that if the bowls melted, they would still be shaped like bowls. This worked perfectly! The bottoms melted, but the sides stayed crisp. We broke off the sides and mixed them into the chili, and then when we came to the bottom of the bowl, we mixed the melted cheese into the remaining chili. It was fabulous!

This looks kind of plain, but I had bowls of lettuce, tomatoes and sour cream for my guests to put on top. Next time, I will put the lettuce on the bottom of the chili and I think that will look prettier.


