


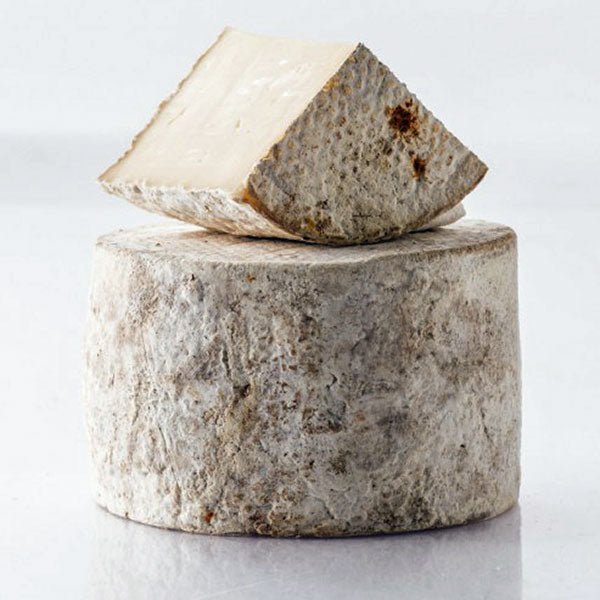

“Little Darling Tomme” from DiBruno Bros.
Or, as the song might go, “We’re just a flippin and a rubbin…”
Natural rinds – that sounds so easy – just you and your cheese growing old together with no barriers between you. (We know all about your love for that cheese you made so carefully. You promised yourself nothing would come between you and it, didn’t you?)
Well, it is easy. All you have to do is keep the bad bacteria (and mites and mice) away from your loved ones and they will thrive. Look at just a few of the most common natural rind cheeses – Stilton, Tomme de Savoie, Parmigiano-Reggiano, Lancashire and Cantal. They were raised naturally and they have proven themselves to be winners on the cheese board. So will yours.

Jim Wallace’s cheeses, rubbed in olive oil
Your job is simply to control their environment. Your tools include your temperature, humidity and air circulation and your goal is to keep the bad bacteria off the good bacteria.
The tips below pertain to aging hard cheeses naturally (as nature intended). Murray’s website affectionately refers to this area of their aging cellar as the “The Expressionists – the place where natural rinds go to relax and freely express their mold tendencies.” Strictly speaking, washed rind cheeses and bandaged cheeses are natural rinds, but they have separate issues, so we have decided to cover them in separate articles. Stay tuned…
These are just a few of the most important tips we have to share with you about aging natural rind cheeses at home:

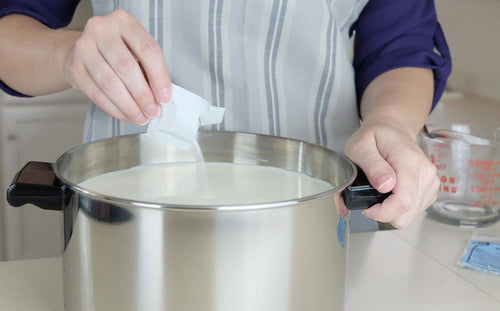
From Artisan Cheese Making at Home
1. Know Your Curds In American Farmstead Cheese by Paul Kindstedt, he mentions an old cheese maker’s adage, “The cheese is made in the vat.” In other words, the aging of your cheese depends on how well you handled your curds. Otherwise, your aging process becomes nothing but damage control. In Kinstedt’s book, there is an excellent chapter about this called Working and Firming the Curds (p. 209).
2. Keep Records It’s important to make notes as you age your cheese (There’s a great Affinage Record form at Mary Karlin’s website Artisan Cheese Making at Home.) (We assume you are already taking notes as you make your cheese and we offer a printable make sheet in our free e-book – sign up on the home page of this blog). If you keep your records handy, you will be able to improve your method every time you make it.
3. Stagger Your Wait Times Make a variety of cheeses with different aging times so you aren’t sitting around waiting for all your cheeses to mature. Or, if you want to make one kind of cheese consistently, stagger your make times. For example, if you make a wheel of cheddar every month, you will probably always have homemade cheddar, aged to perfection.
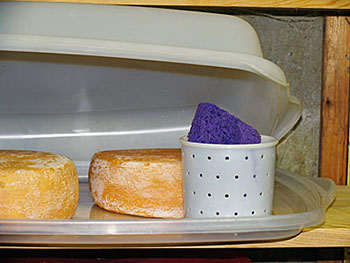
Jim Wallaces’s cheeses in a Rubbermaid “Take-Along”
4. Use Ripening Boxes If you are doing a variety of cheeses with natural rinds, get plastic boxes with lids, larger the size of your cheeses to allow for air circulation. This way, you can put different kinds of cheeses in your cave and each one has it’s own little environment with it’s own humidity level. These are called ripening boxes and you can leave your cheeses in them, at least for the first few months, until they have formed a thin rind. Be sure to put mats on the bottom so your cheese isn’t sitting directly on the surface of the box. Open frequently to provide fresh air and wipe off any moisture that accumulates inside. For more about ripening boxes, click here.

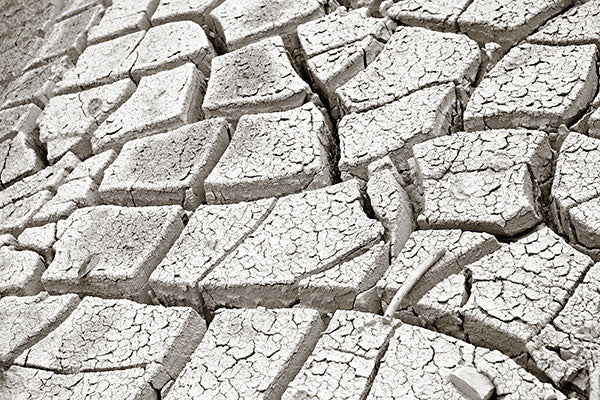
A dried cheese
5. Dry Your Cheese Drying out your cheese after pressing is a very important phase of your operation. Typically, this takes 3-5 days. However, if the air is very humid (above 75%), it can take a week or more. If the air is very dry (less than 60%), put an upside down bowl over your cheese to keep it from cracking.
Do not place your cheese on a plate or a fine mat where the moisture will be trapped beneath the cheese. A mat with a wide thread count placed on top of a wire rack is an excellent surface. A wood board may also be used, because the wood will absorb the moisture.
Turn the cheese over once or twice a day during this drying period. If there are flies in the area, loosely cover your cheese with clean cheesecloth. (Note: If you live in a very hot climate, you might have to dry your cheese in the fridge. This might take up to 2-3 weeks.) When the tops and sides are slightly yellow and feel completely dry, your cheese is ready to be put in the cave.
6. Control Your Temperature In your cave, whatever it may be, temperature is important. (We do not recommend aging your cheese in a regular refrigerator, because it will take at least twice as long to mature than it would at the right temperature and the starter cultures will not be able to work their magic. If you absolutely have to use it, put your cheese in the warmest section of the fridge and keep it inside a plastic box which is larger than the cheese (cheese 40%, empty air 60%).) Wine refrigerators make good “caves” or you can convert any refrigerator to a cave by using a refrigerator thermostat. Most of the time, you will want the temperature to be in the 45-60F range (your recipe should specify). (We have a lot of good info in our blog about aging caves and on our website – click here.

Steve Murtaugh’s drawing from Controlling Humidity in Your Cheese “Cave”
7. Measure Your Humidity Maintaining the right humidity is just as important as keeping the right temperature. A hygrometer will let you know where you stand, but you will still need to provide moisture for the air in your cave. Many folks use sponges with water or wet towels. We also suggest placing a small bowl of salt in your cave or ripening box to help maintain the humidity. (Paul Kindstedt recommends this in American Homestead Cheese and one of our customers did his own research on this subject – click here.) Your goal will usually be 65-75%, depending on the type of cheese you are making. (Note: if there are many cheeses in your cave, they will all be adding to the humidity, so you will need to add less water in order to maintain your goal.)
8. Circulate the Air While cheeses are aging, they emit gases and these gases need to be dissipated by air circulation in your aging environment. It only takes a little-too much air movement will draw moisture from the cheese causing the surface to crack and the cheese to dry out. If you have a cheese room, make sure your cheeses are well spaced. If you have a cheese fridge, regularly leave the door open for a short period to let in new, fresh air and crack the lids on any containers as well. Normally, if you are flipping your cheeses every day, they will get enough fresh air from the opening of your fridge and the opening of your ripening boxes.
9. Flip Flip your cheeses regularly, particularly the first few weeks. This distributes the moisture evenly. Once a day would be optimum. (It’s a good idea to wash your hands first or wear gloves, because any contact you make with the cheese is an opportunity for bad bacteria to enter the rind.)

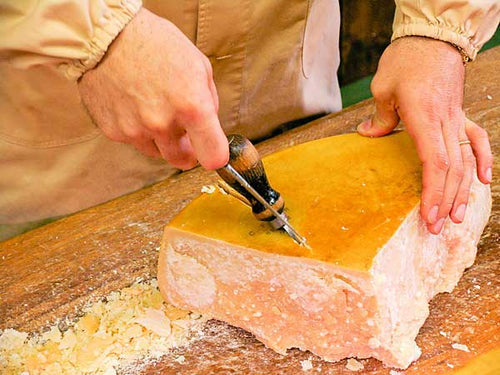
Rubbing the mold off (from our How-To section)
10. Rub Mold always has an open invitation to dine on cheese, so it will appear. You can wipe it off regularly with a dry piece of sterilized cheesecloth or one soaked in a salt water solution (1 tablespoon salt and 1 tablespoon vinegar to 1 cup of water). If there is too much mold and you can’t wipe it off, it may mean that your cheese was either too moist when you took it out of the press or it didn’t air dry for long enough.
Oil rubbing is a good deterrent: When your cheeses get dry (usually after a couple of weeks), coat them with butter, lard, olive oil or any other kind of oil. This needs to be repeated (even every other day for the first month), because it does soak in after awhile. After a month, you can do it less and less often until you will only need to do it every other month.
Oil rubbing has two functions: it helps regulate moisture loss and, it stops mold growth. It can also be a barrier for mites (for more about mites – click here). This method will work on most hard cheeses -just dip a piece of cheese cloth in the oil and rub it thinly on all sides. (Note: Keep your cloth in the fridge when not in use to discourage molds from growing on it.)

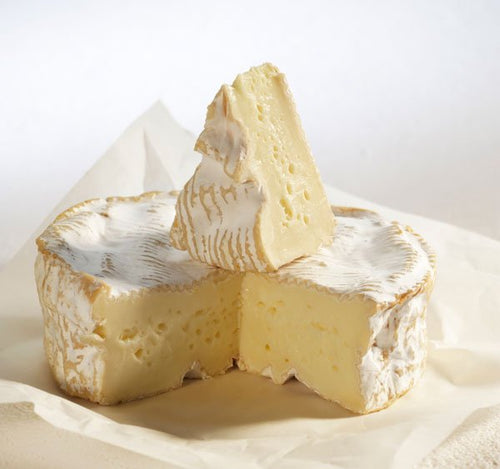
Kirkhams Lancashire at St. Kilian’s Cheeseshop
Bonus Tip: To label your natural rind cheeses, use a prismatic style watercolor pencil-it won’t penetrate the surface – click here.
Questions? They say cheese making is 20% in the making and 80% in the aging. It’s a BIG issue. So, be sure to write to our technical advisor, Jim Wallace at info@cheesemaking.com with any questions you have. Our goal is to make sure you get the best results possible (while having the most fun, of course!).


