


Our Cheese Challenger Does it Again!
As you probably know, last summer Suzanne McMinn (Chickens in the Road) accepted our challenge to make a new cheese every month and she has emerged triumphant every time! This month she aced her first magnificent Romano.
Making Romano
By Suzanne McMinn
URL: http://chickensintheroad.com/cooking/making-romano/
Romano is one of the world’s oldest–and most popular–cheeses. It’s great on top of pasta and garlic toast, and is a key ingredient in many Italian recipes. Named after the city of Rome, it was a favorite of the emperors. It’s a hard, salty, sharp cheese that can be made with sheep’s, goat’s, or cow’s milk (or a combination). If you make it with cow’s milk, add lipase powder. (If you haven’t tried lipase in your Italian cheeses yet, try it! I used to make mozzarella without lipase. Once I started adding lipase, I was hooked on the flavor it adds.) Lipase is an enzyme that adds the particular flavor you find in Italian cheeses, many of which were originally made with goat’s or sheep’s milk.
The only Italian cheese I had tried for a long time was mozzarella, and I had a hard enough time conquering that one. I would look over the Romano recipe periodically and turn the page. I was afraid to try it. But, I’m not allowed to be scared now! I have my cheese challenge for New England Cheesemaking to tackle, and with my goal to make all my own cheese, I couldn’t wait too long to start making Romano. I love Italian food, and unless I want to give up lasagna forever, I’d better get some Romano or Parmesan going because it takes a long time to age. I haven’t tried Parmesan yet, but it’s a similar process to Romano, so I’m eager to try it soon now that I’ve conquered Romano. And yes, I mean conquered! This cheese is so much easier than I expected.
Romano requires thermophilic starter, which is a bacteria that thrives on higher temperatures. Mesophilic starter, which is the starter I’ve used in previous cheese challenge recipes such as Monterey Jack, is actually killed by heat higher than 104F while thermophilic, on the other hand, is inactive at lower temperatures. The process of creating Romano requires heating the milk up to 116F.
The following recipe is from Ricki Carroll’s Home Cheese Making.
How to make Romano cheese:
2 gallons low-fat milk (2 percent)
6 ounces heavy cream
1 packet direct-set thermophilic starter
1/4 teaspoon lipase powder, dissolved in 1/4 cup cool water
1/2 teaspoon rennet, dissolved in 1/4 cup cool water
cheese salt and water for brine
1-2 tablespoons olive oil for the rind (later)
Start by placing the lipase powder in the water to dissolve.

For best flavor, you want the lipase powder to sit, dissolved, for 20 minutes before adding to the milk, so get this going before you start heating your pot of milk.
The lipase powder seems kind of clumpy when it goes in.

But don’t worry–it dissolves perfectly as it sits. Once it dissolves, stir well and wait 20 minutes.

To make the cheese:
1. Heat the milk to 88F.

Add the cream. Add the starter and mix well. Add the lipase, if using.

Cover and allow the milk to ripen for 10 minutes.
By the way, I got a new 12-quart stainless steel pot to use for two gallon cheese recipes and I am loving it. It’s just the right size for two gallons of milk.

2. Add the diluted rennet, stirring gently with an up-and-down motion for several minutes. Cover and allow to set at 88F until the curd gives a clean break. (For me, this takes about an hour.)
This is what a “clean break” means. If you put a knife in there, you could separate the curd without it falling back all over itself. It will firmly separate.

3. Using a curd knife and/or stainless steel whisk, cut the curd into 1/4-inch cubes.

You need nice small curd cubes for Romano. It’s okay if all the pieces aren’t exactly the same size.

4. Heat the curds to 116F over the course of 45 minutes, raising the temperature by 2 degrees every 5 minutes at first, then gradually increasing to one degree per minute. (I do this by turning on and off the heat every few minutes. Watch the temperature constantly. This is The Hour of Paying Attention to the Romano. Don’t go doing something else.)

Maintain the curds at 116F for 30 minutes or until they become firm enough that they retain their shape when squeezed.
The curds will have become much smaller now as much of the whey has been expelled.

Take a few curds into your hand and squeeze them to test.

5. Drain off the whey.
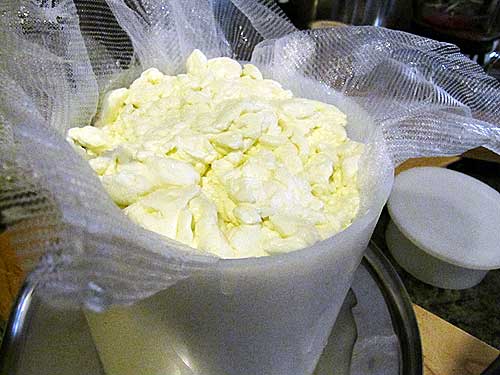
6. Line a 2-pound cheese mold with cheesecloth. (You should be getting your mold lined while you’re heating the curds. Have it ready. Don’t dawdle!) Place the curds in the mold.
Press at 5 pounds pressure for 15 minutes.
7. Remove the cheese from the mold and gently peel away the cheesecloth. Turn over the cheese, re-dress it, and press at 10 pounds pressure for 30 minutes.
8. Repeat the process but press at 20 pounds pressure for 2 hours.
9. Repeat the process again but press at 40 pounds pressure for 12 hours.
10. Remove the cheese from the mold. Peel away the cheesecloth. Make a brine using 2 pounds of cheese salt and a gallon of water. (I actually use smaller bowls and smaller brines now to save on salt, just be sure that you keep the ratio of salt to water in your brine the same and that it is enough to immerse the cheese.) Soak the cheese in the brine for 12 hours in the refrigerator.
11. Remove the cheese from the brine and pat dry. Age the cheese at 55F and 85 percent humidity. Turn it over frequently and check for mold. If there is any, you can remove it with a cloth dampened in vinegar or salt water. (I haven’t had trouble with mold on my Romanos–possibly because it’s a dryer cheese.)
12. After 2 months, lightly rub the cheese with olive oil to keep the rind from drying out. (Note that you only need to use one or two tablespoons of oil.) Age for another 3 to 10 months.
Yield: 2 pounds.
Romano is sharper and dryer the longer you age it. It can be used as a “table cheese” after only 5 months, but if you want that wonderful, hard, flavorful Romano that you can grate on top of your pasta and garlic toast, you really want to wait a year.
A YEAR.
This could be the longest year of my life.
My experience: I love making Romano! Here’s why: IT’S EASY. And fast. It’s one of the quicker hard cheese recipes I’ve tried. From the time you put the milk in the pot to the moment you put it in the press is only 2 hours. And half of that time is when the milk is setting up and you don’t even have to do anything. Where has this cheese been all my life?
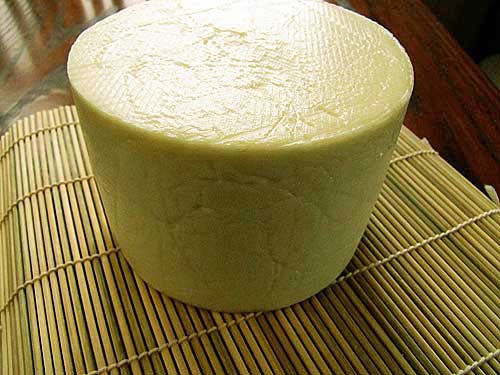
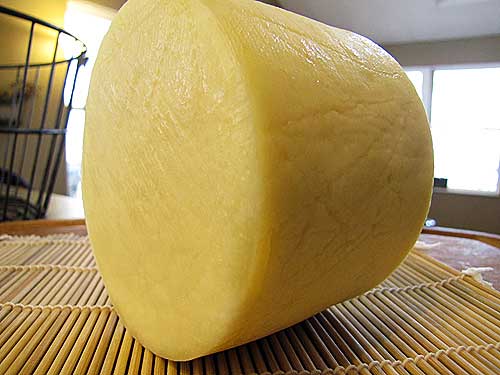
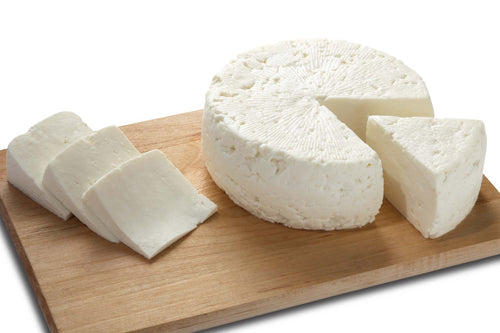
A two-pound Romano worthy of the emperors.

I spent so much time admiring this two-pound romano that 52 finally said, “What’s its name?” I said, “Bobby…..” And then I decided it was a girl. “Sue. Bobby Sue!” I have no explanation for this other than that I think I am a little bit in love with it.
The rind on that cheese is well-knit, by the way. The impressions on the sides of the cheese are from the cheesecloth. I’m still working on refining my method for keeping the cheesecloth from making imprints. I am, quite possibly, obsessed with cheesecloth imprints and my inability to completely eradicate them. I should probably give up on that.
The only real difficulty I had with the recipe was figuring out how to make low-fat milk out of my fresh whole cow’s milk. I researched low-fat milk. What I could find said that low-fat milk is made by taking milk fat out and adding powdered milk solids back (for the consistency of the fluid). Non-fat milk also has powdered milk for the same reason. Only whole milk (from the store) doesn’t include powdered milk. (Who knew?!) I’m milking a cow to make cheese with fresh milk and I’m going to put POWDERED milk into it? Nooooo…….
I took my question to the Chickens in the Road forum and after some discussion, came to the conclusion that the best way to make low-fat milk at home from fresh milk was to let the milk sit longer before skimming the cream. When you bring in fresh milk, after filtering, it goes into a big bowl in the fridge to sit for, usually, a day before skimming. If you let the milk sit longer, two days, more cream rises to the top and, after skimming, a lower-fat milk is left behind. (Note that the milk is refrigerated the entire time.) If you have the time and patience for it, you could even let your milk sit three days before skimming. (Or skim daily for three days.)
I’ve made a couple of Romanos now and will be making more because I have a feeling it’s going to be my go-to hard cheese when I’m “pressed” (haha) for time. None of mine have aged two months yet, though, so I haven’t gotten to the point of rubbing them with olive oil. If you have any Romano experience, I’d love to hear about it!


