


 |
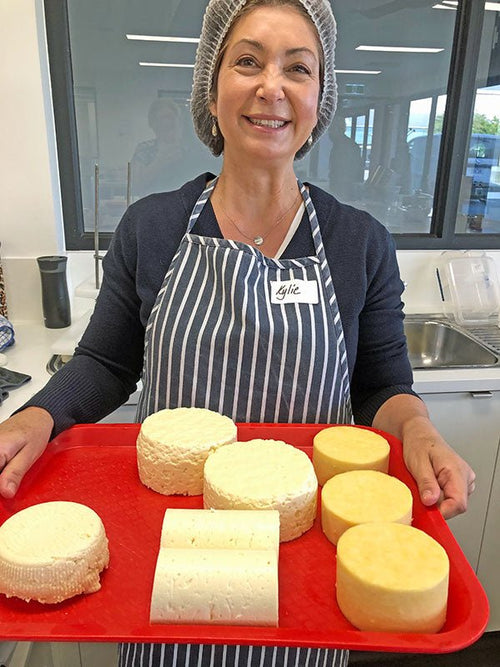
| Mara Welton |
It couldn’t be any easier!
Are you tired of spending a small fortune on those little tubes of string cheese? Why do it? You and/or your children will much prefer the taste of your own healthier version and you’ll be using less plastic, which, of course, is better for the environment.
Thanks to our guest blogger, Mara Welton from Half Pint Farm in the Winooski Watershed area of Northern Vermont, we are presenting our first tutorial about making string cheese. Mara took fabulous pictures of every movement she made during the process, so you can see for yourself how simple it really is.
Mara and her husband, Spencer have a small farm which is extremely productive. Their soil is rich from frequent floodings of the watershed in the spring and fall. This comes from their website:
Isn’t that amazing – from only a couple of acres?!

 |
| Spencer and Mara Welton at a Farmer’s Market |
The Half Pint website is an education in itself. There are hundreds of
pictures of the farm, showing their growing techniques, their produce,
their recipes- and even short informative videos like the one below:
My String Cheese Incident
By Mara Welton at Half Pint Farm

While I was skimming the cream from my incredibly delicious raw milk
from Bread & Butter Farm this morning, it occurred to me that I had too much milk. We had been drinking less than usual this past week, and it appeared that I had now accumulated about a gallon and a half over the past 10 days. Something had to be done.
Normally I would just make a quick batch of ricotta and call it done, but I was feeling like I should do something different this time and settled on making one of our favorite snacks these days: string cheese! For those of you not in the know – string cheese is simply mozzarella shaped into long rods, usually they are in 1 oz. sizes. These, alas, wouldn’t be wrapped in fun cartoon-laden easy-to-open single-serve plastic sleeves, but I planned on enjoying them just the same!

I entered the world of cheesemaking like most friends of mine (excepting, of course, the professional fromagers I happen to know), through the Ricki’s Cheesemaking Kits. These are more and more available in grocery stores and cooking supply shops, but when all else fails, you can buy them online. OR. You could pull together your own cheesemaking kit with a few easy supplies:
OK, now you’re ready to make some cheese! I had only made mozzarella one time before with mixed results, but decided that today was the day that I would master it and add fresh string cheese to my repertoire. Time to make me some string cheese! Luckily for me, it was simple, fun, and incredibly tasty! On to the super-simple steps:

First step: add 1½ teaspoons citric acid to a 5 or 6 quart pot with ½ c. cold non-chlorinated water. I just used the filtered water on the door of my fridge. Swirl around until citric acid is dissolved.

I get my citric acid from our local homebrew store.

Next, measure out 1 gallon of milk, and add it to your pot with the citric acid water.

Put citric-acid-water-milk on stove on medium heat.

While your milk is heating, get your rennet ready – I use liquid rennet, usually found in the yogurt section of my grocery store. It is vegetarian (made from cardoons, an added bonus for this cardoon lover, I tell you!). If you use liquid rennet, you will be using ¼ teaspoon for the 1 gallon of milk. If you end up using rennet tablets, crush up ¼ tablet in ¼ c. of water.

When your milk has reached the magic number of 88°F, take it off the heat, and stir in your liquid rennet or rennet mixture.

Stir it for about 30 seconds to make sure it is distributed evenly, then let sit for 8 minutes. If desired, while stirring, I would add 1 tsp. of salt at this time to give the cheese some flavor. I wish I had done that with this batch.

Using a long-bladed knife, cut up the curds. Your knife should reach all the way to the bottom of your pot.

Should look like this when you are done

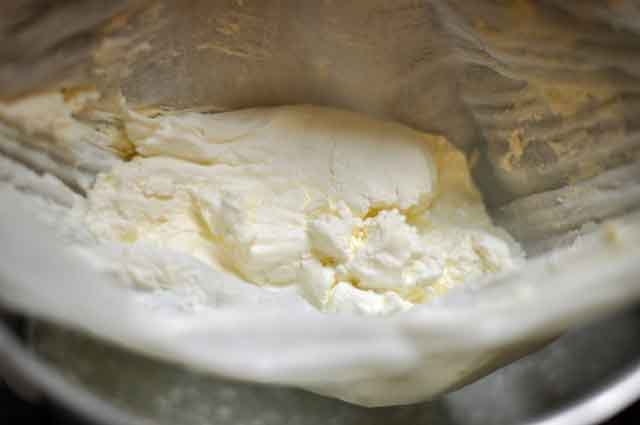
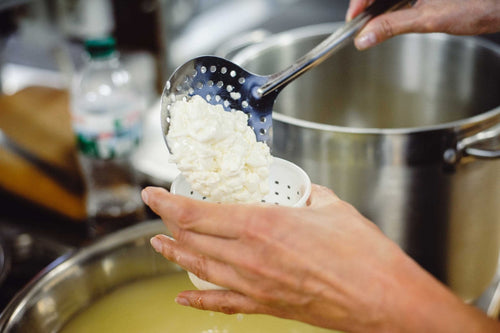
Time to take the curds off the whey! with a slotted spoon, ladle all the curds off the whey, and don’t worry about busting up the curds too much. This will help them release the whey, which is what you are trying to do.

This is the whey leftover from the curds – before squeezing the curds out. As you can see, by volume, there is about ½ curds, ½ whey in this project – pretty interesting, I think.

At this stage, you have 2 options. If you have a microwave (I do not), put your curds in a bowl, in the microwave, on high for 35 seconds. If you do not have a microwave, fill a bowl with boiling water, and submerge the curds in that fine-meshed sieve in the hot water.

Heating the cheese makes it pliable, which is nice because you have to knead it like dough to get that classic stringy texture. I have found that you can let the cheese sit in the hot water for as long as you need to with no drawbacks. I am salting the cheese here – unsuccessfully – I would definitely do it in the aforementioned step instead.

Kneading the cheese. Just like dough. If it stiffens, just toss back in the hot water, or in the microwave for another 35 seconds.

Once pliable enough to break into nice pieces, you can start doing that – I wanted them fairly uniform, so I weighed mine out to 1 oz. each.

Then, I started the process of rolling them into shape. I kept dunking them back into the hot water bath to soften them for rolling out. This step is just like making playdough snakes!

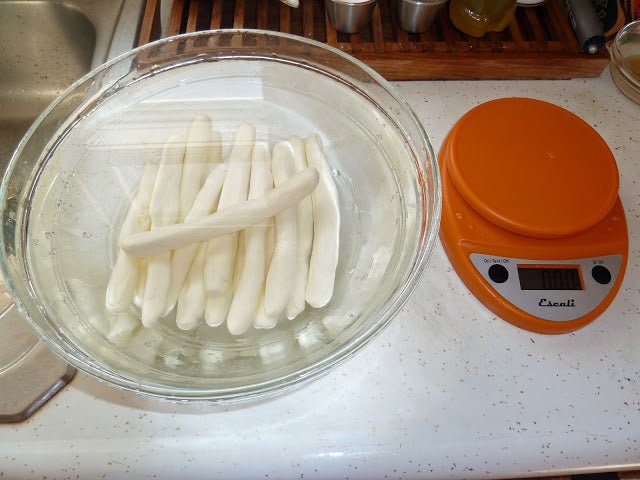
As each stick is formed, and you’ve decided you are done rolling each one out, you can chill the cheese in a bowl of cold water. I just roll them out, shape them, then toss them in the cold water to firm up until I’m done with all the mozzarella sticks.

 |
| Sticks cooling |
My recipe made 15 beautiful string cheese sticks, each around 1 oz. The recipe mentioned that a gallon of milk should make about a pound, so I am happy with this result.

I gotta say – I am thrilled with the stringy goodness that I created today! My only critique is that I would definitely salt it earlier. This batch is a little bland, but definitely edible.
- When making cheese, please use good hygiene. All tools and hands should be extremely clean. It would be so sad if all your efforts resulted in bad bacteria contamination and your hard-earned cheese went bad before its time!
- The recipe above is directly taken from the instructions for homemade mozzarella in Ricki’s Cheesemaking Kit. Please support her and her efforts to get everyone making cheese at home!
- I am storing my string cheese in a plastic zip bag in the fridge for now. I am not sure if we can down nearly a pound of string cheese in a few days, but if all else fails, we DO have Super Bowl coming up this weekend… do I smell homemade fried mozzarella sticks, anyone?
- I am going to try making bocconcini next time, and marinate them in olive oil and spices for future cheese plates.
- It is clear that I have far too little milk now that I know how to make cheese!
- Thanks for letting me give a shout-out to a great jam band from my native Colorado – THE String Cheese Incident rocks, by the way.


