


Peggy Ployhar, from Kenyon, Minnesota has a lot going on! She and her husband and their three young children run a “hobby farm” with an apartment they rent out for farm stays in the summer.
According to her website, With All Your Life, Peggy teaches an impressive list of cooking classes, including cheese making (click here). She also speaks at conferences, meetings and retreats on a wide variety of topics, including the history of cheese in all different areas of the world (click here).
She has a huge collection of healthy recipes including ones for making sour cream, butter, kefir and yogurt. Best of all, she has created a long list of cheese tutorials. As you can see from the list below, there are some unusual recipes you will not find elsewhere (at least in English):
Homemade Domiati Cheese
Vacuum Sealing Cheese
Cleaning a Natural Cheese Cloth
Homemade Mysost Cheese
Homemade Leerdammer Cheese
Homemade Fromage Blanc
A Recipe for Asiago Cheese
Romano Cheese Recipe
Homemade Gouda Cheese
Homemade Chihuahua Cheese
Homemade Scamorza Cheese
Homemade Jarlsberg Cheese
Homemade Colby Cheese
Homemade Bel Paese Cheese
Homemade Piora Cheese
Hot Pepper Havarti
Making Cheddar Cheese
Whey Ricotta
Mozzarella My Way
Making Gruyere Cheese
The latest addition to her tutorial collection is the one below for Brie:
Homemade Brie Cheese
By Peggy Ployhar at With All Your Life
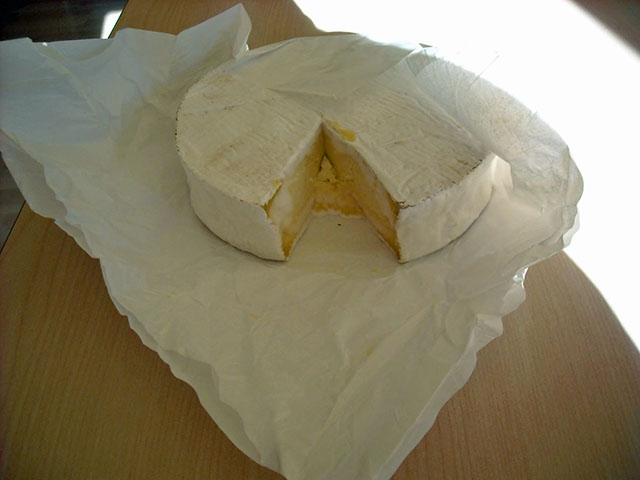
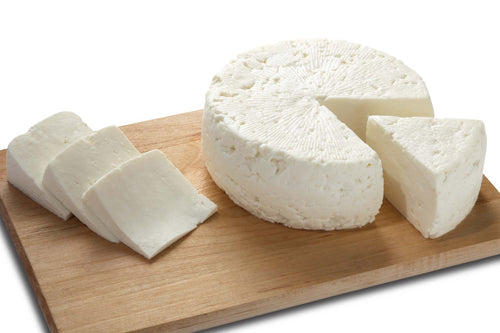
Well, I finally ventured into the realm of mold-ripened cheeses and what I found out is that they are much easier to make then I had at first imagined. The reason I started with Brie is a personal reason though…I absolutely love it, crust and all. Now I know there are many of you, like my husband, who will cut the mold off the outside and eat only the soft middle and there must be a lot of you because when I was at Trader Joes the other day I saw they are now selling a rindless version of Brie. But all of that aside, I tend to think the mold is what makes the cheese. And, if you go a step further and wrap the Brie in a sheet of puff pastry and bake it, then the mold’s flavor is heightened further in adding to the complexity of this wonderful cheese. Well, that’s enough of my ranting about this cheese, here is how you go about making 2 large rounds.
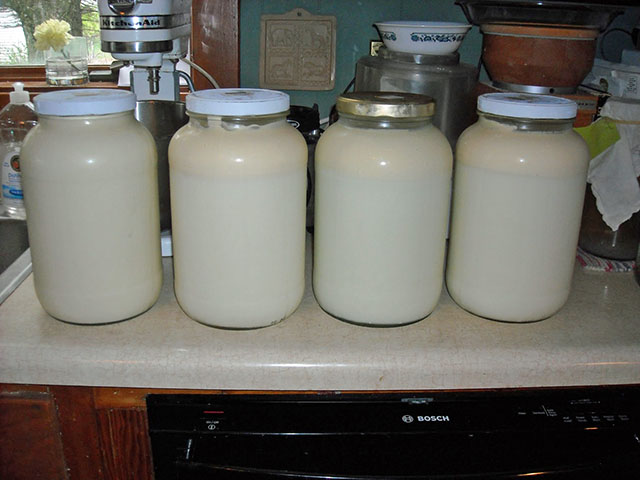
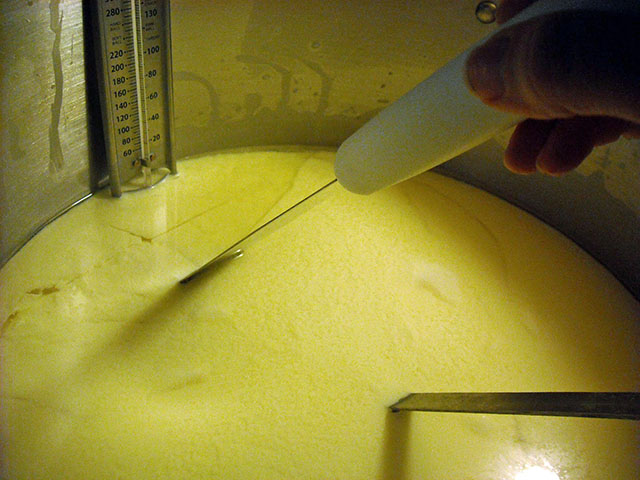
To start off, heat 4 gallons of whole milk to 88 degrees Fahrenheit.
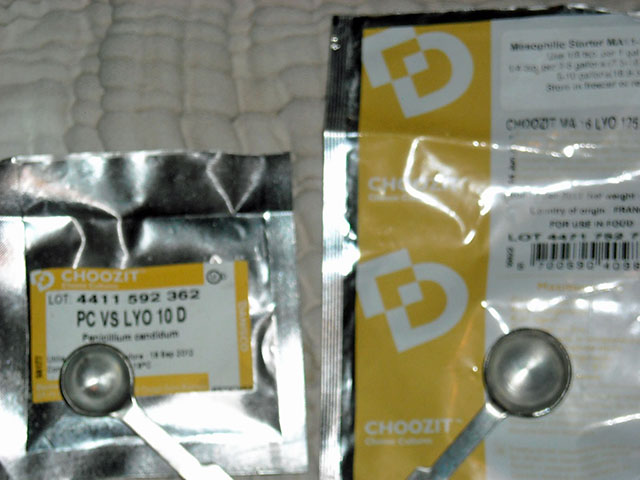
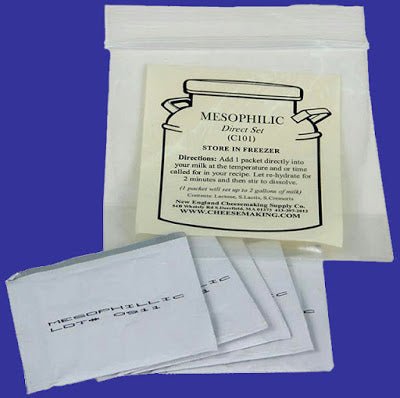
Next, sprinkle 1/2 teaspoon of mesophilic culture plus 1/4 teaspoon of Penicillim candidum mold powder on top of the milk and allow to rehydrate for 5 minutes.
After the 5 minutes, stir up and down with 20 large strokes.
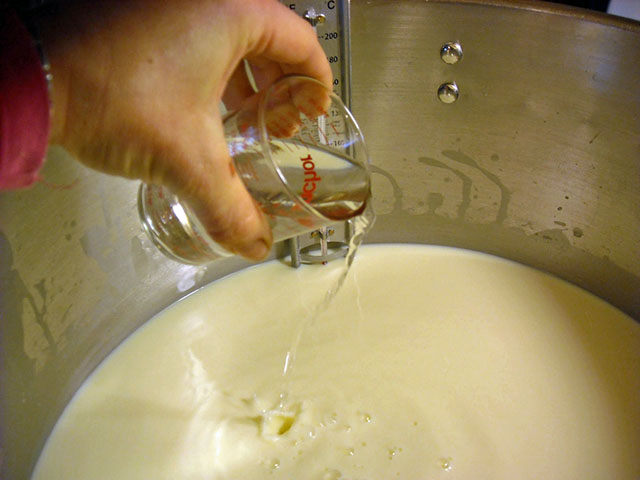
Next mix 1/2 teaspoon of liquid rennet with 1/2 cup cool water, pour the mixture into the cultured milk and again stir up and down with 20 more strokes.
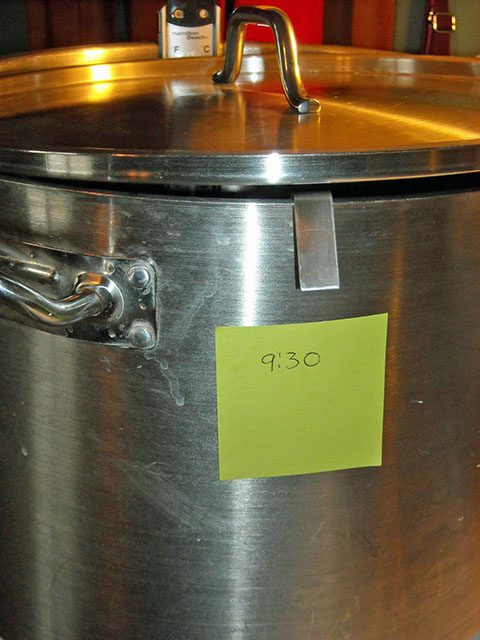
Now, cover the pot and allow to sit for 1 hour and 30 minutes (as you can see, I put a post-it note on to remind me when I needed to tend to it next).
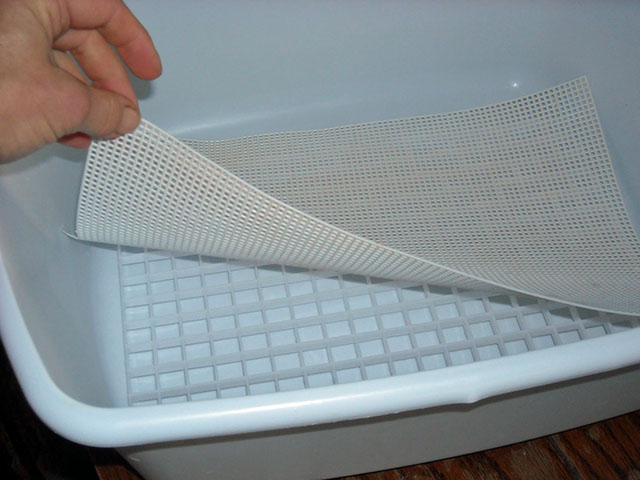
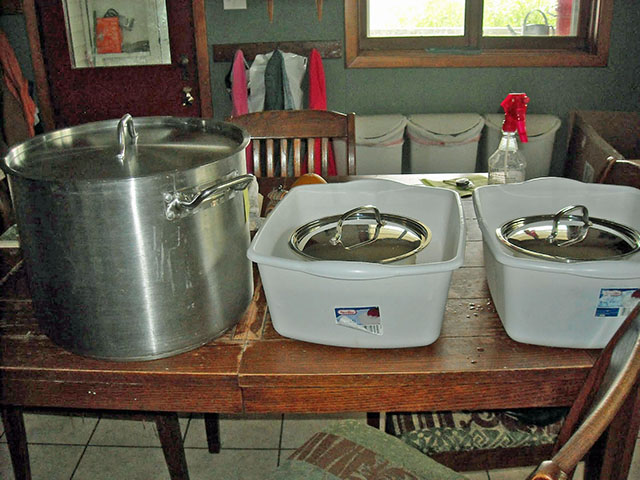
While the milk is setting, take this time to sterilize the draining and mould set up for the cheeses. I have found that this set up works best for me. A draining platform set into the bottom of a plastic wash tub with a draining mat on top, an open ended Brie mould on top of that, and a pot lid to top it all off.

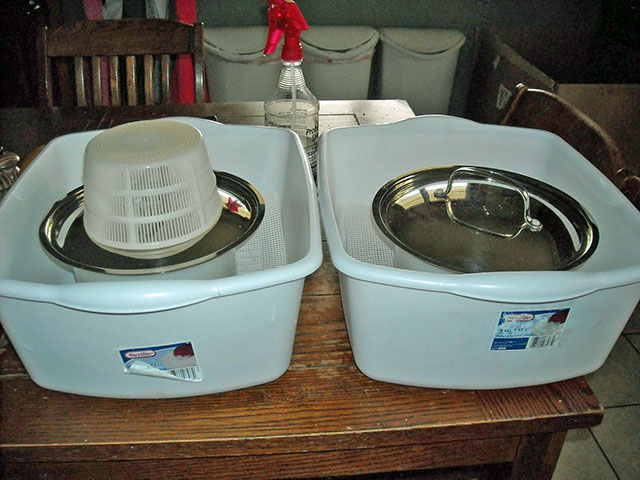 |
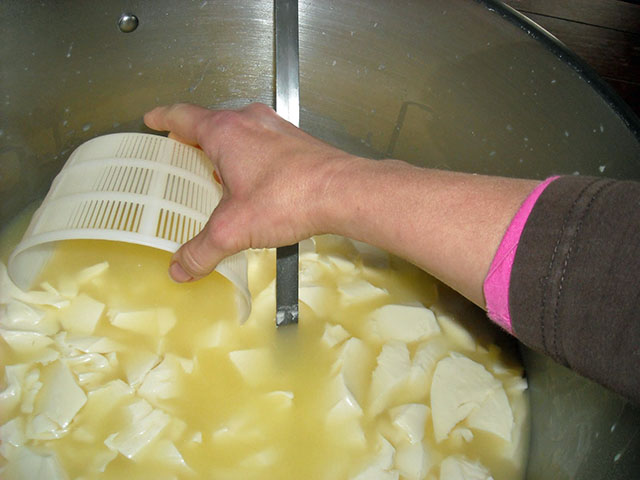
| The basket is for scooping out the curd without too much whey. |
The milk should be well set by this time, so cut the curd…
…then allow it to sit for 5 minutes to firm up.
Now, remove as much of the whey off the top as you can without disturbing the curds.
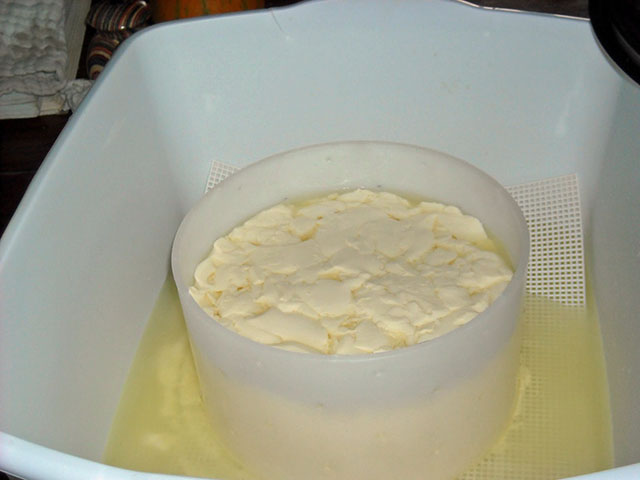
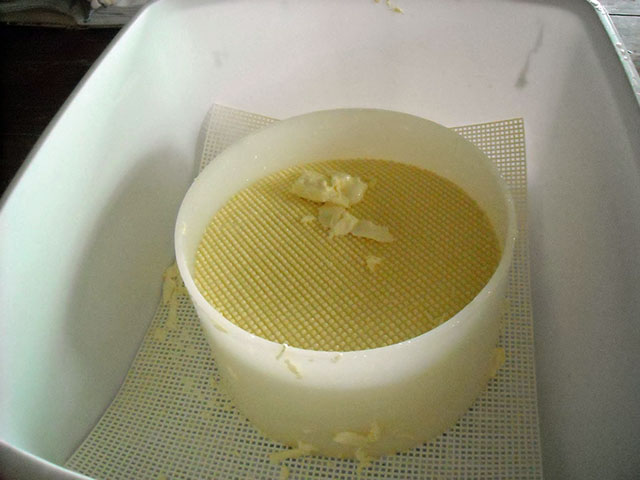
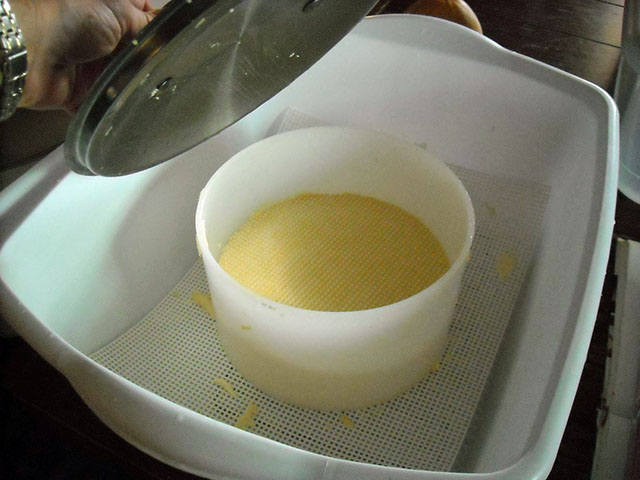
Then carefully ladle the curds equally into the 2 mould set ups until you fill to the top (you will not be able to fit all of the curds in at this point, but be patient). Cover the moulds and the cheese pot and wait for the cheese to drain.

Return about 30 minutes later, very carefully drain the excess whey out of the bottom of the tubs (just lift the platform and all on top out, dump out the whey and then return the mould as it was), and then fill the moulds with more cheese curds. You may need to repeat this step one more time, but just repeat what you did above until all of the curds are equally distributed between the two moulds.
Now, let the cheeses stand for 2 hours (that is from the point the last of the curds were added).
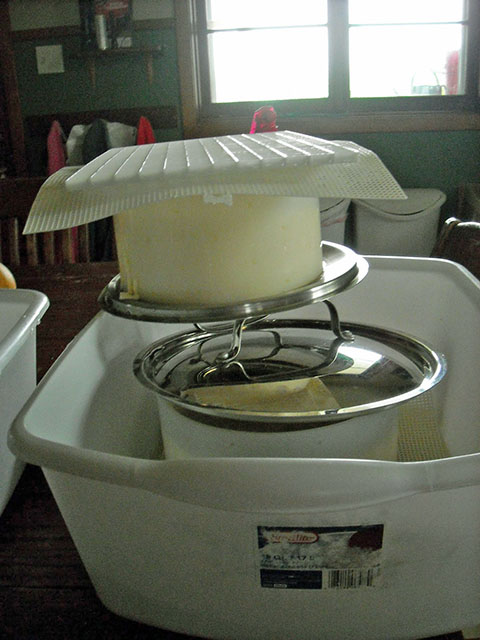
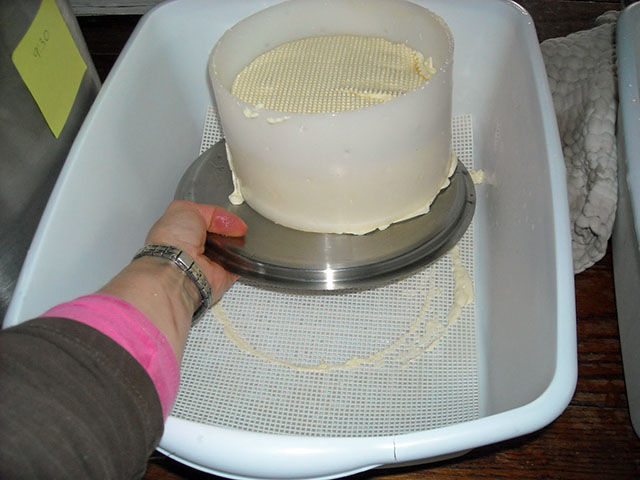
Then, carefully flip the cheeses as the pictures show how below, making sure to drain the tubs once again.
 |
| Carefully lift from the bottom of the platform and remove from the tub |
 |
| Tip upside down onto the lid and carefully balance on other lid and tub |
 |
| Slide the cheese back onto the mat in the drained tub…repeat with other cheese |
Let the cheeses sit for another 2 hours, and then flip and drain once again.
Now, allow the cheeses to drain overnight. In the morning flip and drain again. Leave covered for 2 more hours and then flip and drain one last time.
Finally, transfer the cheese to a tub with a lid making sure to sanitize the platforms and mats and put them into the covered tub before adding in the cheeses.
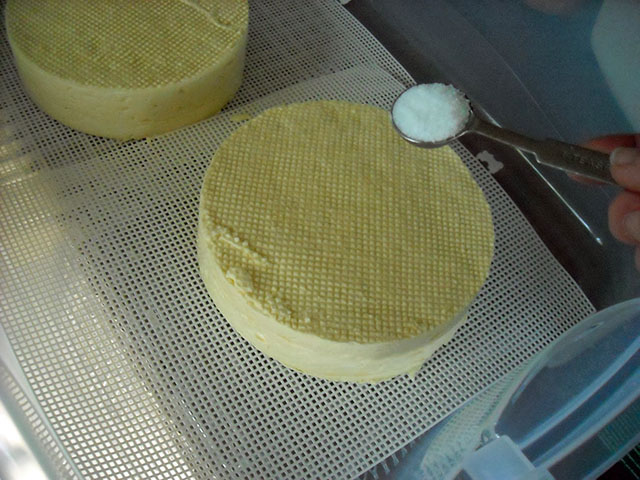
Sprinkle each side of each cheese with 1 tsp of salt and then store the covered tub at 55 degrees for 10 days, flipping the cheese one a day and wiping out the tub each day with a paper towel to remove all excess moisture and drained liquid.

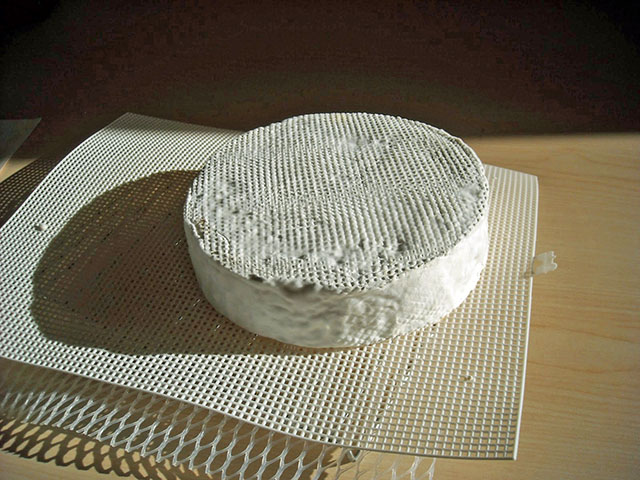
After 10 days the mold on the outside should cover the entire cheese with a nice white thick layer.
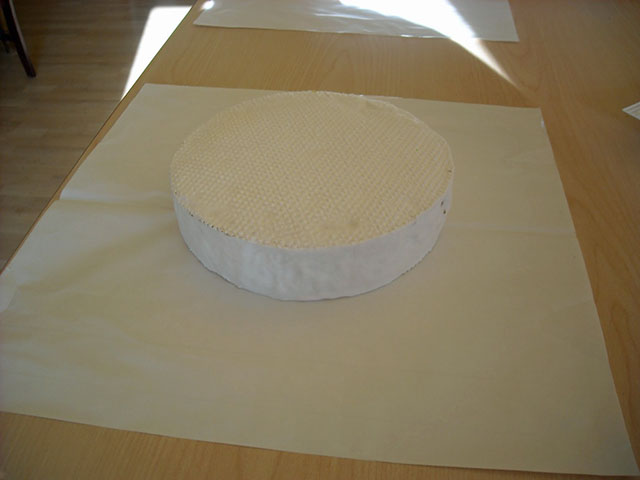
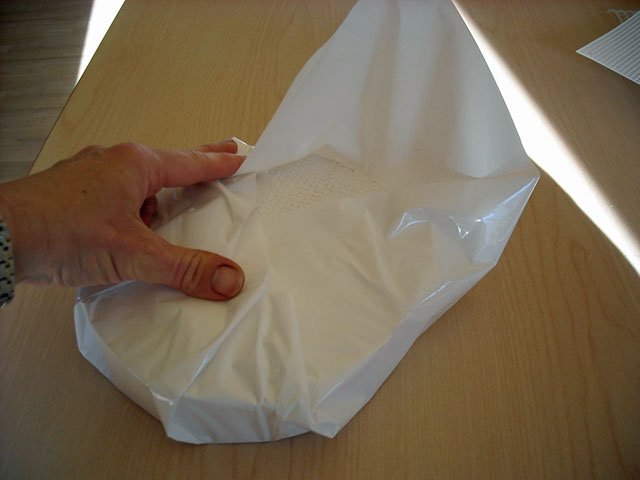
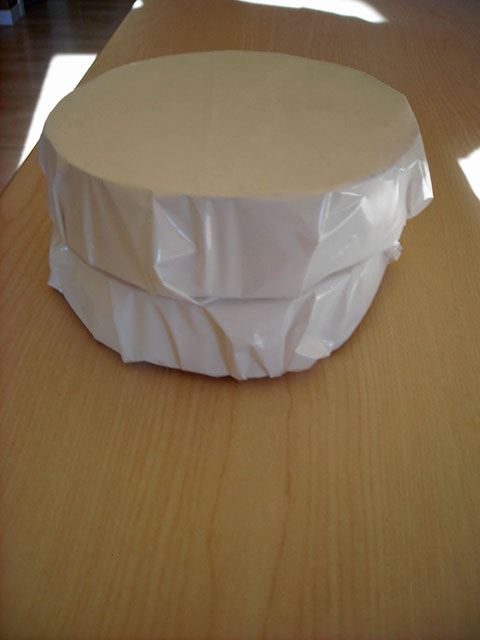
Finally, wrap the cheeses with mold ripening paper (non-shiny side on the inside) and store away at the same temperature for 3 to 4 weeks for it to be fully ripened and ready to eat.
Note: If you do not have an area that is 55 degrees, do not fret. The ripening container can be kept in a refrigerator also, the mold will just take longer to develop on the outside and work at ripening the cheese on the inside. A method that worked well for me was to move the ripening container in and out of the refrigerator each day, half the day in the refrigerator and half a day in a cool (65 degree Fahrenheit) room.


