If it’s fermented- he makes it!
If you make your own beer, chances are you’re aware of Mike Tosmeire, the Mad Fermentationist. He has loads of recipes on his website for making beer, hundreds of articles about making beer and a great list of links to websites about making beer. He’s sort of a beer making guru.
Because he’s MAD, he also makes his own cheese, bread, kombucha, charcuterie, mead, sake, vinegar, wine, pickles and sauerkraut. That’s a lot of good bacteria!
And, his website is LOADED with information about how to make all this stuff. Mike is one very prolific writer. I especially like his posts about making cheese and he was kind enough to share his articles about Camembert with us:
Camembert – Making Cheese at Home
By The Mad Fermentationist (Mike)
https://cheesemaking.com/blogs/fun-along-the-whey/peter-barretts-camember
The first step was to wash and sanitize a large pot, two molds, and various spoons. I used Stan-san, but any sanitizer suitable for brewing would work here as well (Iodophor was actually developed for the dairy industry). For two small rounds of Camembert I used 1 gallon of whole milk, in my case just a standard supermarket jug (the rawer the better though).
Here are the three oddball ingredients, from left to right: rennet (an enzyme that curdles milk proteins), Penicillium candidum (the classic white mold), and Flora Danica (a blend of different acid and CO2 producing bacteria, including Streptococcous lactis, S. cremoris, S. lactis biovar diacetylactis, and S. cremoris).
I heated the 1 gallon of milk to 90 degrees on the stove. I then added 1/4 tsp of the Flora Danica and 1/32 tsp of the Penicillium candidum (eyeballed). It takes a bit of time for these cultures to dissolve so I stirred gently for a few minutes (you want to be gentle as oxygen is not good for lactic acid producing bacteria).
I held the milk at 90 degrees for 90 minutes, during this time the Flora Danica feeds on the milk sugars creating lactic acid which in turn lowers the pH of the milk. This step is necessary for the rennet to curdle the milk proteins properly.
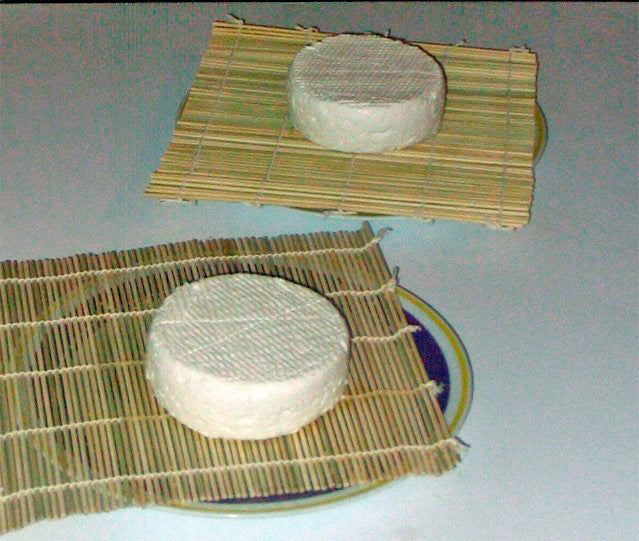
I then added 1/8 tsp of rennet which I had diluted in 2 tbls of filtered water. After stirring in the rennet, I let it sit for 60 minutes still at 90 degrees. After the curd left clean cut marks, I cut the curd in a 1/2 inch checkerboard pattern and let sit for another 30 minutes. The curd was very delicate so I skipped the 15 minutes of stirring (Home Cheese Making).* I scooped the curd into the two round plastic molds positioned on two sushi mats.
* Note from NECS: The 15 minutes of stirring actually firms up the curd. This is somewhat counter-intuitive, so it is easy to misunderstand. We are working on making this concept more clear in our directions.
The whey drained quickly forcing me to pour off the excess that dripped through the mat onto the plate below. After the cheese seemed relatively solid (3 hours) I flipped it over and left it to drain another 2 hours. Took the molds off and added a light covering of kosher salt. Waited 10 minutes, then put it into my chest freezer at 45 degrees, DampRid in the bottom to stop it from getting too humid.
The cheese will stay at 45 for the next two weeks while it develops the classic white mold rind. After the mold develops, I’ll wrap the two rounds in a cheese wrap and give them another 2-3 weeks to ripen at 45F before eating.
At this point I am much happier with this recipe from Home Cheese Making than I was with the one for provolone. That said, I had to drop the step that called to stir the curd for 15 minutes, I am beginning to suspect that maybe I need to add more rennet than the recipes calls for.**
** Note from NECS: This is related to our previous note about stirring the curds. That step firms the curds. Adding more rennet will not do that.
A month later …
Aged Camembert – Tasting
MOUSEBENDER: Camembert, perhaps?
WENSLEYDALE: Ah! We have Camembert, yes sir.
MOUSEBENDER: You do! Excellent.
WENSLEYDALE: Yes, sir. It’s, ah ….. it’s a bit runny.
MOUSEBENDER: Oh, I like it runny.
WENSLEYDALE: Well, it’s very runny, actually, sir.
MOUSEBENDER: No matter. Fetch hither le fromage de la Belle France! M-mmm!
-Monty Python
My first batch of Camembert is finally ready, it has taken about 5 weeks to age. I’m just happy that it looks like Camembert, a big upgrade over my first attempt at cheesemaking. The texture is a bit on the runny side, almost like melted mozzarella (even right out of the refrigerator). The rind has a slightly dense texture, but it isn’t chewy or hard.
The flavor is clean (milk/butter), lightly salty, and accented by that mold ripened cheese flavor that I can’t describe in any other way. In general it is much more tame than the Brie and Camembert I have had with this much age on it.
I had the first of the two rounds after just two weeks of aging. At that point the cheese was still firm, with a texture pretty close to cream cheese. The flavor was very mild and milky with just a hint of the classic, slightly musty, Camembert aroma. At this stage I was beginning to see the cheese closest to the rind beginning to soften and become slightly runny. The mold works from the outside in, so the center is the last part of the round to ripen.
Ideally I would like to make four rounds next time and try one every week starting after the initial two weeks of aging. I would have liked to see how this cheese tasted last week when it wasn’t quite so runny.
Camembert is great on its own or with some bread, duck breast prosciutto, fruit, or a glass of beer. I wouldn’t try to pair it with any aggressive beers because it is so mild, something with some fruit would be nice (but nothing too sour), or something crisp and clean like a pilsner works well.
Making Goat Camembert
After a pretty successful first attempt at Camembert, I thought I would try something similar, but a bit more interesting. So I decided to use goat milk and a slightly tweaked recipe.
I picked up a gallon of whole pasteurized goat milk. The next morning I heated it up to 76 degrees on the stove, then stirred in 1/4 tsp of Flora Danica culture and 1 drop of rennet diluted in 5 tbls of filtered water. I covered the pot with plastic wrap and left it in a warm spot (~74). By the time I returned home from work that evening it had a thick yogurt-like curd with some clear whey visible.
The curd was much sturdier than my previous cheese making attempts due to the longer period of time before cutting it. Instead of putting the draining mats over plates like last time I placed them above small pots so the whey had a place to drain. I used a ladle to scoop the curds into the cleaned and sanitized molds. I flipped the molds every 12 hours for the next two days (after the first 12 hours I moved the mats on top of plates for easier moving), the result was two firm 2 inch thick disks of fresh cheese (the firmer curd resulted in thicker rounds).
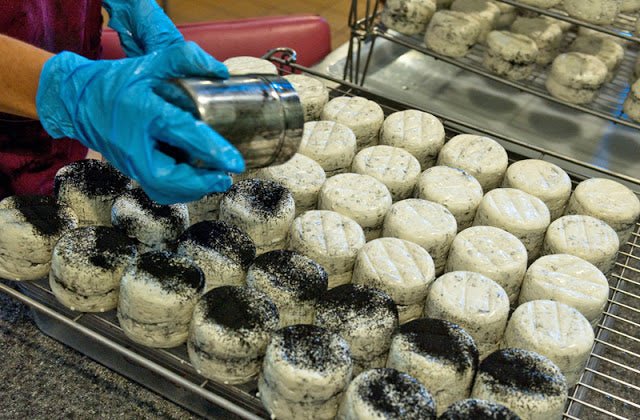
I sprinkled the entire surface of each round with 1 tsp of kosher salt. After waiting 15 minutes for the salt to dissolve I used a small atomizer to spritz ~1/8 tsp of Penicillium candidum (dissolved in 1 tbls of filtered water) onto the cheese.
Ideally, the cheese should be left to mature in a humid spot at around 50 degrees. Luckily I have a chest freezer which can produce those conditions pretty easily. I flipped the cheese once or twice a day for the next 10 days. Spraying the mold on, as opposed to adding it to the milk at the start, made for much faster growth than the first time.
After 4 days in the refrigerator the cheese has a firm, slightly dry texture. I’m not sure if it was the milk or my method, but this batch has a funkier flavor than the cow’s milk Camembert. This batch needs another couple weeks to age (you can just see the mold beginning to ripen the cheese around the edges). Hopefully, after 2-3 more weeks the second round will be ripe and ready to try.


