Suzanne McMinn is One for One in the Big Challenge!
She did it! So, now she’s closer to her goal to become a GREAT home cheesemaker. Suzanne documented her experience in the article below. This article and her giveaways (chosen by random from the comments) may be found at her wonderful website, “Chickens in the Road.”
Meet Jack!
No, not THAT Jack!
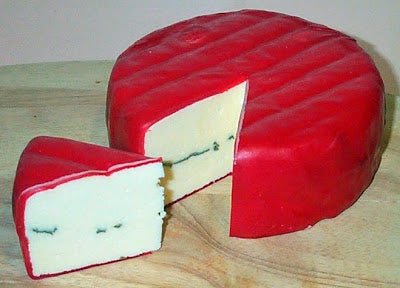
He’s pretty special, though. But I mean Monterey Jack! And PEPPER JACK! (Pepper Jack pictured at the top, just before waxing.)
I love Monterey Jack and especially Pepper Jack. I use Pepper Jack in
my homemade pepperoni rolls. I need homemade Pepper Jack! It all starts with learning how to make Monterey Jack, so I was excited to take on Monterey Jack for my first
cheese challenge post for New England Cheesemaking.
I’m using my well worn copy of
Home Cheese Making by Ricki Carroll from New England Cheesemaking as my guide.
Well worn, not because I’ve made so much cheese but because I’ve fondled it a lot while dreaming about making cheese. I’ve made a lot of soft cheeses, and Farmhouse Cheddar as well as Traditional Cheddar from the book. Now I’m finally (finally!) plowing past my fears and making more new cheeses. There is a lot that is similar in making Monterey Jack to making Traditional Cheddar, so it’s a good recipe to venture out with first. Next month, I’ll be scaring myself to death with something really different. (More on next month’s cheese challenge later!)
Let’s get started!
To make Monterey Jack, you need:
2 gallons whole milk*
1/2 teaspoon
liquid rennet (or 1/2 rennet tablet) dissolved in 1/4 cup cool unchlorinated water
*If you use whole milk, your Monterey Jack will be semisoft, the way we’re accustomed to finding it from the grocery store. If you use skim milk, it will turn out hard enough to grate.
I use direct-set packets of starter and liquid rennet. If you do one thing I tell you about today, buy liquid rennet!!! Save yourselves! (I don’t like the tablets.)
Step 1. Go milk your cow. Let the calf help.
I’m just kidding! You can use milk from the store if you don’t have a cow. I use raw milk from my Jersey sweetheart, Beulah Petunia. You can find out more about milk for cheesemaking
here, including information as to whether or not you may want to add
calcium chloride to your store-bought milk when making cheese. If you have trouble with weak curds when using store-bought pasteurized milk, for a two gallon recipe–add 1/4 teaspoon calcium chloride diluted in 1/4 cup cool water after the milk has ripened in Step 1 and before adding the rennet.
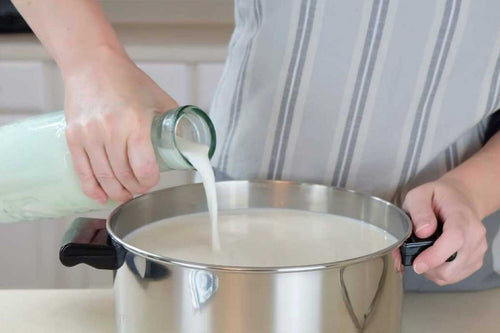
Step 1. (The real Step 1!) Heat two gallons of milk to 88-degrees F. (All temps in my posts are listed in Fahrenheit.) Add the starter and stir thoroughly.
Cover and allow the milk to ripen at 90-degrees for 30 minutes.
Milk holds its temperature really well in a covered pot, by the way.
Step 2. After the 30 minutes have passed, add the calcium chloride, if using. (I don’t use it for my milk.)
Step 3. Add the diluted rennet and stir gently with an up-and-down motion for 1 minute. I’ve had people ask me what an up-and-down motion means. I use a big stainless steel slotted spoon and I just move the spoon straight up and down (or as straight up and down as I can) in the pot as opposed to stirring around in circles. It’s not that hard–you’re not going to mess it up. As long as you don’t go crazy stirring in circles, you’ll be okay.
Cover the pot again and let it sit at 90-degrees for 30-45 minutes, until the curd gives a clean break. I turned the heat back on under the pot for about a minute, bringing the temp back up to 90.
I use both a hand-held digital thermometer and a long clip-on
cheesemaking thermometer. When I’m watching the temperature over a period of time, I use the clip-on one. When I’m spot-checking, I use the little digital one for a quick read.
Step 4. Cut the curd into 1/4-inch cubes and let set for 40 minutes. You can use either a long knife to cut curds or even a tall whisk.
How do you know if your curds are ready? You should be able to cut the curds cleanly, meaning they won’t fall back into a mushy mess together. It’s sort of like cutting little cubes of Jell-O. The curds have a similar jiggly consistency yet clear separation from each other. I usually just stick a butter knife in there to test it to see if the curds are ready. If I can draw a line with the butter knife and see the curds break apart, they’re good to go.
Here are some cut curds:
See how the pieces maintain their shape and separation from each other. We’re making cheese now, baby!
Step 5. Heat the curds to 100-degrees, increasing the temperature by two degrees every 5 minutes. This will take about 35 minutes.

Stir gently but frequently to keep the curds from matting.
It’s important to raise the temperature really slowly because the slow rise of heat causes the curds to expel whey and shrink. If the temperature rises too fast, the curds can get a hard skin to them and not expel enough whey. You can raise the temperature slowly by placing your cheese pot in a sink or larger pot of water that you heat gradually. I just turn the heat on the pot a little bit at a time, watching the temperature so it doesn’t rise too fast. (I turn the heat on and off, watching the temp rise slowly. I have a gas stovetop, which makes heat control more incremental and precise. If you have an electric stovetop, you may want to use the sink or double boiler method.)
Step 6. Maintain the curds at 100-degrees for 30 minutes, stirring occasionally to keep the curds from matting. Let the curds sit for 5 minutes.
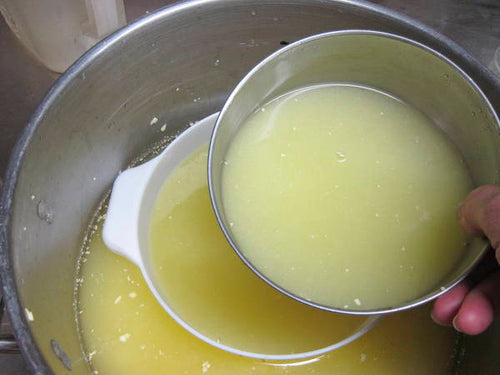
There will be a ton of whey in your pot by now. Look at that–you can’t even see the curds!
Step 7. Carefully pour off the whey to the level of the curds. Allow the curds to set 30 minutes longer, stirring every 5 minutes to prevent matting. Maintain the temperature at 100-degrees.
Step 8. Line a colander with
cheesecloth and place it in the sink. I put the colander on one side of my sink and the cheese pot in the other.
Ladle the curds into the colander. Sprinkle the salt over the curds, mixing gently, and let drain.
If making regular Monterey Jack, you wouldn’t add anything else right now. If you want to make Pepper Jack, now’s the time to add some hot stuff! There are a couple different ways you can make Pepper Jack, but here’s how I did it, based partly on the recipe for Pepato Toscano, a pepper cheese–the recipe is
here. In that recipe, peppers are added in layers as the curds are put in the molds. Pepato Toscano is placed in a brine then aged with a natural rind (not waxed).
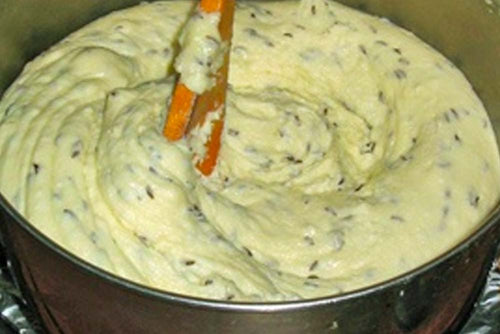
It’s important to not have any additions like peppers poking out on the surface of a cheese that’s not waxed because it’s a possible invitation for mold to get into the cheese. I was waxing my Pepper Jack, so I went ahead and mixed my peppers into the curd along with the cheese salt. I used a tablespoon of coarse ground mixed peppercorns (red, black, green, and white) and a tablespoon of crushed red peppers (seeds and all).
Mixing cheese salt into curds for regular Monterey Jack:
Peppers mixed into the curds for Pepper Jack:
Step 9. Place the curds in a cheesecloth-lined mold.
I also made another Pepper Jack where I did the layering technique with the peppers, alternating placing curds and peppers in the mold, trying to keep the peppers inside the cheese.
Press the cheese with a 3-pound weight for 15 minutes.
I don’t have a 3-pound weight. I got out my kitchen scale and starting weighing stuff. I came up with this ridiculous arrangement:
That’s a jar of ground cayenne pepper on top of a jar of dry beans. Together, they weighed 3 pounds.
Necessity is the mother of invention.
Step 10. Remove the cheese from the mold and gently peel away the cheesecloth. Turn over the cheese, re-dress it, and press at 10 pounds of pressure for 12 hours.
Note: If you’re using a homemade press, double-check to make sure the weight is pressing down on the cheese and not distributing across other parts of the press.
Now go to bed.
Whenever I start to make a cheese, I add up all the steps and the time for each step then plan it so that it’s ready to go in the press for the final pressing toward evening so it’s ready to come out of the press at a decent hour the next day. (You don’t want to be getting up at 3 a.m. to take cheese out of the press.) Plan on about 3 1/2 to 4 hours to get Monterey Jack ready to go in the press.
Step 11. Remove the cheese from the press and the cheesecloth. Place it on a clean surface at room temperature to air-dry. Turn twice a day until the surface is dry to the touch. Drying may take 1-3 days, depending on the temperature and humidity. I air-dried mine for 2 days. I use a rack or a cheese mat and I keep the cheese in a cabinet while it’s air-drying. (I have CATS.)
Regular Monterey Jack, after air-drying:
Pepper Jack, after air-drying:
This one is the second Pepper Jack I made with the layering technique with the peppers. Clearly, I need to practice that some more because some of my peppers got to the edges. (I’m going to wax it, so it’ll be okay anyway.)
This cheese came out better in general because the curds knit together better during pressing. It was my third swing in total at Monterey Jack. Practice makes (almost) perfect! (See how much smoother the last one looks? Keep trying with cheese. Like with anything else, you’ll get better!)
Step 12. Wax the cheese.
I keep my cheese wax in a crock pot dedicated to cheese wax only so it’s there all the time, waiting for me. I just put the lid on when I’m done. When I need it again, I heat it back up! Very handy. I just dip and dip, moving around the wheel of cheese, letting it dry in between dips, until I have a good solid surface of cheese wax.
Step 13. Age the cheese at 55-degrees for 1-4 months, turning it over at least once a week. (If you use raw milk, your cheese should be aged for at least 60 days.) The flavor will become sharper as the cheese ages. Yield: One pound.
I place my waxed cheese on a sheet of aluminum foil with a little tag taped to it with the type of cheese and the date it went into the cheese cave.
And now you know Jack–and so do I!!!
I’ll let you know my Monterey Jack and Pepper Jack results just as soon as they’re aged long enough for me to break into them! And more info coming soon about my next cheese challenge–it’s going to be an adventure!
 |
| Jim Wallace |
Our Analysis
Jim Wallace, our technical advisor, took a look at Suzanne’s cheese the first time she made it to see if she was on the right track. He had a few words of advice:
 |
| First Cheese |
 |
| Second Cheese |
I took a look at Suzanne’s post and there is a slight problem with the curd being too dry. This may be due to excessive stirring speed/time or it could be caused by higher temperatures if her thermometer is not reading well.
OR another reason could be that the curd is fine but there was just not enough weight or time in the press. Either of these will cause this problem. Drier curds need more weight and/or sometimes more time in the press.
Suzanne revised her press and, as you can see in the picture, this resulted in a smoother cheese. Now, it’s on to the next one, so stay tuned . . .


