


Don Kaiser in Billings, Montana started making cheese recently for a very sad reason …
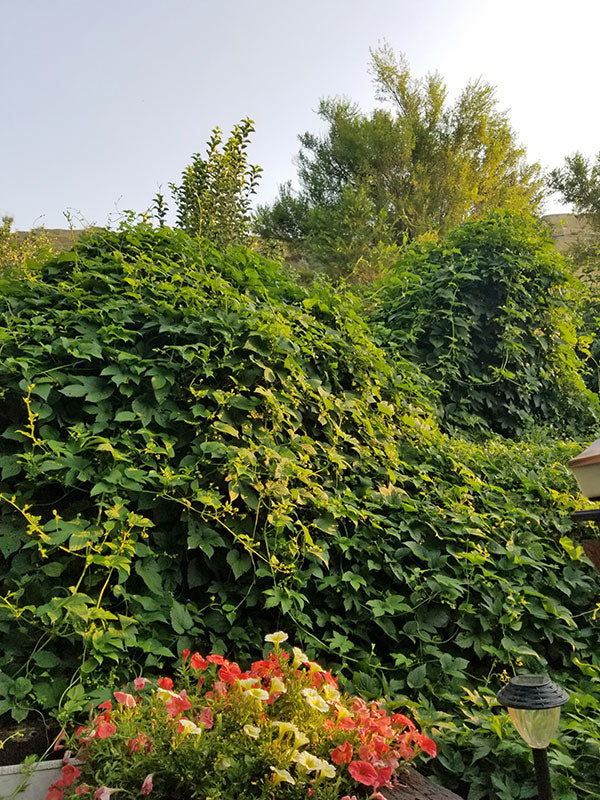
I lived in downtown Billings, well up until last summer. Though I lived in a residential area, my back yard was a sanctuary for me – towering sandstone cliffs, squirrels, rock chucks, mule deer, turkeys and an occasional Bull snake. The wife and I spent thirteen years grooming our little piece of heaven.


I planted apple, peach and cherry trees. I also planted red and black currants, gooseberries, blackberries, raspberries and an assortment of hops for brewing my beer.


Cascade hop plant

Golding hop plant

Me tasting a red ale.
I even had three bee hives to pollinate it all.

Unfortunately, for us as well as several neighbors, the large irrigation canal existing at the base of the sandstone rims began to leak large volumes of water. We measured the leak in one location to be 80,000 gallons a day. The concrete lining had simply failed.
Our thirteen year old house foundation wall was destroyed from the lateral pressure exerted by the saturated hillside and the canal is taking no responsibility. No amount of money can fix the damage – the hillside has rotated down too far.

So, last fall we moved in with my oldest son’s family (here in Billings) as we plan for our future. Not being able to brew beer at this time, I became restless and thought I’d try something new to occupy my time. The love of cheese and creating something both personally rewarding as well as exciting to share with others inspired me to delve into the world of cheesemaking.
Temperature control, sanitation, quality ingredients are all part of brewing so, with a bit of research, patience and knowledgeable cheese patrons, I feel I’m well on my way to a rewarding adventure. As it has been said many times before “one door closes and another one opens.”
Recently, after making wine and beer for years, he made his first cheese …
As far as the recipe goes, I’m almost embarrassed to tell you about it after reading more about cheese making. But here it goes:

My first cheese – a farmhouse blue with homemade nut and fruit crackers. Firm, yet creamy at the same time. (The recipe for the crackers came from The Wandering Fig.)
I used one gallon of cream-line milk. (By the way, there’s only one source of production in the whole state of Montana.) I used rennet from the local brew shop, also the only location in the largest city of Montana. (Perhaps you may understand a little better the appreciation I have for cheesemaking.com.)


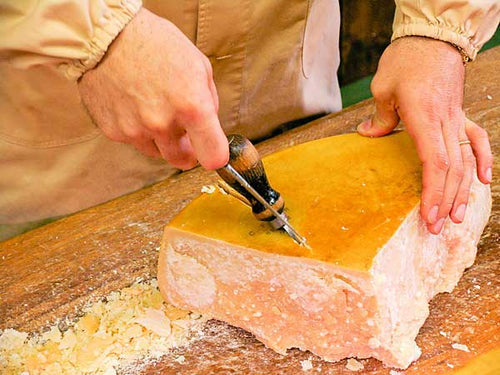
I found this curd cutter at Etsy.com. It was made by Steve Benz.
After pressing what was supposed to be a farmhouse cheddar, I realized I hadn’t put the recommended amount of salt in the curds. Rather, I had just sprinkled it as you would on any other type of food. So, I rubbed it with butter, covered it with sea salt and bandaged it with cheesecloth.
After a few weeks in my cave, I removed it, pierced it with a skewer and placed it in a container of bourbon, flipping it over the next day.
Two days later, I thought – what else can I do to my poor cheese? Then I thought – what about adding mold? I figured it was too late, but, I was sure I had already ruined it anyway, so …
I took the veins from two ounces of a commercial blue cheese and rubbed it all over the surface. The next day, I thought – what about the bourbon I had soaked it in – how would that affect the mold? As it turned out, the alcohol had no negative affect on both flavor and mold production.
After aging only two weeks, a full bloom of mold surrounded the cheese.

Even with all the possible consequences of cutting the cheese too soon – I thought – I’ve probably already ruined it so I might as well get it over with. I scraped the outer layer of mold to reveal a firm, yet creamy cheese interior.

The blue mold had developed in many of the pierced openings.

I must say that the first taste was a total surprise. I shared it with self proclaimed blue cheese lovers at work, receiving many wonderful complements. However, the most rewarding compliment came from my oldest son. “Dad I’ve tasted several blue cheese and I have to say this tastes just like blue cheese.”
He said this with a grimace on his face. You see my son despises blue cheese and I thought – now that’s a true compliment!
His press …
I converted a stainless steel sausage press. Well actually it hadn’t been converted at that time – I did the conversion after I purchased the stainless steel drip tray from cheesemaking.com.

His cave …
I purchased a 4.3 cu. ft. mini fridge without a freezer compartment and I used one of my analog override controls to keep it at 50F.

I realized that as with brewing, controlling your temperatures is as critical as any aspect of cheese making.
Now, with the arsenal of newly acquired ingredients, I believe I can produce some exceptionally fine cheeses.
His continuing adventures …
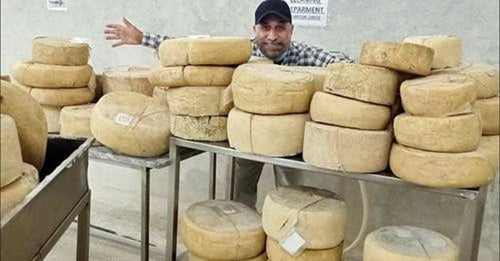
As for the other cheese projects in the picture of my cave:
The darker one in the container was an attempt at a Monterey Jack. But after watching a YouTube video by Gavin Webber, I decided to try out a chili pepper version.
I boiled dried chili flakes and chipotle powder and added it to the curds. After pressing and air drying, I covered the entire cheese with a local chili-infused olive oil and sprinkled it with more ground chipotle powder.

Monterey Jack with the chili infused olive oil before I bandaged it.


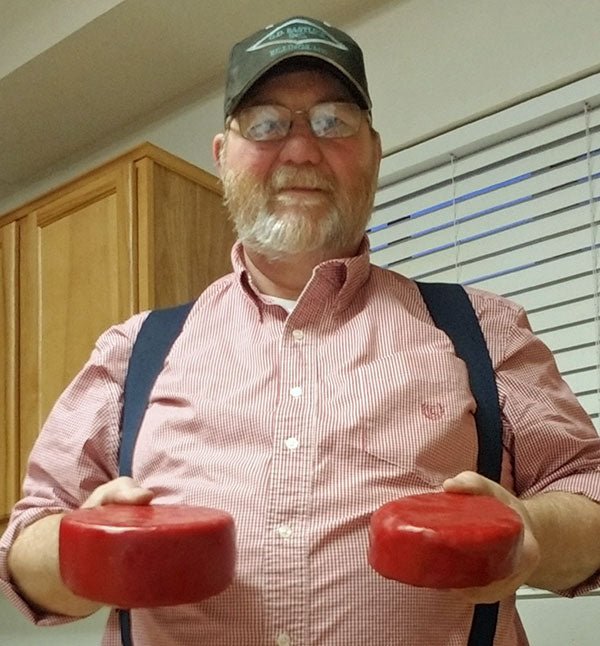
Holding my chili-infused Monterey Jack
Once bandaged, I poured more chili oil on the cheesecloth and covered it with chipotle powder. You can definitely smell the chili when you open the door, however, the flavor of the oil is that of a fresh Anaheim pepper and the chipotle should just add a bit of smokiness.

Holding my Colby on the left and Gouda on the right.
The small waxed wheel (ok, baby wheel) is an attempt at a gouda. I put fresh cracked multi-colored peppercorns in the curd and, after pressing, placed it in a salt brine. This was my third and final cheese using a commercial buttermilk as a starter. (I hadn’t received my first purchase from cheesemaking.com at that point.)
Even though you can use buttermilk as a starter, you can’t be sure of your pH levels without a meter. I own one for making honey wine but since I’m just learning about cheese making, I would rather keep with a tried and true recipe. Well, at least when it comes to the souring stage.
The larger waxed wheel is a 2lb. Colby. I didn’t have any annatto so, once again I boiled some chipotle powder for color and smokiness. It doesn’t add any heat. There’s a version of this we purchase at the grocery store.


Drying Havarti
What’s next …
As far as my next cheese, I want to make something world class – without any added adjuncts. That’s how I approach brewing beer. One should master the technique before trying to create your own recipes. Ok, so I obviously didn’t do that with my first attempts at cheesemaking however, now I have the proper ingredients to do so.

I used to see this book (Home Cheese Making) in the brew shop so many times. I wish I would have bought it years ago.
The problem is “What Cheese?” – there are so many to choose from. An aged cheddar or perhaps a brie style? This is the same problem I have with brewing beer (ok, problem may be the wrong word). I’m leaning towards the brie.
I want one day to sit down on a warm sunny afternoon and sip on a glass of my honey wine with slices of fresh artisan sourdough bread and, of course, a variety of homemade cheeses. I do enjoy a tasty snack tray with friends.

A sourdough bread I frequently make.

I made these trays for a holiday party we had down at the local brew shop. Cheese is quite expensive, another great reason to make your own.


Rolled brie using phyllo leaves and drizzled with my own honey.


