


The Second in a Three Part Series about Kefir Grains
This series started with a request we put in the November Moosletter for folks to recommend a good source for kefir grains. We had quite a few responses and we received a lot of good information.
It was way too much for one article, so we decided to do a series of three: 1. Ordering them , 2. Growing them, 3. Using them and sending them to friends (will be posted December 8th).
Many readers contributed knowledge, but two of them, in particular, sent us pictures of the entire process they use to grow their grains:
Growing the Grains:
Katie at Pacific Sourdough, Waldport, Oregon
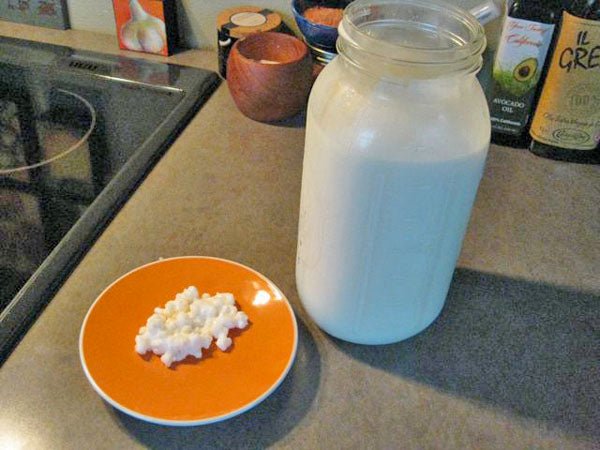
I just add the grains (about two tablespoons) to1/2 gallon of fresh milk (I usually skim the cream off the top first and make creme fraiche, then butter!) and place the jar in a warm spot-my water heater closet works perfect at a constant 75 degrees. I leave it overnight and strain the grains out in the morning or put it in the fridge and strain it when I have time later. The straining is the most difficult part of the process, but all that is required is a stainless steel strainer, a bowl and a little shaking. Then I whizz with the hand blender for super creamy texture.
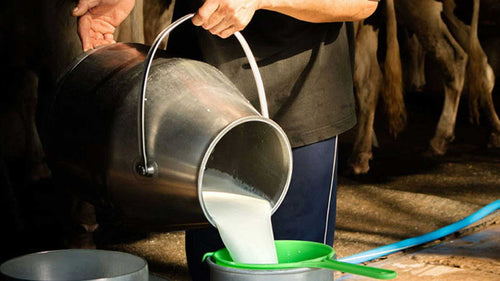
Whole raw milk to start:

Skim off the cream (or not):

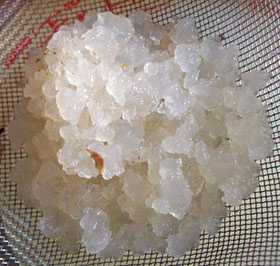
The kefir grains:

Slip grains into the milk:

Give a little shake:

Put in a warm place:
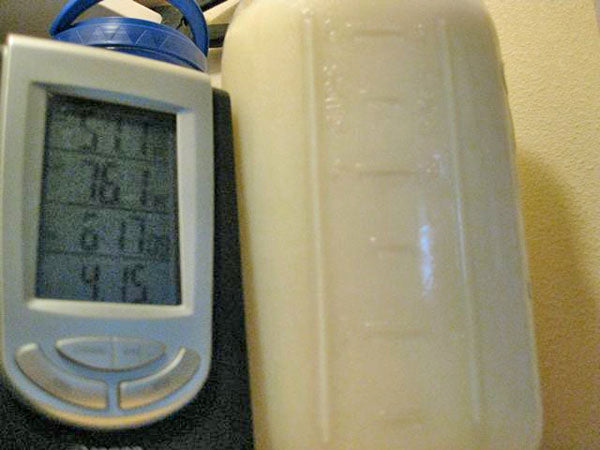
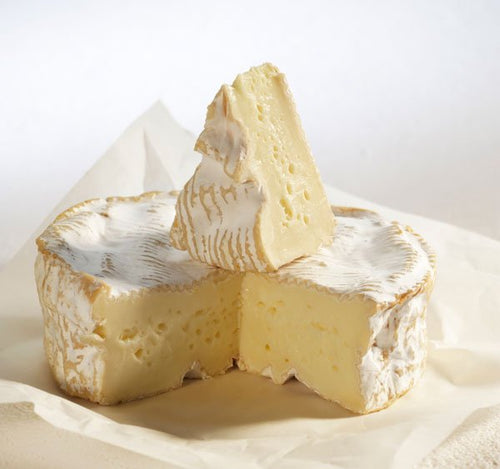
After about 12 hours at 75 degrees, milk has fermented into kefir:

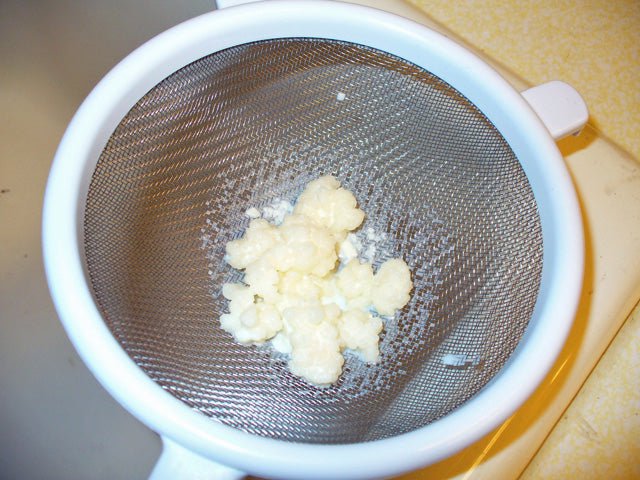
Strain the kefir:

Thick kefir curds:

Save the grains:

Strained kefir is a bit rough:

Hand blend for smooth creamy kefir:

Drink a big glass!

Gene G., Florida
I bought some kefir grains (kefir bacteria colonies that look and feel like little rubbery curds) and have been making it every day for several months now. At first, I wasn’t sure if the grains were as healthy as they should be because they never seemed to multiply. Now, however, the kefir grains are multiplying quite rapidly. So much so that I have to give some away to others who can then start their own kefir cultures or I just eat them.
You can also freeze dry them for a back up if necessary. For me, kefir grains are definitely the way to go–they are self-contained colonies of bacteria that love either raw goat or cow’s milk, and will also work with pasteurized milk. Every morning I strain the grains out of the batch of kefir made the day before, place them in a new Mason jar of milk and let them do their thing overnight.
If you have too much kefir, just put the jar of milk/kefir grains in the fridge for up to a week or so to slow them down. Then, take them out and proceed as normal when you’re ready to make more kefir. If taken care of they should last indefinitely.
Here are the pictures from this morning’s kefir grain (kefir bacteria colonies) feeding. As has often been noted kefir “grains” is misleading but that’s the word we seem to be stuck with. There is no “grain” involved, rather these rubbery little things are actually living colonies of bacteria.
Here’s the milk after 24 hours with the kefir grains.

Note how thick the milk has become:

Stir it up good to allow it to go through the strainer better:

Pour through a non-metal strainer (some say the kefir grains may react adversely with some metals). The solid looking pieces coming out are the kefir grain colonies :

Gently push the milk through the strainer without mashing the grains:

The stars of the show–the kefir grain colonies. These grains have been multiplying rapidly lately, they are about triple in number from what I began with. If you get too many you can eat some of them, give some away to others to make their own kefir, freeze some for emergencies (but I haven’t done this yet), or add them to a bigger batch of milk. These grains ferment 12 -16 oz of milk quite rapidly and if I needed more kefir I could easily place them in a larger container or milk, but I can’t eat the amount of kefir that I’m already getting.

Place the kefir grains into a fresh batch of milk and allow to sit overnight (or longer to taste) at room temp (low 70s) and repeat the above process the next day. If you need to take a break, put the grains into a jar of cold milk and place in the fridge for a up to a week or so. They will hibernate without suffering any damage. When you’re ready for more kefir, reintroduce them to new milk at room temp and resume the process (discard the milk they were being stored in).

Place each batch of newly made kefir in the fridge or leave it out to sour a little more if you like.
More specifics about growing grains:
Contributed by Michael Duke, Utah
I’ve tried kefir form different cultures as it seems everyone has their own culture. To make the most of your kefir grains, its essential to follow proper kefir recipe instructions. This ensures that you not only grow your grains effectively but also use them to create delicious and nutritious kefir at home. Understanding how to grow kefir grains is just one part of the process; the next step involves using them effectively in your own kitchen. For those who are new to kefir, its worth noting that kefir is easier to make than yogurt and has been a staple in many cultures for centuries. Kefir Info provides insights on how to start making your own kefir at home. Each kefir is different. I think each culture adapts over time to the local yeast and bacteria in one’s home. I know a woman who swears that her baking yeast will contaminate her kefir culture, so she cultures the kefir in her basement far from where she bakes yeast breads in her kitchen. I’ve heard of another local woman who searches for new cultures, then blends them to obtain different results.
You can harvest the kefir at any time. The longer it ferments the more sour the flavor and the more the milk sugars have been digested. A typical indicator that people use to determine when to harvest is to look for whey “bubbles”. I use a clear glass mason jar so I can see the whey “bubbles” form.
Depending on how many grains are used, the volume you are culturing, the amount of kefir from the last batch you included in the culture, the temperature you culture at and the amount of culturing you desire (degree of sourness) you are looking at 10-24+ hours.
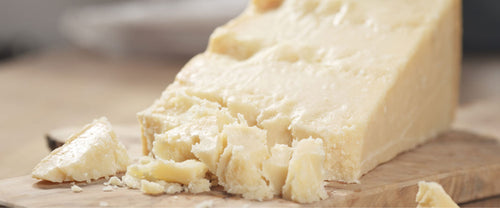
The temperature you culture at will change the end product. As I recall, you can culture at just about any temperature below 90 but most folks go for a constant 80-85 degrees. I think the Kefir group at Yahoo has an explanation about the different end products at different temperatures. At some point — usually after 2-3 days of culturing — the kefir will truly separate into whey and a kefir cheese.
At harvest time, I very gently stir the kefir to break up the curds into smaller sizes that can be strained. Be careful not to damage the kefir grains. They can be gently squeezed but can be damaged by aggressive stirring. The key is “very gently.” You don’t want to crush the kefir grains and you don’t want to eliminate all of the effervescence.
Then, depending on how strict you are about your culture, use a plastic (NOT metal) strainer to strain the kefir into a glass or plastic (not metal) bowl. I’ve been told that kefir doesn’t like contact with metal but have never seen a good explanation of why. I found a spaghetti strainer that covers half of a pot. This fits nicely over the opening of a large mouth mason jar. I gently shake the jar to help move the kefir curds through the strainer. The kefir grains should be left behind in the glass mason jar.
Some folks re-use the same mason jar. Others start with a clean (sterilized?) mason jar. Add 3 parts fresh, raw milk to 1 part kefir from your previous batch. The previous kefir will contain many enzymes & good bacteria that will jumpstart the next batch in addition to providing a low pH to prevent the growth of “the bugs” you don’t want in your milk. Mix the fresh milk and kefir before adding the kefir grains.
Some folks periodically rinse their kefir grains in water to examine them. They can tell the health of the “colony” by looking at them. My eyes are not that well trained. I’ve been told to avoid chlorinated water when rinsing your grains.
The grains can be stored in fresh milk for about 6 months in the fridge. Or they can be frozen for a couple of years.

Equipment Advice:
My suggestion is to get a pickle keeper to make the kefir in. It makes life so easy.
I got mine on Amazon, but it doesn’t appear to be there any longer. Anyway, this makes kefiring so simple. I also wash the grains under tap water every week just to clean them up, and they are none the worse for wear.
George Stevens, Antiqua, Guatemala


