What do I do with all these grains?!
Indeed, they do grow and grow and grow… However, the good news is that they are so loaded with probiotic bacteria and yeasts that you will want to give them to everyone you know.
This article is the third in a series that began with a request we put in the November Moosletter for folks to recommend a good source for kefir grains. We received so much information that it was way too much for one article, so we did three: 1. Ordering them, 2. Growing them, 3. Using them and shipping them to friends.
Ways to Use Kefir:
These are the suggestions we received from our readers who answered our request for information in the November Moosletter:
I generally just make kefir every day and either drink it straight, or put it in a blender drink (smoothie). I also use it in sourdough bread, and occasionally use it for a cheese starter. Sometimes I drain it to make kefir cheese. I feed it to my dog for a probiotic, and occasionally to my goats for the same reason.
Another thing I do, btw, is give my dog extra kefir grains when I have no one to pass them on to. She loves them.
Joy Metcalf
My husband drinks a shake every morning that he mixes with kefir, fruit and ground flax seed.
I’ve started making water kefir, which I love, in the last several months, and have also used my grains to help the fermentation process when I make sauerkraut and pickles.
I still use goat’s milk to make the milk kefir, and I think that’s why my grains multiply so well. Plus, I think an environment has developed in my kitchen that helps the grains to grow.
Lynn Knight
Tanya Winchenbach
Betty Kriel
Kathy Schweitz
Lynn Andrade
Sending Grains to Friends:
We heard from many readers on this subject. When you grow grains, you end up sharing the excess with friends and even sending them to folks in the mail. That’s why there are so many kefir growers online willing to send grains, many for just the cost of shipping.
(At least one of our responders, Monique Trahan, wrote a blog article about her grains and another about a cheese press she made.)
Our “super responder of the month award” (which earned her our undying love and affection) goes to Betty Kriel, from Texas who sent us step-by-step directions and pictures of the whole process. She researched all this when her mother from South Africa came to the US to visit her. Her mother didn’t know how to preserve her grains during the 6 weeks she would be away, so she threw them out. Betty had to send her more, so she did some research and learned a couple of ways to do it:
Two Shipping Methods
By Betty Kriel
There are two ways to dry and transport kefir which I’ve used:
1. One is to dry grains out for a day and put them in milk powder – if you’re traveling, for instance, and the grains will only be kept in limbo for a short period of time.
2. If you want to ship grains over the country, as I did earlier this year to my mom in South Africa, then it’s better to dry them out completely before shipping – posting them can take weeks and the grains in milk powder will probably start smelling weird if posted.
 |
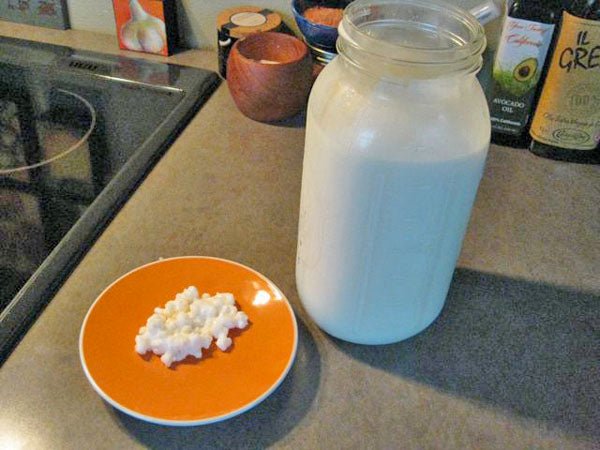
| Live kefir grains in jug of milk. |
1. Transporting air dried kefir grains in milk powder
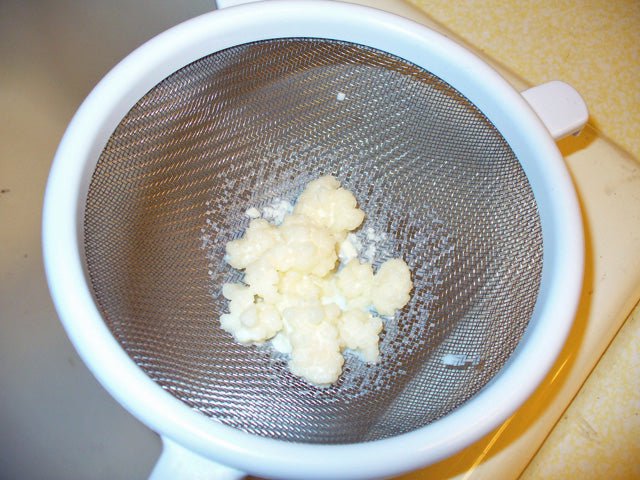
1. Wash live kefir grains in spring or distilled drinking water until the water is not milky anymore. Do not use chlorinated tap water.
 |
| Kefir grains ready to wash in spring water. |
 |
| Washing kefir grains. |
2. Break up kefir grains into smaller pieces (about ¼ inch or smaller) – some grains may produce slimy “strings” when pulled apart – this is OK, normal.
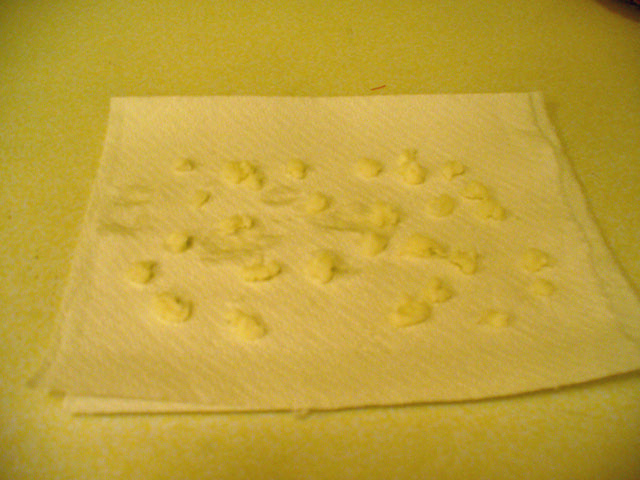
3. Dry with paper towel to get rid of excess water.
 |
| Drying on a paper towel. |
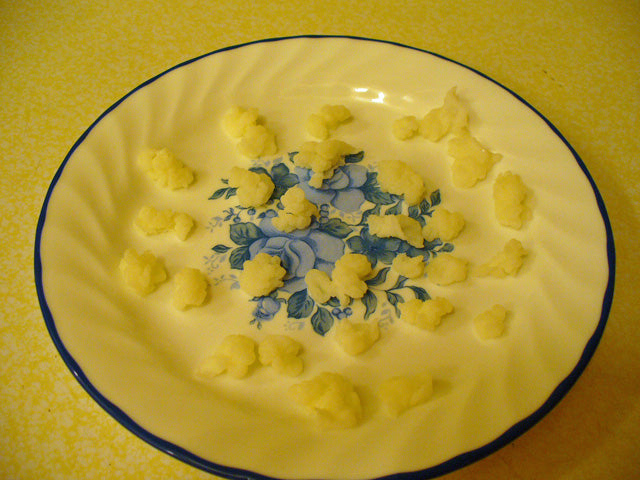
4. Place kefir grains on plate and cover with netting/mesh/doily to air dry on the kitchen counter – let it dry for at least 48 hours. The grains will still be fairly soft to the touch and not completely dried out and hard.
 |
| Grains ready to air dry for 24 hours. |
 |
| Grains covered with cloth while drying. |
5. Cover grains with dried milk powder (any kind) in air tight container with lid firmly closed – fill up container with milk powder completely and make sure the grains are somewhere in the middle, completely covered.
 |
| Container filled with any kind of milk powder. |
 |
| Air dried kefir grains are still spongy to the touch. |
 |
| Kefir grains buried in milk powder. |
I packed the grains like this and transported them to South Africa in 2010. It took about five days from when I packed the grains in the dried milk powder till when I could take them out of the container and start getting them back to life again. I followed the process below to get them activated:
6. Take the grains out of the milk powder – discard the milk powder.
 |
| “Treasure Hunting” – taking the grains out of the milk powder. |
7. Wash the grains in spring water or distilled drinking water to get rid of milk powder. Do not use chlorinated tap water. Note: the grains may have a yellow/pink/grey-ish color. This is OK.
 |
| Kefir in bottle, ready to be revived. |
8. Put kefir grains in a glass/plastic jar and fill with about two cups of fresh/store bought milk.
 |
| Fresh milk added to grains. |
9. Cover with a clean cloth or cap (not too tight to allow gas from the fermentation process to escape) and set aside at room temperature.
10. Wait 24 hours, stirring periodically with a plastic spoon or twirling the jar to mix in the grains with the milk. Note: the mixture may have a very unpleasant extra sour/”rotty” smell for the first couple of days and may also have a pink/grey/yellow-ish color – this is OK. You may also notice a thick residue forming on top of the mixture for a couple of days. This is also OK.
 |
| Grains already revived after 24 hours. |
11. Strain out the kefir grains with a plastic or stainless steel strainer, put the grains back into a clean jar and repeat the process above in steps 8, 9 and 10 till the grains are white and the mixture has a pleasant/”normal” smell and taste. This will take a couple of days – depending on the amount of kefir and milk used, it may take up to a week or slightly more to get the grains back to life again.
 |
| Strained kefir grains. |
 |
| Kefir grains back in the bottle. |
 |
| Grains in fresh milk. |
 |
| Grains still a bit yellow. |
 |
| Grains back in the bottle. |
 |
| Fresh milk added. |
 |
| Strained kefir grains ready to be consumed. |
2. Sending air dried kefir grains via postal system (for weeks at a time)
1. Wash live kefir grains in spring or distilled drinking water till the water is not milky anymore. Do not use chlorinated tap water.
2. Break up kefir grains into smaller pieces (about ¼ inch or smaller) – some grains may produce slimy “strings” when pulled apart – this is OK, normal.
3. Dry with paper towel to get rid of excess water.
4. Place kefir grains on plate and cover with netting/mesh/doily to air dry on the kitchen counter – let it dry until completely dried out and hard to the touch. This should take several days. The dried grains will be yellowish and look almost like dried pasta pieces/small dried squashed up macaroni pieces.
5. Once completely dried out, the grains can be placed in a Ziploc bag. Push out as much air as you can and close the bag. It’s now ready for shipping. You can of course also use vacuum packing.
I packed the grains like this and sent them off to my mother in South Africa in 2011. It took about two weeks for the parcel/envelope to reach her. She followed the process below to get them activated:
6. Put kefir grains in a glass/plastic jar and fill with about two cups of fresh/store bought milk.
7. Cover with a clean cloth or cap (not too tight to allow gas from the fermentation process to escape) and set aside at room temperature.
8. Wait 24 hours, stirring periodically with a plastic spoon or twirling the jar to mix in the grains with the milk. Note: the mixture may have a very unpleasant extra sour/”rotty” smell for the first couple of days and may also have a pink/grey/yellow-ish color – this is OK. You may also notice a thick residue forming on top of the mixture for a couple of days. This is also OK.
9. Strain out the kefir grains with a plastic or stainless steel strainer, put the grains back into a clean jar and repeat the process above in steps 6, 7 and 8 till the grains are white and the mixture has a pleasant/”normal” smell and taste. This will take a couple of days – depending on the amount of kefir and milk used, it may take up to a week or slightly more to get the grains back to life again.


