


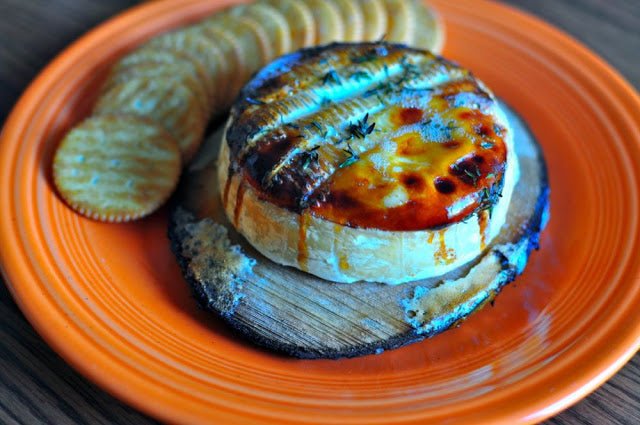
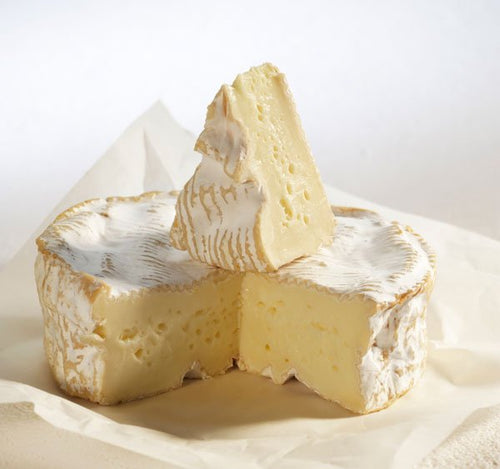
Similar to Mozzarella, it is very popular in the Republic of Georgia
We are very excited that Maria Schumann of Cate Hill Orchard in Vermont sent us this recipe. Maria traveled to Georgia in the early 2000’s where she fell in love with all things Georgian, especially the cheese.
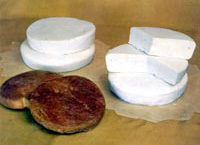
This past summer, after she began milking her own sheep, she searched far and wide for the recipe for Sulguni (a stretched curd cheese which is sometimes brined and given the moniker- “pickled cheese”).
Finally, she wrote to a company in New Zealand which makes it – Colchis Ltd. The owners, Nina and Marina Kandelaki make 2 kinds – semi-hard and smoked. They sell it at various online locations and at their website – http://www.colchischeese.com.
Nina sent Maria a detailed recipe which she had adapted for using with 13 gallons of milk (much less than they usually use per batch). It seems amazing that she would take the time to do this! However, at this point, we know enough about the integrity and generosity of cheese makers to never be surprised.
We thank Nina for this wonderful recipe and we thank Maria for sending it to us.

Sulguni
By Nina Kandelaki at Colchis Ltd
I have not actually tried making sulguni out of sheep’s milk, so I don’t know if it will work the same as with cow’s milk as we do it. (I know that goat’s milk is not as good in terms of getting a nice stretchy curd, so I’m not sure if it’ll be the same with sheep’s milk … though people in Georgia do make it from sheep’s milk, so it should be okay.)
Adding starter:
Anyway, we use a buttermilk starter for our cheese because it gives it that nice sourish taste, but you can, of course, feel free to experiment with other ones. What we do is inoculate about 200mls (3/4 cup) of milk (any milk-it doesn’t have to be raw or unhomogenized) with about 20mls (4 tsp) of buttermilk the night before cheesemaking and leave it in a warm place such as a hot water closet, or wrapped in blankets near a heater. Ideally, the milk being inoculated shouldn’t be straight out of the fridge, but room temperature is fine. It takes about 8 hours for the starter to be ready.
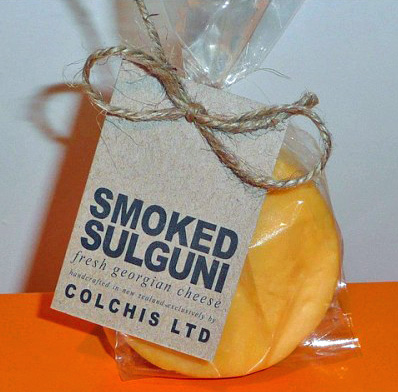
Now let’s assume you’re working with 50L (13 gallons) of milk. First, you need to heat it up to 37.5C (100F), and once it’s that temperature, add the starter. How much starter you add depends on what type of sulguni you want – basically, the longer you want it to drain (thus achieving quite firm curds and making a harder cheese) the less starter you add. I think for you this is probably the best way to go, because soft sulguni can be very tricky to get right. So, for 50L (13 gallons) of milk, I would add maybe 50-70ml (1/4-1/3 cups) of starter and stir it around.
I should have mentioned that it’s a good idea to make it in a chilly bin or some kind of insulated container because the warmer the curds are kept, the firmer the cheese will be. Also, you need to wait about an hour before you add the rennet, and the temperature of the milk should not be lower than 37C (99F) when you add it – and, of course, the less milk you have, the faster it cools down, so either make it in a container which will keep the warmth in, or do it on the stove so you can heat the milk back up to 37C (99F) when you need to add the rennet. Of course, this is to get the curds firm. If you just wait an hour and add the rennet when the milk is colder, you’ll you’ll just have a creamier texture – so maybe that’s what you’re after. There’s really no wrong answer, as you probably know sulguni comes in hundreds of different varieties because everyone has their own way of making it. It just depends on your taste.
Adding rennet:
Now, rennet … I guess this will be a trial and error situation because I cannot give you an exact amount without knowing how strong it is. We use a vegetarian rennet (which tends to be stronger than animal) and I use a concentration of 0.4mls (6 drops) for every 1 litre (1 quart), so for 50L (13 gallons) it would be 20ml (4 tsp) of rennet. I’m not sure where you can get it in the States but I guess if we in little ol’ New Zealand have a hobbyist cheese shop which sells it, then I’m sure you guys will too! It can be a little expensive though. (Note: We sell all kinds of rennet including organic vegetable rennet and it isn’t expensive!)
You add the rennet into a glass of warm water (about 37-38C (99-100F)) and stir it with a spoon, and then very quickly you pour it into the milk, stirring as you go, and when you finish pouring, stir it some more. Then, you leave it to set. How long you leave it before cutting determines what kind of cheese you get – the longer you leave it uncut, the softer the cheese will be. So, if you’re making a hard(ish) cheese, you want to cut the curds very finely (as fine as they will get) as soon as the milk has set. The way you judge that is by doing a clean break test – basically, you stick your finger in and break the curds and it should…well…break clean! It’s hard for me to explain but have a look at the two pictures at the top of this page –
http://biology.clc.uc.edu/Fankhauser/Cheese/clean_break/Problem_getting_a_clean_break.html
Cutting the curds:
Once a clean break is achieved, you cut the curds. I recommend doing this with an egg beater or whisk – just stick it in and stir it around until the curds are all broken into about 2-3ml (1/10 inch) pieces. They should be tiny, kind of like the pulp in orange juice. Then you leave it for about 20 minutes to drain.
Draining the curds:
After that time, you’ll see that the curds have all sank to the bottom and all that’s left on top is whey. Now you need to start draining it. We do it with pumps but what you can do is simply get a jug and a sieve, take out some curds and whey with the jug and pour it over the sink so the whey gets poured out but the curds are left in the sieve (you can also save the whey and make ricotta from it), then return them to the rest of the curds and repeat the process until there is as little whey left as possible. Of course, whey will just keep on coming out for the next few hours so you don’t need to be too thorough, just do it often, every 20-30 minutes or so and try to get as much whey as you can.
As time goes by, you will notice that less whey is coming out of the curds, and the curds are firmer, and eventually they start to matte. You’re on the right track, but try to keep them from matting (just break them up) so they drain better. Ideally, the temperature in the container should be about 30-35C (86-95F). You don’t want it to get too cold. In fact, up to 37F (99F) is fine but don’t let it get hotter than that or the bacteria might die.
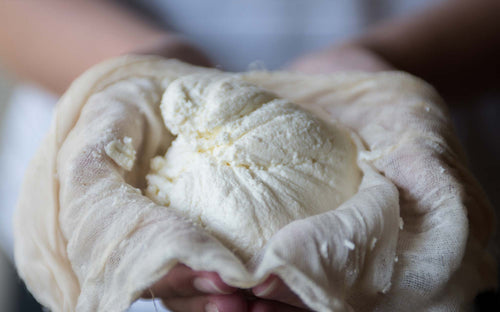
Stretching the curds:
Once the curds have gotten to the point of matting, or when you see that they are hardly producing whey, you have to start doing stretch tests. So, boil some water, take out a little piece of curd (about a centimeter or two) and put it in the hot water. After about 20-30 seconds, take it out and try stretching it. It’s really hard to say which is just the right amount of stretch, but basically “stretchy but not too stretchy!” You just have to develop a feel for it. Anyway, once it starts stretching, you’re ready to make cheese. (The process should have taken about 5-8 hours.)
What you’ll need now is some hot water, ideally 75C (167F), at least not colder than 65C (149F). And lots of it. I’m not sure what is the best way to go about it in your case (we have a vat and pumps)…but 50L (13 gallons) will make about 5 kilos (11 lbs) of cheese, and if you want them to be about a kilo each (2 lbs), then you’ll need about ten kettle-fulls of hot water. Also, you’ll need – 1. a large bowl to hold both the water and the curds, and a sieve or colander, preferably a plastic colander. 2. a plastic dinner try to stretch the curds on. 3. salt 4. thick rubber gloves and probably fabric gloves to wear underneath.
What you do next is break up the curds if they are matted. You don’t want any large pieces because they won’t heat through, and you want to try to get them mostly the same size so they heat evenly. Before you start stretching, it’s a good idea to cover the curds with quite a bit of cold water to stop the acidifying process, and just leave them in the water until you finish. If they become quite hard to fish out from the water then you can definitely pour some off. You don’t actually have to do it at all, I generally don’t but it doesn’t take us very long to get through 50L (13 gallons) of cheese because of our set-up, so it wouldn’t have time to over-acidity. Anyway, now the stretching!
Take out the curds with the sieve or colander. How big you want the cheeses to be is entirely up to you but traditionally they come in wheels weighing about 0.5 – 1 kilo (1-2 lbs). Ours are usually about 600 grams (1.3 lbs). You then put the curds in a large bowl or bucket and pour hot water over them. The curd : water ratio should be about 1 : 6. Well, it depends how hot the water is, of course. You will see if the water is not hot enough or if there’s not enough of it as the curds won’t stretch.
It takes about 40 seconds to a minute for the stretching to begin. Making sure you’ve got your gloves on (fabric gloves underneath too for extra protection against the hot water), stick your hand in the bowl, lift it out with some curds and check that they are stretching. If they are, you pour out the contents of the bowl into your colander, give it a little shake to remove excess water, then transfer it onto your tray. Then salt it, and how much salt you use is once again up to you – for 500 grams (1 lb) I would use maybe 2 teaspoons. Then, you begin to knead it like a dough, and I don’t know how best to explain this…I tried having a look at some videos on making mozzarella but it isn’t quite the same process.
Basically, you fold the curd mass over itself about 12 – 16 times, and then form a ball by folding the edges underneath. It doesn’t actually have to be a ball, it just needs to be folded somehow so it’s smooth on top.
Molding the cheese:
Then you put it into a container of cold water, just to cool it down a little bit so it doesn’t need to be in there for more than a minute or two. The traditional shape of sulguni is round, but it doesn’t really matter what shape you make it. You’ll need a mold of some sort, like a baking tray with a removable bottom. It should legally be bottomless so the cheese can keep draining but if it’s quite hard, there won’t be an excess of liquid, so you could get away with pretty much any container – even a regular soup bowl, but then I do recommend that you check on it from time to time and pour off the liquid if there is any (there still should be a little bit even with harder cheese).
With a bottomless mold, you should turn the cheese over after a couple of hours to get an even texture on top and bottom. The important thing is to not leave it in water like mozzarella. So, you let it sit overnight and then you’re done! Ideally, you’d keep it in a cool room but it’s fine at room temperature provided it isn’t too warm.


