


Terrence with his wife, Marty Illick at his 66th birthday party.
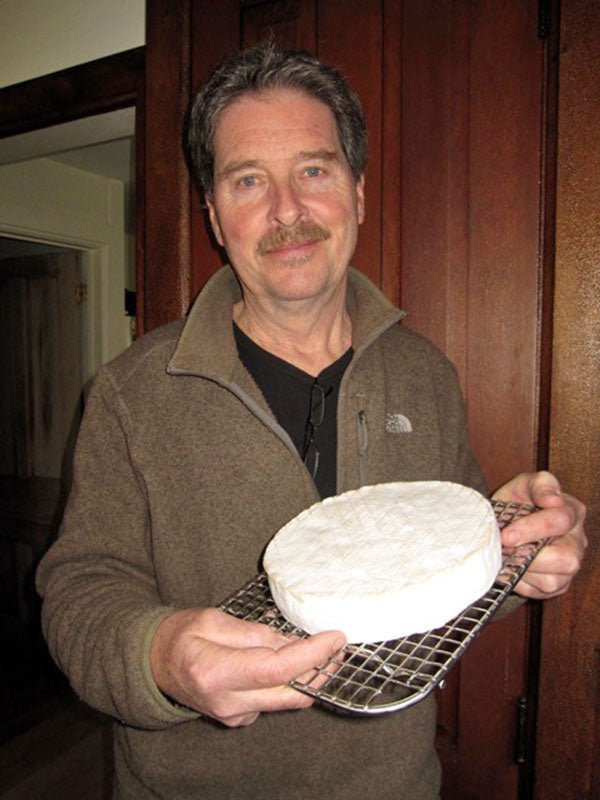
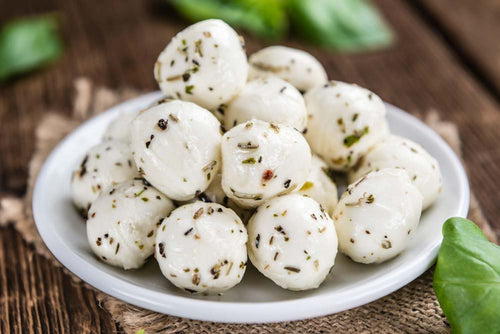
This summer, we posted an article (Using Wildflowers In/On Your Cheese) with pictures of Terry Dinnan’s fabulous goat cheeses. He uses herbs, like sage, instead of ash to create lines of color through his cheeses. He told us he is as interested in how things look as in how they function. This must be the reason why everything he makes is beautiful.

His cheeses:
I’m currently making camembert, brie, ash-coated chèvre, an aged goat cheese, and feta.

Brie. 8in. x 1.5in.

Aged goat cheese. 5in. x 4in.
The aged goat cheese isn’t ready to eat yet and seems quite hard, so we have yet to see if it’s a success. I’m wanting to try some cheeses that can be aged longer than bries and cams. My goat’s milk supply will be put on hold for the winter, so I’ll use raw cow’s milk then.
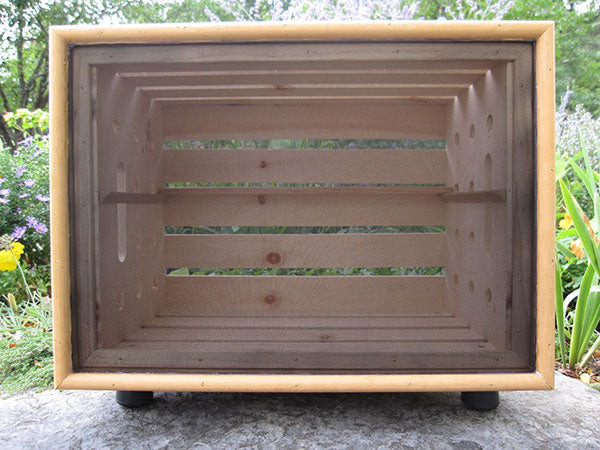
I generally go through a few stages and locations when making most cheeses. I’m still a neophyte, so I’m in no way an expert on this and I’m sure things will change as I learn more. I drain the curds in our kitchen (70sF) using hanging muslin or forms with trays. Room temp seems to be good for this and when the dripping stops, I usually move to our cooler basement (60s) where I use a “drying box” that is a milk crate covered with a fine mesh screen to keep flies away.

Milk crate with screening – clips let me flip up the screen to turn and monitor the cheeses. I may switch to wooden crates (similar set-up) cheap from craft stores.
Update:
I recently noticed that an occasional fruit fly was getting through the fiberglass screening used on the milk crate drying box that I was using. Dang things! I ordered a much finer stretch mesh fabric (online) and stretched it over a wooden crate ($9) that I bought at a craft store. I drilled extra air holes in the crate’s sides which were solid. I stapled the fabric and then covered the seams with wooden corner molding. I finished by siliconing along the wooden frame to prevent the fabric from pulling away from the staples. The front is a simple wooden frame that pressure fits tightly onto the front and the box is lifted on short legs with rubber “feet” to allow for air to infiltrate the bottom.


During the drying stage, I use a great little muffin cooling fan (info below) to gently move air around.

I love this muffin cooling fan – small (3 x 3in.), quiet, gentle, well-made. AC Infinity Axial 8038 – $16.99 (Amazon).
When the cheese has dried and has developed a healthy white rind, I move the younger ones to a wine cooler that I bought (used-$75) and keep in the 50sF and about 85% humidity. I have to keep a wicking towel in a tray of water to keep up the moisture. I use your temp/humidity measuring instrument to monitor that (click here).

Wine cooler. I added cheese drying matting to shelves and tray of water with wicking towel in the bottom.
For cheeses that will age a month or longer, I’m using a small chest freezer with a Johnson Controls overriding thermostat which I set at 55F. The humidity in the freezer wants to be 100%, so I have tried hanging dry towels inside to reduce it to the mid 90s. This seems to work at times but has been a bit inconsistent. I haven’t run into any major problems with the higher humidity – probably because I haven’t yet aged anything longer than three months.

Chest freezer with thermostat override. Inside are cams, aged goat and brie.
Set-up for Camembert:
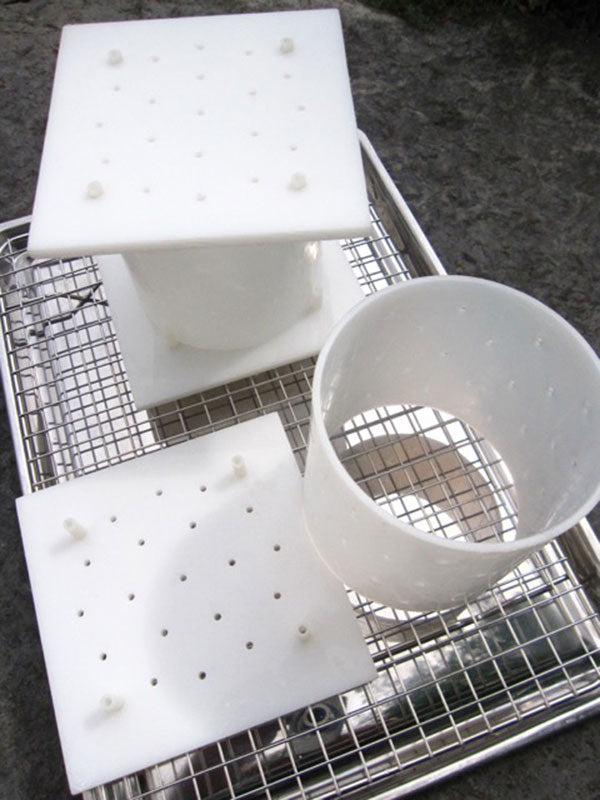
When I started trying to make camembert, I was using the standard draining mats and rigid boards to flip the curd mass as it settled. The mats sometimes stuck and broke the curd, so I wanted to try working with a smoother surface. I ordered 1/4 in. thick food grade plastic sheets* and cut them into 6×6 in. squares. When I first tried them, it was challenging because they are ridiculously slippery, especially when wet with whey.
So, I drilled 1/4 in. holes and pressure-fitted inch-long nylon bushings (from the hardware store) to hold the molds in place and to also sit into the racks I use for draining. I also drilled 1/8 in. drain holes where the molds sit on the boards to allow for bottom drainage through the plastic sheets. This set up is working pretty well and my recent attempts at flipping have gone smoothly. I set the molds on a stainless steel rack and jelly roll pan that fit together (Amazon). The pan would be better if it was a bit deeper (to hold more whey) but it works fine and stainless is a good idea.
*Food grade HDPE plastic sheets can be ordered on Amazon but its important to connect with the vendor to be sure it’s food grade. Also Grainger (a supply co.) has it at <Grainger.com> where you can search on “food grade plastic sheets” and select a size and thickness. I bought a 1/4 in. sheet that was 12 x 24 in. and it costs about $12.
Other hobbies:

Terry made this peace symbol and the stone ball in front of his barn.

Terry: “The peace light is plugged in at the barn. We have solar panels on our barn roof and produce more power than we use so we group net meter. We are credited for our use by the power company and the extra gets credited to our daughter and brother-in-law (at other sites).”
You seem to be pretty handy with making your own equipment …
I’m a retired stone mason and own a small limestone quarry in Essex, NY. Over the years, I’ve had to maintain equipment and just generally figure things out (when I could) to get things done quicker and cheaper. Generally, I’ve always been interested in how things work, so I find myself taking things apart and either fixing them or destroying them in the process.
Stone working involved saws, grinders, drills, etc., so I’ve ended up with some of that stuff. My wife and I also like to provide a reasonable proportion of what we consume, so we cut firewood, garden, have egg and meat birds, make wine, do sourdough, etc. Living like that leads to experimenting with tools and processes to make projects easier or more enjoyable (hopefully both).

Terrace with stone table


Their side yard. Terry made the chairs, 2 ton concrete spheres, and stonework
I really don’t want to get into “production.” I make things for family and friends and have always been impressed with the beautiful things people made to use in their everyday lives. American indians, Japanese, Europeans, everywhere!……..people made objects they needed as well as most of their food. It seems we don’t generally have time for that these days. I’m not into going back to “simpler times,” I just like being closer to my existence.
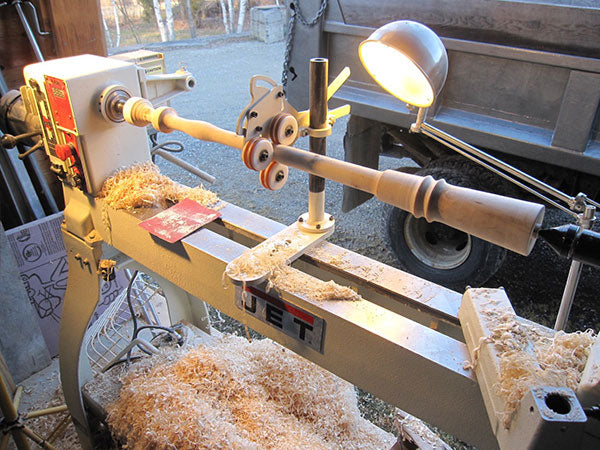
Wood lathe with 32 in. “pounder” in progress

Large applewood “pounder” for mashing elderberries (wine) and cabbage (kraut)

Large bark-edged maple bowl

Spalted apple—shallow bowl

Slate weight for fermenting fresh veggies

Vermont slate. I buy 2nds from a slate company’s “boneyard” which is pretty inexpensive. I have the tools for sawing, grinding, shaping, and sanding. Slate is very impervious (almost the same as glass), so its interesting for food use. We tested some when we were thinking about kitchen countertops by putting catsup and crushed blueberries on it overnight. The next day it sponged off without staining. Amazing.
We raise 30 meat birds every 2 years. I put together this enclosure which we move twice a day to provide fresh grass for the birds. It slides easily with rope pulls and was inexpensive to make with plastic plumbing parts and fencing.


