


 |
| Esperanza Pallana of Pluck and Feather |
Often Called “Mexican Parmesan”
It’s Cinco de Mayo this week and that reminds me how much I wish I was in Mexico eating elotes (grilled corn) Mexican style (see recipe at the end of this article).
One of the main ingredients in this fabulous concoction is Cotija, a very salty cheese which is eaten fresh or aged. It doesn’t melt, so it is primarily grated or crumbled and used as a flavor enhancer on refried beans, tostadas, tacos, salads, soups and chili.

Originally, Cotija came from the Michoacan region of Mexico. These days, the recipe seems to be a closely guarded secret. In fact, I could only find one recipe for it on the Web- at Esperanza Pallana’s Pluck and Feather, “a blog about urban farm life.”
Fortunately, Esperanza allowed me to use her recipe in this article. She makes her Cotija fresh style, but it may be aged for 3-12 months. If you have a recipe to share, send it along to jeri1000@gmail.com.
Cotija Cheese
By Esperanza Pallana (Pluck and Feather)
 |
| Cotija sprinkled on refried beans |
After trying my hand at a Queso Asadero, which is supposed to be similar to mozzarella in texture (but came out a queso blanco) I realized I needed to know a bit more before attempting a harder cheese that takes time to develop. I did not want to risk wasting precious goat’s milk. So I attended a cheese party at Pineheaven Farm. This was definitely helpful. Thus, I tried a Mexican cheese called Cotija. This cheese is a very salty cheese crumbled atop tacos, beans, enchiladas, corn, soups. Pretty much sprinkle it on anything you want to accent with a salty creamy garnish. Cotija is traditionally made with cows milk. It was created in Cotija, Michoacán in Central Mexico.

Things you’ll need:
– 1 gallon milk
– Large cooking pot
– Cooking thermometer
– 1/4 tsp calcium chloride
– 1/8 tsp thermophilic bacterial culture (1/2 of our small pack)
– Electric mixer
– 1/2 cup salt* (cheese salt is best or cut down to 1/3 cup)
– 1/4 rennet tablet or 1/4 tsp liquid rennet in 1/4 c. water
– 3 to 4 tbsp. cool water
– Cheesecloth
– Cheese mold and weight (Note: Esperanza used a homemade mold with a weight on top. Our small mold would be much more convenient and it has a follower to hold the weight.)
– 1 1/2 cups salt (for brine)
– 1 qt. warm water
Instructions:

Warm the milk in the cooking pot to 100F. Once the milk is warmed, add the calcium chloride and bacteria culture tablet. Keep the mixture at a constant temperature of 100F through the end of Step 3.
Stir the mixture for 20 minutes by hand or at medium speed using your mixer.
Dissolve the rennet in the cool water. Slowly add this to the milk mixture, allowing the mixer to stir the milk mixture for another 5 to 10 minutes. Remove the mixture from heat.
Allow the mixture to rest for 45 to 90 minutes. After resting, the mixture will have solidified to a soft curd. Break the mixture into smaller curds, about 1-inch cubes, using your hands, a knife, a spoon, or whatever works for you. Let the curds rest for another 10 minutes.

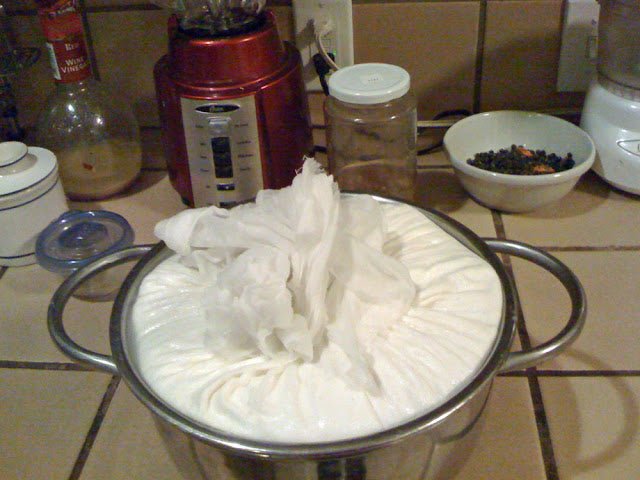
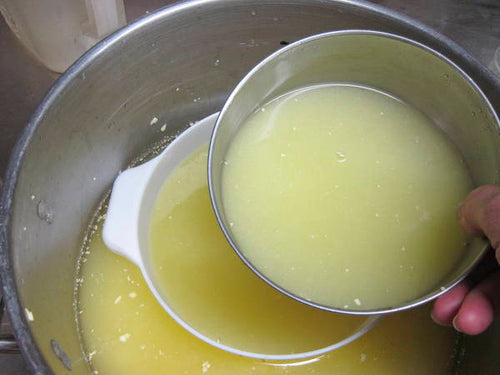
Pour the mixture through a cheesecloth to remove the whey (the watery mixture in which the curds are floating).

Stir the salt* into the curds.
Place the drained cheese into a cheese press, and press for 30 minutes. Then, flip the cheese in the press, and press for another 12 hours. This removes any excess moisture and allows the cheese to harden. (Note: You may also hang the cheese in the cheesecloth to drain if you are going to use it crumbly.)

It shrank more and I placed it in a 48 oz tub that I had skewered lots of holes in. I placed the tub atop a rack and in a pan to collect the whey.

When the curds shrank more in the tub, I added a weight to press. It worked but did not give an even shape.

Prepare a brine solution of 1 1/2 cups salt* in 1 quart of warm water. Allow the solution to cool to room temperature.

Carefully remove the cheese from the press (it will still be soft). Soak the cheese in the brine for 30 hours, flipping the cheese every 10 hours to encourage rind development. The rind is the hard coating on the outside of cheese.
Remove the cheese from the brine, and place in your refrigerator for 2 weeks to allow it to ripen. Check the cheese for mold. If any mold grows on the rind simply wipe it away with a paper towel or cloth. Do not wrap the cheese while it ripens or it will not ripen properly.

Store the cheese in an airtight container once it has ripened.
*Results: The texture is more smooth and creamy and less crumbly. However, we did get it to crumble on food. While the flavor of Cotija normally has a pungent saltiness, this batch is saltier than I’d prefer. Edible but very salty. This is likely due to the fact that I used Morton table salt instead of kosher salt. So the grains are finer and the quantity more concentrated. I did cut back on some of the salt anticipating this but I could have cut back even more … or just used kosher, though I think the brine could be 1 c. of salt only. Lastly, the shape was funky. I need a cheese press. All in all, I like it and am more confident in my cheese making. However, as I mentioned, Cotija is traditionally a cow’s milk cheese. To be most correct with the Mexican goat’s milk cheeses, my next attempt will be with an Añejo.

 |


