


 |
| Simona and her husband, Robert Vogel on vacation in Hawaii |
It’s the same as the French version, but not mold-ripened.
Simona Carini’s food website, Briciole is a great place to learn about cheese and to learn Italian at the same time. While she gives you information and beautiful pictures, she uses key Italian words. At the end of the article, if you push the audio button, you can hear her pronounce those words. How cool is that?
The article below is just one of many at Simona’s site. There is also an invaluable page of cheese making resources.
Simona will be posting more cheeses soon because she recently took Jim Wallace’s advanced cheese making class in French cheeses. Meanwhile, here’s her post about Coulommiers:
Homemade English-Style Coulommiers
(a.k.a. English Farmhouse Cheese)
By Simona at Briciole
https://briciole.typepad.com/blog/cheese-making/
I am not sure why I had never tried to make this fresh cheese before, but I am certainly glad that the availability of fresh goat milk (latte di capra) coupled with an impending trip steered me towards it. Different from Coulommiers, its English-style counterpart is not mold-ripened and can be eaten shortly after being made.
I followed the recipe for this cheese given in the book 200 Easy Homemade Cheese Recipes by Debra Amrein-Boyes. I adapted the given recipe by dividing the quantities by four and by using one quart of fresh goat milk and 1.5 quarts cow milk (latte di mucca), instead of all cow milk. Ricki Carroll’s Home Cheese-Making also has the recipe for it. (They are slightly different, mostly in the use of a different starter culture.) (Note: Our recipe uses Flora Danica instead of Mesophilic.) In the introduction, Carroll describes the special mold used to make Coulommiers. A Camembert mold can also be used, and this is what I have done.
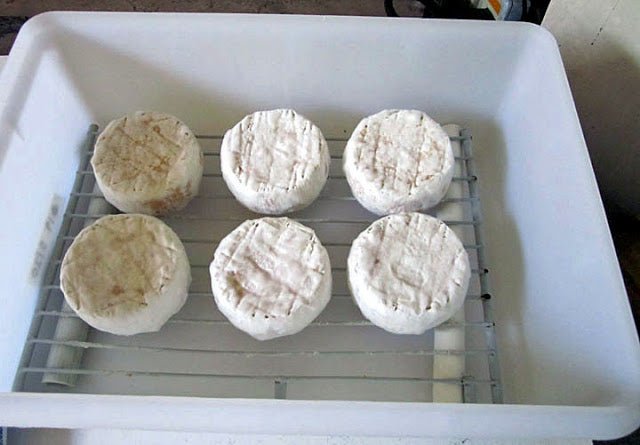
It was not the first time I had used this mold, so I knew that it requires special attention. After the curd is formed, thin slices of it are ladled into the mold. Draining of the whey (siero di latte) is by gravity, which takes some time, so the watchword here is “patience” (pazienza). In the photo below you can see drops of whey sliding along the side of the mold, which has small holes all around.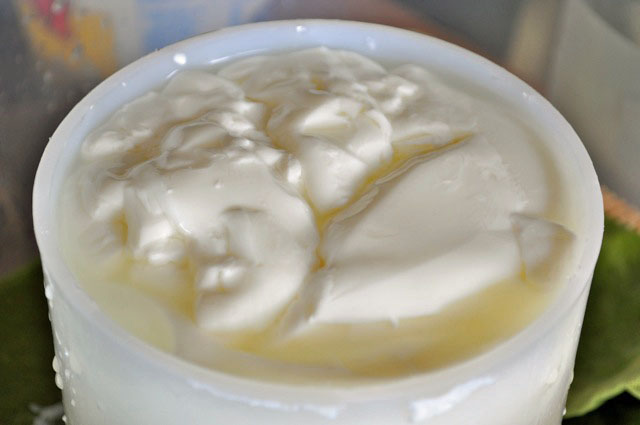
I filled the mold almost to the rim, waited until the curd’s level dropped then added a bit more. I continued this process until all the curd was used. What happens if you go too fast? The mold has no bottom, so if you overfill it, the pressure may move it and you may end up with curd rushing out from the bottom (been there, done that).
To help prevent any movement of the mold and also to make sure there was no leaking of curd through the cheese mat, I put a sterilized piece of cloth under the mold (the green thing you can glean in the photos). This may or may not be acceptable, but it was certainly useful. If you can manage to be patient and come back to the mold over and over again to fill it, and make sure the draining occurs undisturbed, the process is actually kind of fun to watch. As you can see below, the curd level has gone down and the curd looks more compact than in the photo above.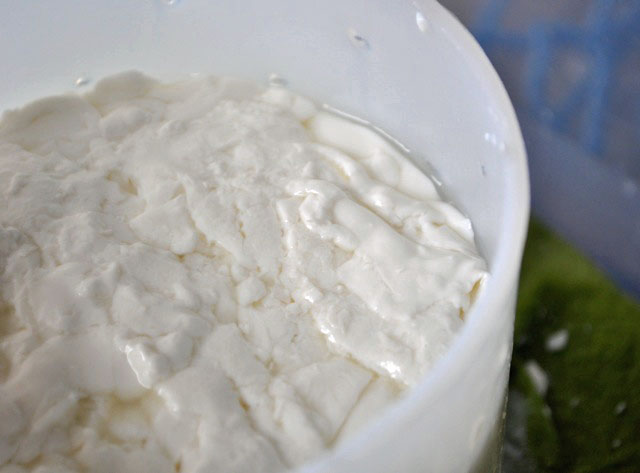
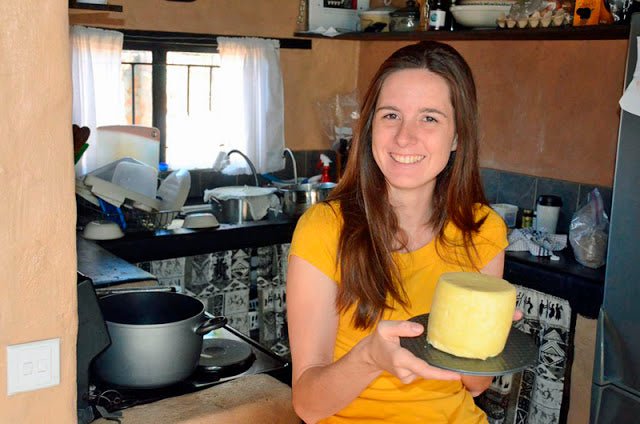
Unfortunately, I don’t have additional images of the process nor of the cheese when it came out of the mold. Just to give you an idea, the mold is 4-1/4″ high and the thickness of the final cheese is 1.5 inches. The photo below shows the finished cheese resting on the mat (if it reminds you of a sushi mat, it’s because that is what it is). The cheese has already been flipped, and you can see the markings left by the mat on its surface.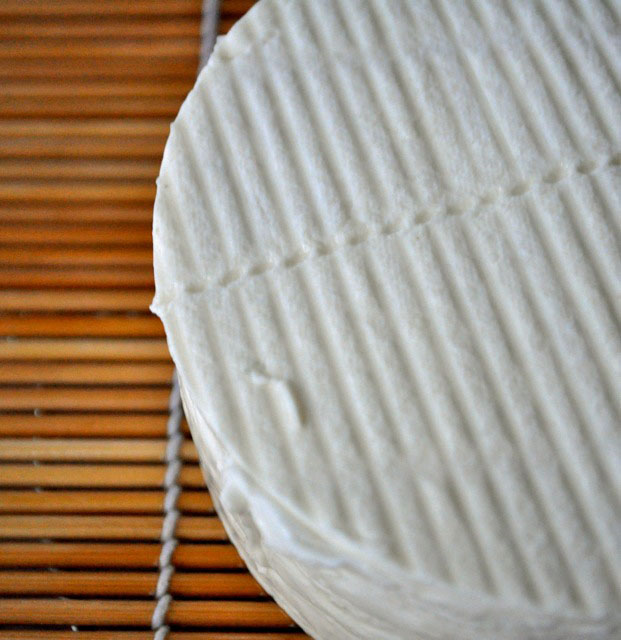
After a day or so in the fridge, we started consuming the cheese, whose surface glistens nicely in the light. The cheese is wrapped in a special two-layer paper described on this page accompanying a previous cheese post.
The end product was a pretty small cheese that tasted fresh and milky. In my case, there was a also delicate tang provided by the goat milk. The cheese pairs well with my homemade bread. Pane e formaggio (bread and cheese) is really one of my favorite foods to eat during dinner.
I also used it over French toast. After flipping the toast, I put on it four thin slices of the cheese and let it warm up and soften, but only slightly, to protect the delicate flavor of the cheese. This was a special French toast also for another reason, but the revelation will have to wait a couple of weeks. Let me just say that the head of my Quality Assurance department (a.k.a., my husband) fully approved.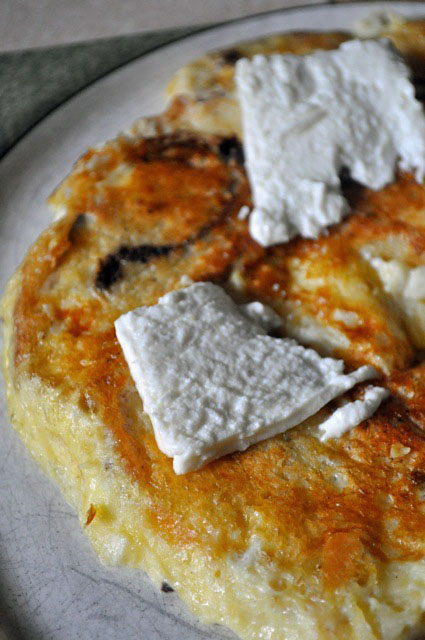
A couple of nights ago, I brought the cheese to the table together with 100% whole-grain bread (which you can see in the photos in this post) and my red beet spread: everything was warmly received. Other serving suggestions come from the cheese-making book’s author. Amrein-Boyes says: “It is very versatile: try a slice with a muffin for breakfast, or drizzle with olive oil and sprinkle with herbs and a few capers for an easy gourmet appetizer.”
I will make this cheese again, maybe using Ricki Carroll’s recipe for comparison. As always, stay tuned for more reports about my adventures in cheese making.


