


Curds are Squeaking in Alaska!
Brian Dixon just started making cheese a few months ago, but he is apparently a very fast learner! He has already shared his experiences with us twice-once when he made Mozzarella in January, 2011 and then again a few weeks ago when he made Fat Free Fromage Blanc with his daughter, Deana.
His goal is to make a Stilton, the “king” of cheeses. This would be way too much of a challenge for most of us. However, I have a feeling he will do it someday because Brian himself is the “king of the do-it-yourselfers.” He bakes bread, makes homemade sausage, brews beer and he’s even building a boat!
Cheese Curds – ala Jim Wallace from the New England Cheesemaking Supply Company
By Brian Dixon
While relatively simple as far as cheese making goes, I was really looking forward to making cheese curds. I’ve had them before in various locations, but never the ‘real ones’ from Wisconsin or Minnesota, so I didn’t know what to expect …except that they should be a) relatively mild, and b) squeaky when chewed! And for me, this make was a milestone.
After spending more than 2 months experimenting with different milk supplies here in the Anchorage, Alaska area where ultra-pasteurized milk seems to be the near universal answer, I have finally found a milk supply that works. Well, two of them actually. The one used for this recipe is the low-cost solution …Lucerne brand milk from Carrs/Safeway. All of the other store-purchased milks that I have tried have failed, except for reasonable success with $11 per gallon ‘cream on top’ pasteurized-only milk from Horizon …and no longer listed on their web site, so who knows if it is even still available?
All of their other milks are ultra-pasteurized of course. Sigh. BUT, I’m a happy cheese maker now that I have discovered that Lucerne is consistently reliable and must not be overheated during processing. The other source of milk that I got dialed up on is the locally-available cow share for obtaining raw cow milk at a reasonable price: $5 per gallon. The Lucerne only saves me a little since around here, it sells for about $3.50 per gallon. I’ll probably fire up the cow share deal within a few weeks since I’m going to be busy with business and travel for the next 3 weeks or so.

The first step is to heat the milk slowly to 96F. (Jim’s recipe says this step is critical and must accurately be run by the clock.) I misinterpreted this step and held the milk at 96F for 90 minutes. I measured the pH before and after this and it remained at 6.5. (Maybe if I had used raw milk with all that God put into it, the pH would have dropped during the 90 minutes.) I didn’t realize my error until later, but apparently it didn’t make much difference because everything went smoothly after that.
I also got a new alcohol lab thermometer lately, so I was able to more accurately calibrate my probe thermometers in the critical range that I need to use for cheese making. If youre inspired by Brians cheese-making journey, you might want to try making your own cheese curds at home. For a great start, refer to our Cheese Curds Traditional Recipe Instructions, which will guide you through the process of achieving that delightful squeak and fresh taste that everyone loves. As Brian continues to explore cheese making, he might find inspiration in the Beaufort Cheese Making Recipe, which captures the essence of traditional cheese crafting in the picturesque Tarentaise mountains. This cheese, much like Stilton, has its own unique characteristics and challenges that could intrigue any enthusiastic cheesemaker. I also recently bought a new-used wine fridge which will be my future cheese cave, a Meade (same as Honeywell) wireless thermo-hygrometer with 2 senders for measuring temperature and relative humidity in ‘the cave’, and a hydrometer for measuring specific gravity (for cheese brining solutions, of course). Next, I need to make a simple cheese press and I’ll be off …ready to start making hard cheeses (now that I can successfully get good curds from cheap …er …low-cost milk).
Next, I added ½ teaspoon liquid calcium chloride dissolved in 5 tablespoons of cool water and sprinkled a packet of the C201 thermophilic culture over the milk. I let the culture rehydrate for a couple of minutes, then used 20-25 vertical forward/back strokes with my cheese ladle to mix the CaCl2 and culture into the milk. The milk was then covered and kept at 96 F for 30 minutes to allow the culture to ripen (acidify) the milk.
Next, I measured ½ teaspoon of liquid animal rennet into ¼ cup cool water, mixed, then stirred that into the ripened milk …at which time, I started a timer to keep track of how long the rennet had been hard at work producing the curd.
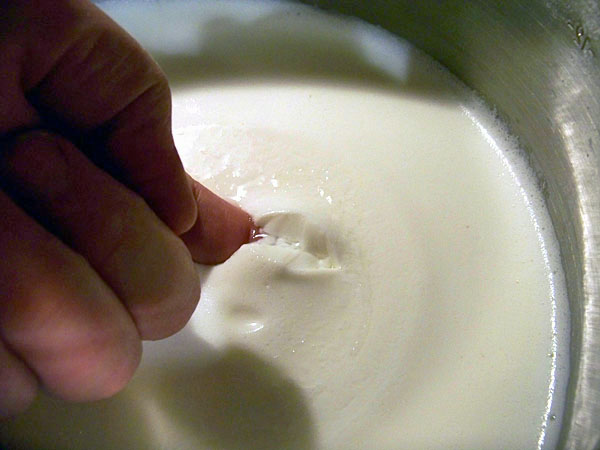
Something new to me was determining when to cut the curds more accurately. I have read about doing things like dipping a knife or spoon into the milk to determine when it first starts to flocculate, and also that you can use the ‘spinning bowl method’ to do the same. I think most people use the spinning bowl method because it’s pretty hard to get wrong.
So, the first thing I did after adding the CaCl2 and C201, was to float a small custard bowl on the milk. Once you know how long that took, you can use a simple multiplier to calculate exactly when to cut the curd …depending on the type of cheese you’re making. Most hard cheeses, cheddars included, use a floc multiplier of around 3X (up to 3.5X). I decided to treat this recipe like cheddar since I think (assumed?) that the mid-west cheese curds are most likely those from their cheddar making process.
This recipe predicted early flocculation to occur between 6 to 10 minutes, and my bowl suddenly refused to spin at about 8-1/2 minutes. Right on time! I decided to cut the curd at 27 minutes (total from when rennet was first added.) As you can see above, I had a nice clean break right on time at 27 minutes. The whey was also quite clear at this point, no non-solidified (if you can call it that) milk solids. The curds still felt quite soft and I may round up a little on the CaCl2 next time to see if it firms them up at all. Every milk is different.

The recipe said to cut the curds into ¾” cubes, but I rounded up a tad and went with 1″ cubes. I thought the larger curds might make the finished cheese curds more moist as it does with other recipes. I waited 3 minutes to allow the curds to shrink and firm up just a little, then gently stirred them now and then while slowly heating them at about 1-1/2 degrees per minute up to the required 116 F. The curds continued to shrink up and expel whey, and the whey stayed clear which means my gentle touch was indeed preventing loss of milk fat and other solids.
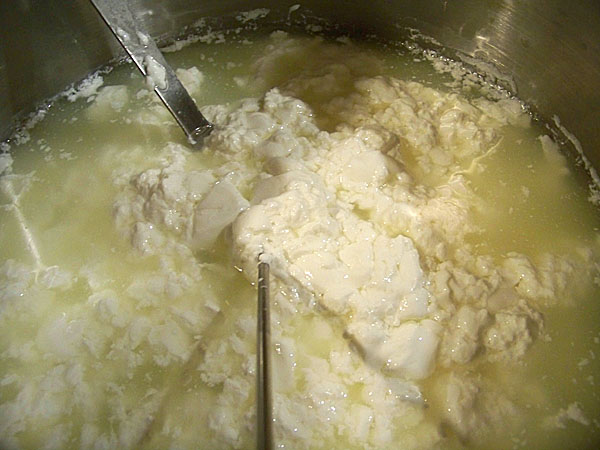
Here are the curds right after reaching 116 F. The recipe said it would take 30 minutes to increase the temperature 20 degrees (from 96 to 116 F), but I did it in 28 minutes by accident …slightly fast, but not too far off. Notice how the curds tend to clump together. They are still soft, but a lot more resilient than they were, and you can see that they’ve given up a lot of whey.

The curds require cooking at 116 F for 30 to 60 minutes. Having no clue how they would turn out since I hadn’t made them before, I picked the average and went with 45 minutes. I only had to stir once ever several minutes to keep the curds from matting and to ensure an even 116 F throughout the pot, and I only had to turn on the flame for one brief moment to maintain the temperature.

…And here’s how they looked after the 45 minutes of cooking. I took up a handful and verified that they easily ‘knit’ together when squeezed and didn’t fall apart, but were also still able to be crumbled back again. From what I have read (being more bookish than experienced at this point), this indicates a successful curd.

The curds were transferred to clean cheese cloth, allowed to drain for a moment or two, then…
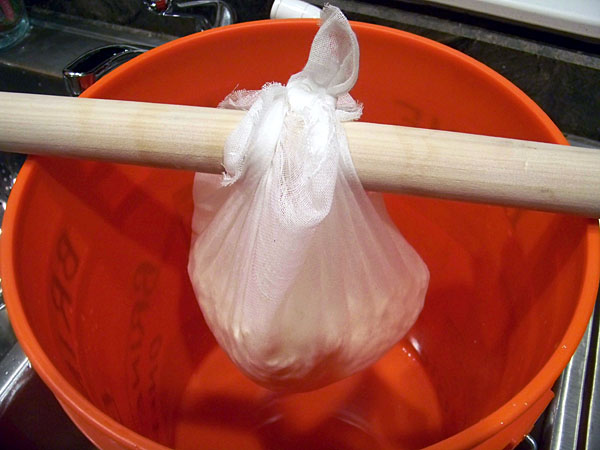
…the corners were tied and the cheese was allowed to drain under its own weight for about 20 minutes.
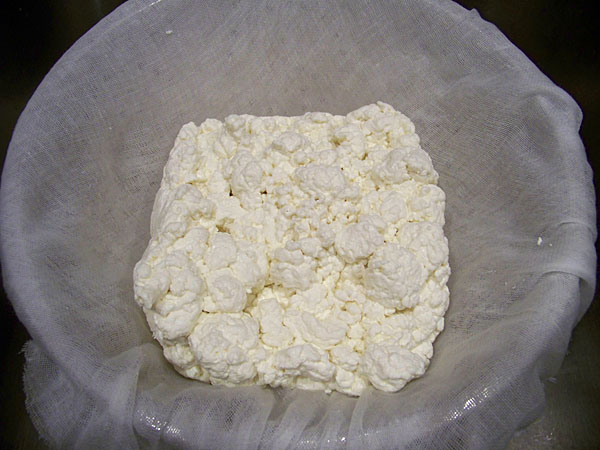
At this point, you can see that the curds are easily knitting together even without pressing them.
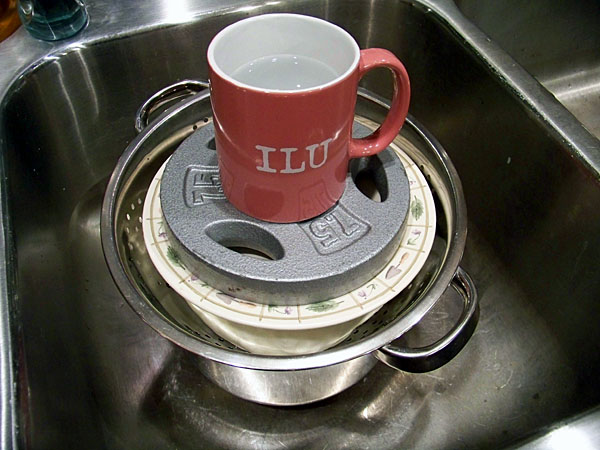
I twisted the cheese cloth tight to squeeze out additional whey, then folded the cheese cloth tightly over the mass of cheese, put it in a colander to drain, and weight it down with a small plate and about 8 pounds of weight (one 7-1/2 pound weight plus a cup of water?). I didn’t have the recommended gallon jug of water to use as a weight.

After about 2 hours, the cheese felt plenty firm, so I went ahead and removed it from the cheese cloth.

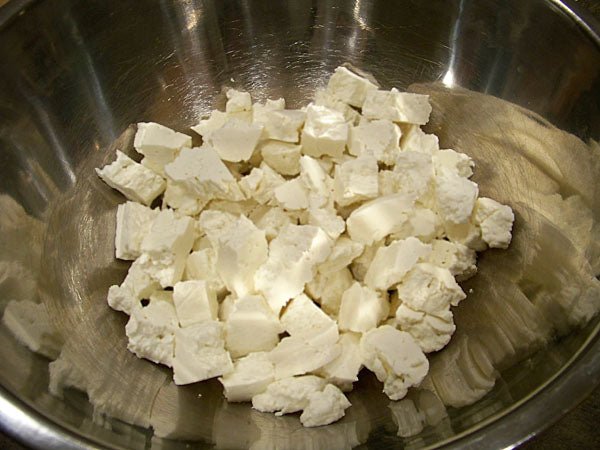
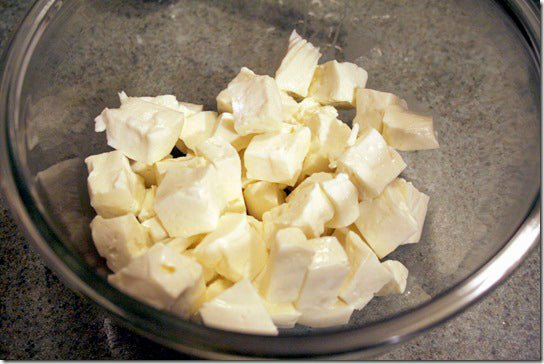
And here’s the finished product! To mill the curds into chunks, I first sliced the patty of cheese into ¾” slabs, then broke the slabs up with my hands to create the curds as shown. I tossed them with about a teaspoon of salt and called them done!
Were they good? Yes …and the kids ate them all up within 24 hours (I’m still on a diet and only get samples of my wares!). We liked them with just salt on them, with Cajun spice on them, and what the kids like best was when they were tossed in about a 50/50 mixture of zesty BBQ sauce and hot wings sauce. We still had a few left over by that night, so my wife tried them in a …tadaaaa …stir fry! As long as you add them late in the game so they don’t melt, they were great in a stir fry. The only thing that the whole family kept laughing about was how every bit of stir fry went ‘squeak-a squeak-a squeak-a’ from the fresh cheese curds! Next time, I’m going to try a genuine Poutine…


