


Mariana eating chestnuts which grow well in Slovenia.
Mariana Veiga is from Brazil originally. She and her husband and young son traveled around the world three years ago, including Mongolia (Making Cheese with Nomads in Mongolia). Now, they have settled in Bled, Slovenia (Cheese Festival & Cows’ Ball in Slovenia).
Mari has a YouTube channel about traveling with kids (The Veigas). Of course, she hasn’t been traveling much lately, so she has been posting videos about making cheese (in Portugese) – https://youtu.be/22oMahTgxeM
She has sent us many recipes from Brazil, including Mari’s Brazilian Cheese Bread and Brigadeiro – A Sweet Treat From Brazil. She was kind enough to send us these two recipes recently and we are happy to share them with you:
Fresh Cheeses from Brazil by Mariana Veiga
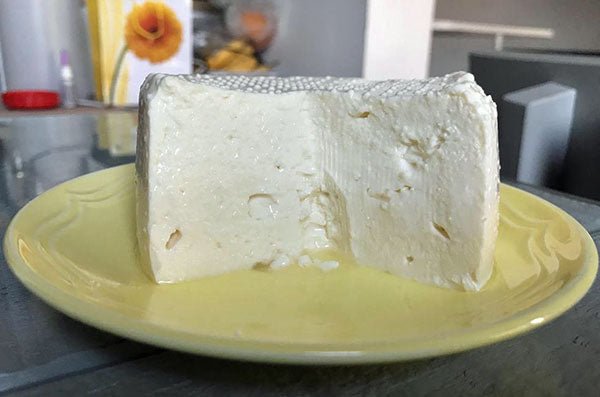
Minas (or Queijo Frescal)

This is one of Brazil’s most popular cheeses. It is very soft, moist, and fresh. I can eat one wheel in one sitting!
It is usually recommended by nutritionists, since it has less calories per serving than harder cheeses. It has many names in Brazil, such as queijo fresco (fresh cheese), queijo branco (white cheese), and queijo frescal. Minas cheese is a generic definition of many types of cheese typically made in the state of Minas Gerais and this one is one of the most popular.
It is very easy to make, doesn’t require any pressing or aging, and becomes ready on the same day.
Yield: 2 pounds (900g)
Aging: No
Skill level: Beginner
Ingredients:
5 quarts + 2 cups (5l) milk
1/8 tsp single strength liquid rennet
1/3 cup salt (3 ounces/75g) salt
Optional: Oregano, peppercorn and dry herbs, if desired
Equipment:
Thermometer
Curd Knife
Spoon or ladle
Cheese Mold (for this cheese I think it’s more practical to use the “basket” type, like ricotta molds, so you don’t need to use draining mats. But, the combination of a Camembert mold + mat is also fine.)
Instructions:
1. Heat the milk to 104F (40C). If using pasteurized milk, you will need to acidify as usual.
2. Add rennet, stir for 30 seconds and let it coagulate for about 40 minutes. If the mass is still not firm, wait 40 more minutes.
3. Cut the curd mass to about 1/4″ pieces, and then allow the curd to rest for 5 minutes. Stir slowly for 5 minutes, to allow the curd surfaces to firm up more.

4. Remove about 2 cups (0.5l) of whey and add the salt. If you want to add dry herbs or spices, do it now. Stir for 5 more minutes.

5. Transfer the curd to the molds and allow the whey to drain. Flip the cheese 3 hours after that. Wait 3 more hours and remove the mold. Your cheese is ready!

6. Since it is a very moist and fresh cheese, it will still release whey until the next day (if you don’t eat it all before that, of course!). Store the cheese in a sealed container in the fridge, so it remains fresh and moist. You can also “age” it a little, by leaving it uncovered in the fridge for about 1 week. It will get firmer, yellowish, and with an interesting stronger taste.

Requeijão Cremoso

I dare to say that requeijão is better than cream cheese. The consistency is smoother and the cheese is not acid at all. It is a very common spread in Brazil and goes with almost anything. You can spread it on bread, use it as a pizza topping, stuff dumplings, and use as a cream cheese replacement. It also goes really well with pão de queijo, a Brazilian cheese bread that tastes like heaven. It is very quick and easy to make, so I really suggest everyone give it a try!
Yield: Almost 1 pound (400g)
Aging: No
Skill level: Beginner
Ingredients:
4 1/4 cups milk (1l) milk (raw or pasteurized)
1/4 tsp (1g) citric acid diluted in 2 tbsp of water or 2 tbsp lemon juice
2 tbsp (25g) butter, softened
½ tsp salt
Equipment:
Strainer
Cheesecloth
Blender
Instructions:
1. Bring the milk to boil. Turn off the heat as soon as the bubbles appear or you will burn the milk in the bottom of the pan and affect the final taste.

2. Remove ½ cup of milk and save it for later.

3. Add the citric acid (or lemon juice) and wait around 5 minutes to set the curd. If nothing happens in 5 minutes, heat the milk again (but be careful to not burn it!).

4. The mass is solid and will separate from the whey, which looks yellow and liquid.
5. Cover the strainer with cheesecloth and strain the content. (I have a coffee filter that works just fine, but I don’t know if it is something available worldwide. So, if you don’t have one, the cheesecloth and strainer combo is great too).

6. Put the strained mass in the blender, add the butter, salt and the rest of the milk. Blend for a few seconds until it is smooth.
7. Pour it in an uncovered container and let it sit in the fridge for 2 hours.
8. Enjoy!


