


Another Use for Whey
Andrew Luberto (from Nesconset, New York) wrote to us when he saw a note from one of our customers in the News From Our Customers section of our Moosletter (July issue). He offered to share his recipe for milk mead and, of course, I jumped at the chance. I asked him how he came by it and he responded:
I am an avid homebrewer and certified BJCP judge (Beer Judge Certification Program). I brew for multiple events around my area, regularly conduct classes on brewing and tasting beer, judge in regional beer/mead/cider competitions, and write fairly frequently for the local homebrew clubs in my area on Long Island. I’m also an educator for middle school kids, so I have a lot of practice explaining things.
I’ve only made one cheese – it was the recipe for ricotta off your website. From a mead making perspective, I actually had the reverse problem that the cheese makers had, what do I do with the curds? My wife had Ricki’s “Home Cheese Making” book so I went to your website and found the ricotta recipe. I did just purchase some liquid rennet, calcium chloride, and lipase powder though, which is how I saw the Moosletter and the part about uses for whey.
 |
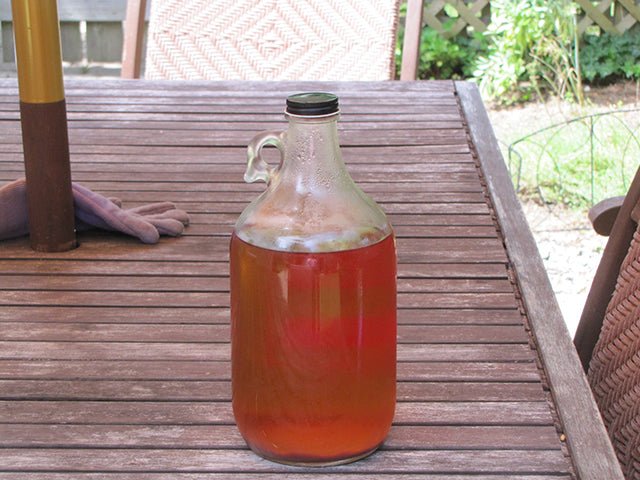
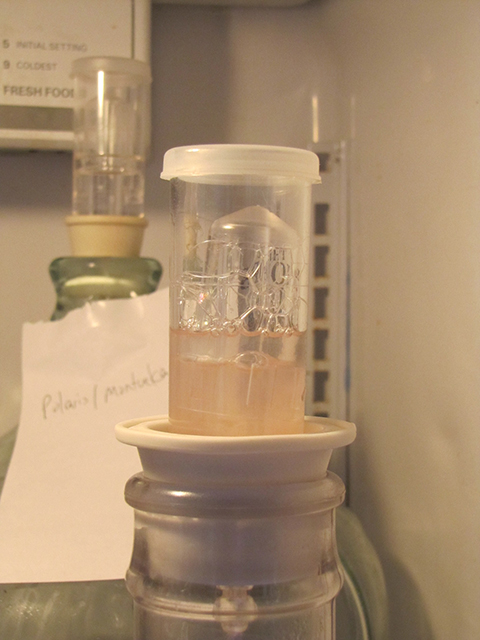
| Andrew’s mead with Avery label printed on his computer |
Milk Mead (Lactomel)
By Andrew Luberto
This article is meant for the person with little or no experience in making fermented beverages and trying not to break the bank on ingredients and new equipment.
What you’ll need:
Equipment:
2 gallon food grade bucket with lid ($5)
3 piece air lock (optional) ($1.29)
Star-San sanitizer ($10)
Food grade plastic spoon ($4.50)
1 gallon glass jar ($6)
Racking cane and tubing ($7 approx)
Total: $33.79
Ingredients: (for 1 gallon of lactomel)
3-4* pounds grade A honey (your choice of variety but I would stick to Orange Blossom, Blueberry, or Wildflower. Stay away from Cranberry.) ($ varied, $10-20 average)
1 packet (5 grams) Lalvin 71b-1122 Dry Yeast ($1)
6 grams plus 1/2 teaspoon Go-Ferm (Yeast activator) ($2)
1/2 teaspoon Ferm-aid K (Yeast Nutrient) ($2)
1 gallon of whey (priceless)
Total: $25 approximately
For anyone who doesn’t know, mead is an alcoholic beverage derived from fermented honey, dating back to around 8000 BC. Mead was developed across multiple civilizations in places like Egypt and Greece and is believed to be the oldest fermented beverage in the world. Some even think that the term Honey Moon is derived from the practice of supplying a newly married couple with enough mead to last a month, or a full moon cycle.
There are many different types of meads depending on what you make it with (spices, fruit juice, etc). The term lactomel refers to a honey wine made with milk (or more specifically whey). The idea of milk and honey always conjures up fascinating scenes of biblical antiquity in my mind, lots of beards and robes, frankincense and myrrh, the whole nine yards and the fact that I had the left over whey from cheese making made creating a lactomel an easy decision. Plus, who wouldn’t want to try a milk and honey wine? Lactose is the sugar found in whey and, unlike honey, is not fermented to alcohol in beer. As a result, your mead will have a creamy texture to it. Before you get started with this it’s important to note that you should avoid using any whey where bacteria or molds were introduced. Bacteria and mold is great for cheese but not so much for fermented beverages.**
So, to get started, you’ll need some basic equipment. The most important thing you’ll need is a food grade container that can hold at least two gallons of liquid. I would suggest a two gallon fermenting bucket – if you don’t have something available, they usually run about $5. Whatever you use, be sure there is plenty of head room, you’re going to have to agitate the mead while it’s fermenting and my carpet learned the hard way that the fermenting mead foams up significantly.
If you’re going to buy the bucket I would also suggest a three piece airlock ($1.29) and a small bottle of Star San sanitizer ($10). You’ll also need a large spoon, preferably stainless steel or food grade plastic. If you have an electric drill and plan on making more meads I would recommend buying a stir whip/agitator rod instead of buying a spoon. They run about $20, however, after stirring/degassing your mead twice a day for two weeks they seem to be worth their weight in gold.
You will also need an additional one gallon air tight container to transfer your mead into after it finishes fermenting, a 1 gallon glass jar will run you about $6. I would also recommend a racking cane and tubing to make the transfer process much easier ($5-$8).
The two items you must purchase and probably don’t have laying around are yeast and nutrients. Yeast is the magic that turns simple sugars into ethanol alcohol which in turn gets people to dance at weddings. Without yeast there would be no alcoholic beverages. For this mead we’ll be using Lalvin 71b-1122, Narbonne yeast.
Yeast are living organisms and like all living organisms need certain nutritional requirements in order to function at their best. Unlike wine and beer, honey does not contain enough nutrients to help aid yeast in the fermentation process. Without the addition of nutrients like Diammonium Phosphate you will have some seriously stressed yeast cells and an end product you probably won’t be happy with. The nutrients I use and recommend are Fermaid-K and Go-Ferm. You can buy 8 ounces each of these (which will be enough for multiple batches) for about $2 bucks a piece. You can skip these if you want to save a few bucks but I wouldn’t recommend it.
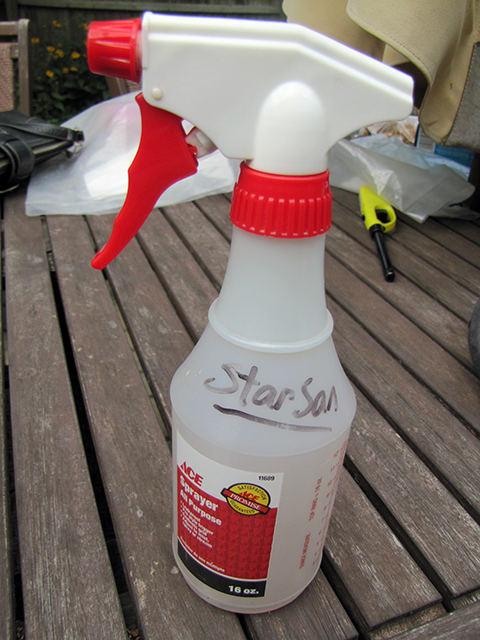
The last thing you’ll need is a sanitizing agent. Do NOT use dish soap, dish soap leaves traces behind that you will taste and feel in your mouth later and not in a good way. So unless you developed a taste for soap as kid from having your mouth washed out on a frequent basis, skip the dish soap. For a sanitizing solution, there are a few different things; if you have bleach lying around add 1 tablespoon to 1 gallon of water. Anything you want to sanitize will have to soak for about 20 minutes and then be rinsed. As I mentioned above, the easier product is Star-San, it needs only 30 seconds of contact time and contributes no off flavors. Most brewers I know put the solution in a spray bottle and simply spray down anything they want to sanitize with no rinse off.
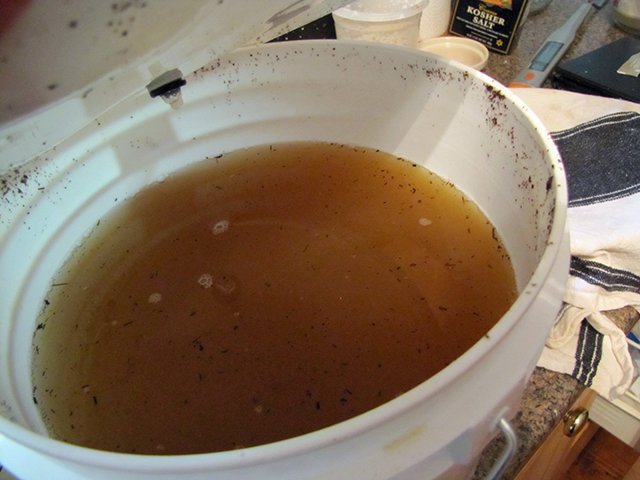
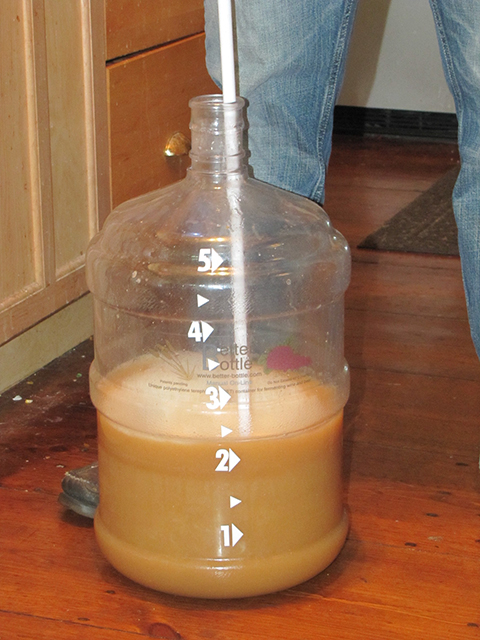
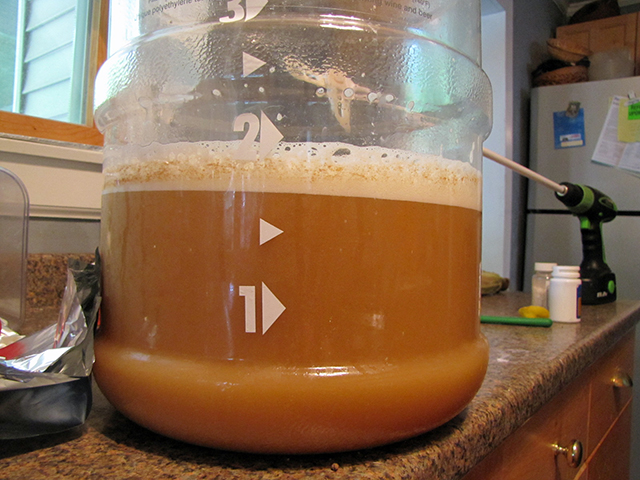
Once you have all these elements, you’re ready to go. So let’s assume you made a ricotta or mozzarella cheese, without the introduction of a starter, using 1 gallon of milk and you have the left over whey sitting in a pot.
1. Sanitize the inside of the fermenter, the spoon or stir whip, and air lock if you’re using one.
2. After you remove the curds, pour the whey into your sanitized fermenter (the container you’ll be using to ferment the mead).
 |
| Mead in fermenter with oak powder |
3. Add 4 pounds of honey. Make sure you’re only using grade A honey. Not all honey is good for making mead, in fact only a small percentage of honey produced in the United States is mead grade. The heat of the whey should make the honey thin enough to easily mix the two with your sanitized spoon. You should end up with about a gallon to a gallon and a quart of liquid. If it’s under 1 gallon, top it up with some carbon filtered or bottled water.
4. Cover the whey/honey mixture and put it in your fridge. We want to get the temperature of it down to around 62F. This might take a few hours, which is ok, just make sure it’s completely covered. If you have an airlock, fill it with some sanitizer and put it in the hole in the top of the fermenting bucket.
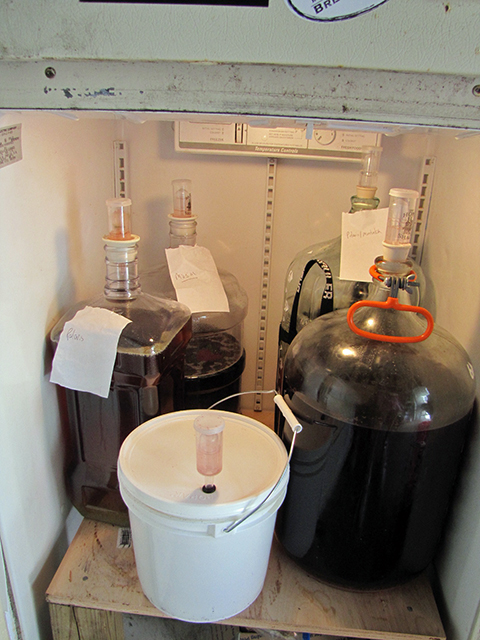 |
| Different meads fermenting |
 |
| Airlock bubbling with CO2 |
5. Once the honey/whey reaches a temperature of about 62F (be sure to sanitize your thermometer!) begin to rehydrate your yeast. Use 6 grams of Go-Ferm mixed into two ounces of 104F water and sprinkle the dry yeast on top. Choose a vessel that is wide enough to spread the dry yeast out evenly in one thin layer. Cover and let sit for fifteen minutes. After fifteen minutes you should start to see the yeast begin to proof and foam a bit – if you bake then you know what I’m talking about here.
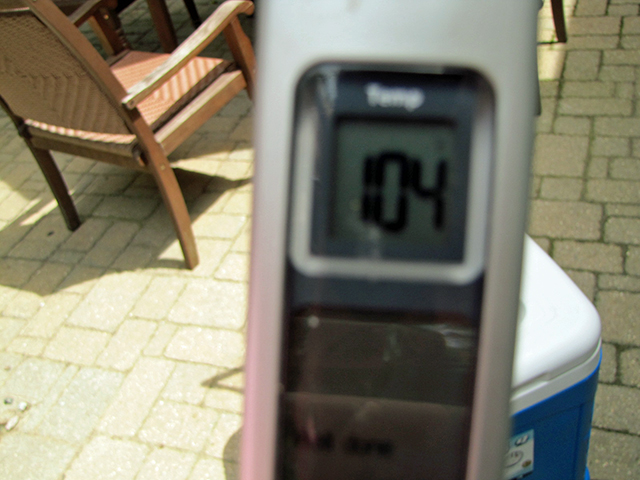 |
| Temperature of water is 104F for yeast hydration |
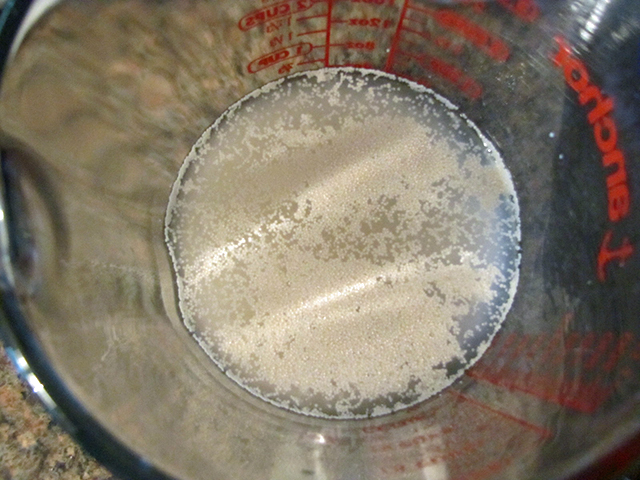 |
| Yeast before being fully hydrated |
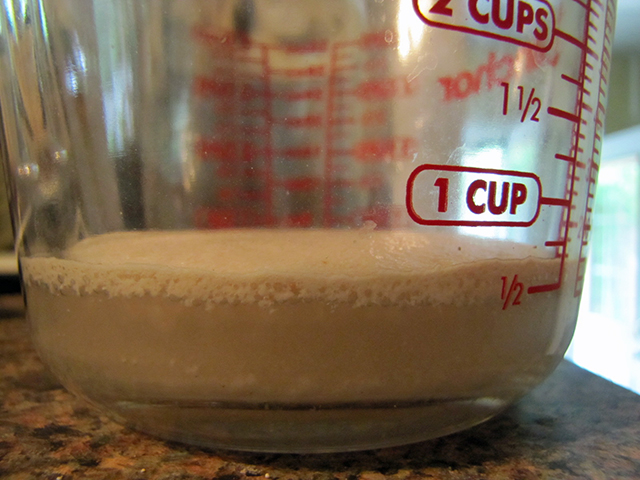 |
| Rehydrated yeast |
6. Create a teaspoon of nutrient mix consisting of a 50:50 ratio of Ferm-aid k and Go Ferm.
7. Once the yeast is foamy after 15 minutes or so, stir it up to suspend all the yeast cells and pour it directly into the fermenter.
8. Add ¼ teaspoon of the nutrients after you pitch, or pour, the yeast.
9. Vigorously stir the liquid, or must, for a few minutes to introduce oxygen. Yeast need oxygen in order to replicate and grow.
10. Cover it up and place the fermenter in a cool, dark area that generally remains in the 60s and doesn’t have wide swings in temperature throughout the day.
11. Stir/degass your mead vigorously twice a day for the first two weeks. You want to introduce oxygen for the yeast and expel CO2 that the yeast will be producing. Be careful, it will foam up on you.
 |
| Aerating and degassing with a stir whip |
12. Stagger the rest of your nutrients ¼ amount per day at 24, 48, and 72 hours.
 |
| Mead fermenting |
13. After a month, use your racking cane to transfer the mead into
your secondary one gallon container. Make sure both of these are
sanitized. Put the container in your refrigerator.
14. Let your mead sit for another month in your fridge to clear out. Open the cap now and again to make sure there is no additional CO2 being trapped. After a month it should be crystal clear. If not, try adding some gelatin dissolved in warm water to the mixture and let it sit for another week.
 |
| Mead placed in a gallon jar to clarify |
15. Rack your finished mead into some sanitized food grade bottles or containers, I think flip top clear glass bottles always look nice but empty wine bottles work, too, if you have the corks. Drink right away with friends or let it age for a special occasion.
If you get ambitious and want to scale this up to three gallons, all the ingredients and steps remain the same – you’ll just need an additional 6-8 pounds of honey and gallon of whey. Also, feel free to add fruit during fermentation or spices after fermentation finishes.”
Lastly, if you’re using whey from a cheese made with citric acid, your mead will have a chardonnay quality to it. Adding oak chips or powder will enhance the complexity of that flavor.
* 4 pounds of honey will give you a sweet mead with high levels of honey character, 3 pounds will be dryer with a less honey character. Either is fine, depending on your preference.
Mead’s generally are characterized as dry, semi-sweet, or sweet. Remember honey is a simple sugar and the yeast will eat almost all of
it up to make ethanol so there will only be a small percentage of residual sugar left over. You could do the exact same recipe with 2.5
lbs per gallon but there will be much less honey character and a much dryer champagne like mead.
The best option is to find a local apiary, you could use honey locator for that. You can also get it in quantity off the website Northern Brewer. Lastly I’ve seen grade “A” honey for sale in Trader Joe’s, $10 for a three lb can. What you want to avoid is going to one of those large bulk food distributors like Costco or BJs and getting a ten gallon container marked “honey.”
** Regarding the bacterial starter, you could use the whey from it but you would have to bring the whey to a boil for fifteen minute first to kill anything left over after you remove the curds.
Bacteria will compete with the yeast for nutrients and sugar and give the finished product off flavors, think about a blue cheese flavor in a wine and you see why that’s something to avoid. The whey would have to be cooled down a bit first before adding the honey so you don’t lose a lot of the flavor compounds you want from the honey. Also, you’re going to lose a bit of liquid from evaporation from the boil so you would have to add water to make up the difference.
If you use yogurt or sour cream (as starters) you will be introducing lactobacillus into the whey which will sour the mead, too, so you would have to boil that whey as well. A little acidity from citric acid or a yogurt starter is ok, especially with a sweet mead like this, you just don’t want the bacteria to propagate or you’ll get an infected finished product. I made a beer that I purposely added lactobacillus to about a year ago and aged it in a oak barrel that was used to make a Cab Franc. It’s generally regarded as awful by anyone I unsuspectingly offer it to (although there are some very good beers like a Berliner Weiss that have great character from Lactobacillus). The important thing to remember is that this is your mead and you can do whatever you want!”


